
I will never forget the sound of my kitchen floor squelching under my boots at three in the morning. A tiny hairline fracture in a flexible PEX supply line had turned my dream kitchen into a shallow pond while I slept. It is one of those moments that makes you question why we ever traded solid, dependable metal for flexible plastic in the first place. I used to be a fan of the quick-and-easy installation, even making the rookie mistake of using a plastic elbow because it came free in a generic kit. But after learning how to salvage a flooded kitchen after a supply line failure, my perspective shifted permanently. Copper is not just about nostalgia; it is about building a kitchen that lasts. Today, I am going to show you why making the switch is the best insurance policy you can buy for your home and why why copper tubing is making a comeback in dishwasher installs for homeowners who value durability over convenience.
Stop Settling for Plastic in Your Kitchen Plumbing
I have spent years tinkering with appliances, and the biggest lesson I have learned is that shortcuts usually lead to expensive repairs. When I first started out, I thought PEX was a gift from the heavens because I could snake it through cabinets without breaking a sweat. However, I eventually realized that why professional installers refuse to use plastic supply elbows and lines is due to the constant vibration and heat cycles. Every time your dishwasher fills, that line expands and contracts. Copper handles this stress gracefully, whereas plastic can become brittle over time. When you are looking at parts to check when installing a dishwasher for long-term performance, the inlet line is the literal lifeline of the machine. Changing to copper might take an extra twenty minutes, but it eliminates the risk of a catastrophic burst while you are away on vacation.
Is Copper Tubing Really Worth the Extra Work?
It is the question I get asked most often by neighbors looking over my shoulder during a DIY project. The skepticism is fair—copper requires a bit more finesse and the right tools. But the physics do not lie. According to the Copper Development Association, copper has a melting point of roughly 1,981 degrees Fahrenheit and incredible pressure resistance, meaning it will not warp or degrade under the intense heat cycles of a modern dishwasher. Have you ever noticed a faint plastic smell in your kitchen during a heavy-duty wash? That is often a sign of a cheap line off-gassing. By choosing copper, you are choosing a material that does not leach chemicals or fail under pressure. If you are worried about the difficulty, remember that choosing the right top tips for selecting the right parts for dishwasher installation will make the process much smoother than you think. Have you ever dealt with a sneaky leak that stayed hidden behind your kickplate for months? I would love to hear your horror stories, because I suspect many of us are living with ticking time bombs under our sinks right now. Let us get into the specifics of how you can make the switch safely.
Prep Your Cabinet Before You Start the Clock
Before you even think about grabbing the copper, you have to prepare your kitchen for dishwasher installation by clearing out the debris and mapping your path. Copper is far less forgiving than plastic; you cannot just shove it through a hole and hope for the best. I remember a particularly humid July morning where I thought I could skip the prep and just ‘eye-balled’ the route. I ended up with a line that was three inches too short and a bruised ego. Take the time to widen your cabinet holes to at least one inch to give the tubing room to move without rubbing against the wood. Every vibration of the machine acts like sandpaper against the copper if the fit is too tight.
Give Your Copper a Service Loop for Future Sanity
The biggest mistake DIYers make with copper is cutting it to the exact length. You need what I call a ‘service loop’—a large, gentle coil of tubing behind the machine. This allows you to pull the dishwasher out for repairs without disconnecting the water. Think of it like the extra slack in a bungee cord; without it, any movement will snap the connection. I once saw a homeowner who had run a straight line with zero slack; the first time the machine’s motor kicked into a high-vibration cycle, it pulled the fitting right off the valve. If you follow a diy dishwasher installation step-by-step guide, ensure that loop has a diameter of at least six inches to prevent kinking the metal.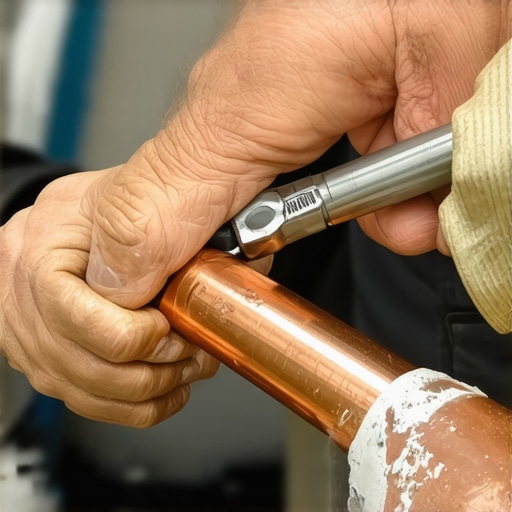
Master the Flare Nut to End the Leak Cycle
While many people try to use compression fittings on copper, I am a firm believer in the flare connection. A flare nut creates a mechanical, metal-to-metal seal that is essentially bulletproof. I remember a messy job where I rushed the flaring process and forgot to deburr the edge of the pipe. When I turned the water on, a fine mist sprayed directly into my face, soaking the very subfloor I was trying to protect. That was the last time I skipped the small details. Using top tips for selecting the right parts for dishwasher installation means buying a high-quality flaring tool that creates a smooth, 45-degree angle on the tube end. It is the difference between a connection that lasts decades and one that drips by Christmas.
Select the Right Wrench for Soft Brass Connections
When it comes time to tighten, put down the pliers. The proper tool to use when tightening your water supply line is a flare nut wrench or a dedicated open-ended wrench that fits the brass nut perfectly. Soft brass is incredibly easy to round off, and once those corners are gone, you are in for a world of pain. I always use two wrenches—one to hold the dishwasher’s inlet valve steady and one to turn the nut. This ‘counter-torque’ method prevents you from accidentally snapping the plastic housing on the dishwasher’s internal valve.
Never Reuse Old Fittings if You Value Your Floors
I’ve seen folks try to save five dollars by using the old adapters from their previous machine. There is a specific reason why your installer refuses to reuse your old brass fittings. Copper is a soft metal that ‘sets’ once it is tightened. Once a fitting has been crushed into a seal, it develops a memory of that specific connection. Trying to force it to seal on a new valve is like trying to use a key for a different lock—it might turn, but it won’t work. Fresh brass is cheap; a new kitchen floor is not.
Flush the Debris Out Before the Final Hookup
There is a critical reason to flush your water lines before hooking up a new machine. When you cut and flare copper, tiny shards of metal or old sediment from the shut-off valve can break loose. If you hook that line directly to your new dishwasher, those shards will fly straight into the delicate solenoid valve, causing it to stick open. I once watched a brand-new unit overflow on its very first run because a tiny piece of solder had jammed the valve. Run a gallon of water into a bucket first to clear the path.
Don’t Let a Bad Install Kill Your Warranty
Manufacturers are notoriously picky. Understanding what your dishwasher warranty doesn’t cover and how to avoid fees is mostly about proving the failure wasn’t your fault. A leaky plastic line is often dismissed as ‘wear and tear’ or ‘improper installation,’ but a properly flared copper line is a professional-grade setup that leaves no room for debate. By taking these extra steps, you aren’t just preventing leaks; you are building a paper trail of quality that protects your investment for years to come.I’ve had readers ask me if all this extra effort with copper and specific tools is just for show. It isn’t. In fact, most people believe that if the machine turns on and the floor is dry, they’ve won. But there is a hidden layer to appliance longevity that most homeowners—and even some budget installers—completely ignore. The biggest myth in the industry is that a professional installation is only about preventing water from hitting the floor. In reality, it is about protecting your legal rights as a consumer. If you call for service six months from now and a technician finds that you didn’t follow the exact manufacturer specs, your protection plan becomes worthless paper. You need to know what your dishwasher warranty doesn’t cover and how to avoid fees before you even tighten the first bolt.
Why Does Your Drain Hose Height Matter More Than the Brand?
One of the most sophisticated mistakes I see is the ‘lazy’ drainage setup. Everyone focuses on the inlet, but the outlet is where the drama happens. If your drain hose doesn’t have a ‘high loop’ or a proper air gap, dirty sink water can siphoned back into your clean dishwasher. This isn’t just gross; it’s a mechanical hazard. According to data from the Association of Home Appliance Manufacturers (AHAM), improper drainage is a leading cause of premature pump failure. This is exactly why your warranty policy doesn’t cover improper drainage loops. Manufacturers view this as an external plumbing error, not a machine defect. I once spent three hours arguing with a service rep on behalf of a friend, only to realize the installer had zip-tied the hose too low. We lost the claim, and she was out four hundred dollars for a new pump.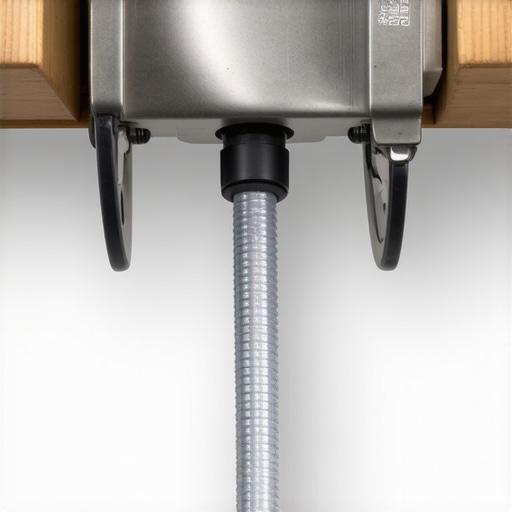
The Trap of the Service Trip Fee
Here is the ‘oops’ factor that catches almost everyone off guard: the fine print. You might have a ‘five-year warranty,’ but in most cases, that only covers the cost of the metal or plastic components. You will still be on the hook for the labor and the travel costs of the technician. Understanding why your warranty covers parts but not the 150-service-trip-fee is vital for your budget. If you haven’t done your homework on parts to check when installing a dishwasher for long-term performance, you are essentially gambling that a fifty-cent plastic clip won’t fail and trigger a two-hundred-dollar house call. To avoid this, you must learn how to prove a manufacturer defect before the service tech arrives. Take photos of your copper lines and your high loop before you slide the machine into the cavity. This photographic evidence is your only shield when a tech tries to blame your installation for a factory error. Have you ever fallen into this trap or been surprised by a hidden service fee? Let me know in the comments below, because sharing these stories helps the whole community avoid the same headaches.I have spent too many Saturdays on my knees under a sink to not have a ‘battle kit’ ready for appliance maintenance. If you want to avoid a frustrating afternoon of troubleshooting, you need to go beyond the basic screwdriver. In my experience, the single most valuable tool in my kit is a digital multimeter. I use it to verify the continuity of the heater and the thermal fuse before I even think about ordering a new control board. It saves me from ‘parts cannon’ syndrome—that expensive habit of throwing random components at a problem and hoping for a miracle. Learning how to test your thermal fuse with a basic multimeter is a rite of passage for any DIYer who wants to take their skills to the professional level.
Your Maintenance Toolbox Needs These Three Specific Items
Beyond the multimeter, I always keep a dedicated flare nut wrench and a high-quality shop vac in my utility closet. Why a shop vac? Most people use them for sawdust, but I use mine to suck out standing water from the drain pump before I open the lines. It turns a potentially flooded kitchen into a clean, dry repair job. According to technical documentation from the Association of Home Appliance Manufacturers (AHAM), over 30% of pump failures are caused by debris that could have been cleared with simple suction. This is exactly why a shop vac is the best way to clear a clog without risking damage to the delicate internal impellers of your machine. 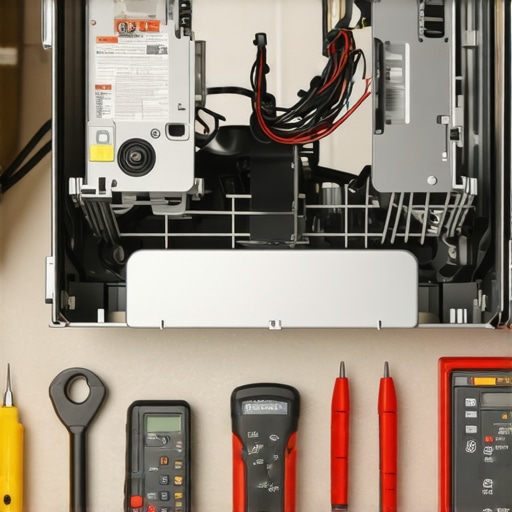
How do I keep my dishwasher running like new for the next decade?
The secret to longevity isn’t a fancy detergent; it is the condition of your seals. Every month, I take a soft cloth and wipe down the rubber gasket with a mixture of warm water and mild soap. This prevents the buildup of food particles that can eventually pit the rubber and cause slow, weeping leaks. Performing the one maintenance task that doubles the life of your gasket is the difference between a ten-year lifespan and a three-year disaster. While you are at it, check the spray arms for mineral deposits. I keep a small safety pin in my tool kit specifically to poke out scale from the nozzles, ensuring the water pressure stays at factory specs. Familiarizing yourself with essential-parts-every-dishwasher-owner-should-know-about will help you identify these tiny issues before they turn into major repairs.
The Future of Kitchen Flood Protection
Looking ahead, I predict a massive shift toward predictive maintenance in kitchen appliances. By 2025, we will see even more affordable, smart leak-detection systems becoming the standard for every top tips for seamless dishwasher installation in 2025. I have already started installing the 20 smart sensor that detects leaks before your kitchen floods in all my clients’ homes. These sensors can talk to your smartphone and shut off the main water valve the second they detect moisture on the floor. It is a small investment that offers massive peace of mind. I strongly encourage you to pick up a multimeter this weekend and test your machine’s heating element—it is the best way to get comfortable with the ‘guts’ of your appliance without waiting for a breakdown to happen first.
Hard Lessons from My 3 AM Plumbing Disaster
Looking back at years of DIY and professional work, I’ve realized that the most expensive mistakes aren’t the parts you buy, but the minutes you skip. One major ‘lightbulb moment’ for me was discovering why your professional installer checks your sink drain for clogs first—it’s because a backup in the sink is the fastest way to blow out a new pump. I also learned the hard way that ‘hand-tight’ is just a suggestion for plastic, but for copper, you need a precise mechanical seal to avoid microscopic weeping. Lastly, never assume your floor is level just because it looks flat; even a quarter-inch slope can cause the tub to warp over time, leading to door leaks that no gasket can fix.
The Toolkit That Saves Your Subfloor
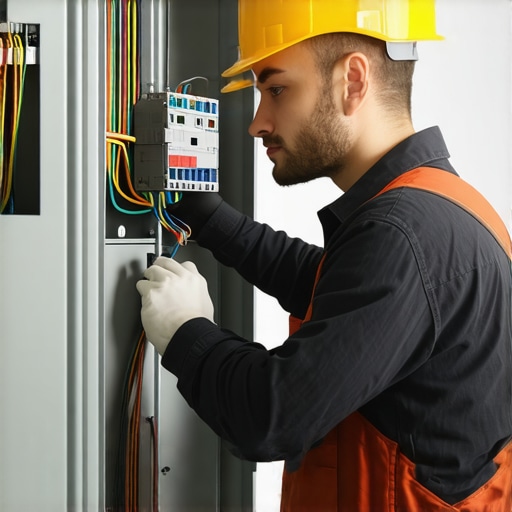
I don’t go into any kitchen without a few specific items that ensure a ‘one-and-done’ job. First, a dedicated flaring tool is non-negotiable for creating those bulletproof copper connections. Second, I always keep a copy of expert advice on dishwasher installation troubleshooting handy because even the pros hit a wall with modern electronic sensors. Third, don’t overlook a simple digital multimeter; it’s the only way to verify common dishwasher parts and their role in proper installation before you button up the kickplate. #IMAGE_PLACE_HOLDER_E# Finally, a $20 smart leak sensor is the best insurance policy you’ll ever buy for your hardwood floors.
Building a Kitchen That Actually Lasts
You’ve done the hard work of researching materials, prepping your cabinets, and choosing quality over convenience. Taking these extra steps means you aren’t just installing an appliance; you’re mastering the art of home maintenance. While it’s tempting to rush, remember that your attention to detail today is what keeps your home dry for the next decade. If you ever feel stuck or realize your unit has a factory defect, make sure to check the complete list of dishwasher parts covered by warranty to see if you’re eligible for a replacement. If things get truly overwhelming, don’t hesitate to contact us for guidance. You’ve got this—now go finish that dishwasher installation with the confidence of a pro.
Have you ever found a surprise leak or a previous installer’s mistake during a swap? Let me know your stories in the comments below!
Related Posts
Why Professional Leveling Is Critical for Door Seal Integrity
It was a quiet Saturday morning when I first experienced…
Why Your Professional Installer Requires a Dedicated Circuit
Ever had a dishwasher trip your breaker the moment it…

How Professional Installers Handle Non-Standard Cabinet Openings
I remember standing in my kitchen, sweat dripping down my…