
It was 8:00 PM on a Tuesday, and my sink was a mountain of lasagna-crusted plates. I hit the ‘Start’ button, ready to retire to the couch, but instead of the familiar hum of rushing water, I got a pathetic little click and a frantic blinking light. My dishwasher was basically telling me, ‘I don’t think I’m closed, so I’m not doing a thing.’ I stood there, staring at a machine that worked perfectly yesterday, feeling that familiar dread of a $200 service call just to have someone turn a screwdriver. That’s when I realized: my dishwasher wasn’t dead; it just had a broken ‘handshake.’ The door latch had finally given up the ghost.
You Can Fix This Before the Repairman Even Calls You Back
Let’s be honest: waiting three days for a service tech to show up just to spend 15 minutes unscrewing a plastic housing is a special kind of torture. I’ve been there. Early in my DIY journey, I actually tried to force the door shut with a wooden shim—huge mistake. It didn’t fix the latch, and it nearly cracked the inner tub. I learned the hard way that common dishwasher parts and how to replace them isn’t just a hobby; it’s a survival skill for the modern homeowner. Swapping a latch is arguably the easiest win you can get under your belt. Most people think they need a master’s degree in electrical engineering to touch a wire, but essential parts every dishwasher owner should know about usually just snap into place once you get the panel off.
Is it Really Just the Latch or am I About to Ruin My Machine?
I get the skepticism. You’re worried that if you start poking around the wiring, you’ll end up with a dead unit or a flooded kitchen. But here’s the reality: the door latch is a simple mechanical switch housed in a plastic frame. It’s designed to be accessible. According to industry data from Consumer Reports, a significant portion of appliance service calls are for minor mechanical failures that homeowners can tackle with a single Torx screwdriver. If you are currently staring at a mountain of dishes and need a temporary fix, you might be tempted to research how to bypass a faulty door latch sensor safely, but for a permanent, safe solution, a total replacement is the only path forward. You aren’t going to break the door; you’re just going to give it its ‘brain’ back. Before you dive in, it’s always smart to double-check understanding dishwasher warranty policies for peace of mind to ensure you aren’t leaving money on the table, though for most of us with older machines, the DIY route is the fastest way to a clean kitchen.
Have you ever stared at a blinking ‘Door’ light and felt like your kitchen was personally insulting you? I’d love to hear about your most frustrating appliance ‘fail’ in the comments—did you fix it or call in the cavalry?
Kill the Power Before You Touch a Single Wire
Safety isn’t just a suggestion; it’s the difference between a successful fix and a trip to the ER. Before you even think about grabbing a screwdriver, head to your circuit breaker and flip the switch. I once skipped this step thinking I could ‘just be careful’ while working on a neighbor’s machine. I touched a live terminal with my thumb, and let’s just say the resulting yelp was enough to wake the baby next door. If you are nervous about the electrical side of things, a diy dishwasher installation step-by-step guide covers the basics of power management effectively. Once the power is dead, open the door and prepare for some light surgery.
Getting Under the Hood of Your Door
To get to the latch, you have to peel back the layers of the door like an onion. Most modern units use a ‘clamshell’ design where the inner stainless steel panel is bolted to the outer decorative panel. You’ll need a Torx T15 or T20 screwdriver for this. Pro tip: Don’t take out all the screws at once. Start from the bottom and work your way up, leaving the two top screws for last so the heavy outer panel doesn’t come crashing down on your toes. While you have the panel open, it’s the perfect time to look for other worn components; the most popular dishwasher parts and how they improve performance often include these simple mechanical switches that take the most abuse over years of slamming the door shut.
Finding Your Units Hidden Identity
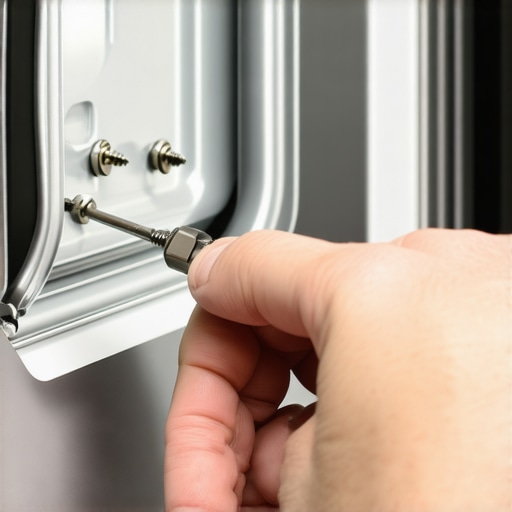
You cannot just buy a ‘standard’ latch. Every manufacturer—Bosch, Whirlpool, KitchenAid—thinks their latch design is a work of art. To get the right one, you must find your model number. It’s usually laser-etched on the very top of the door frame or tucked inside the side wall. If you’re struggling to find it, check out this guide on how to find your units hidden model number for replacement parts. Using the wrong part is like trying to put a Ford engine in a Chevy; it might look close, but it’ll never fire up correctly. I once spent forty minutes trying to force a generic latch into a Samsung frame, only to realize the screw holes were off by a mere millimeter. Save yourself the headache and buy the OEM (Original Equipment Manufacturer) part.
Snapping the New Latch Into Place
The latch itself is usually held in by two screws or a couple of plastic clips. Once the screws are out, the latch will dangle by its wire harness. These harnesses are generally ‘keyed,’ meaning they only plug in one way, much like a USB cable or a LEGO brick. Gently pull the plastic connector—not the wires—to disconnect the old unit. If the wires look scorched or brittle, you might be dealing with a deeper electrical issue, and you should learn how to test your thermal fuse with a basic multimeter before proceeding. Snap the new latch into the housing, reconnect the harness, and reverse your steps to put the door back together. When you’re top tips for selecting the right parts for dishwasher installation are followed correctly, that satisfying ‘click’ when you close the door for the first time will feel like a victory lap.
The Final Handshake Test
Before you screw everything back in tight, do a dry run. Close the door and listen for the mechanical engagement. It should feel firm, not mushy. If it feels like you’re forcing it, the latch might be misaligned with the strike plate (the little hook on the tub). Misalignment is a common hurdle, much like essential parts for troubleshooting dishwasher installation issues that often require just a slight nudge to the left or right to sit perfectly. Once it clicks smoothly, flip the breaker back on and run a quick rinse cycle. If the light stays solid and the water starts flowing, you’ve officially saved yourself a $200 repair bill and conquered the machine.
Now that you’ve mastered the mechanical swap, let’s talk about the nuances that separate a DIY hero from a frustrated homeowner. A common belief I see on forums is that opening your machine’s door panel automatically ‘voids’ your manufacturer’s protection. However, the reality is more nuanced. According to the U.S. Federal Trade Commission (FTC) guidelines regarding the Magnuson-Moss Warranty Act, manufacturers cannot legally void your entire warranty just because you performed your own repairs or used a non-brand part, unless they can prove your work caused the specific failure. I’ve spent years how to diagnose dishwasher parts during warranty periods, and the real threat isn’t the act of repair—it’s the paperwork. Most people lose out because they don’t have a paper trail, which is why your warranty claim fails without an authorized receipt. Have you ever fallen into this trap of thinking you were ‘locked out’ of your own machine? Let me know in the comments.
Your Warranty Is More Resilient Than You Think
While the law protects your right to repair, you have to be smart about what understanding dishwasher warranty policies for peace of mind actually entails. If you accidentally snap a wire while replacing the latch, that specific damage isn’t covered. This leads to the ‘oops’ factor I see most often: the mounting mistake. When reattaching the machine to your cabinetry, please stop using standard wood screws for metal-lined cabinets. I’ve seen homeowners puncture their inner tub because they used a screw that was a quarter-inch too long, turning a $30 latch fix into a $500 scrap metal project. If your machine vibrates slightly, it’s better to use the specific clips provided by the manufacturer rather than improvising with drywall screws that will inevitably corrode.
Can a Cheap Replacement Latch Actually Fry My Control Board?
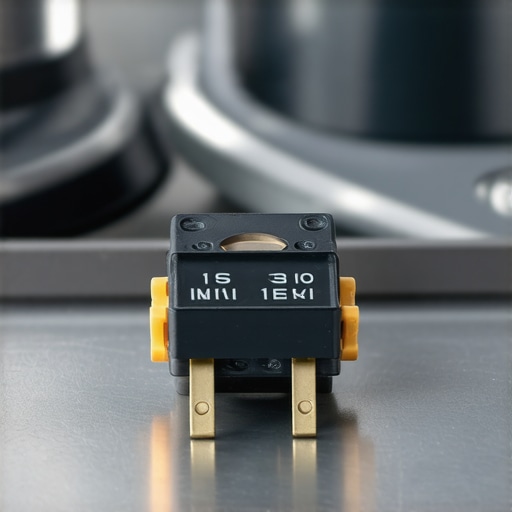
This is the question that keeps savvy DIYers up at night. The answer is a frustrating ‘maybe.’ While many third-party parts are fine, some generic latches have slightly different electrical resistance levels. If the control board is sensitive, a ‘ghost’ signal can cause the processor to overheat. This is why you must learn how to spot a fake replacement part before it fries your control board. #IMAGE_PLACE_HOLDER_C# Beyond just the electrical specs, you need to know what your dishwasher warranty doesnt cover and how to avoid fees so you don’t call a tech for a ‘failed’ part that was actually just a knock-off that didn’t fit properly. True expertise isn’t just knowing where the screws go; it’s knowing how every component talks to the ‘brain’ of the machine to ensure your kitchen remains a flood-free zone for years to come.
Once you’ve successfully swapped that latch, you’re no longer just a ‘person who owns an appliance’—you’ve officially joined the ranks of the self-reliant. But let’s keep that momentum going. If there is one thing I’ve learned from tearing apart dozens of these machines, it is that the right gear makes the difference between a thirty-minute win and a four-hour nightmare. I never start a repair without my small wet/dry shop vac sitting right next to me. While it might seem overkill for a door latch, you would be surprised how often a mechanical failure is exacerbated by a tiny leak or a backup you didn’t see coming. In fact, I’ve found that why a shop vac is the best way to clear a clog is the most underrated secret in the DIY world; it allows you to suck out standing water from the sump before it ever hits your hardwood floors.
The Three Tools I Never Start a Repair Without
Beyond the vacuum, you need a dedicated set of Torx drivers. Don’t rely on those cheap, multi-bit screwdrivers that come in ‘homeowner kits.’ The bits often slip, and stripping a T15 screw on a stainless steel door is a fast track to misery. I personally use a set of long-reach magnetic drivers because reaching the bottom screws on a heavy door panel requires a steady hand and a bit that won’t drop the hardware into the ‘abyss’ of the kickplate. When you are the proper tool to use when tightening your water supply line, precision matters more than brute force. I’ve seen too many DIYers use pliers on plastic fittings, only to crack the housing and cause a slow drip that goes unnoticed for months.
How do I maintain my dishwasher’s performance over several years?
The secret to longevity isn’t just fixing things when they break; it’s preventing the ‘handshake’ from failing in the first place. Every six months, I take a damp microfiber cloth and wipe down the door gasket. It sounds tedious, but a buildup of old detergent and food particles can actually create enough resistance to prevent the door latch from seating correctly, putting unnecessary strain on the plastic strike plate. I’ve found that the one maintenance task that doubles the life of your gasket is simply keeping it clean and supple. If you notice your door is getting harder to close, don’t slam it harder. Instead, check the parts to check when installing a dishwasher for long-term performance, specifically the leveling legs. A machine that has ‘walked’ or tilted forward will misalign the latch and eventually snap the internal switch.
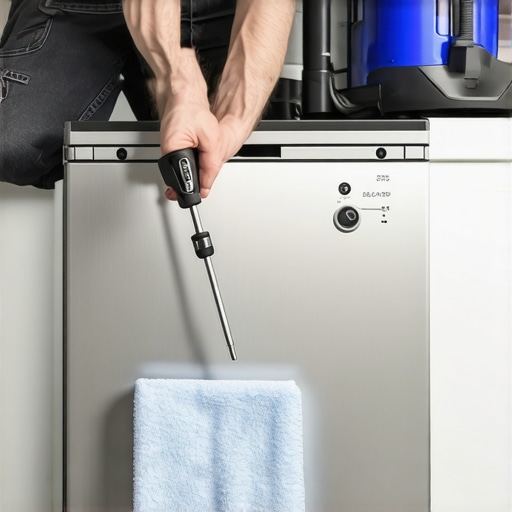
The Association of Home Appliance Manufacturers (AHAM) notes in their DW-1 technical standard that most consumer-grade dishwashers are engineered for approximately 2,500 cycles. If you’re running your machine once a day, you’re looking at a seven-year lifecycle. However, by understanding dishwasher parts a key to effective maintenance, you can easily push that to twelve or fifteen years. It’s all about the small wins, like knowing how to clear a blocked impeller without disassembling the pump when the machine refuses to drain. These minor interventions keep the ‘brain’ of the machine from throwing error codes that lead to premature replacements.
The Future of Your Kitchen Might Be Self-Diagnosing
We are moving toward an era where your dishwasher will tell you exactly which part is failing before it actually stops working. Many newer Bosch and Miele units already use flow meters and optical sensors to predict clogs. I predict that within the next five years, the ‘broken handshake’ scenario will be solved by haptic feedback doors that won’t even let you start a cycle if the alignment is off by a fraction of a millimeter. For now, though, we have to stay vigilant. Installing the 20 smart sensor that detects leaks before your kitchen floods is the best bridge between old-school mechanical reliability and new-school tech safety. If you haven’t checked your model number yet, do it today—order a spare latch and keep it in your ‘junk drawer.’ When it eventually fails at 8:00 PM on a Tuesday, you’ll be the hero of the house. I challenge you to pull your kickplate off this weekend and just look for signs of moisture; catching a small leak now is the ultimate pro move.
Hard Truths About Door Latch Repairs That No One Tells You
Over the years, I’ve realized that the physical swap of the latch is only half the battle. To truly master this repair, you need to look for the subtle signs of failure that a manual won’t mention.
- Plastic is fragile, even when it’s new. Many DIYers snap the mounting clips because they apply force at a 45-degree angle. Always pull and push connectors straight on to avoid a second trip to the parts store.
- The ‘Handshake’ is more than a click. It’s an electrical circuit. If your door feels closed but won’t start, your strike plate might be warped. I’ve seen homeowners research how to stop your dishwasher from moving when you open the door as a fix, only to realize the machine was just tilted too far forward, preventing the latch from fully engaging the sensor.
- The hidden cost of the service call. Remember why your warranty covers parts but not the 150 service trip fee—doing this yourself isn’t just about the $30 part; it’s about avoiding that predatory ‘convenience fee’ that often costs more than the machine is worth.
The Gear I Pack for Every Kitchen Fix
I don’t believe in buying every tool in the aisle, but for dishwashers, these are non-negotiable for me. First, get a magnetic parts tray. There is nothing worse than a T15 screw falling into the dark gap between your subfloor and the cabinets. Second, keep a small tube of silicone grease nearby; the part you must lubricate to stop a squeaky door often interacts with the mechanical tension of the latch, and a little dab can prevent friction wear. Finally, always have the contact for a reliable parts supplier on hand. Knowing when to replace dishwasher parts for optimal performance ensures you aren’t just patching a sinking ship, but actually extending your machine’s lifespan by years.
Why Your First DIY Fix is Just the Beginning
Fixing a door latch might seem like a small win, but it’s the gateway to total kitchen independence. Once you realize that these machines are just a collection of logical switches and hoses, the fear of a breakdown disappears. You’ve successfully navigated common dishwasher parts and how to replace them effectively, which means the next time an error code pops up, you’ll reach for your toolbox instead of your phone. Your kitchen deserves to work as hard as you do, and now you have the skills to make sure it does without a $200 bill hanging over your head.
Was there a specific moment during this fix where you almost gave up and called a pro? I’d love to hear about the ‘stuck screw’ or ‘missing clip’ that tested your patience in the comments below!
Related Posts
How to Test a Heating Element Without Tearing the Machine Apart
I remember the moment clearly—my dishwasher suddenly stopped heating, and…
Why a Shop Vac is the Best Way to Clear a Clog
I stood there, ankle-deep in a metaphorical swamp, staring at…
Why You Should Never Bypass Your Dishwasher Thermal Fuse
Imagine this: You’re excited to finish your latest kitchen upgrade.…