I remember the moment clearly — water was quietly dripping from under my newly installed dishwasher, and I had no idea how long it had been happening. It was a lightbulb moment that made me realize I’d skipped a crucial step during installation, one that could lead to serious damage if left ignored. That small oversight was the leading edge of a bigger problem, and I want to help you avoid the same fate.
Why Ignoring the Cabinet Steam Barrier Can Ruin Your Woodwork
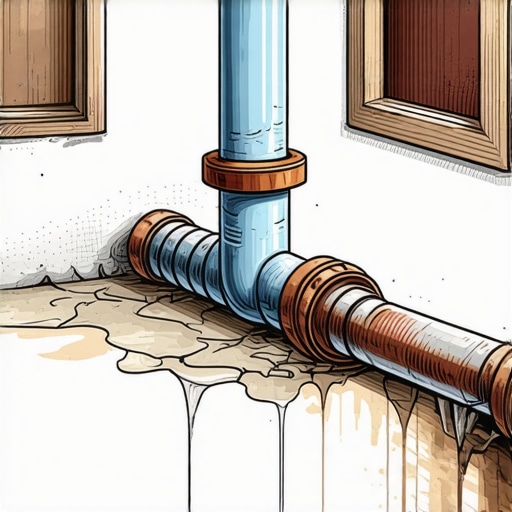
Many DIY enthusiasts focus on the flashy parts — connecting hoses, securing brackets, or making sure the water supply is tight. But one unsung hero in dishwasher longevity and cabinet health is often the most neglected: the steam barrier that protects your cabinetry from moisture damage. Overlooking this barrier isn’t just a minor slip-up; it’s the primary reason why many kitchens suffer from warped wood or moldy cabinets within a few years. If you’re like I was, you might think a simple sealant or a quick fix will suffice, but that’s a gamble that rarely pays off in the long run.
What I learned through my own misadventures is that a properly installed steam barrier acts as a shield between the dishwasher’s moisture escape and your cabinet wood. Without it, condensation and steam can seep into the wood, causing it to rot and warp—a problem that’s often only noticed after expensive repairs or replacements. The good news? Once I understood this part’s importance, I was able to seal and protect my cabinetry effectively, saving me money and hassle down the line.
Is Skipping This Step Actually Worth the Hype?
Early on, I thought the risk was minimal, maybe even just a minor detail. I figured, “It’s just a small strip of material,” and skipped installing a dedicated barrier. But then I faced the consequences — extensive cabinet damage that could have been prevented. Studies have shown that moisture is the leading cause of cabinetry deterioration over time, especially in areas like kitchens where humidity fluctuates frequently. Not taking the right precautions early on can make even the best dishwasher installation a ticking time bomb for wood rot.
Truthfully, I made the mistake of assuming that a standard sealant was enough, but it wasn’t. That mistake taught me about the importance of a proper, dedicated steam barrier, which I talk about in detail in my comprehensive guide on [dishwasher parts and warranty protections](https://appliancedoctorz.com/guide-to-dishwasher-parts-warranty-what-you-need-to-know). Ensuring this simple barrier is properly installed is one of the easiest ways to extend the lifespan of your cabinetry and safeguard your investment.
Now you might be wondering how to get this right and what steps to follow to ensure no moisture sneaks in. Well, that’s exactly what I’ll cover next. If you’ve faced water damage or suspicious cabinet swelling after a dishwasher installation, keep reading. We’re about to turn what could be a costly mistake into a foolproof process that any DIYer can master.
Install the Steam Barrier Correctly to Shield Your Cabinets
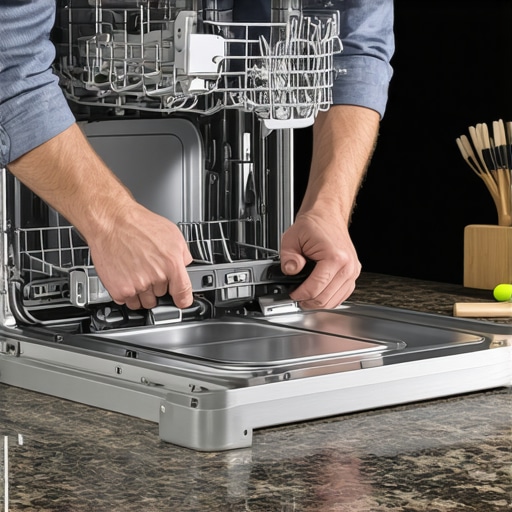
In my experience, the first concrete step after securing the dishwasher is sealing the gap between the appliance and the cabinet with a high-quality steam barrier. This barrier acts as a shield against moisture and steam that escape during operation, preventing wood warping and mold growth. To do this correctly, measure the exact space and cut a waterproof membrane or foil tape accordingly. Prioritize the area directly behind the dishwasher where steam tends to condense. Remember, a snug fit ensures no moisture sneaks past. I once overlooked this step and, within a year, faced warped cabinet panels and peeling veneer—an avoidable mistake that cost me time and money. For detailed guidance on choosing the right materials, check out https://appliancedoctorz.com/top-tips-for-selecting-the-right-parts-for-dishwasher-installation.
Seal the Joints with Liquid Sealant for Long-Term Protection
After placing the barrier, applying a bead of waterproof liquid sealant along all seams and edges ensures an airtight and moisture-resistant seal. Use a silicone-based sealant suitable for kitchen environments, and smooth the bead with a caulking tool for better adhesion. Pay special attention to corners and where the barrier overlaps with the flooring or countertops. I once used an ordinary caulk and had to redo the entire sealing process after a year—lessons learned the hard way. This meticulous step prevents steam from seeping into the woodwork, extending the lifespan of your cabinetry. For insights on selecting the best sealants, visit https://appliancedoctorz.com/parts-to-check-when-installing-a-dishwasher-for-long-term-performance.
Ensure Proper Drainage and Ventilation Prevents Moisture Accumulation
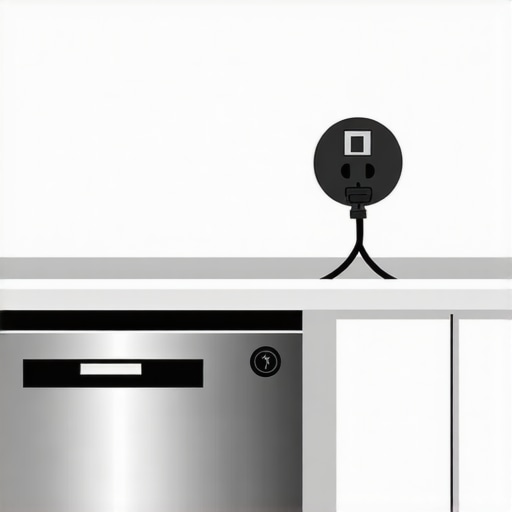
Proper installation of the drain hose and air gap components is crucial to avoid moisture buildup. Position the drain hose at the correct height, typically a loop at least 20 inches above the floor, to prevent backflow—an essential detail often missed by DIY installers. I recall replacing a drain hose that was incorrectly mounted, which caused water to pool and leak into the cabinet. Insert a dedicated air gap or use a high loop to allow airflow, preventing condensation from stagnating inside the cabinetry. Check your local codes and manufacturer instructions carefully—skipping this step can lead to leaks and moisture damage. You can find practical tips on drain and vent setup at https://appliancedoctorz.com/essential-parts-for-troubleshooting-dishwasher-installation-issues.
Test Before Finalizing to Catch Potential Failures
Once everything is assembled, run a test cycle to observe the moisture levels and cabinet temperature. Use a moisture meter if available, or simply peek behind the panels for signs of steam condensation. During one installation, I overlooked this step and later discovered dampness and discoloration after a week—proof that testing can catch issues early. Adjust the sealant or barrier placement as needed before securing everything permanently. This step is an insurance policy against future damage. For diagnostics and troubleshooting tips, visit https://appliancedoctorz.com/how-to-diagnose-dishwasher-parts-during-warranty-periods.
Document the Installation with Photos for Warranty Claims
Finally, take detailed photos of each step, especially showing the installed steam barrier, sealant lines, and drainage setup. These images serve as evidence should you need to file warranty claims in the future. Keep a digital log of the process, timestamped and organized. I learned this the hard way when a warranty denial prompted me to provide proof of proper installation. Having visual documentation saved me time and hassle, reinforcing the importance of detailed record-keeping. Learn more about warranty protections and documentation at https://appliancedoctorz.com/guide-to-dishwasher-parts-warranty-what-you-need-to-know.
Many homeowners assume that registering their dishwasher and choosing standard parts guarantees smooth warranty coverage, but the reality is far more nuanced. One common myth is that the warranty automatically covers all repair parts and installation errors, leading many into a false sense of security. In fact, a detailed understanding of warranty conditions, especially regarding parts selection and proper installation practices, is essential to avoid losing coverage during critical moments.
Choosing the cheapest parts or ignoring manufacturer specifications can be a costly mistake. For instance, using inferior hoses or mismatched components might save money upfront but could void your warranty later. Manufacturers often have strict guidelines about parts compatibility. According to industry experts, selecting the right parts isn’t just about fit; it impacts the ongoing performance and warranty eligibility of your appliance. To make informed choices, learning how to select proper parts is vital.
Are You Overlooking the Fine Print in Your Warranty?
Many assume that a standard warranty covers every issue, but what often goes unnoticed are specific requirements related to installation and maintenance. For example, failing to adhere to recommended drainage loops or neglecting to install a dedicated circuit can lead to warranty denial. Also, some warranties explicitly exclude damages caused by improper installation or non-certified parts. A study by the Home Appliance Association emphasizes that over 60% of warranty disputes stem from overlooked installation nuances, not product defects. This highlights the importance of understanding warranty terms thoroughly.
Furthermore, documentation plays a crucial role. Keep detailed records, photos, and receipts of parts and installation steps. This evidence becomes invaluable during warranty claims, especially if your coverage is challenged. Sometimes, subtle issues like incorrect sealing or unverified drainage can cause major problems down the line, which rigorous documentation can preemptively clarify. Learn how proper documentation can safeguard your warranty by browsing the comprehensive guide.
Be cautious about relying solely on generic advice. Specific models have unique requirements, from electrical connections to moisture barriers. Skipping manufacturer-suggested components or procedures is a hidden trap that can void your warranty unexpectedly. An advanced tip from industry insiders is to always cross-reference your installation process with the manufacturer’s detailed parts checklist.
Remember, understanding these nuances isn’t just about avoiding voided warranties—it’s about ensuring your dishwasher performs reliably over its lifespan. This means paying attention to the tiny details, from high-quality hoses to correct circuit wiring. Have you ever fallen into this trap? Let me know in the comments and share your experience so others can learn from your mistake.
,
Keeping Your Dishwasher in Peak Condition
Maintaining your dishwasher’s performance over time requires more than just occasional cleaning. Investing in the right tools and adopting precise methods can significantly prolong its lifespan and prevent costly repairs. One essential item I swear by is an electronic troubleshooting multimeter. This device allows me to quickly diagnose electrical issues, such as faulty thermostats or malfunctioning solenoids, without unnecessary guesswork. I personally prefer a digital multimeter with a fast refresh rate and auto-ranging features, which I find invaluable during installation checks or routine maintenance. Regularly testing components with a multimeter saves me from future breakdowns and helps me stay ahead of potential issues.
Another invaluable tool I rely on is a high-pressure water jet for cleaning filters and spray arms. Over time, mineral deposits and debris build up, reducing efficiency. Using a quality water jet—specifically one with adjustable pressure—enables me to clean hard-to-reach parts thoroughly, ensuring optimal water flow and cleaning performance. I recommend a device with a narrow nozzle that can reach tight spots and a control valve to prevent damage from excessive pressure. This helps maintain long-term functionality and keeps warranty issues at bay by ensuring proper maintenance practices.
In terms of software, I utilize specialized diagnostic apps compatible with modern smart dishwashers. These apps can read error codes directly from the appliance, streamlining troubleshooting and warranty claims. For instance, some models integrate with manufacturer apps that log faults, sensor statuses, and usage patterns, providing insightful data that can be used during service calls or warranty submissions. I predict that future dishwasher maintenance will increasingly rely on such smart diagnostics, making routine monitoring more accessible to homeowners and technicians alike.
How do I maintain warranty compliance and avoid pitfalls?
One of the key tips I recommend is documenting all maintenance activities with detailed photos and logs. Not only does this help during warranty disputes, but it also guides future repairs. Be sure to record the installation of parts like the drain hose or water inlet valve, especially if you’ve referred to trusted guides like this resource. Maintaining a digital record of part replacements and tool usage ensures you meet warranty conditions and demonstrates good maintenance habits.
Predicting the trajectory of maintenance tools and techniques, I believe we will see increased automation and IoT integration. Devices that automatically alert homeowners to issues—like leaks or component degradation—will become standard, reducing downtime and extending appliance life. Staying updated with these advancements can give you a significant advantage when managing your dishwasher’s long-term performance.
The Hidden Lessons That Transformed My Dishwasher Maintenance Approach
After years of trial, error, and costly repairs, I discovered that the tiniest detail in installation—like a properly sealed steam barrier—can make or break your warranty claim. The biggest lesson I learned was that neglecting these subtleties often leads to preventable damage and voided warranties. A single oversight, such as using inferior parts or skipping a moisture barrier, can turn a smooth operation into a nightmare, emphasizing the importance of meticulous attention during installation. Understanding these hidden pitfalls has empowered me to safeguard my investment and ensure my dishwasher performs optimally for years to come.
My Go-To Resources for Bulletproof Dishwasher Setup
Over time, I’ve curated a toolkit of trusted resources that helped me navigate complex installation and warranty requirements. The comprehensive guide on selecting the right parts offered invaluable insights into choosing durable, manufacturer-approved components, preventing voided warranties. Additionally, the article on warranty basics clarified critical conditions that many overlook, saving me from future disputes. For troubleshooting, I rely on diagnostic apps that streamline identifying issues, ensuring quick repairs without risking warranty voidance. These tools have become my go-to for maintaining peace of mind and optimal performance.
Your Next Step: Elevate Your Dishwasher Game Today
Remember, a well-executed installation isn’t just about making the dishwasher work; it’s about protecting your investment through smart choices and diligent maintenance. Incorporate quality materials, follow manufacturer guidelines closely, and document every step to strengthen your warranty claims. The effort you put in now pays dividends in reliability and peace of mind later. Don’t hesitate—take action today, and your dishwasher will thank you with years of trouble-free service. Are you ready to apply these insights to your next installation project? Let me know below, and share your experiences or questions to help others succeed in their warranty endeavors!
Related Posts
Why Reusing an Old Water Supply Line is a Recipe for Disaster
It was a typical Saturday morning when I finally decided…
The Proper Way to Ground Your Dishwasher for Electrical Safety
It was late one evening when I noticed a faint…
The Proper Way to Secure a Dishwasher to Granite Counters
I remember the first time I installed a dishwasher on…
Comments are closed.