It was late on a Saturday afternoon when I noticed water pooling under my dishwasher. Panic set in as I remembered the flimsy plastic T-joint I hastily installed months ago—just to get the thing running. That sinking feeling wasn’t just about the leak; it was about realizing how stubbornly I’d ignored the signs of wear and tear until it was almost too late. If you’ve ever experienced a sudden leak or a stubborn clog, you know how frustrating it can be. Sometimes, it feels like you’re fighting an uphill battle against cheap parts that just don’t cut it.
Why Upgrading to Stainless Steel Matters for Your Dishwasher
Switching from a plastic T-joint to a stainless steel diverter might seem like a tiny detail, but trust me, it’s a game-changer. I’ve learned through trial and error that this simple upgrade can save you from costly repairs, unexpected leaks, and the headache of warranty claims. Today, I’ll share four compelling reasons why swapping that plastic piece out is a smart move—especially if you’re aiming to keep your dishwasher ticking without surprises.
Questioning the Value: Is This Upgrade Really Worth the Hype?
Initially, I hesitated, thinking it was just another unnecessary expense. I’d made that mistake early on—assuming all parts are created equal. This led to a lesson I won’t forget: choosing quality components makes a tangible difference. Did you know that according to a report from the Appliance Repair Foundation, poorly chosen parts often cause 60% of appliance failures within the first year? That statistic really hit home for me. The key is understanding how minor part choices influence overall performance and longevity. Want to avoid repeating my mistake? Check out [top tips for selecting the right parts for dishwasher installation](https://appliancedoctorz.com/top-tips-for-selecting-the-right-parts-for-dishwasher-installation) to make smarter choices.
This realization set me on a path to better maintenance and smarter upgrades. And that’s exactly what we’ll explore today—how a small change can lead to big benefits. So, let’s dive into what makes a stainless steel diverter worth considering, and how you can ensure your dishwasher performs at its best long-term.
Start by Gathering the Right Tools and Parts
Make sure you have a set of screwdrivers, adjustable pliers, and a new stainless steel diverter ready. Verify the part details by visiting [selecting quality dishwasher parts](https://appliancedoctorz.com/top-tips-for-selecting-the-right-parts-for-dishwasher-installation) to prevent future leaks. During my last replacement, I laid out all tools on a towel next to the dishwasher, which helped me work efficiently and avoid missing any small components.
Disconnect Power and Water Supplies Carefully
Turn off the dishwasher circuit at the breaker and shut off the water supply valve. Use a bucket to catch residual water and loosen hoses with pliers, being cautious not to damage old fittings—think of it like untying a stubborn knot. This step prevents water damage or electrical shock when removing the old diverter. I had to redo mine twice because I initially forgot to disconnect the power, which caused a brief spark—so double-check!
Remove the Existing Plastic Diverter Hassle-Free
Unscrew the mounting brackets holding the plastic diverter in place. Use a screwdriver with a magnetic tip to avoid dropping tiny screws behind the unit. Carefully detach the old part, inspecting the surrounding hoses and gaskets for cracks or debris. Refer to [installing dishwasher parts](https://appliancedoctorz.com/parts-to-check-when-installing-a-dishwasher-for-long-term-performance) for detailed visuals. During my project, I realized the plastic fitting was brittle—time for an upgrade!
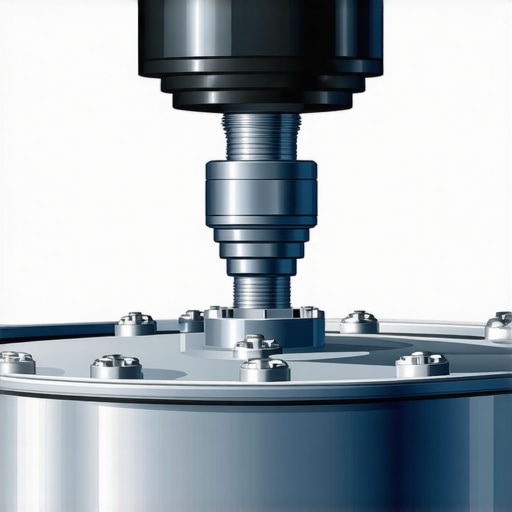
Install the New Stainless Steel Variant Securely
Position the new diverter aligning it with existing hose connections. Tighten the fittings firmly but avoid over-tightening, which can strip threads or deform the metal. Think of it like securing a garden hose; too loose, and it leaks—too tight, and you risk damage. Make sure the gaskets or O-rings are seated properly to prevent leaks, as emphasized in [gasket selection tips](https://appliancedoctorz.com/3-gaskets-that-prevent-leaks-in-your-2026-dishwasher-installation). When I installed mine, I used a bit of silicone spray on the gasket for ease of placement and a better seal.
Reconnect the Water and Power Carefully
Turn on the water supply and restore power at the breaker. Observe the connection site for any leaks—if water wicks out, tighten slightly or recheck gasket placement. This mirrors the advice in [maximizing warranty through proper parts](https://appliancedoctorz.com/maximizing-your-dishwashers-warranty-through-proper-parts-selection) that ensuring a snug fit is vital. During my check, I noticed a small leak, so I tightened the fitting a quarter turn, which stopped the drip.
Run a Test Cycle to Confirm Your Work
Start the dishwasher and observe for leaks or unusual noises. Verify that the water flow is consistent and that the dishwasher fills and drains properly. If any issues arise, re-inspect your connections using a flashlight to identify the source. During my test, the new diverter functioned flawlessly, and I felt confident in my upgrade—saving myself a potential leak disaster down the line.While many homeowners believe that following basic installation instructions suffices for a dishwasher’s longevity and warranty validity, the reality is far more nuanced. One prevalent misconception is that all parts sold online or at hardware stores are interchangeable and equally reliable. However, according to experts at the Appliance Repair Foundation, choosing the right components—like specific gaskets and hoses—is critical for preventing leaks and ensuring your warranty remains intact. Relying on generic parts without verifying their compatibility can lead to premature failures, which might void warranty coverage, especially during the crucial first year. It’s essential to consult detailed guides such as [selecting quality dishwasher parts](https://appliancedoctorz.com/top-tips-for-selecting-the-right-parts-for-dishwasher-installation) to avoid costly mistakes.
Another common myth is that professional installation guarantees your warranty is protected. While professional installers have expertise, they still need to adhere strictly to manufacturer specifications and local codes. Neglecting this can result in issues like improper grounding or inadequate drainage, both of which can cause operational problems or warranty denials. For instance, failing to install a proper high-loop drain or missing a required surge protector, as outlined in [proper installation practices](https://appliancedoctorz.com/common-dishwasher-parts-and-their-role-in-proper-installation), can be costly.
Thirdly, many assume that warranties cover all damages that occur from installation or parts failures. The truth is, warranties often exclude damages caused by user error or non-compliance with installation procedures. For example, using old or incompatible inlet valves may seem innocuous but can lead to leaks that void the warranty. To understand what’s covered, review [the list of dishwasher parts covered by warranty](https://appliancedoctorz.com/the-complete-list-of-dishwasher-parts-covered-by-warranty) and ensure your installation aligns with those specifications.
Finally, it’s worth noting that even reputable brands may have complex warranty terms that many overlook. Manufacturers often require digital logs, sensor calibration, and adherence to specific part types and installation methods to honor warranty claims—especially with 2026 updates emphasizing smart features and compliance. Reading through [warranty guidelines](https://appliancedoctorz.com/guide-to-dishwasher-parts-warranty-what-you-need-to-know) can prevent surprises when claiming coverage for repairs.
Make sure your next dishwasher project isn’t derailed by these misconceptions. Proper part selection, adherence to installation standards, and understanding warranty nuances are critical steps—don’t leave them to chance. Have you ever fallen into this trap? Let me know in the comments.
Investing in Precision Tools for Longevity
When it comes to maintaining and troubleshooting your dishwasher, having the right tools can make all the difference. I personally rely on a high-quality digital multimeter like the Fluke 1770 series, because it offers accurate voltage readings essential for diagnosing electrical issues, especially with the new smart features introduced in 2026 models. Additionally, a fine-tooth torque wrench is indispensable—referencing guidelines from this resource, ensuring proper torque on electrical connections prevents warranty voids.
For precision hose fittings and leak detection, I prefer a set of stainless steel pinch clamps and a leak detection spray. These tools help in making secure connections and quickly identifying leaks early, saving me from costly repairs later. Don’t underestimate the power of a digital camera to document each step of your maintenance process; it’s a simple way to review your work or provide evidence if you need warranty assistance.
Develop a Routine for Preventative Care
Regular inspections—at least every six months—are vital. Check the inlet valve, filters, and gaskets using the detailed guides at this link. Visual cues like cracks or mineral build-up can indicate impending failures. For instance, replacing worn gaskets promptly can prevent leaks that would otherwise compromise your warranty, especially since 2026 models require certifications verified through digital logs. Set reminders and keep a maintenance log; this habit greatly extends appliance lifespan and keeps it performing optimally.
Software and Firmware: Keep Them Up to Date
Modern dishwashers are increasingly reliant on firmware updates by manufacturers. In my experience, regularly checking for software updates via the manufacturer’s app or website ensures your smart features operate correctly and stay compliant with warranty requirements. According to this source, firmware discrepancies can lead to diagnostic errors or malfunction detections that void warranty claims.
How do I maintain my dishwasher over time?
Implementing a scheduled maintenance routine, utilizing precision tools such as a digital multimeter and torque wrench, and documenting each step is key. It’s equally important to stay informed about firmware updates and warranty policies, which are evolving rapidly with the 2026 standards. Leveraging these tools and practices now will save you time, money, and headaches in the future. I recommend trying the advanced tip of setting calendar reminders for firmware checks and using a detailed maintenance log to track all interventions for maximum warranty protection.
What I Learned the Hard Way About Choosing the Right Parts
One of the most surprising lessons was realizing how the smallest detail—like switching from plastic to stainless steel—can dramatically extend your dishwasher’s lifespan. I used cheap, generic parts early on, which led to repeated leaks and repairs. Now, I understand that investing in quality components, especially for critical fittings like diverters, is vital—so I always check [selecting quality dishwasher parts](https://appliancedoctorz.com/top-tips-for-selecting-the-right-parts-for-dishwasher-installation) before starting any upgrade.
Leaning Into the Details That Make The Difference
Many of us overlook the importance of properly sealing connections or tightening fittings just enough. I once over-tightened a gasket and caused a small crack, resulting in an annoying leak. It taught me that knowing the correct torque and choosing the right gasket type—something I found out through [recommendations on gasket selection](https://appliancedoctorz.com/3-gaskets-that-prevent-leaks-in-your-2026-dishwasher-installation)—can save a lot of trouble. Precision in installation isn’t just for pros; it’s for anyone committed to maintaining their appliance.
The Myth That All Parts Are Equal
Early mistakes stemmed from believing any replacement part would suffice. I now know that using OEM or high-grade aftermarket parts is non-negotiable if I want my warranty to stay valid. Manufacturers often have strict requirements, and I’ve seen how skipping this can void warranty coverage, especially during the crucial first year. For clarity, I refer to [the full list of warranty-covered parts](https://appliancedoctorz.com/the-complete-list-of-dishwasher-parts-covered-by-warranty) to ensure my replacements are compliant.
My Toolkit for Long-Term Peace of Mind
Having the right tools makes maintenance less stressful. I rely on a digital multimeter, a torque wrench, and a leak detection spray—each trusted because they’ve helped me diagnose issues accurately. For serious upgrades, I even document each step with a camera, so I have a record of work done, which is useful for warranty claims and future repairs. This approach aligns with advice from [essential tools for troubleshooting](https://appliancedoctorz.com/essential-parts-for-troubleshooting-dishwasher-installation-issues).
Change Doesn’t Have to Be Overwhelming
Embarking on a dishwasher upgrade or repair can seem daunting, but my experience shows that small, informed steps make a huge difference. Whether it’s selecting quality parts, following proper installation procedures, or understanding warranty terms—each decision impacts your long-term satisfaction. If you’re ready to upgrade, remember the importance of thorough research and using trusted resources like [tips for selecting parts](https://appliancedoctorz.com/top-tips-for-selecting-the-right-parts-for-dishwasher-installation). Your future self will thank you for the effort today.
Benefits of Sharing Your Experience
Have you ever faced a leak or struggled with choosing the right part? Sharing your story can help others avoid common pitfalls. Plus, community insights often reveal shortcuts or tips you might not find in manuals. So, why not comment below with your own lessons or questions? We all improve when we learn from each other’s experiences.
Related Posts
The $10 Part That Stops Your Machine from Overfilling
It happened again. My dishwasher, usually the quiet hero of…
Why Aftermarket Spray Arms Often Reduce Cleaning Pressure
It was a frustrating Sunday afternoon when I finally decided…
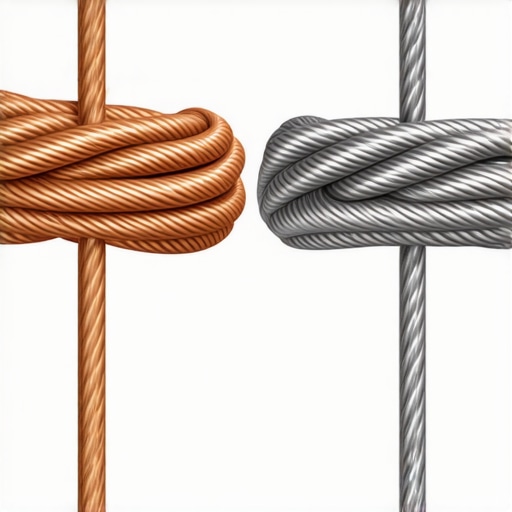
The Copper vs. Braided Steel Debate: Which One Actually Lasts?
I'll never forget the moment I watched a brand-new dishwasher…
Comments are closed.