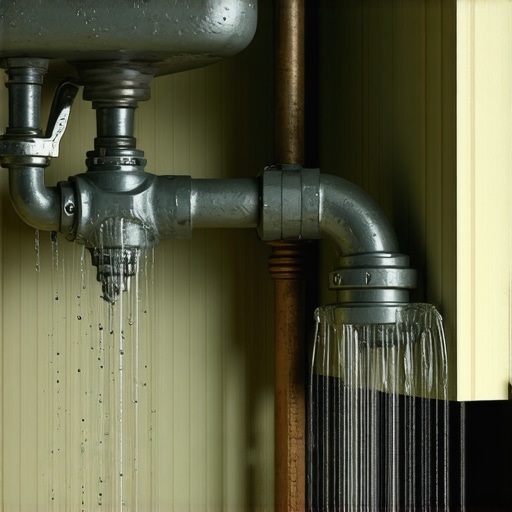
One chilly morning, I awoke to the unsettling sound of water rushing under my sink. Heart pounding, I rushed to turn off the main valve, only to realize I had no idea where it was. The panic, the mess—it’s a nightmare no one wants to face. That day, I learned an invaluable lesson: installing a dedicated water shutoff valve isn’t just a luxury; it’s a necessity that can save you from costly disasters.
Why a Water Shutoff Valve Is Essential for Every Homeowner
Installing a dedicated water shutoff valve turns the chaos of a burst pipe or leak into a manageable situation. Instead of hunting down the main supply—a task often complicated by voltage, access, or other obstructions—you can shut off water quickly from a single, accessible point. This simple upgrade not only prevents flooding but also safeguards your belongings and peace of mind.
This is especially critical if you have appliances like dishwashers or washing machines connected to your water lines. A small malfunction or unnoticed leak here can escalate rapidly, causing water damage and expensive repairs. Early on, I made the mistake of neglecting this upgrade. When my dishwasher’s hose leaked, I scrambled for the main valve, which was tucked away behind furniture and hard to reach—time I could have spent curbing the damage. If you’re wondering about proper installation, I highly recommend checking out [top tips for selecting the right parts for dishwasher installation](https://appliancedoctorz.com/top-tips-for-selecting-the-right-parts-for-dishwasher-installation); it covers essential tips that apply to water shutoff valves too.
Curious if this small change makes a real impact? Well, according to the National Flood Insurance Program, nearly 37% of claims come from pipe or appliance leaks, costing the average homeowner thousands. That’s why proactive measures like a dedicated valve are worth their weight in gold.
But here’s where many of us stumble: early installation mistakes. I learned this the hard way—installing a valve without proper sealing or access can render it useless during emergencies. To avoid this pitfall, ensuring you select high-quality parts and professional installation methods is key. For some helpful insights on choosing the right components, explore [selecting the best parts for long-term performance](https://appliancedoctorz.com/top-tips-for-selecting-the-right-parts-for-dishwasher-installation).
Now that I’ve shared my story and stress the importance, let’s delve into the practical steps to make this upgrade a reality—and peace of mind a permanent fixture in your home.
Prepare Your Workspace and Tools Carefully
Start by turning off the main water supply to prevent any accidental leaks. Clear the area around your dishwasher and locate the water inlet hose. Gather essential tools like adjustable wrenches, a bucket to catch drips, Teflon tape, and the right size fittings. Think of this step as laying a strong foundation before building a house—precise preparation ensures everything fits perfectly later.
Disconnect the Existing Water Line
Carefully loosen the nut connecting the water supply line to the dishwasher’s inlet valve. Hold the pipe steady with a wrench to avoid twisting or damaging it. Expect some water to remain in the line; have your bucket ready. Remember, this is akin to unscrewing a stubborn bolt—apply steady pressure to prevent stripping the fitting.
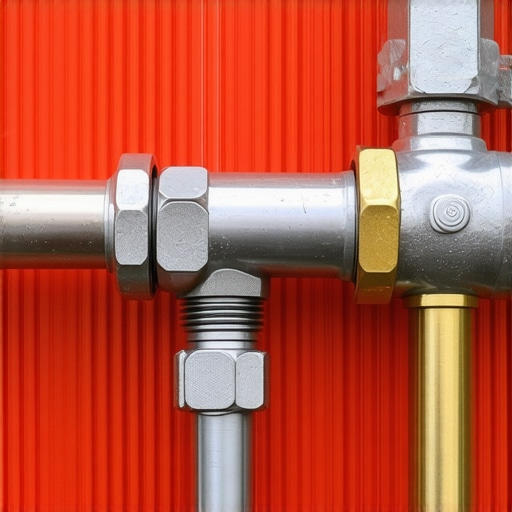
Install the Shutoff Valve Inline
Attach the new shutoff valve directly to the water inlet pipe, using Teflon tape on threaded fittings for a watertight seal. Tighten securely but avoid over-tightening, which can deform the fittings—comparable to threading a screw just enough so it doesn’t wobble. If your valve has a shutoff handle, test its operation to make sure it opens and closes smoothly.
Ensure Proper Positioning for Accessibility
Position the valve so it’s easily reachable, ideally at waist level. Use a mounting bracket if provided to secure the valve to a stable surface. This is similar to installing a thermostat where you can quickly get to it when needed. Proper placement saves precious seconds during emergencies, reducing potential water damage.
Reconnect and Test Your Installation
Reconnect the water supply line to the new valve, tightening fittings securely. Turn on the main water supply and watch for leaks. Open the shutoff valve gradually—tighten fittings if you see any drips. Think of this as releasing a safety valve slowly—monitoring ensures safe operation. Confirm that water flows smoothly into your dishwasher.
Seal and Secure the Area
Wrap the fittings with further Teflon tape if necessary and tighten all connections. Clear any tools or debris, and make sure the environment is dry and safe. Consider labeling the shutoff valve for quick identification, like marking a fire exit. This small step enhances your preparedness for future issues and simplifies routine maintenance.
Verify System Functionality and Home Safety
Run a short cycle in your dishwasher to observe the operation. Check for leaks at all connections and ensure the valve operates correctly. If you notice any problems, revisit fittings and tighten as needed. This process is similar to a test drive after car repairs—ensuring everything works reliably before considering the project complete.
By following these precise steps, you not only install a reliable water shutoff valve but also gain peace of mind against unexpected leaks. Remember, choosing quality parts—like those recommended in top tips for selecting the right parts—and proper technique are your best allies in safeguarding your home.
Many homeowners believe that choosing generic parts for their dishwasher installation is a cost-effective shortcut, but this misconception can lead to costly repairs and voided warranties. In reality, investing in high-quality, manufacturer-approved components ensures compatibility, longevity, and warranty validity. An often-overlooked detail is the importance of proper sealing techniques—skipping Teflon tape or over-tightening fittings can cause leaks that damage your floors and sabotage your warranty coverage. For example, using the wrong type of clamp or failing to inspect your inlet valve thoroughly can result in micro-leaks that escape detection until significant damage occurs. Advanced installers know that small mistakes during installation, like misaligning spray arms or neglecting to replace worn-out parts, can compromise cleaning performance and even trigger error codes. When selecting parts, always consult trusted sources, like [top tips for selecting the right parts](https://appliancedoctorz.com/top-tips-for-selecting-the-right-parts-for-dishwasher-installation), to avoid cheap replacements that don’t meet standards. Curious about how warranty policies actually work? Many assume that under any circumstance, parts are covered for as long as the machine is under warranty; however, manufacturers often exclude wear-and-tear items like seals or filters unless properly installed or maintained. Going beyond surface-level knowledge is crucial—know that [maximizing your dishwasher’s warranty](https://appliancedoctorz.com/maximizing-your-dishwashers-warranty-through-proper-parts-selection) involves using recommended parts and following precise installation procedures. For more nuanced insights, check out [common mistakes in installation and how to avoid them](https://appliancedoctorz.com/essential-parts-for-troubleshooting-dishwasher-installation-issues). Remember, even the smallest oversight, like not firmly securing the drain hose or neglecting to run a test cycle, can invalidate your warranty and lead to expensive repairs later. So, next time you plan an upgrade or repair, dig deeper into the details—your home and wallet will thank you. Have you ever fallen into this trap? Let me know in the comments.Maintaining your dishwasher’s optimal performance over time requires more than just periodic cleaning; it demands the right tools paired with proven maintenance routines. I personally rely on a few industry-standard tools that have proven invaluable during my repair and maintenance sessions. A high-quality digital multimeter, for instance, is essential to accurately diagnose electrical issues, such as faulty thermostats or sensors. I prefer models with auto-ranging capabilities, like the Fluke 117, because they quickly adapt to different voltage levels and prevent inaccurate readings. For mechanical checks, a set of precision screwdrivers and nut drivers—specifically those with ergonomic handles and magnetic tips—make disassembly and reassembly more straightforward, reducing the risk of stripping screws or damaging delicate components. When inspecting or replacing water inlet valves, I always make sure to have a proper pipe wrench and Teflon tape on hand, ensuring a tight, leak-proof seal. For draining and testing water flow, clear plastic hoses are useful for visual inspection and help catch leaks early. Over the years, I’ve also integrated a digital leak detector into my toolkit, which alerts me immediately to any unseen water ingress, safeguarding against hidden damage. Looking ahead, this trend towards smart diagnostic tools is set to revolutionize home appliance maintenance, with IoT-enabled sensors providing real-time health reports directly to your smartphone. For example, sensors embedded within the dishwasher can monitor motor performance or seal integrity, reducing the need for invasive inspections. If you’re serious about keeping your dishwasher in top shape, I recommend investing in a comprehensive toolset like this. Remember, consistent use of the right equipment not only extends the lifespan of your appliance but also ensures warranty compliance. To maximize these benefits, regularly verify that your tools are calibrated and in good condition. Want a proactive tip? Try installing a smart leak sensor beneath your dishwasher; it can save you thousands by alerting you to leaks before they cause extensive damage. For detailed guidance on selecting reliable parts and tools, check out this comprehensive guide.
The Hardest Lesson I Learned About Installation, Parts, Dishwasher, Warranty
One of my biggest takeaways was realizing that even small mistakes during installation—like skipping Teflon tape—can void warranties and lead to costly repairs. Precision matters; rushing through these steps isn’t worth risking your home investment.
3 Myths About Installation, Parts, Dishwasher, Warranty That Held Me Back
I believed that cheap parts could save money, but I found out they often cause micro-leaks and void warranties. Also, I used to think that professionals are the only ones who can do these upgrades, yet with proper guidance, DIY can be reliable and satisfying.
What Experts Won’t Tell You About Installation, Parts, Dishwasher, Warranty
Many overlook that manufacturer-specified parts are crucial for warranty coverage. Using generic replacements might seem cost-effective but often leads to incompatibility and invalidates your warranty—including surprises that cost you more long-term.
Curated Resources and Tools for Your Dishwasher Journey
My go-to tools include a high-quality digital multimeter like the Fluke 117 for electrical checks, precision screwdrivers for safe disassembly, and a digital leak detector for early water ingress alerts. Trustworthy resources like the comprehensive guide on selecting the right parts ensure maintenance success and warranty adherence.
Take Action Now—Empower Your Home Maintenance
Don’t wait until a leak ruins your kitchen or your warranty becomes void. Armed with knowledge, quality parts, and proper tools, you can confidently handle your dishwasher upgrades and repairs. Your home safety and peace of mind are worth the effort—start today!
Have you ever wondered about the most overlooked aspect of dishwasher installation that could cost you in the long run? Share your experiences below!
,
Related Posts
Why Reusing an Old Water Supply Line is a Recipe for a Flooded Kitchen
It was a morning like any other when I finally…
The Mounting Bolt Mistake That Makes New Dishwashers Shake
Ever since I installed my new dishwasher, I couldn’t ignore…
Why This $12 Hammer Arrestor Is the Only Way to Stop Banging Pipes
It was midnight when I first realized my kitchen had…