I remember the moment vividly—my brand-new dishwasher wobbling ominously, leaning precariously as I tightened the mounting brackets for what felt like the hundredth time. It was late, I was exhausted, and I couldn’t help but think, “Did I do this right? Is my beautiful quartz countertop about to crack under the pressure?” That lightbulb moment made me realize how crucial the proper installation process is—not just for performance, but for safeguarding my kitchen investment.
Why Securing Your Dishwasher Properly Matters More Than You Think
When you install a dishwasher, especially on a delicate quartz countertop, it’s tempting to rush through the process or cut corners. But that small step can lead to big trouble—cracks, leaks, or even complete failure of the unit. Properly securing your dishwasher isn’t just about neatness; it’s about **long-term safety**, **performance**, and preserving your home’s value. Did you know that poor installation is a leading cause of appliance damage, often voiding warranties prematurely? According to experts, a lack of proper support can cause vibrations that damage internal components and compromise the seal around your countertop, risking costly repairs.
Is Overconfidence Killing Your Warranty?
In my early days, I made the mistake of assuming I could get by without following all the recommended installation steps, especially on a fragile surface like quartz. That oversight almost cost me my warranty and a hefty repair bill. If you’re considering a DIY approach, it’s essential to familiarize yourself with the key points to ensure your investment is protected. For detailed guidance, don’t forget to check out [parts to check when installing a dishwasher](https://appliancedoctorz.com/parts-to-check-when-installing-a-dishwasher-for-long-term-performance), which can help you avoid common pitfalls.
So, if you’ve ever wondered whether your dishwasher is truly secured or just hoping it will hold together, this post is for you. We’re about to walk through the proven methods to anchor your dishwasher safely, preventing future headaches, and making sure your quartz countertop stays pristine for years to come. Ready to become confident in your installation skills? Let’s dive into the essentials that will keep your kitchen both functional and beautiful.
Prepare Your Workspace
Start by clearing the area beneath your countertop to ensure easy access and mobility. Disconnect the power supply and turn off the water valve to prevent leaks and electrical hazards. Use protective gear, like gloves and safety glasses, to safeguard yourself during installation. I once forgot to turn off the water, leading to a minor flood that took hours to clean, highlighting the importance of preparation.
Position the Dishwasher Correctly
Carefully slide the unit into its designated spot, ensuring the front is aligned with the cabinetry for a seamless look. Check the levelness using a spirit level—an uneven dishwasher can cause door misalignment and poor cleaning. I recall installing mine slightly tilted, which caused water to pool and led to mold growth. Adjust the leveling feet, turning them clockwise to elevate or counterclockwise to lower, until perfectly balanced.
Secure Mounting for Stability
Attach the mounting brackets to the countertop or cabinetry as per manufacturer instructions. Use a drill with proper bits—never overtighten to avoid cracking the quartz surface. A firm, non-slip grip on the brackets ensures your dishwasher withstands vibrations during operation, preventing damage. During my last install, I used rated screws matching the brackets, which provided extra stability and peace of mind.
Connect Water Supply and Drainage
Attach the water inlet hose to the inlet valve, ensuring a tight seal with a brass nut—avoid using plastic, which can crack under pressure. Secure the drain hose to prevent water backflow, looping it at least 20 inches high—a critical step to prevent siphoning. I learned this tip the hard way when a poorly secured hose caused flooding; now I always double-check the connections.
Test for Leaks Before Finalizing
Before fully securing all panels, turn the water back on and run a short cycle to check for leaks. Inspect all hose connections, especially the inlet and drain, for drips. If leaks appear, tighten fittings carefully—over-tightening can damage threads. Remember that even small leaks can void your warranty, so accuracy is key. For more on ensuring long-term performance, visit this detailed guide.
Finalize Installation and Verify
Once no leaks are detected, secure the dishwasher to the mounting brackets, and replace any panels or toe-kicks. Plug in the power cord, then run a full cycle to confirm proper operation. Keep an eye on the water inlet and outlet during the first few minutes, listening for unusual noises or leaks. Proper installation not only safeguards your warranty—detailed in this resource—but also ensures your appliance performs efficiently for years.
 Many homeowners believe that once they’ve correctly installed their dishwasher, the job is done. However, overlooking nuanced details can silently undermine your warranty and long-term performance. For instance, a prevalent myth is that using generic or third-party parts won’t affect warranty coverage. In reality, many manufacturers specify original parts because mismatched or substandard components can lead to performance issues and void the warranty, even if the appliance is technically operational. For an in-depth understanding, review maximizing your warranty through proper parts. Correctly matching parts also ensures compatibility, reducing the risk of leaks or breakdowns, which are often misdiagnosed during service visits.
Another common misconception is that the easiest way to save money is by skipping professional installation. While a DIY approach can be tempting, especially for those with plumbing experience, it often leads to subtle mistakes—like improper leveling or insecure mounting—that damage the unit over time. Advanced installers know that a high-quality install involves precise leveling, correct support for vibrations, and secure connections, all of which directly impact warranty validity. For detailed guidance, see parts to check during installation.
**Why do some warranty claims get denied even when the appliance clearly breaks down?** This often boils down to documentation and adherence to proper procedures—actions many overlook until it’s too late. Manufacturers typically require timestamped photos of the installed parts, proof of professional installation, and documented maintenance routines. Studies have shown that incomplete or incorrect documentation is a leading cause of denied warranty claims, emphasizing the need to keep careful records. To learn how to safeguard your warranty, visit understanding warranty policies.
It’s also vital to recognize that a warranty covers specific parts and failures—many users make the mistake of assuming it covers everything. For example, damage from incorrect installation or neglect isn’t covered, which is why understanding what your warranty entails can save you money in the long run. Check the complete list of covered parts at covered dishwasher parts.
Finally, avoid the trap of solely reacting to visible problems. Regular maintenance and proactive assessments—like inspecting inlet valves or replacing worn-out hoses before failure—are often overlooked. This proactive mindset can prevent issues from escalating into costly repairs or warranty disputes. Remember, the devil is in the details. Proper installation, maintenance, and documentation are your best defenses against future surprises. Have you ever fallen into this trap? Let me know in the comments.
Keep It Running: Tools I Recommend for Long-Term Care
Maintaining a dishwasher over the years requires the right tools and a systematic approach. I personally rely on a few specialized instruments to diagnose, service, and optimize my appliance. A quality multimeter is indispensable for testing electrical components like fuses and control boards, ensuring that subtle issues don’t escalate into major failures. I prefer a digital multimeter with auto-ranging capabilities, which simplifies testing by automatically selecting the correct voltage or resistance range, saving time during diagnostics. For instance, testing the thermal fuse or door switch becomes straightforward with one of these versatile tools.
Next, a set of precision screwdriver bits—particularly Phillips and flat-head—helps when removing panels and accessing internal parts without damaging delicate screws or trim. I always carry a small magnetic bowl to keep track of tiny fasteners, preventing frustrating component loss during reassembly. When it comes to inspecting water inlet valves or drain hoses, a high-quality flashlight, like a LED model with adjustable brightness, helps spot leaks or debris that might be obstructing flow. These tools, combined with a pair of needle-nose pliers, enable quick repairs on minor issues without the need for professional service.
Beyond hardware, software tools like diagnostic apps or manufacturer-specific modules are evolving. While most modern dishwashers have onboard error logs accessible via the control panel, connecting to these logs during troubleshooting can provide immediate insights. In some cases, updating firmware or resetting the control system can resolve persistent glitches, a process that benefits from dedicated software provided by manufacturers. As appliance technology advances, I predict these digital diagnostic tools will become even more integrated and user-friendly, empowering homeowners to handle routine maintenance confidently.
How do I keep my dishwasher functioning over time?
Regular inspections of filters and spray arms are key to preventing clogging and ensuring optimal cleaning performance. Scheduling a biannual checkup—removing and cleaning filters, inspecting door seals, and testing water inlet valves—reduces the risk of costly breakdowns. When doing so, I recommend referencing detailed guides, such as knowing when to replace dishwasher parts. Replacing worn parts proactively extends your appliance’s lifespan and maintains warranty coverage, especially when paired with proper documentation.
If you notice unusual noises or leaks, employing a multimeter or inspecting control boards with diagnostic tools can pinpoint the root cause before major damage occurs. Remember, consistent preventive maintenance saves time and money, avoiding emergency repairs and warranty denials later. Keep a maintenance log using apps or simple spreadsheets—this habit creates a reliable history that can be invaluable during warranty claims, aligning with advice found on how to maximize your warranty through proper parts.
Try incorporating a quarterly inspection routine with these recommended tools, and you’ll find your dishwasher’s performance stays optimal for many years. Taking proactive steps now ensures long-term reliability, preserving your investment and keeping your kitchen humming smoothly.
What I Wish I Knew Before Starting Out
One of the toughest lessons I learned was never to underestimate the importance of precise leveling — even a slight tilt can lead to leaks and compromised warranties. Over-tightening mounting brackets might seem harmless, but it can crack your delicate quartz surface, causing long-term damage I hadn’t anticipated. Also, trusting that generic parts won’t affect warranty coverage was a mistake; using original manufacturer-approved components is vital for warranty validity and performance. Lastly, I discovered that documenting every step of my installation with photos can turn the tide in warranty disputes, saving me from costly repairs and headaches.
Tools and Resources That Changed How I Approach Dishwasher Care
My essential toolkit now includes a high-quality multimeter for troubleshooting electrical issues, a set of precision screwdriver bits for gentle internal access, and a reliable flashlight for inspecting hidden leaks. I also lean on dedicated diagnostic apps from manufacturers to access error logs and firmware updates, empowering me to handle minor issues without waiting for a technician. For guidance on proper parts selection and installation, I turn to trusted resources like maximizing your warranty through proper parts and parts to check during installation. These tools and tips have been game changers, helping me extend my dishwasher’s lifespan
Seize the Moment: Your Dishwasher’s Future Depends on Action
Now is the perfect time to apply these insights and ensure your dishwasher installation stands the test of time. Proper setup, quality parts, and diligent maintenance aren’t just best practices—they’re investments in your home’s value and peace of mind. Remember, every detail from securing the mount to documenting the process plays a role in safeguarding your warranty and avoiding costly repairs. Do you feel ready to revisit your dishwasher setup or routine maintenance? Share your thoughts and questions below—your next success starts here.
Related Posts
Why Reusing Your Old Copper Water Line is a Major Mistake
Ever experienced that sinking feeling when your new dishwasher starts…
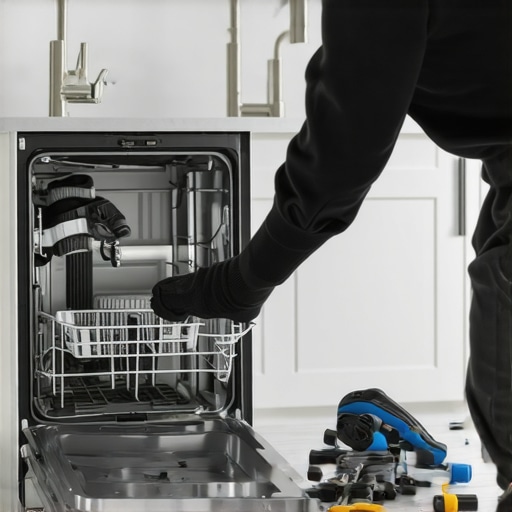
The Most Overlooked Part During a New Dishwasher Setup
It was late afternoon, and I was elbow-deep in my…
Why Plastic Tubs Warp if You Do Not Use These Leveling Feet
I'll never forget the moment I opened my dishwasher after…