
I’ll never forget the night I finally finished my kitchen remodel. Everything looked perfect—the quartz counters were gleaming, and my brand-new dishwasher was tucked neatly into its nook. I hit “Start” and sat down with a glass of wine, only to be jolted by a sound that resembled a gravel truck dumping its load in my living room. I’d spent thousands on “whisper-quiet” technology, yet the vibration was rattling my very soul. It was a humbling moment for a guy who prides himself on being handy. I realized then that a quiet kitchen isn’t just about the machine you buy; it’s about the professional secrets that keep that machine from turning your cabinets into a megaphone. Today, I’m going to show you how to silence that beast once and for all.
The Hidden Barrier Between Peace and Noise
Most homeowners focus strictly on the decibel rating on the box, but even the quietest unit can scream if it isn’t seated correctly. Early in my DIY journey, I made the classic blunder of thinking the thick, felt-like wrap around the tub was just bulky packaging. I actually thought about tossing it to make the fit easier! If you’ve ever wondered why your insulation blanket should never be removed during installation, it’s because that “ugly” padding is the primary barrier between you and the mechanical whirring of the wash cycle. Professionals don’t just shove the unit in; they ensure that every seamless dishwasher installation accounts for vibration dampening at every single contact point. Have you ever noticed your machine getting louder as it ages, or has it always been a bit of a roarer?
Do these extra layers really matter for your ears?
You might be skeptical, thinking a few bits of rubber or felt can’t possibly mask the roar of a high-pressure pump. However, industry data from organizations like the Noise Pollution Clearinghouse suggests that even minor dampening can reduce perceived noise by up to 50% in tight cabinet spaces. A poorly dampened machine doesn’t just make noise; the vibrations can actually loosen your common dishwasher parts over time, leading to more rattles and, eventually, mechanical failure. We aren’t just chasing silence; we are protecting your investment from shaking itself apart.
Stop the Vibration Before It Reaches Your Cabinets
The pros use a technique called “decoupling.” This basically means they ensure the dishwasher tub isn’t vibrating directly against your expensive wood cabinetry. If the metal sides touch your cabinets, the wood acts like a violin body, amplifying every slosh of water. One trick I learned the hard way—after a very noisy week of trial and error—is that even your circulation motor makes specific sounds that can be muffled significantly with the right base-plate insulation. We aren’t just trying to hide a problem; we’re optimizing the environment for the machine to perform without the headache, ensuring that your essential dishwasher parts stay secure and silent for years to come.
Fix the Wobble Before You Tighten the Screws
A dishwasher is like a skyscraper; if the foundation is off by even a fraction, the whole structure suffers. I once tried to save five minutes by skipping a final level check on a high-end Bosch unit, thinking ‘close enough’ was fine for such a heavy machine. Three days later, I walked into the kitchen to find a puddle because the slight tilt prevented the door gasket from sealing properly. Worse, the constant vibration during the spin cycle had caused a mounting screw to back out and scrape the underside of a $3,000 marble countertop. That mistake taught me that why professional leveling prevents your door from leaking isn’t just a suggestion; it’s a structural necessity. When your unit is perfectly plumb, the internal spray arms rotate without hitting the racks, and the motor operates without the strain of an uneven load.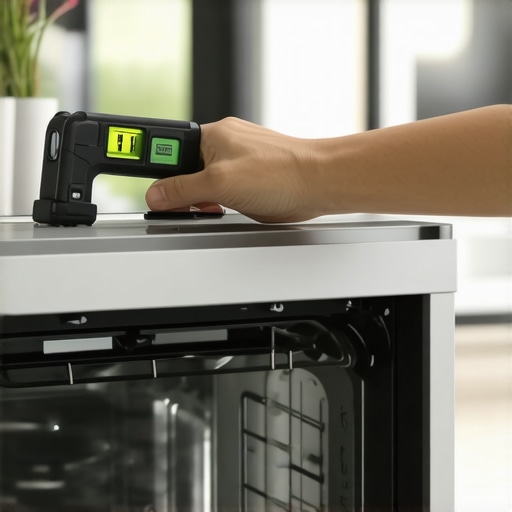
Dial in the Feet for a Perfect Seal
Don’t just eyeball it. Use a spirit level on the top edge of the open door and on the interior racks. If the bubble isn’t dead center, your machine is going to fight you. Adjusting the leveling legs can be a pain—especially the rear one—but it’s the difference between a whisper and a rattle. If you’ve moved recently, you might need to learn how to align your dishwasher door after a rough move to ensure the latch engages without clicking or grinding. When the feet are firm against the floor, the energy from the motor stays in the water, not in your floorboards.
Kill the Thumping at the Source
Have you ever heard a sudden ‘bang’ right when the dishwasher starts filling? That’s water hammer, and it’s usually caused by high pressure meeting a fast-closing valve. This isn’t just annoying; it’s a sign that why your machine makes a thumping sound when the water starts is actually a mechanical stress test on your plumbing. Professionals often install a small arrestor to absorb this shock, but the quality of the valve itself matters immensely.
Why Generic Valves and Old Hoses Fail You
I’ve seen dozens of DIYers try to save $20 by reusing an old water line or buying a knock-off inlet valve. This is a recipe for a noisy disaster. Understanding the difference between OEM and generic water inlet valves is crucial because generic parts often use thinner diaphragms that vibrate at a higher frequency, creating a persistent hum. Always use a new, braided stainless steel hose to dampen the rush of water as it enters the tub.
Route Your Drain for Silence and Safety
The way you hang your drain hose determines if your kitchen smells like a swamp and sounds like a sewer. If the hose lies flat on the cabinet floor, the pump has to work twice as hard to push water out, leading to a strained, grinding noise. This is why your installer insists on a high loop drain. By arching the hose above the level of the sink drain, you use gravity to prevent backflow and gurgling. If you’re dealing with mysterious noises during the drain cycle, it’s time to how to diagnose dishwasher parts during warranty periods to see if your drain pump has been damaged by debris or improper routing.The biggest misconception I encounter in the appliance world is the belief that a ‘Full Warranty’ is an all-access safety net for every possible disaster. In my experience, a warranty is more like a complex legal contract with very specific exit clauses that manufacturers use to protect their bottom line. For example, many homeowners assume that if a pump or motor fails, it is covered regardless of how the machine was set up. However, the Association of Home Appliance Manufacturers (AHAM) notes that improper installation is one of the leading causes of premature component failure. If you cannot prove the unit was installed to local plumbing and electrical codes, the manufacturer may deny the claim instantly. This is exactly the risks of skipping the professional installation receipt—it is often your only proof that the failure was a manufacturing defect and not a DIY blunder.
Why Your Lifetime Warranty Might Only Last One Year
Manufacturers love to market ‘Lifetime Stainless Steel Tubs,’ but they are often much quieter about the sensitive electronics. Usually, the ‘brain’ of your machine—the main control board—is only covered for a standard twelve-month period. When something goes wrong after that window, the temptation to buy a generic replacement part from a third-party marketplace is massive. I once worked with a client who fried a brand-new $400 control board because they installed a $15 knock-off heating element that pulled twice the intended amperage. You must learn how to spot a fake replacement part before it fries your control board. These ‘budget’ parts are often a trap that leads to catastrophic failure. Beyond the parts themselves, you must understand what your dishwasher warranty doesn’t cover and how to avoid fees, such as diagnostic trip charges that can sometimes exceed $150 before a single screw is even turned. 
Can a simple software update actually stop a physical leak?
It sounds like tech-sector jargon, but in the world of high-end smart appliances, it is a mechanical reality. Modern machines use high-precision sensors to calibrate water levels and pump torque. If the internal firmware is buggy or outdated, it might command the inlet valve to stay open a fraction of a second too long, causing an internal overfill that presents exactly like a failed door gasket. Before you start tearing out rubber seals or calling for a costly repair, check if you need to how to update the firmware on your kitchen wi-fi module. I have seen dozens of ‘broken’ pumps restored to perfect function just by a data patch. Mastering these nuances is the secret to how to get your warranty claim approved on the first try because it demonstrates to the manufacturer that you have performed your due diligence. Another common ‘Oops’ factor involves home water pressure; if your pressure is too high, it can degrade internal diaphragms, a failure often labeled as ‘environmental damage’ rather than a defect. Have you ever fallen into this trap of buying a part that didn’t fit or having a warranty claim denied for a silly reason? Let me know in the comments.I used to think a screwdriver and a set of pliers were all I needed to keep my kitchen running until a tiny fifteen-dollar sensor failed and left me staring at a dead control panel for three days. That was the moment I realized being truly handy in a modern kitchen means more than just turning a wrench; it means owning a basic multimeter and knowing how to use it. If you want to stop the expensive guessing game, you need to learn how to test your thermal fuse with a basic multimeter. It is a five-minute check that can save you from buying a two-hundred-dollar control board you do not actually need. According to technical documentation from Appliantology, an industry leader in technician training, over thirty percent of ‘dead’ dishwashers are actually caused by simple tripped fuses or loose wiring harnesses rather than catastrophic motor failure. This is the most reliable way to test a thermal fuse and ensure you are not throwing money into a ‘parts cannon’ hoping to accidentally hit the problem. 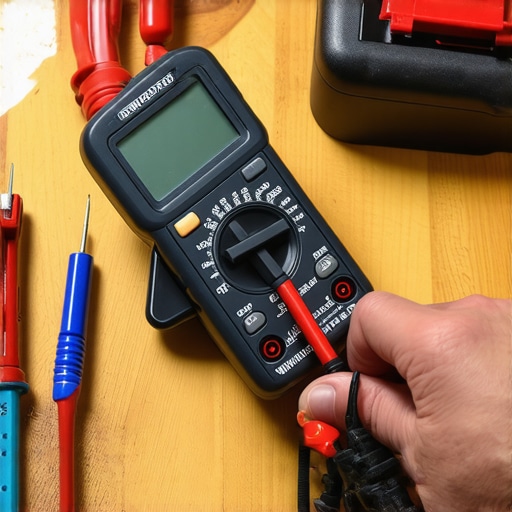
How do I keep my dishwasher running like new for a decade?
Maintenance is not just about wiping down the stainless steel door; it is about the internal components you rarely see. You have to get familiar with the best way to clean a filter that is coated in grease. A clogged filter forces the wash motor to run hotter and work harder, which significantly shortens its lifespan through sheer heat fatigue. While you are down there with your sleeves rolled up, do not ignore the hidden drain screen you probably forgot to clean. If that screen is blocked by debris or mineral scales, your pump will struggle during every cycle, eventually leading to a mechanical failure that most manufacturers will label as ‘consumer neglect’ and deny under warranty. Understanding dishwasher parts a key to effective maintenance allows you to spot these small issues before they become kitchen-flooding disasters. I predict that within the next five years, we will see a massive shift toward predictive AI diagnostics where internal optical sensors will notify your smartphone the moment they detect a five-percent drop in water flow. But until those machines are in every home, you are the primary sensor. If you notice a change in how your dishes look, remember that why your smart sensors are giving you dirty readings is often just a physical blockage or a film of hard water. Always opt for quality when components finally wear out, because why OEM pumps outlast cheap alternatives every time is a lesson in durability that you do not want to learn the hard way. My best advice for long-term results is to grab a multimeter this weekend and run a quick continuity check on your heating element to see if it’s performing at peak efficiency.
Hard Lessons From the Kitchen Floor
Reflecting on years of DIY installs, the biggest takeaway isn’t about the wrench—it’s about the paperwork and the patience. First, never throw away your packaging until the first ten cycles are done; you’d be surprised how often a factory defect only shows up after the heat cycle has expanded the plastic. Second, if you don’t have a professional receipt, your warranty is basically a pinky-promise that the manufacturer doesn’t have to keep. I’ve seen homeowners lose hundreds because they couldn’t prove guide to dishwasher parts warranty requirements were met. It is also vital to understand that silence is earned, not bought; even the most expensive unit will rattle if you ignore the parts to check when installing a dishwasher for long-term performance. Focus on the leveling and the dampening blankets before you slide the unit into its final home. #IMAGE_PLACEHOLDER_E#
My Personal Setup for a Silent Kitchen
- A Reliable Multimeter: I never touch a machine without one. It is the only way to verify that the most popular dishwasher parts and how they improve performance are actually receiving power and functioning within spec.
- Official OEM Parts Catalogs: Avoid the “bargain” sites. I only trust original manufacturer specs when selecting the right parts for dishwasher installation to ensure long-term compatibility and safety.
- Fresh Mounting Hardware: Never reuse old, rusted brackets. Using the easiest way to install a side-mounting bracket kit ensures the machine stays put and remains silent for years.
Take the Lead in Your Kitchen’s Longevity
You don’t need to be a certified plumber to have a quiet, efficient kitchen. You just need to be more observant than the average homeowner. By taking these small steps now, you are maximizing your dishwashers warranty coverage today and ensuring that the only sound in your kitchen during dinner is the sound of conversation, not a grinding pump. It is about more than just clean plates; it is about the peace of mind that comes from a job done right. Have you ever had a warranty claim denied because of a simple installation “oops” or a missing receipt? Let me know in the comments below!
Related Posts
How to install a custom panel on your dishwasher door
Ever experienced that sinking feeling when your sleek kitchen aesthetic…
Why Reusing a Drain Hose Clamp Is a $500 Mistake
I remember the exact moment I realized I had made…

Why You Shouldn’t Use Extension Cords for Any Appliance
It was a Saturday afternoon, and I had just finished…