
I’ll never forget the sound of my first solo dishwasher installation. I was so proud of myself for sliding that shiny new unit into the cabinet cavity. But then I hit ‘Start.’ Instead of the quiet hum I paid for, it sounded like a freight train was barreling through my kitchen. Why? Because I’d looked at that thick, fuzzy black felt wrap during unboxing and thought, ‘This looks like extra packing material.’ I peeled it off and tossed it in the bin. That was a loud, expensive mistake I don’t want you to repeat. Today, we are going to talk about why that seemingly ‘extra’ padding is actually one of the most critical components of your machine and how keeping it intact ensures your kitchen doesn’t turn into a construction zone every time you wash a load of dishes.
That Frayed Blanket is the Only Thing Saving Your Kitchen Cabinets
The first thing you need to know is that the insulation blanket isn’t just for noise; it’s a thermal shield. When I stripped mine off, I noticed my wooden cabinets getting suspiciously warm. Over time, that heat can warp your expensive cabinetry or even cause the finish to peel. When you are following a diy dishwasher installation step-by-step guide, it might feel like the unit is too tight to fit with the blanket on. Trust me, it’s supposed to be snug. That padding acts as a buffer, preventing the vibration of the machine from rattling against your counters and protecting your home from the high temperatures generated during the sanitize cycle. If you find yourself struggling to get the unit level because of the bulk, remember that why professional leveling prevents your door from leaking is often tied to how well the unit sits within its insulated ‘sleeve.’ Removing it might make the slide easier, but you’ll pay for it in noise and potential cabinet damage later.
Is it really going to cause a fire if I take it off?
While a fire is unlikely, the risks are more about the longevity of your machine and your home’s interior. According to the Association of Home Appliance Manufacturers (AHAM), proper insulation can reduce noise levels by up to 10 decibels and significantly improve energy efficiency by retaining heat inside the tub. Without it, your machine has to work harder to keep the water hot, which puts extra strain on your heating element. Plus, if you ever need to file a claim, you might find that the mistake that voids your lifetime tub warranty is often linked to improper installation or the removal of factory-standard parts. Manufacturers design these units to operate as a single system. When you start stripping away parts like the insulation, you are essentially redesigning the appliance, and usually not for the better. Have you ever been tempted to peel off that ‘extra’ layer just to get the machine to fit into a tight space? It’s a common urge, especially in older kitchens with non-standard openings, but it’s one you should resist at all costs. To get things right from the start, check out these top tips for seamless dishwasher installation in 2025 to ensure you aren’t sacrificing performance for a few millimeters of clearance. Now that we’ve established why it has to stay, let’s look at how to properly secure it so it doesn’t bunch up while you’re pushing the unit back.
Tape That Blanket Like Your Kitchen Depends on It
Think of your dishwasher’s insulation blanket like a heavy winter coat. If it’s loose and unzipped, it’s going to snag on every corner. I once spent two agonizing hours trying to figure out why my brand-new unit wouldn’t sit flush against the cabinets, only to pull it back out and find the black felt had wadded up like a crumpled sock at the very back of the cavity. It wasn’t just annoying; it was blocking the airflow and putting pressure on the drain hose. To avoid this, you need to secure the insulation to the chassis before the unit ever touches the cabinet. Use high-quality foil tape—the same kind used for HVAC ducts—to anchor the edges of the blanket to the top and sides of the tub. Avoid regular duct tape, as the heat from the wash cycles can cause the adhesive to turn into a gooey mess over time. While you are at it, ensure you understand the best way to tape your vapor barrier during installation to protect the underside of your countertop from steam damage. 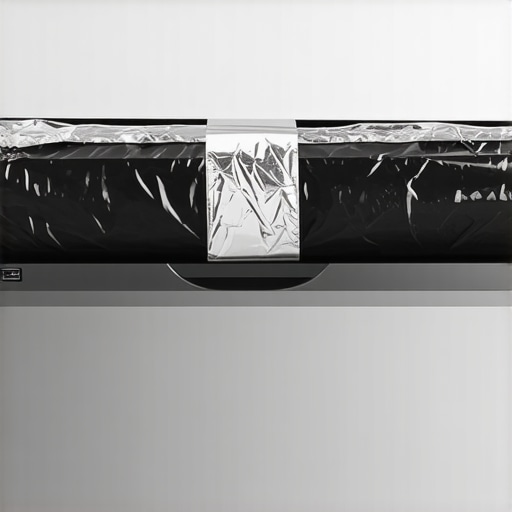
Stop the Bunching Before the Final Push
Once the blanket is taped down tight, your next move is managing the ‘umbilical cord’ of the machine: the power cord, the water line, and the drain hose. Most people just shove the unit in and hope for the best, but that is how hoses get kinked and leaks start. I find it best to have a partner at the sink cabinet pulling the slack through the access hole as I slowly slide the dishwasher into place. This keeps everything taut and prevents the machine from resting on its own lines. This is a critical part of common dishwasher parts and their role in proper installation because a pinched line can burn out a pump or cause a slow, hidden leak that rots your floorboards. If you feel resistance, stop. Pull it out an inch, check your lines, and try again.
Why New Valves Aren’t Just an Upsell
One of the most common questions I get is whether you can reuse the old supply line and shut-off valve. The short answer is: don’t. Why your professional installer insists on a new water valve comes down to the integrity of the seal. Old brass fittings develop a ‘set’ or memory; once you disturb them, they rarely reseal perfectly on a different thread. Spending the extra twenty dollars on a new braided steel line and a fresh valve is the cheapest flood insurance you can buy. While you are under there, make sure you are following the ‘high loop’ rule. Why your drain hose needs a high loop to stop the smell is a lesson you don’t want to learn the hard way. Without that physical arch in the hose, dirty sink water can backflow into your clean dishwasher, leaving you with a stinky mess and ‘clean’ dishes that are anything but.
Leveling is the Secret to a Dry Floor
Once the unit is in the hole, grab your bubble level. If the machine is tilted even slightly forward, water will pool against the door seal rather than draining back into the sump. This is why professional leveling prevents your door from leaking and why it is the most skipped step in DIY jobs. Adjust the front legs so the unit is perfectly plumb, and don’t forget to check the side-to-side level as well. If the tub is twisted, the door latch won’t align, and the sensors might refuse to start the cycle because they think the door is open. Use a headlamp to peer under the kickplate and ensure the legs are making solid contact with the floor, not just the edge of the subfloor or a piece of stray tile.Once the machine is level, you might think the hard work is over, but this is where I see most homeowners walk right into a trap that costs them hundreds down the road. We need to talk about the ‘Generic Parts Myth.’ Everyone loves a bargain, and when you see a $15 water inlet valve online that looks exactly like the $60 manufacturer version, it is tempting to save the cash. But in my years of experience, this is the quickest way to end up with a flooded kitchen. The solenoids in those knock-offs aren’t built to the same specifications, and how to spot a fake replacement part before it fries your control board is a skill every DIYer needs. If that cheap valve fails and stays open, your dishwasher will overfill until it hits your hardwood floors. When it comes to the heart of the machine, the difference between OEM and generic water inlet valves isn’t just a marketing ploy; it’s about the safety of your home. 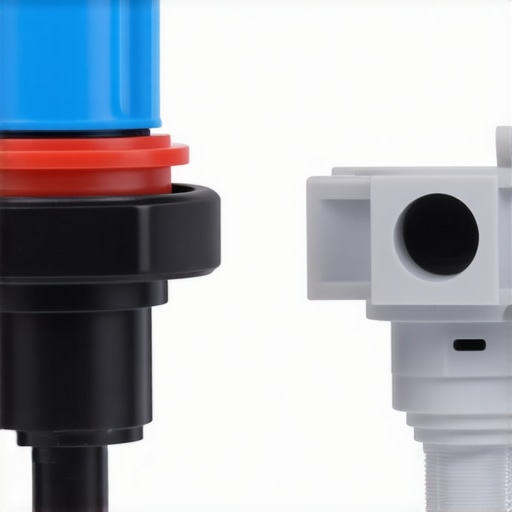
Why Your DIY Success Story Might Fail a Warranty Audit
Here is a bit of a contrarian take: just because you can install it yourself doesn’t mean you always should if you care about the long-term protection of the machine. Most people assume that if the unit works, the warranty is safe. However, many manufacturers have fine-print clauses that can lead to why your warranty claim fails without an authorized receipt or proof that the installation met specific local codes. If you ever have to call for service, the first thing a technician might check is whether you reused an old supply line. If they see an old, corroded brass fitting, they can deny the claim on the spot, citing ‘improper installation.’ To avoid this, focus on maximizing your dishwashers warranty coverage today by documenting your process, keeping receipts for every new part you used—like that brand-new water valve—and even snapping a photo of your ‘high loop’ drain hose. This creates a paper trail of competence that is hard for an insurance company to argue with.
Can your local water supply actually kill your warranty coverage?
This is the ‘hidden nuance’ most people ignore until it is too late. If you live in an area with high mineral content, you are essentially running liquid sandpaper through your machine. According to a study by the Water Quality Research Foundation (WQRF), appliances using hard water can fail up to 30% faster due to scale buildup on sensitive components like the heating element and flow sensors. Some manufacturers are now getting savvy to this, and the impact of hard water on your warranty eligibility is becoming a major point of contention. If they find the pump is seized because of calcium deposits, they may classify it as ‘lack of maintenance’ rather than a factory defect. That is why understanding dishwasher warranty policies for peace of mind means more than just reading the manual; it means knowing your home’s environment. Have you ever fallen into this trap? Let me know in the comments if you’ve ever had a claim denied for something as simple as hard water or a reused hose. Digging into these details now ensures you aren’t just installing a dishwasher, but protecting a long-term investment.If you want to transition from a lucky DIYer to a seasoned pro, you need to stop guessing and start measuring. I’ve found that the biggest difference between a machine that lasts three years and one that lasts fifteen isn’t the brand—it’s the precision of the maintenance. I keep a dedicated Dishwasher Survival Kit that goes beyond a simple screwdriver. I’ve spent too many hours fumbling with a standard screwdriver when a 1/4-inch nut driver would have removed those kickplate screws in seconds; it’s about having the right gear to make maintenance a five-minute job instead of a Sunday-ruining chore. My secret weapon is a cheap telescopic inspection mirror. Why? Because you can’t fix what you can’t see. I use it to peer behind the motor assembly while the machine is running a test cycle, which is the best way to test for a slow leak behind the kickplate without having to lie face-down on your linoleum. I also never travel without a basic multimeter. Being able to check continuity on a thermal fuse can save you from a $400 repair bill for a $10 part. If you’re serious about your setup, you should learn how to test your thermal fuse with a basic multimeter before you even think about calling a technician. #IMAGE_PLACE_HOLDER_D#
How can I make this unit outlast the mortgage?
People often ask me what the holy grail of dishwasher longevity is. It’s not a magic chemical; it’s consistency. Every six months, I pull the bottom spray arm and perform a deep clean because the best way to clean the hidden filter under the spray arm is to physically remove the debris that your machine’s self-cleaning cycle misses. I also pay close attention to electrical safety standards. The National Electrical Code (NEC), specifically Section 422.16(B)(2), is very clear about the length and grounding requirements for dishwasher power cords, specifying they must be between 3 and 4 feet long. Many homeowners ignore this and use whatever old wire they have lying around, but that is a recipe for a house fire. Ensuring your setup meets these standards is why I recommend how to replace a damaged power cord safely to anyone dealing with an older kitchen. By treating understanding dishwasher parts as a key to effective maintenance, you’re not just fixing problems; you’re preventing them from starting.
Why AI is the next big thing for your kitchen drain
Looking ahead, I predict we are moving toward a predictive maintenance era. Within the next few years, high-end dishwashers won’t just tell you they are broken; they’ll tell you when they are going to break based on vibration signatures in the wash motor. We are already seeing the start of this with the $20 smart sensor that detects leaks before your kitchen floods. These tools are becoming so affordable and integrated that skipping them will soon be seen as negligent by insurance companies. If you want to stay ahead of the curve, invest in essential parts every dishwasher owner should know about, like smart shut-off valves. It’s much cheaper to scale your home’s intelligence now than to pay for a full kitchen remodel after a catastrophic leak. My best advice? Go pull your kickplate off right now and use a flashlight to check for any salt-like residue on the motor—that’s your first sign of a slow, silent pump failure.
The Hard Truth About Those ‘Extra’ Dishwasher Parts
After years of tinkering, I’ve realized that the manufacturers don’t just throw things in the box for fun. If you find yourself holding a plastic bracket or a foam strip and wondering where it goes, stop until you find out. These essential parts for troubleshooting dishwasher installation issues are often the difference between a dry floor and a midnight flood. I also learned that how to diagnose dishwasher parts during warranty periods starts with your ears; if the sound changes, something is wrong. Lastly, never assume the ‘standard’ parts in the box are the only ones you need. Sometimes, top tips for selecting the right parts for dishwasher installation include upgrading to a better valve than what the kit provides.
The Gear That Actually Makes Your Setup Pro-Level
I don’t go into any install without my ‘Big Three.’ First, a high-quality multimeter is non-negotiable because the most reliable way to test a thermal fuse involves actual data, not guesswork. Second, I always keep a fresh set of the most popular dishwasher parts like extra drain hose clamps in my bag. Finally, I swear by a long-handled inspection mirror; it allows you to see a hidden leak under the motor housing before it ruins your cabinetry or rots the subfloor.
Take Control of Your Kitchen’s Longevity
Installing a dishwasher isn’t just about plugging it in; it’s about setting up a system that protects your home for the next decade. When you take the time to focus on parts to check when installing a dishwasher for long-term performance, you’re investing in your own peace of mind. Don’t rush the leveling or skip the high loop. You’ve got the knowledge now to make this dishwasher installation a massive success. Have you ever found a mysterious part left over after your own DIY project? Let me know in the comments below!
Related Posts
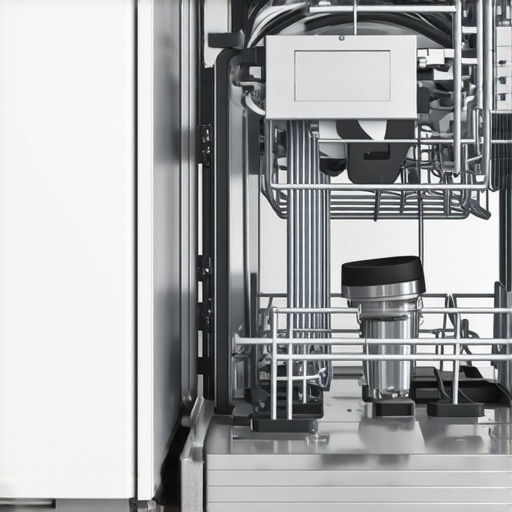
The correct hose length for a proper dishwasher installation
It was late on a Saturday afternoon when I finally…
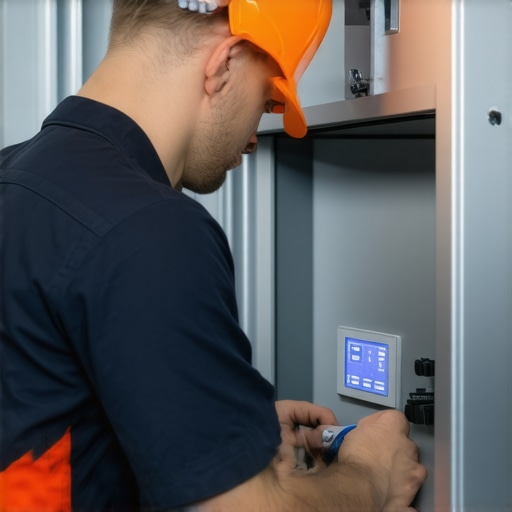
The Risk of Skipping the Cabinet Steam Guard During Install
I remember the moment vividly—tight space, installing a brand-new dishwasher,…
Stop Hand-Tightening Your Water Line: Use This Specific Tool
I remember the first time I installed a dishwasher and…