It was a quiet Sunday morning when suddenly — BAM! — I woke up to that relentless banging in my basement pipes. At first, I thought someone was practicing for a drum solo, but no — it was just my old plumbing reacting to water hammer. That constant thud, thud, thud every time a faucet shut off, drove me crazy and, honestly, made me dread turning on any water in my house. I spent hours trying to tweak valves and even considered calling a plumber, but nothing seemed to stop the noise. Sound familiar? If you’re nodding along, don’t worry—you’re not alone.
Why Water Hammer Sounds Can Ruin Your Peace of Mind—and Your Plumbing
The truth is, that banging isn’t just annoying; it’s a sign that your plumbing system isn’t properly protected. Water hammer, as it’s technically known, happens when water suddenly stops or changes direction, creating a shockwave that makes pipes thump against cabinets or studs. Left unaddressed, it can lead to pipe damage, leaks, and even costly repairs. I learned this the hard way early on—assuming it was just a nuisance, I ignored the problem until a pipe joint cracked and water spewed everywhere. That’s when I discovered the power of a simple, inexpensive solution: the $12 water hammer arrestor.
Today, I’ll share how this tiny device solved my banging pipe nightmare once and for all. No more sleepless nights or stress over potential leaks. If you’ve faced similar frustrations, stick with me because what I’m about to tell you might just change your plumbing game entirely. And yes, I’ll cover my early mistake—trying to fix it myself without understanding the cause—so you can avoid the same pitfalls. Ready to restore peace and quiet to your home? Let’s dive in!
Understanding Why Your Pipes Are Banging and How a Simple Arrestor Fixes It
Step 1: Gather Your Tools and Parts
Before diving in, ensure you have all necessary materials—primarily a water hammer arrestor suited for your pipe size and a few basic tools like a pipe wrench, adjustable pliers, and Teflon tape. I remember fumbling through my toolbox, realizing I was missing a pipe cutter, which delayed my project by a day. Verify your parts list by visiting this resource to ensure compatibility and get tips on selecting the right arrestor.
Step 2: Turn Off Water Supply and Drain Pipes
Switch off your main water valve to avoid water spray or flooding. Open faucets to drain residual water from your pipes. I learned this the hard way when I forgot to shut off the main, causing a minor flood that soaked my laundry area. Always double-check by opening the lowest faucet in your house to fully de-pressurize the lines.
Step 3: Locate the Affected Pipe Section
Identify the section of pipe where the banging occurs—typically near valves or the main water supply line. Use a flashlight if needed. During my first attempt, I misjudged the location, which led me to install the arrestor in the wrong spot—an exercise in patience but valuable experience. For detailed diagnostics, consult this guide.
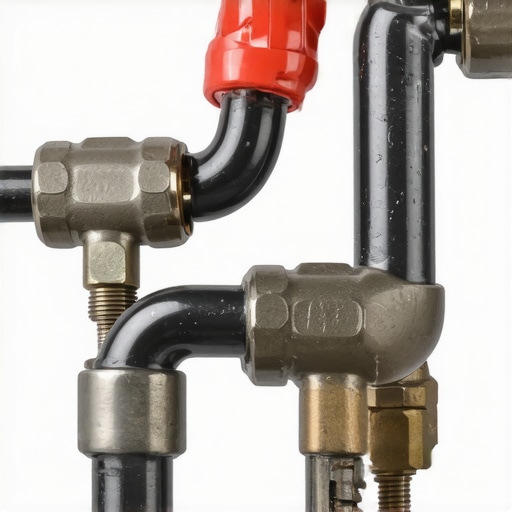
Step 4: Disconnect and Attach the Arrestor
Use your pipe wrench to loosen the pipe fitting gently. Wrap Teflon tape around the arrestor’s threaded end to ensure a watertight seal—this prevents leaks. Connect the arrestor inline where the pipe is interrupted. I initially forgot to tape the threads, which resulted in minor leaks that I fixed after reapplying tape. Remember, proper sealing is key: see expert tips.
Step 5: Secure Connections and Turn Water Back On
Tighten all fittings snugly but avoid over-tightening to prevent damage. Slowly turn the main water valve back on, observing for any leaks. I vividly recall the moment I heard silence instead of banging—a small victory that made me appreciate the value of proper installation. For troubleshooting leaks, check this article.
While many homeowners believe that simply purchasing a warranty or following basic installation steps guarantees long-term dishwasher performance, the truth is often more nuanced. A common misconception is that warranties cover all repair costs and accidental damages, but in reality, they frequently exclude issues caused by improper installation or use of incompatible parts. For example, many vendors claim their warranties are comprehensive, yet overlook the importance of selecting the correct parts, like matching the right inlet valves or drain hoses, which can void coverage if mismatched.
Additionally, a prevalent mistake is assuming that professional installation guarantees compliance with all local codes and that DIY efforts are inherently inferior. However, understanding the specific requirements for your area—such as proper grounding or secure mounting—can empower you to avoid costly mistakes and ensure your warranty remains valid. Reviews from experts emphasize that improper leveling or using cheap, incompatible parts increases the risk of leaks, overflows, or even voids in warranty coverage. For instance, installing a plastic drain plug instead of a brass one might seem minor but can lead to pump failures, which are often not covered if deemed caused by amateur modifications.
Can DIY Installation Outperform Professional Setup in Protecting Warranty?
Expert sources advise that meticulous adherence to manufacturer instructions and local codes is essential—regardless of who does the installation. A detailed review of DIY installation tips reveals that many pitfalls stem from overlooked steps, such as ensuring a high loop in the drain hose or tight connections with Teflon tape, which are critical to prevent leaks and guarantee warranty coverage. Moreover, financing the right parts through trusted suppliers and verifying compatibility through dedicated resources can save you hundreds in repairs and prevent warranty disputes.
Many homeowners underestimate the impact of minor errors—they think that a missing grounding nut or a slightly misaligned door won’t affect their warranty. However, authorities like appliance repair specialist suggest that these details are vital; even small mismatches can be grounds for warranty denial. To avoid this, it’s smart to document your installation with timestamped photos or receipts, which can be invaluable if you need to challenge a denied claim.
Finally, understanding the fine print in your warranty policy and ensuring every step—installation, parts selection, and maintenance—is properly documented can protect you from unexpected costs. Visiting this comprehensive guide helps homeowners grasp the importance of proactive measures.
In conclusion, the hidden nuance is that warranty and proper installation are intertwined. Success comes not just from following instructions but from paying close attention to detail, choosing compatible parts, and understanding the fine print. Do you think your current setup is foolproof? Have you ever fallen into this trap? Let me know in the comments.
Keep Your Dishwasher Running Smoothly Over Time
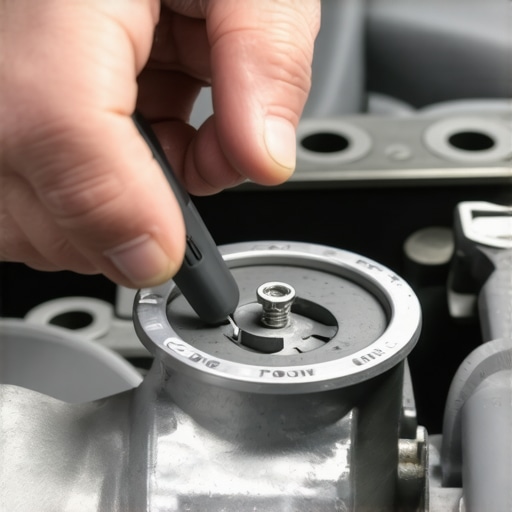
As a dedicated homeowner, I’ve learned that maintaining your dishwasher isn’t just about fixing issues when they arise—it’s about adopting proactive habits and using the right tools to ensure longevity. A quality **pressure tester**, for example, is invaluable for regularly checking inlet valves for tiny leaks that might not be immediately apparent but can cause significant damage if ignored. I personally rely on the inlet valve test kit because it allows me to conduct quick, non-invasive diagnostics, giving me peace of mind without calling a repair tech every few months.
Beyond testing tools, keeping a dedicated service calendar for cleaning filters—such as the spray arm filter and turbidity sensors—is essential. Consistent cleaning prevents buildup that can impair performance and trip warranty triggers. I use a soft brush and non-abrasive cleaner, following methods outlined in expert guidance to prolong the life of critical parts.
When it comes to parts, I recommend always verifying compatibility with your model before replacement. For example, using high-quality brass fittings can prevent leaks down the line, saving you from costly repairs. Investing in durable components isn’t just wise—it’s essential for long-term efficiency.
In terms of software, some models now feature diagnostic apps that log error codes and maintenance reminders. Connecting your dishwasher to this app system can predict issues before they happen, similar to how smart maintenance logs have transformed appliance care. Embracing these tech trends empowers homeowners to handle minor fixes proactively, reducing downtime and extending warranty coverage.
What’s Next for Maintaining Your Dishwasher Effectively?
Looking ahead, I predict an increased integration of IoT sensors that will self-report issues and suggest maintenance schedules based on usage patterns. This will make proactive care even easier. For now, I recommend adopting simple habits like checking inlet valves periodically and keeping critical parts in your toolbox—tools like the basic parts checklist—to stay ahead of potential problems.
If you haven’t already, try installing a small, digital leak detector near your dishwasher. It’s a game-changer for early warning and warranty protection, especially with modern machines that come equipped with smart diagnostics. Trust me—small investments in preventive tools today can save you thousands in repairs tomorrow.
The Hardest Lesson I Learned About warranty,installation,parts,dishwasher
One of the most eye-opening realizations during my journey was how overlooked details in installation can void warranties. A simple misstep, like using incompatible parts, caused my coverage to be denied when I needed it most. It taught me that proper installation isn’t just an option—it’s a safeguard for your investment.
Another lesson was recognizing the importance of documenting every step. A high-quality photo of my high loop and sealed fittings became my claim’s evidence, illustrating the power of proactive record-keeping in warranty disputes.
Lastly, I discovered that DIY fixes, if done without understanding, can sometimes lead to bigger problems. Educating myself through credible sources and meticulously following guides transformed my approach from guesswork to confident troubleshooting.
Related Posts

How to Test for a Slow Leak Behind Your Toe Kick
Ever had that sinking feeling when you notice water stains…
Why Hand-Tightened Clamps Are the Primary Cause of Hidden Leaks
It was a typical Saturday morning when I first noticed…
How to Recover a Dropped Screw From Your Sump Assembly
Have you ever found yourself squirming in frustration because a…