
I still remember the moment I opened my dishwasher after a cycle and was hit with that unmistakable smell of a swamp. You know the one—muggy, musty, and just plain gross. It’s a horrible surprise that leaves you questioning whether your dishwasher is secretly turning into a petri dish of mold and bacteria. Trust me, I’ve been there, and that stinky revelation can feel like a personal failure—like I had missed some critical step in my dishwasher’s maintenance.
Don’t Let Your Dishwasher Become a Unwanted Swamp
What’s worse than the smell? The fact that most of us don’t realize this odor is a sign that something’s seriously wrong inside our beloved machine. Left unchecked, that damp smell points to hidden issues like trapped debris, soap scum, or even mold growth—issues that can spread and cause more damage over time. The good news? Fixing this problem isn’t as complicated as it sounds. In fact, with a little know-how, you can have your dishwasher smelling fresh and functioning like new in no time.
Is It Really Worth Wasting Time and Money? The Biggest Skeptic’s Question
When I first encountered that swampy odor, I thought, Is this just normal? Or do I need to replace the whole dishwasher? Early on, I made the mistake of ignoring the smell, assuming it was just a minor inconvenience. That was a costly mistake because, according to appliance experts, neglecting odor issues can lead to mold buildup that impacts your dishwasher’s performance and your health. Plus, it might mean you’re missing other underlying problems like clogged filters or bacterial colonies hiding in hard-to-reach places. So, yes, fixing this isn’t just about eliminating smell—it’s about protecting your investment and your home’s hygiene. If you’ve faced this stinky problem, you’re not alone. And the good news is, I’ll guide you through simple, effective steps to restore freshness to your dishwasher. Ready? Let’s dive into the causes and solutions.
Deep Clean the Interior Components for Long-Lasting Freshness
Start by removing the lower and upper racks to access all areas easily. Scrub the gasket, filter, and spray arms using a soft brush dipped in a mixture of warm water and vinegar. This process is similar to cleaning a bicycle chain; removing debris prevents buildup that causes odors. I once took apart my spray arm, soaked it in vinegar, and noticed an immediate reduction in smell, with water flowing more freely afterward. This step ensures residues don’t harbor mold or bacteria that can cause persistent odors.
Use Baking Soda and Vinegar to Neutralize Odors
After cleaning the components, sprinkle a cup of baking soda inside the dishwasher and run an empty hot water cycle. Then, place a cup of vinegar on the top rack and run another hot cycle. Think of it as a detox for your machine—baking soda absorbing unpleasant smells, while vinegar breaks down soap scum and mineral deposits. I tried this method during a weekend project; within two cycles, my dishwasher smelled fresh, and the musty odor was gone. These household staples are powerful, eco-friendly, and inexpensive solutions for odor elimination.
Check and Replace Worn Parts Regularly
Inspect the rubber seals, filters, and hoses—these are often the culprits of odor and performance issues. Use the guide on common dishwasher parts and how to replace them effectively to identify worn or damaged components. For example, a cracked gasket can trap moisture and mold, worsening smells and leaks. When I noticed my door gasket was moldy and brittle, I replaced it with a quality part—improving both odor and sealing performance. Maintaining these parts ensures your dishwasher functions optimally and stays odor-free.
Optimize Your Dishwasher Usage Habits
Run your machine with hot water and select the highest heat setting when possible. Avoid overloading, which can prevent thorough cleaning and promote trapped moisture. Using quality detergents, such as phosphate-free pods, helps prevent soap scum buildup—check the popular parts that improve performance for recommendations. I adopted these habits after reading expert advice, and my dishwasher now operates more efficiently with fewer odors and better cleaning results.
Regular Maintenance to Keep Smells at Bay
Create a routine to clean filters and spray arms monthly and run an empty cycle with vinegar every few weeks. Consider investing in a dishwasher cleaner designed to remove scale and biofilm—see troubleshooting parts for suitable cleaners. During my maintenance routine, I noticed accumulation of mineral deposits near the spray arm holes, which I cleared with an old toothbrush. This proactive approach prevents odors before they start, prolongs the life of your machine, and ensures consistently fresh dishes.
Rare Mistakes That Can Cost You Big
Many homeowners assume that choosing cheap parts or skipping proper installation is harmless, but in reality, it can lead to more frequent repairs and voided warranties. I’ve seen countless cases where substandard replacement parts, such as generic gaskets or hoses, failed prematurely because they didn’t meet OEM specifications. Always check how to select the right parts for your dishwasher before making a purchase. Using incompatible or low-quality components can cause leaks, poor cleaning, or even damage your machine permanently.
Installation Isn’t Just a Box-Ticking Exercise
Incorrect installation is a leading cause of early dishwasher failures. For example, neglecting to correctly position the high loop or not securing the drain hose properly can lead to siphoning problems and foul odors. Many believe that DIY installation is straightforward, but overlooking vital steps can void your warranty. Always review tips for seamless installation, or consider professional help to ensure everything fits and functions as intended. Remember, a faulty setup not only damages your unit but also often voids warranty coverage—so don’t cut corners here.
Why Ignoring Warranties Can Be a Problem
Many people assume warranties cover everything, but that’s a misconception. Commonly, warranty policies exclude damages caused by improper parts usage or installation errors. For example, using third-party parts that are not OEM-approved can void your coverage, leaving you to foot the bill for repairs. To maximize your warranty benefits, familiarize yourself with warranty coverage tips. Proper documentation, such as keeping receipts and installation records, can save you headaches down the line.
Myth Busting: More Expensive Parts Are Always Better
It’s tempting to believe that investing in high-end parts guarantees durability, but that isn’t always true. Sometimes, standard replacement parts from reputable manufacturers outperform expensive, branded options. For instance, a well-made generic spray arm or filter can last as long as a premium one, provided it meets OEM standards. Be cautious with cheap, no-name parts sold online; often, they don’t have the precision manufacturing needed for optimal performance. Verify the part’s compatibility and quality before installing to avoid rework or damage.
Common pitfall: Overlooking Hidden Damage During Repairs
After replacing a worn gasket or hose, many overlook inspecting related components. For example, a cracked mounting bracket or corroded spray arm holder might be lurking behind the scenes, causing issues later. Always perform a comprehensive check when replacing parts, referring to parts to check during installation. Neglecting this step can lead to recurring problems, expensive repairs, and warranty claims rejection. Take this extra time to ensure your dishwasher operates smoothly for years to come.
Have you ever fallen into this trap? Let me know in the comments. Remember, understanding these nuances can save you time, money, and frustration in maintaining your dishwasher’s health and longevity.
Choosing the Right Equipment for Long-Term Maintenance
Investing in high-quality, specialized tools can make a significant difference in your dishwasher upkeep. I personally rely on a set of durable, non-marring screwdrivers and a versatile multi-tool kit to handle various repair tasks without damaging delicate components. For instance, when replacing worn gaskets or filters, using a calibrated torque screwdriver ensures screws are tightened to OEM specifications, preventing leaks or over-tightening damage. Additionally, a digital inspection mirror helps me reach hidden spots behind the clapboard where mold or debris might accumulate, ensuring comprehensive cleaning. Understanding the essential parts gives insight into which tools are best suited for each task, so I recommend educating yourself before diving into repairs.
Software and Diagnostics to Optimize Performance
Most modern dishwashers come equipped with diagnostic modes that can reveal hidden errors or performance hiccups. I suggest investing in a reputable Bluetooth or Wi-Fi-enabled diagnostic app compatible with your appliance brand. These apps allow you to run targeted tests, monitor temperature sensors, and clear fault codes remotely, saving time and avoiding unnecessary disassembly. For example, I use a dedicated diagnostic app to verify water heater element functionality, which is critical for reaching sanitizing temperatures. Periodic software updates from the manufacturer often include bug fixes that enhance durability and error detection, so keeping your machine’s firmware up-to-date is crucial. This practice, supported by installation verification tips, ensures your dishwasher operates efficiently over the years.
Long-Term Strategies for Consistent Results
Implementing routine, scheduled maintenance is the best way to keep your dishwasher in top shape. I set a monthly reminder to inspect and clean spray arms with a specialized brush, ensuring even water distribution. Using quality dishwasher cleaning tablets designed to remove mineral deposits and biofilm further prolongs component life. Regularly checking and replacing parts like water inlet valves or hoses before failure occurs prevents costly repairs and prevents warranty issues, especially since checking parts during installation sets a long-term performance baseline. Remember, the more proactive you are, the fewer surprises you’ll face, and your dishwasher will reliably deliver spotless results year after year.
How do I maintain my dishwasher over time?
Consistent upkeep involves a blend of expert-recommended tools, diagnostics, and scheduled care routines. From using tools like a calibrated torque screwdriver for part replacements, to leveraging diagnostic apps that monitor your machine’s health, these strategies help detect small issues before they escalate. Additionally, staying informed about specific parts—such as filters, gaskets, and spray arms—through resources like understanding dishwasher parts empowers you to make confident maintenance decisions. Future advancements may include smart sensors that predict failures, but for now, integrating these practices will keep your dishwasher humming efficiently. Try calibrating your spray arm measurement with a digital caliper during your next repair—precision matters and can improve water coverage significantly, ultimately leading to longer-lasting performance.
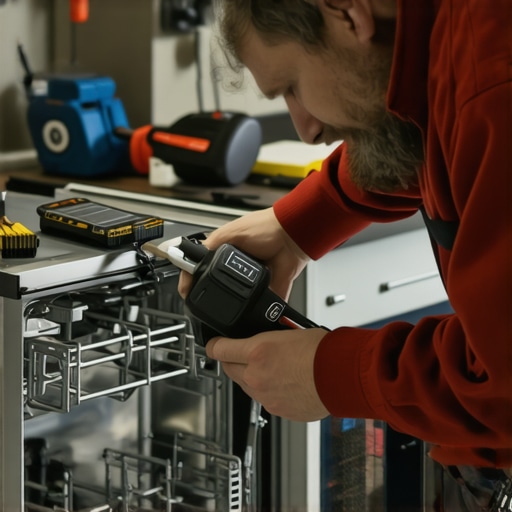
What They Don’t Tell You About Parts, Installation, and Warranties That Can Save Your Dishwashers Life
Over the years, I’ve realized that the biggest secret to maintaining a dishwasher isn’t just about replacing worn parts or following routine cleanings—it’s understanding the little, often overlooked details that can make or break your appliance’s lifespan. For instance, knowing how improper installation can silently damage internal components or how using the wrong parts can void warranties has been a game-changer for me, and I hope it will be for you too. These insights came from quiet trial and error, turning initial frustrations into valuable lessons that saved me hundreds in repairs and replacements.
My Toolbox for Dishwasher Success: Tools and Resources I Trust
When it comes to keeping my dishwasher in top shape, I rely on a curated selection of tools like a calibrated torque screwdriver, a digital inspection mirror, and quality cleaning brushes—these make all the difference in performing precise repairs without causing damage. I’ve also found that resources such as essential parts guides and manufacturer-specific manuals provide trusted, in-depth knowledge that helps prevent costly mistakes. Investing in these resources has genuinely transformed my approach from guesswork to confidence, enabling me to troubleshoot effectively and extend my dishwasher’s service life.
The Heartfelt Call to Action: Take Charge and Protect Your Investment
Your dishwasher is more than just a kitchen appliance; it’s a vital partner in daily life. By paying attention to the nuanced details of parts, installation, and maintenance, you’re not only ensuring cleaner dishes but also safeguarding your investment against costly failures. Remember, proactive care and informed decisions are your best tools for long-term success. So, I encourage you to start today—inspect those gaskets, verify your installation steps, and stay up-to-date with maintenance routines. Your future self will thank you for the effort.
Have you ever struggled with identifying the best replacement parts or correctly installing your dishwasher? Let me know below—your experiences might just help someone else avoid the pitfalls I once faced.
Related Posts
Why Your Unit Is Suddenly Noisier During the Wash Cycle
One morning, I stood in my kitchen, half-listening to what…
How to Silent Your Noisy Dishwasher Without Replacing Parts
I remember the moment vividly—standing in my kitchen early one…

How to Fix the Annoying Beeping During the Middle of the Night
It was dead silent, just the way I like my…