It was a typical Tuesday afternoon when I opened my dishwasher to find a mini flood cascading onto my kitchen floor. Instantly, I knew something was off, but what stunned me was realizing that a simple overlooked detail could have prevented that mess: the high-loop in the drain hose. I had installed my dishwasher myself, following generic instructions, and missed this crucial step. That moment was an eye-opener about how small installation errors can lead to bigger headaches down the line.
Preventing Sink Backflow: The High-Loop Solution
Have you ever dealt with a damp cabinet, unpleasant odors, or water backing up into your sink after running your dishwasher? These issues are more common than you’d think, and they often trace back to improper drain hose setup. The fix is surprisingly simple yet frequently overlooked: incorporating a high-loop in your drain hose. This technique creates a natural barrier against backflow, helping your dishwasher drain correctly without sending dirty water or debris into your sink or cabinet. In fact, many professional plumbers insist that a properly installed high-loop goes a long way in reducing maintenance and preventing water damage, saving homeowners money and frustration over time. For a detailed explanation on how to diagnose and prevent common dishwasher issues, check out [Diagnose dishwasher parts during warranty periods](https://appliancedoctorz.com/how-to-diagnose-dishwasher-parts-during-warranty-periods). Now, let’s explore why forgetting this step can be costly and how to make sure your installation stands the test of time.
Is the high-loop really necessary—won’t my setup work without it?
Early in my DIY journey, I thought I might save time by skipping the high-loop, assuming that a simple downward bend would suffice. Big mistake. Without the high-loop, I had a persistent smell of old socks and occasional water backflow—reminders that the drain wasn’t functioning properly. The mistake taught me the importance of following proper installation guidelines, which emphasize the high-loop as a crucial component of effective drainage. Failing to incorporate it can lead to water getting drawn back into your dishwasher or spilling onto your floor, risking damage to your cabinetry and promoting mold growth. It’s worth reminding yourself that proper installation isn’t just about avoiding immediate leaks but ensuring long-term performance and peace of mind. For more detailed guidance, see [parts to check when installing a dishwasher](https://appliancedoctorz.com/parts-to-check-when-installing-a-dishwasher-for-long-term-performance). Next, we’ll look at the practical steps to correctly set up your drain hose, so you won’t have to deal with those unwanted surprises again.
Pinpoint Your Drain Hose Placement
Start by positioning your drain hose so it can reach the sink drain or waste tee without kinks or sharp bends. Use a level to ensure the hose runs evenly and avoid sagging sections that could cause clogs or backflow. Remember, a proper slope of about 1/4 inch per foot helps gravity do its job, preventing standing water inside the hose. I once installed mine with a slight dip, which resulted in water pooling and causing nasty odors — a mistake I quickly corrected by adjusting the hose’s tilt for optimal drainage. For detailed guidance on preparing your space, check this step-by-step prep guide.
Secure the High-Loop Effectively
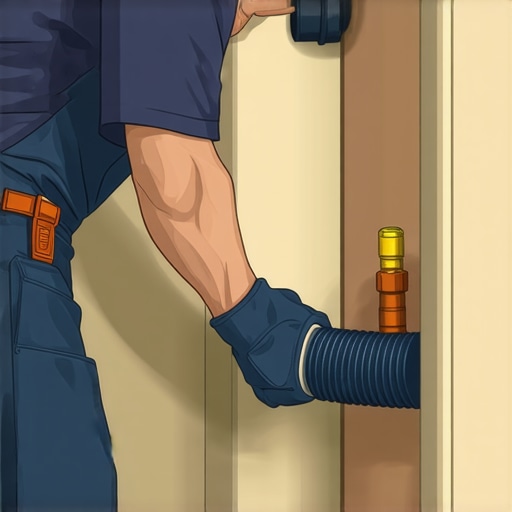
This is the core step where many DIYers falter. Create a high-loop in the drain hose, elevating it above the dishwasher’s drain connection point before descending toward the drain. Use sturdy clamps or zip ties to secure it firmly against the underside of the countertop or cabinetry. The goal is to position the loop at least 18 inches above the disposal or sink drain inlet — this acts as a vital barrier against siphoning or backflow. I once temporarily placed the loop too low, resulting in water siphoning back into the dishwasher during heavy use. After re-installing with a proper high-loop, the issues vanished, illustrating how crucial this step is. For insights on selecting the right clamps, visit this resource.
Double-Check Your Connections
Next, attach the hose securely to the dishwasher drain outlet, ensuring the clamp is tight and the connection is airtight. Use a screwdriver to tighten clamps evenly, avoiding over-tightening which may damage the hose or fitting. Then, connect the other end to the sink waste or tailpiece, making sure it’s snugly fitted with no leaks. Remember, a loose connection here is a common cause of water leaks and water damage. I personally tested my setup by running a cycle and inspecting for drips — a quick check that saved me from potential flood damage. For troubleshooting tips, see this troubleshooting guide.
Test Before Finalizing
Always run a short cycle to observe how water flows through your setup. Check for any leaks at all connection points and listen for unusual noises indicating improper fittings. If water pools or leaks, tighten clamps or adjust the hose position accordingly. This step mirrors a practice I adopted after a messy leak during an initial test run, which taught me the importance of thorough checking. Confirming all connections are secure prevents costly repairs later. For a comprehensive checklist, visit this diagnostic resource.
Many homeowners believe that once they purchase a dishwasher, its warranty will cover any issue that arises, no matter what. However, this is a misconception that can lead to costly surprises. Manufacturers often have strict conditions about the parts covered and the proper installation procedures required to keep warranty validity intact. For example, installing the wrong type of drain hose or neglecting to secure the high-loop may void your warranty, leaving you responsible for repairs that could have been covered. Additionally, many assume that DIY installation is always sufficient, but in reality, improper setup can cause long-term damage and compromise warranty protections. It’s essential to familiarize yourself with the specific warranty policies of your appliance, which can be quite nuanced. For instance, some warranties cover only certain parts like the pump or control board, while excluding wear-and-tear components. Understanding these details can save you from unnecessary expenses and ensure your investment is protected. According to industry experts, one of the most overlooked aspects is documenting your installation and maintenance procedures, which can be invaluable during warranty claims. Moreover, avoid the trap of reusing old or incompatible parts, as this can cause premature failure and void your warranty. It’s also a common mistake to assume that the manufacturer’s list of warranty-covered parts includes everything that might fail; in reality, some issues fall into grey areas or are considered user damage. For comprehensive guidance on warranty policies and how to navigate them effectively, check out Understanding dishwasher warranty policies for peace of mind. Remember, being proactive with proper installation, regular maintenance, and thorough documentation is the best way to maximize your warranty coverage and extend the lifespan of your dishwasher. If you’re unsure about your setup or warranty conditions, consult a professional or refer to your manufacturer’s guidelines to avoid costly pitfalls. Have you ever fallen into this trap? Let me know in the comments!
Keeping Your Dishwasher Running Smoothly with the Right Tools
Maintaining a dishwasher isn’t just about occasional cleaning; it requires the right equipment and a methodical approach. I rely heavily on a few specific tools that streamline troubleshooting and routine maintenance. For example, a high-quality multimeter helps me quickly verify electrical components like thermostats and switches, ensuring safety and functionality without guesswork. Additionally, a stethoscope-style mechanic’s scope allows me to listen closely for unusual noises—this simple device can reveal whether a pump is struggling or if there’s a debris blockage inside the spray arms. Using these tools regularly enables me to spot small issues before they escalate, saving time and money in the long run. As technology advances, I predict that smart diagnostic tools connected to your smartphone will become more prevalent, offering real-time alerts for common failures and maintenance needs.
How do I maintain my dishwasher over time?
To keep your dishwasher performing at its best, establish a routine inspection schedule. Start by examining the drain hose for kinks or leaks—remember, the high-loop is essential here to prevent backflow issues. Check the inlet valve and filters periodically to ensure they’re free of debris; a clogged filter can cause poor drainage or water temperature issues. I find that a monthly visual check combined with testing key components with a multimeter helps catch problems early. Additionally, keep the spray arms clean and free of mineral buildup, especially if you have hard water. For detailed guidance on long-term performance, see [parts to check when installing a dishwasher](https://appliancedoctorz.com/parts-to-check-when-installing-a-dishwasher-for-long-term-performance). Adjusting your maintenance habits based on the manufacturer’s recommendations can significantly extend your appliance’s lifespan and keep it running efficiently for years to come.
The Hidden Lessons I Learned About Installing a Dishwasher
One of the most valuable lessons I discovered was that overlooking small details, like securing the high-loop, can lead to costly repairs and frustration. Small mistakes in installation, such as misplacing the drain hose or not verifying connections, can cause persistent odors, backups, or water damage. These experiences reinforced the importance of patience, thoroughness, and following detailed guidelines to ensure a reliable setup. It’s these insights that turn a DIY project into a lasting investment, saving you time and money in the long run.
My Go-To Tools for a Successful Dishwasher Installation
Over time, I’ve come to rely on essential tools that make troubleshooting and routine maintenance straightforward. A quality multimeter helps verify electrical components, ensuring safety and performance. A mechanic’s scope is invaluable for diagnosing odd noises or pump issues, providing quick insights without guesswork. Investing in these tools boosts confidence and enables you to catch minor problems before they escalate, ultimately extending your dishwasher’s lifespan. For those interested, I often consult resources like this troubleshooting aid to keep my toolkit up to date.
Embracing the Power of Proper Installation to Protect Your Warranty
One critical realization I wish I’d known earlier is that proper installation isn’t just a best practice—it’s a key to preserving your warranty. Manufacturers often have strict conditions regarding parts and setup procedures, like securing the high-loop or using approved hoses. Skipping these steps can not only cause performance issues but also void your coverage, leaving you financially vulnerable. Familiarizing yourself with warranty policies, such as these guidelines, helps safeguard your investment. Documenting your installation details offers extra peace of mind, especially if future repairs are needed, and ensures your warranty remains intact during unexpected issues.
Related Posts
Why Your Dishwasher Needs a 20-Amp Breaker to Function Properly
I vividly remember the first time my dishwasher stopped mid-cycle,…
Why Your High-Loop Drain Is Essential for Sanitary Cleaning
I'll never forget the moment I discovered a tiny, overlooked…
The Drain Hose Length Rule Most Installers Ignore
It was a frustrating morning when my brand-new dishwasher refused…