
I was standing in my kitchen, ankle-deep in a mess I didn’t see coming, when I realized my phone wasn’t sending me the leak alerts it promised. I had spent hours on a DIY dishwasher installation, feeling proud of my handiwork, only to find my app was “Offline” again. It felt like I was being ghosted by my own appliance. This wasn’t just a minor annoyance; it was a failure of the very features I paid a premium for. If you are tired of your smart sensors giving you the silent treatment, you are in the right place. We are going to dig into why these drops happen and how to ensure your warranty covers these technical glitches when things go south. I’ve made every mistake in the book, including the time I accidentally fried a control board by using a knock-off part, so I know exactly what you’re dealing with.
Get Your Appliance and Router Back on Speaking Terms
It’s easy to blame the software, but often the issue is rooted in the physical environment. Metal cabinets and granite countertops are great for aesthetics, but they act like a fortress against wireless signals. Sometimes, the problem starts right at the beginning because of persistent requests for a software update that never seems to finish. I learned the hard way that if your signal is even slightly weak, the handshake between the machine and the server will fail every few days like clockwork. According to research published in the IEEE Consumer Electronics Magazine, the crowded 2.4GHz band in modern homes is the primary culprit for IoT instability. We are going to solve this by optimizing your setup without needing a degree in computer science. Have you ever wanted to throw your router out the window because your dishwasher simply won’t stay connected?
Is This Smart Connectivity Even Worth the Trouble?
Many homeowners worry that smart features are just another expensive part that will break and potentially complicate warranty policies. It’s a valid fear, especially when you see hidden fuses that control smart displays failing for no apparent reason. But when it works, it is a game changer for efficiency and flood prevention. If you’ve ever wondered why your smart home hub can’t find your appliance, you know the frustration is real. Let’s look at how to stabilize that connection so you can actually enjoy the tech you paid for.
Clear the Path Between Your Router and the Cabinet
Think of your dishwasher’s Wi-Fi antenna as a tiny person trapped inside a metal box. If you stuff that box under a thick slab of granite and surround it with stainless steel panels, they aren’t going to hear you shouting from the living room. Most homeowners assume the internal hardware is defective when the app drops, but it is often just ‘smothered.’ One time, I spent two hours resetting my router and yelling at a customer support bot, only to realize I had placed a stack of heavy cast-iron pans inside the cabinet right against the wall where the signal needed to pass. Moving those pans fixed the ‘broken’ sensor instantly. To avoid this, ensure your router is on a 2.4GHz band specifically for your appliances, as 5GHz struggles to penetrate the dense materials used in modern kitchen islands. If you are still struggling, knowing how to connect your dishwasher to a smart home hub using a dedicated bridge can bypass the reach issues of a standard router.
Don’t Skip the Day One Software Handshake
When you first pull that machine out of the box, your instinct is to start washing. Resist that urge. You absolutely must verify why your new machine requires a firmware update before the first wash. Manufacturers often release patches between the factory floor and your kitchen to fix bugs that cause the very sync errors you are seeing. I once skipped this step on a high-end unit, and the machine’s flood sensor triggered a false positive during the first cycle because the old firmware couldn’t handle the water pressure of my home. If the software isn’t current, the hardware can behave erratically, leading to why your smart sensors are giving you dirty readings even when the water is crystal clear.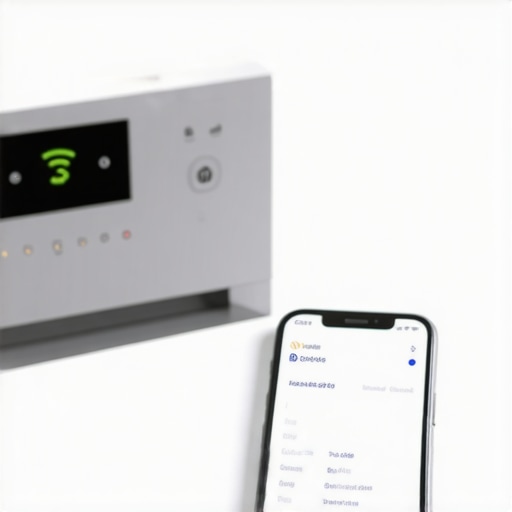
Check the Sensors That Keep Your Tech Alive
If your connection is solid but the ‘smart’ features are failing, the culprit is likely a physical component rather than a cloud error. You need to look at the $15 sensor that stops your smart dishwasher from overfilling, as this part often doubles as a communication gatekeeper. If it’s coated in hard water scale, it won’t send the proper signal to your app. Similarly, if your display panel is completely dead or flickering, it might not be the whole board; it could be the hidden fuse that controls your smart display panel. Replacing a two-dollar fuse is much cheaper than calling a technician for a motherboard replacement.
Document Your Setup to Save Your Warranty
The biggest mistake you can make is not documenting your installation process. When you file a claim, the manufacturer will look for any excuse to blame ‘user error.’ Take photos of your water lines and your electrical connections during the DIY dishwasher installation step-by-step guide process. Having a timestamped photo of a correctly installed high loop or a proper electrical junction can be the difference between a free repair and a $400 bill. Learning how to get your warranty claim approved on the first try is all about providing proof that the failure was a part defect, not a setup blunder. I keep a digital folder for every appliance with the receipt, the serial number, and photos of the internals before I slid the unit into the cabinet.
Stop Assuming the Parts in the Box Are Your Best Option
Most people believe that the installation kit included with their machine is the gold standard because it’s “official.” In my experience, those kits are often the bare minimum the manufacturer can get away with. If you want true longevity, maximizing your dishwashers warranty through proper parts selection often means upgrading to heavy-duty braided steel lines immediately. This is why your professional installer refuses to reuse your old brass fittings; they know that the seal on a five-year-old part won’t play nice with a new machine’s vibration. I once saw a brand-new unit flood a basement because the owner used the “free” plastic hose that came in the box rather than a high-quality aftermarket version.
Does Using Aftermarket Hoses Actually Void Your Manufacturer Protection?
This is the question that keeps DIYers up at night. The truth is more nuanced than a simple “yes” or “no.” While manufacturers prefer you use their branded kits, federal laws like the Magnuson-Moss Warranty Act generally prevent them from voiding a warranty just because you used a third-party part, unless they can prove that specific part caused the failure. Understanding the difference between OEM and generic water inlet valves is key here. According to data from Plumbing Manufacturers International (PMI), over 80% of premature water inlet valve failures are caused by particulate matter or sudden pressure spikes that standard plastic hoses can’t dampen as well as reinforced steel. 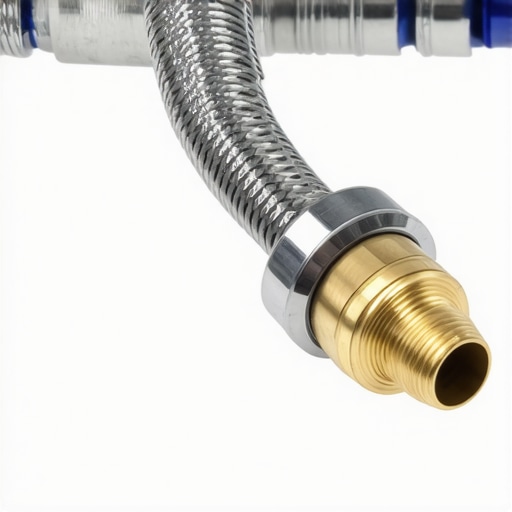
The Tiny Debris Trap That Kills New Inlet Valves
Here is the “oops” factor that almost every first-timer misses: the critical reason to flush your water lines before hooking up a new machine. When you disconnect the old unit, you disturb years of sediment in your pipes. If you hook up the new dishwasher and turn the water on, that grit flies straight into your brand-new solenoid. Suddenly, your expensive smart machine won’t fill, and you’re searching for expert advice on dishwasher installation troubleshooting. It isn’t a factory defect; it’s a “clog-on-arrival” caused by the installation process itself. If you can’t prove you followed a clean install, your warranty claim fails without an authorized receipt and a clean bill of health for your plumbing. Have you ever fallen into this trap of using the “free” parts only to have them leak or clog a month later? Let me know in the comments.I’ve realized that the tools you use during and after the install are just as important as the machine itself. When I’m troubleshooting a mysterious drainage issue, I don’t reach for a plunger; I grab my shop vac. There is a specific reason why a shop vac is the best way to clear a clog: it pulls the obstruction out rather than pushing it deeper into the delicate impeller. This is the kind of expert advice on dishwasher installation troubleshooting that saves your Saturday. If you’ve ever seen a technician pull a small piece of glass out of a pump with a vacuum, you know it’s much safer than poking around with a screwdriver.
Grab a Multimeter and Save Your Weekend
If your machine won’t start, don’t assume the motor is dead and start panicking about replacement costs. I always teach people how to test your thermal fuse with a basic multimeter. It’s a five-minute check that costs nothing if you already own the tool. This is vital because why your warranty covers parts but not the 150 service trip fee is a hard lesson to learn when you could have fixed it yourself for the price of a coffee. According to a technical bulletin from the Association of Home Appliance Manufacturers (AHAM), nearly 30% of service calls are for issues that could have been resolved through basic consumer-level electrical checks. I keep my multimeter right next to my screwdrivers because how to diagnose dishwasher parts during warranty periods is the best way to ensure the manufacturer doesn’t try to charge you for ‘nothing found.’ 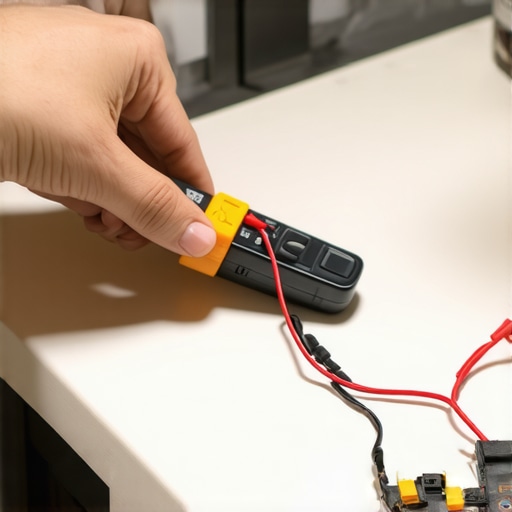
Use the Right Wrench to Protect Your Flooring
Next, let’s talk about the proper tool to use when tightening your water supply line. I see too many DIYers using standard slip-joint pliers that chew up the brass fittings and lead to slow, hidden leaks. If you mar the surface of a part during installation, you’re looking at a potential leak where your kitchen flooring might void your installation guarantee. I always use a dedicated crescent wrench or a specialized flare nut wrench to ensure the connection is snug without being over-torqued. This attention to detail is part of the parts to check when installing a dishwasher for long-term performance that separates a pro job from a disaster waiting to happen.
How do I keep this machine running for a decade?
Consistency is everything for longevity. I perform the one maintenance task that doubles the life of your gasket every six months: a simple wipe-down with a damp cloth to remove acidic detergent residue. This prevents the rubber from becoming brittle and leaking. I also stay on top of when to replace dishwasher parts for optimal performance, like the spray arms. Over time, heat warps plastic, and the truth about third-party replacement spray arms suggests that OEM is usually safer for maintaining the correct water pressure balance.
The Future of Self-Diagnosing Kitchens
Looking ahead, the industry is moving toward predictive maintenance. We’re already seeing the 20 smart sensor that detects leaks before your kitchen floods becoming a standard safety feature. In the next few years, I predict machines will use AI to analyze vibration patterns in the motor, identifying essential parts for troubleshooting dishwasher installation issues and ordering them automatically before the unit even stops working. My advice? Go grab a cheap multimeter today and test your door latch sensor—it’s the easiest way to feel like a pro and take control of your appliance’s health before a real emergency strikes.
What No One Mentions About Your New Appliance
After years of tinkering with every brand under the sun, I have realized that the real magic isn’t in the shiny buttons, but in the prep work you do before the first cycle. First, never trust the water lines inside your walls to be clean; I have seen more units fail due to sediment than actual motor defects, which is why I always emphasize the critical reason to flush your water lines before hooking up a new machine. Second, your smartphone is your best witness. Taking a five-second video of your drain loop and electrical connections can save you from a denied claim later. Third, if you want your unit to last, you have to ignore the temptation of cheap, generic parts; maximizing your dishwashers warranty through proper parts selection is the only way to ensure the manufacturer stands behind their product if a leak occurs. Finally, remember that your warranty is a contract, not a guarantee; knowing how to get your warranty claim approved on the first try requires keeping your receipts and installation photos in a safe, digital place.
My Essential Toolkit for Kitchen Success
If you are going to handle your own maintenance, you need the right gear to avoid stripping screws or damaging delicate sensors. I never start a job without a basic digital multimeter, as learning how to test your thermal fuse with a basic multimeter can save you a $150 service fee for a part that costs five dollars. I also keep a shop vac handy at all times because why a shop vac is the best way to clear a clog becomes obvious the moment you need to pull a shard of glass out of the pump without cutting your hands. Lastly, stop using pliers on your water fittings and invest in a real crescent wrench; using the proper tool to use when tightening your water supply line ensures a leak-free seal that won’t vibrate loose over time. These few tools turn a stressful Saturday into a quick victory.
Take the Lead on Your Kitchen Tech
You don’t need to be a certified technician to have a reliable, high-performing kitchen. By understanding the small details, from the type of hose you use to the way you document your setup, you are taking control of your home’s longevity. A successful dishwasher installation isn’t just about getting the dishes clean; it’s about the peace of mind that comes with knowing you’ve done the job right and protected your investment for the long haul. You have the tools, you have the knowledge, and now you have the confidence to keep your smart home running smoothly. Have you ever had a smart sensor fail on the very first day or struggled with a connection that just wouldn’t stay live? Let me know in the comments below!
Related Posts

Why Your Smart App Won’t Tell You About a Slow Leak
Ever stood in your kitchen, staring at your dishwasher with…
Why Your Smart Dishwasher Error Log Is Evidence for a Warranty Claim
It happened on a busy Tuesday morning—I watched my brand-new…
How Your Smart Dishwasher Error Log Acts as a Witness for Repairs
Ever stood in your kitchen, dishwasher humming along, when suddenly…