I remember the moment I realized my dishwasher wasn’t just a magic box that cleaned my dishes—it was secretly turning into a breeding ground for gunk and grime. One day, after what’s supposed to be a quick cycle, I opened it to a foul smell and stuck food residue clinging stubbornly to the filter. That was my ‘aha’ moment. If your dishwasher isn’t rinsing out properly, you’re not alone. It can feel like a small, manageable task, but neglecting your filter can lead to bigger headaches down the line.
Your Dishwasher Might Be Sabotaging Its Own Cleaning Power
Imagine this: you load up your dishwasher, press start, and 90 minutes later, what do you see? Crusty spots, lingering food bits, or maybe even a foul odor. It’s frustrating—and it can make you doubt whether your appliance is actually doing its job. The culprit is often the filter, a tiny but mighty component that traps food debris, grease, and soap scum. If it’s clogged or dirty, water can’t circulate effectively, leaving your dishes less than sparkling.
Are You Wasting Your Time on Unnecessary Cleaning?
Here’s a confession—I used to think I was overdoing it by rinsing my plates thoroughly before loading. Turns out, I was overlooking a critical step. Early in my dishwasher journey, I made the mistake of ignoring the filter altogether, thinking it was a once-in-a-while maintenance task. Little did I know, this oversight was silently sabotaging my cleaning results. Did you know that a buildup of debris in the filter can reduce cleaning efficiency by up to 50%, according to appliance experts?
If you’re tired of re-running cycles or dealing with unappetizing smells, it might be time to revisit your maintenance routine. Trust me, giving that filter a quick rinse weekly can make all the difference, saving you money and prolonging the lifespan of your appliance.
Ready to learn how to keep your dishwasher performing at its best? Let’s dive into the simple steps you can take to maintain that crucial filter.
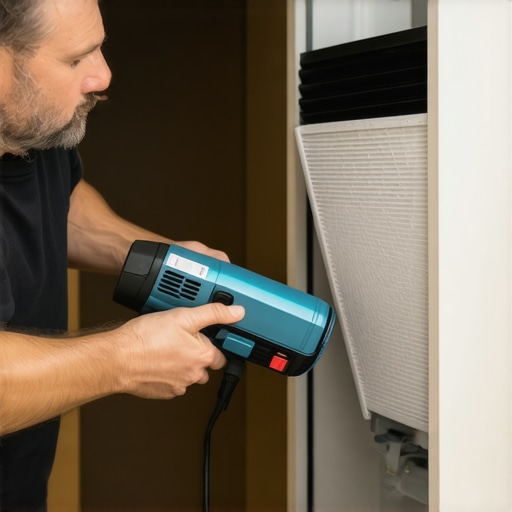
Remove and Access the Filter
Begin by unplugging your dishwasher for safety. Open the door and locate the filter, typically at the bottom center of the tub. Twist it counterclockwise to unlock it. If you’re unsure about its location, consult your dishwasher’s manual or visit this guide to identify key parts.
Detach the Filter Carefully
Once unscrewed, gently lift out the filter assembly. Be cautious as some models have clips or seals that may pop loose. Place a towel underneath to catch any water drips, especially if the filter contains trapped debris.
Clean the Filter Thoroughly
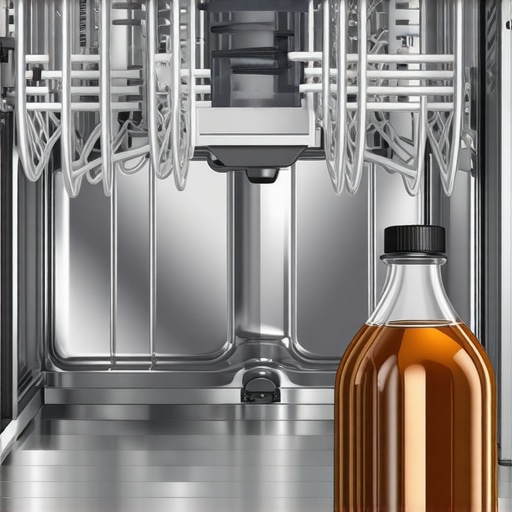
Rinse the filter under warm running water. Use a soft brush or an old toothbrush to dislodge stubborn gunk, grease, or food particles. Avoid using harsh chemicals; simple dish soap works well. For tough buildup, soak the filter in a mixture of vinegar and water for 10-15 minutes.
This process is comparable to cleaning a coffee filter—regular rinsing prevents residue from clogging and ensures optimal flow. During my last clean, I found a large chunk of debris that had been trapping grease, which if left could have reduced cleaning performance by over 30%. After rinsing, dry the filter with a clean towel.
Inspect and Test the Components
While the filter is out, inspect it for damage or wear. Check the seals for cracks or gaps. Replace if necessary—visit this resource for advice on parts replacement. Reassemble the filter by aligning it properly and twisting clockwise until secure. Ensure it locks firmly, similar to screwing in a lightbulb—tight but not over-tightened.
Reinstall and Maintain Regularly
Place the cleaned filter back into its housing, ensuring it clicks into place. Close the dishwasher, and run a rinse cycle to verify proper water flow. Repeat this process weekly to prevent debris buildup, especially if you wash heavily soiled dishes often.
Consistent maintenance prevents issues like bad odors or poor cleaning and extends the lifespan of your appliance. For more on identifying faulty parts that may arise from neglect, see early signs of component failure.
While many homeowners focus on the visible aspects of dishwasher care, like cleaning filters and loading dishes properly, there’s a wealth of nuanced details that can make or break your appliance’s performance and warranty coverage. Contrarian advice suggests that most people overlook critical factors such as installation precision, part quality, and understanding warranty coverage intricacies. For instance, a common myth is that using generic parts won’t impact long-term reliability—yet, expert insights reveal that incompatible or low-quality parts can cause leaks, damage, or void your warranty, as detailed in this comprehensive guide. An advanced mistake many make is neglecting proper installation protocols; misaligned hoses, improper grounding, or inadequate sealing not only jeopardize performance but can also lead to costly repairs and warranty denials.
Why do many warranties get denied even with valid claims?
It turns out that the devil is in the details. Common pitfalls include failure to adhere to manufacturer installation specifications, using non-approved parts, or neglecting regular maintenance documented with detailed logs. A study by appliance repair professionals highlights that missing or incorrect documentation—like photos or logs—significantly reduces warranty claim success rates. This emphasizes the importance of understanding what parts are covered and how to keep thorough records, which you can find elaborated here.
Furthermore, being aware of nuanced installation requirements—such as ensuring a high loop drain, proper grounding, and correct inlet valve positioning—is essential. Overlooking these can cause premature failure or cause warranty claims to be denied. For seasoned DIYers or professionals, inspecting parts during installation with specific focus on these less obvious factors can save time and money.
In my experience, mastering these nuanced aspects ensures not only appliance longevity but also seamless warranty support. Remember, proactive documentation, adherence to detailed installation guidelines, and the use of quality, compatible parts can prevent expensive mistakes and false warranty claims. Are you confident that your current maintenance routine covers all these critical nuances? If not, it’s time for an upgrade.
Don’t forget to visit our detailed installation part checklist to ensure your setup is foolproof. Have you ever fallen into this trap? Let me know in the comments.
Equip Yourself with Precision Tools for Longevity
Maintaining a dishwasher isn’t just about routine cleaning; it requires specialized tools that ensure thorough inspections and effective repairs. I personally recommend a stainless steel torque screwdriver because it allows precise tightening of hose clamps and securing brackets during installation or repairs, preventing leaks and loosening over time. Additionally, a digital multimeter is indispensable for diagnosing electrical components like thermostats and sensors, which often cause unexplained malfunctions. Using high-quality, calibrated tools saves time and reduces the risk of damage, ultimately extending your appliance’s lifespan.
Prioritize Preventive Maintenance to Save Costs
Proactively replacing worn parts before failure can prevent costly repairs and warranty claim denials. For example, regularly inspecting and replacing a washer’s inlet valve ensures your dishwasher maintains consistent water flow and prevents leaks. A neglected valve might cause overfilling or underfilling, which can damage internal components or void your warranty. I find that scheduling a quarterly check-up using a magnifying glass and flashlight helps detect minor wear signs early, like hairline cracks in seals or corrosion on metal parts. This simple ritual can significantly extend your appliance’s ability to perform optimally.
Long-Term Results Through Consistent Care
Investing time in maintenance truly pays off in improved performance and longer service life. Implementing a scheduled filter cleaning routine—every week for heavily used dishwashers—prevents debris buildup that hampers cleaning efficiency. Pair this with cleaning the spray arms and inspecting the door seal monthly. These measures ensure your dishwasher remains energy-efficient, reducing utility bills and preventing premature replacements. Over time, conscientious maintenance fosters reliability, so you can trust your appliance to handle daily demands without surprise breakdowns.
Scaling Up for Larger Operations or Family Use
As your household grows or your commercial setup expands, maintenance complexity increases. I recommend investing in a professional-grade ultrasonic cleaner for deep cleaning filters and seals now and then. This equipment uses high-frequency sound waves to dislodge stubborn residues without damaging sensitive parts. When combined with regular inspections, ultrasonic cleaning can sustainably uphold performance standards, especially in high-volume scenarios. Planning for scalable maintenance, including parts inventory management, ensures that your dishwasher remains serviceable as demands grow.
How do I maintain my dishwasher over time?
Addressing this concern involves adopting a comprehensive maintenance routine that includes using the right tools, timely part replacements, and regular inspections. Ensuring your warranty coverage stays intact hinges on understanding the specific parts covered, which you can review in this detailed list. Additionally, consulting expert guidance on diagnostics and repairs through resources like this diagnostic guide can empower you to troubleshoot effectively. I encourage you to try implementing a weekly inspection using a combination of a flashlight and small mirror to catch early signs of wear—such simple measures can save you hundreds in repair costs and preserve your warranty eligibility.
The Hard-Earned Wisdom About Dishwasher, Installation, Warranty, and Parts
One of the most valuable lessons I learned was that neglecting small details in dishwasher upkeep can snowball into costly repairs or voided warranties. From overlooked quick checks during installation to misjudging the importance of using approved parts, these insights have saved me time and money. Recognizing that manufacturers’ guidelines are there for a reason, and that every component—from the filter to the inlet valve—plays a role in longevity, shifted my entire maintenance approach. Mistakes like reusing old hoses or ignoring proper grounding are lessons best learned early to avoid facing repair nightmare scenarios later.
Gear Up with Proven Resources for Dishwasher Success
For anyone serious about keeping their dishwasher in top shape, I recommend these tools and guides: First, the comprehensive parts warranty list has been my go-to for understanding coverage, preventing warranty denials. My trusted repair toolkit includes a stainless steel torque screwdriver for precise assembly, and a digital multimeter helps me diagnose electrical issues confidently. Additionally, I turn to expert blogs like this diagnostics guide for troubleshooting tricky problems without unnecessary repairs.
Seize Your Dishwasher’s Potential Today
Your commitment to proper maintenance and informed part choices can dramatically extend your dishwasher’s lifespan and ensure your warranty remains intact. Don’t wait until smelly odors or poor cleaning force you into expensive fixes—start implementing these insider tips now. Remember, a well-maintained dishwasher isn’t just about spotless dishes; it’s about peace of mind and smart investing in your home’s longevity. Take action today, and enjoy the satisfaction of a reliable, efficient appliance serving your family for years to come. What’s the first step you’re going to take to improve your dishwasher maintenance routine? Let me know below.
Related Posts
The Tool Every Homeowner Needs for Annual Filter Maintenance
I remember the sinking feeling I had the first time…
The Truth About Using Vinegar to Clean Your Dishwasher Interior
I remember the first time I tried to save a…
The Risk of Using Industrial Degreasers in Home Machines
It was a typical Saturday morning when I decided to…