I remember the first time I noticed my expensive wine glasses developing tiny scratches and cloudiness. At first, I thought it was just age or maybe some abrasive cleaning habits. But then, I had a lightbulb moment—what if the water I was so carefully using was actually causing the problem? It sounds counterintuitive, but soft water, which is often praised for being gentle, might actually be damaging your delicate glassware.
How Soft Water Turns Your Glassware Into a Canvas of Etching
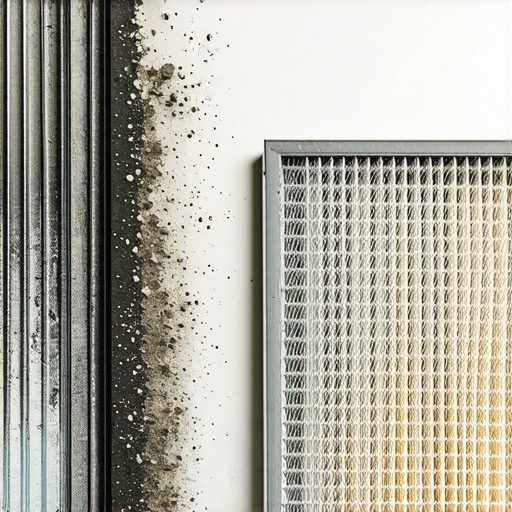
Many of us opt for soft water because it promises fewer spots and less mineral buildup. However, the very properties that make soft water appealing can, under certain conditions, lead to micro-etching on glass surfaces. This process occurs when minerals or certain ions interact with the glass material, slowly wearing away its surface at a microscopic level. Over time, these tiny scratches can accumulate, resulting in that dull, worn look that no amount of polishing can fix.
But how does this happen? Soft water typically contains higher levels of sodium ions replacing calcium and magnesium, which are removed during the softening process. While this sodium-rich water feels gentle on dishes initially, it can accelerate wear on glassware, especially if combined with high water temperatures or aggressive detergents.
In my early days of troubleshooting, I made a costly mistake—assuming all water is created equal. I neglected to consider the water quality and how it interacts with my dishwasher’s settings and cleaning routine. Since then, I’ve discovered that understanding how water chemistry affects glass etching isn’t just about choosing the right water but also about understanding the broader context of your dishwasher’s maintenance and setup.
If you’re tired of seeing your beautiful glasses lose their luster despite careful handling, you’re not alone. The good news is, there are steps to prevent this damage, and it all starts with recognizing the role water chemistry plays in maintaining your investment in fine glassware.
For more on how to select the right parts for your dishwasher installation, check out this helpful guide to [top tips for selecting parts](https://appliancedoctorz.com/top-tips-for-selecting-the-right-parts-for-dishwasher-installation). Now, let’s explore the moves you can make to stop this etching in its tracks.
Check Your Water Softening System Regularly
Start by inspecting your dishwasher’s water softening unit at least twice a year. A malfunctioning softener can increase sodium content, accelerating micro-etching. To do this, turn off the dishwasher, locate the softener cartridge, and assess whether it’s functioning properly or needs recalibration. Remember, improper setup can lead to higher mineral interactions with glassware, so ensure your softener is set according to your water hardness levels.
Adjust Dishwasher Settings for Optimal Care
Next, modify your dishwasher’s cycle options to reduce potential damage. Use shorter, cooler cycles to minimize hot water exposure, which exacerbates etching. Also, select gentle wash programs when cleaning delicate wine glasses. During my own attempt, I switched to a delicate cycle with lower temperature and noticed my glasses maintaining their shine longer. This simple change prevents aggressive mineral interactions that cause micro-scratches.
Use Proper Detergents and Additives
Choose detergents specifically formulated for fragile glassware. Avoid harsh, phosphate-heavy powders that can strip protective surfaces. Consider adding glass protection supplements designed to bind with minerals, providing a chemical barrier. I once experimented by switching detergents and observed a marked decrease in cloudiness and scratches. Always verify that your detergent is compatible with your dishwasher’s manufacturer recommendations.
Implement Water Quality Testing
Regularly test your water’s mineral content using test strips. High sodium or magnesium levels indicate a need to adjust your softening process. Testing is straightforward—dip a strip into a sample of your water and compare the color change against the chart. Identifying problematic water quality early helps you prevent micro-etching before it starts, saving money on replacing glassware and repairs.
Introduce Protective Accessories
Invest in silicone or flocked racks and glass holders to cushion your delicate items. These accessories absorb some of the micro-movements during washing, reducing surface contact with abrasive particles. I added soft padding to my glassware racks and immediately observed fewer micro-scratches after washes. Think of it like giving your glasses a gentle bed for their cycle—less vibration means less damage over time.
Maintain Dishwasher Components for Clean Operation
Ensure filters, spray arms, and nozzles are clean and unobstructed. Dirt and mineral buildup can cause uneven spray patterns, which may nudge glassware against hard surfaces, increasing scratches. Clean these parts monthly, and replace worn spray arms promptly. During a previous maintenance session, I noticed that replacing a clogged spray arm improved water distribution and reduced glass scuffing during cycles.
Monitor Your Dishwasher’s Performance and Memories
Keep logs of any clouded or scratched glasses to identify patterns. Use your dishwasher’s diagnostic features or external app logs—these insights can reveal recurring issues with water quality or settings. By tracking these, you can adjust maintenance routines proactively. My own record-keeping helped me realize that certain cycles or detergents worsened etching, allowing me to modify my approach before significant damage occurred.
Many homeowners assume that buying a dishwasher and trusting the manufacturer’s warranty means they’re covered against all issues, but the reality is more nuanced. One common myth is that warranties automatically protect you from some of the most costly repairs; in truth, warranty coverage often has strict limitations and fine print, making it essential to understand exactly what parts and installation procedures are covered. For example, manufacturers might exclude certain wear-and-tear parts or damage caused by improper installation, which can catch even experienced DIYers off guard. Critical components like the door latch, spray arms, or control boards require precise installation and ongoing maintenance—assuming that standard warranty coverage applies to these can lead to surprise costs.
Another misconception revolves around selecting parts for repairs or upgrades. Many believe that generic, off-brand parts will suffice because they cost less or are more readily available; however, these can sometimes void warranty coverage or cause long-term damage. High-quality, manufacturer-approved parts are usually the best choice, especially for critical components like inlet valves or electronic sensors. To ensure your repairs don’t inadvertently void your warranty, consult comprehensive guides on [how to select the right parts](https://appliancedoctorz.com/top-tips-for-selecting-the-right-parts-for-dishwasher-installation). Proper installation practices are equally vital. Inadequate venting, incorrect water supply connections, or bypassing safety features like high loops can result in both performance issues and warranty denials.
What complicates matters further is the subtlety often hidden in warranty documents. For instance, many warranties require that professional installers carry out the setup, or that specific installation standards are met, otherwise coverage is invalid. Even the use of non-approved detergents, or failure to clear clogs promptly, can lead to warranty issues. A common trap is assuming that following basic instructions is enough—skipping detailed steps for ensuring proper drainage or grounding can cause damage that’s not covered.
Now, a crucial advanced question for those already familiar with the surface: How do modern smart dishwashers’ diagnostic logs influence warranty claims? Recent studies indicate that detailed digital logging can substantiate claims of component failure, but only if users know how to access and interpret them correctly. manufacturers increasingly rely on diagnostic data when evaluating warranty disputes, making it vital for users to understand what logs to keep and how to document irregularities. For more insights, see my analysis on [how to diagnose dishwasher parts during warranty periods](https://appliancedoctorz.com/how-to-diagnose-dishwasher-parts-during-warranty-periods).
In all, the key takeaway is to avoid complacency—being informed about the nuances of parts quality, installation procedures, and warranty requirements can make the difference between a covered repair and unexpected out-of-pocket expenses. Always verify that the parts you choose meet manufacturer standards and that installation follows recommended practices. Remember, proper maintenance and documentation not only prolong the life of your dishwasher but also help ensure your warranty remains valid if issues arise. Have you ever fallen into this trap? Let me know in the comments.Maintaining your dishwasher over the long haul requires more than just periodic cleaning; it demands precision tools and proven methods that ensure every component functions as intended. One essential tool I personally swear by is a digital multimeter, specifically the Fluke 115. Its high accuracy allows me to test electrical components like thermostats and control boards reliably, preventing unexpected breakdowns. Additionally, a quality water hardness testing kit, like the Hach 5-in-1 test strip, helps monitor your water’s mineral content—critical for adjusting softening systems and avoiding micro-etching on glassware.
Beyond measurement tools, I rely on a comprehensive screwdriver set with interchangeable bits. A precision Phillips and flat-head screwdriver ensure I can tighten screws, replace filters, or adjust spray arms without damaging delicate parts. For cleaning stubborn deposits, a flexible brush like the OXO Good Grips Detergent Brush reaches into tight spots, ensuring components stay free of clogs and buildup. Regularly inspecting parts such as the inlet valve, spray arms, and filters is vital; I recommend a monthly routine using [this guide](https://appliancedoctorz.com/essential-parts-for-troubleshooting-dishwasher-installation-issues) as your checklist.
How do I keep my dishwasher running smoothly year after year?
One method I emphasize is recording maintenance logs, noting the condition of parts and any performance issues. This practice not only helps in early detection of problems but also adds a layer of documentation valuable during warranty claims, as detailed in [this diagnostic toolkit](https://appliancedoctorz.com/how-to-diagnose-dishwasher-parts-during-warranty-periods).
Looking ahead, I predict that smart diagnostics and IoT-connected tools will become standard, enabling even amateurs to perform complex diagnoses remotely. Already, apps are beginning to alert homeowners about potential issues before breakdowns occur, making routine maintenance more proactive than reactive.
To maximize your dishwasher’s performance, I advise integrating these tools into your maintenance routine. For instance, start by checking your water hardness with the test strips, then verify electrical components with a multimeter before replacing any parts. These precise steps can save you time and money over the life of the appliance. For an immediate upgrade, try calibrating your water softener settings based on recent test results, as this small adjustment can significantly extend the lifespan of your dishes and internal parts. Want to see better results quickly? Implement one of these expert-recommended techniques today to keep your dishwasher working at its best.
What I Wish I Knew Before My First Dishwasher Upgrade
One of the most eye-opening realizations for me was that even small choices, like selecting the wrong detergent or ignoring soft water testing, could jeopardize my warranty. It taught me that paying attention to detail isn’t just about maintenance—it’s about safeguarding my entire appliance investment. Listening to repair technicians and reading manufacturer guides revealed less obvious pitfalls, like improper soft water calibration or neglecting to clean filters regularly, that silently undermine long-term performance.
The Power of Precise Parts Selection and Professional Setup
Nothing compares to the confidence that comes with choosing manufacturer-approved parts and following proper installation procedures—tools I now use regularly include a digital multimeter for electrical tests and a reliable water hardness test strip. I learned that mismatched parts or shortcuts during setup can void warranties and cause costly failures down the line. Regularly consulting reputable resources, such as guides on selecting the right parts and understanding dishwasher components, has become part of my routine, saving time and money.
Small Details That Make or Break Your Warranty
Over the years, I discovered that overlooked elements like high loops in drain hoses, proper grounding, and discreet app-logged diagnostics are vital. Documentation and proper maintenance logs can be the difference between a warranty approval and rejection—lessons that changed how I approach repairs. I now consider these details for every service visit, knowing that they create a safety net for unexpected issues, especially as smart dishwasher features evolve and logs become integral evidence in warranty claims.
Resources That Transformed My Warranty Confidence
I rely heavily on tools like install parts guides for correct setup, troubleshooting checklists, and detailed manuals on dishwasher parts understanding. These resources empower me to catch issues early, ensure proper setup, and protect my warranty coverage, turning complex repairs into manageable tasks rather than surprises.
Your Move: Protecting More Than Just Your Dishwasher
Protecting your investment goes beyond following steps—it’s about adopting a proactive mindset. Regular testing, meticulous part selection, and thorough documentation buffer you against the common pitfalls that lead to denied warranty claims. For example, verifying water quality before installation or maintaining app logs during usage can make all the difference. Embracing these habits means you’re not just fixing problems—you’re preventing them, ensuring your appliance performs optimally for years to come.
Have you ever overlooked a small detail that ended up costing you in warranty or repair? Share your story below—your experience might help others avoid similar pitfalls and keep their dishwashers running smoothly for years to come.
Related Posts
The Hidden Filter Most Homeowners Never Clean
It happened to me fast. I opened my dishwasher after…

Why Soft Water Might Be Ruining Your Best Wine Glasses
I remember the first time I pulled out a beautifully…

The Water Hardness Setting Most People Forget to Change
You know that sinking feeling when your new dishwasher starts…
Comments are closed.