
Ever been halfway through a wash cycle when your dishwasher suddenly starts shaking violently? It’s a gut-wrenching moment, especially when all you wanted was to enjoy some peace while your dishes get sparkling clean. I remember the first time this happened in my home; I was convinced a major part had broken and was about to call for professional help. But after some digging and trial, I realized that the culprit was surprisingly small—a tiny plastic part that caused big vibrations. That eye-opener changed everything for me, and I want to share that revelation to save you similar frustration.
The Common Culprit Behind Unpleasant Vibrations in Your Dishwasher
That insignificant plastic piece is often overlooked because it’s so small and easy to dismiss. Yet, it plays a crucial role in stabilizing the rotating components during the spin cycle. When this tiny part, often called the dishwasher’s balancing insert or a related clip, becomes dislodged or damaged, it can set off a chain reaction leading to intense vibrations and potentially even damage. It’s akin to a small pebble causing your car’s shock absorbers to shake loose—something seemingly minor with major consequences. Understanding and replacing this part can preserve your appliance’s lifespan and sanity.
Is a tiny plastic part really responsible for such chaos? Or am I overhyping the issue?
You might be skeptical, and truth be told, I was too at first. I initially assumed an imbalance in the load or uneven flooring was the cause. My mistake? I didn’t inspect the micro-components that hold everything together—a mistake I urge you not to make. As I learned from my experience, many appliance failures stem from overlooked small parts, and identifying them can save a lot of money and hassle. For more detailed info, check out this guide on essential dishwasher parts.
Now that we understand the what and the why, let’s move toward the how. In the next sections, I’ll walk you through the practical steps to diagnose and fix this tiny yet mighty contributor to your dishwasher’s chaos. Ready to regain control over those wild cycles? Let’s dive in.
Prepare Your Tools and Workspace
Before diving into the repair, gather essential tools: a Phillips and flat-head screwdriver, pliers, a flashlight, and possibly a replacement part from this guide. Clear a workspace near your dishwasher—lay down a towel to catch any drips and to keep small parts from bouncing away during disassembly.
Disconnect Power and Water Supply
Always unplug the dishwasher or turn off its circuit breaker to prevent electrical hazards. Shut off the water supply at the valve behind or beneath your appliance. Think of this step as shutting off the water and electricity before performing open-heart surgery on your dishwasher—necessary for safety and peace of mind.
Access the Interior Components
Remove the lower kickplate panel by unscrewing the screws along the bottom edge. Use a flashlight to locate the main tub and identify the small plastic clip or insert that holds the balancing or spinning parts in place. In my experience, gently prying off the panel reveals the tiny part hiding in plain sight, often secured with clips or snaps.
Identify and Remove the Faulty Part
Carefully detach the damaged or dislodged plastic component using pliers if necessary. Remember, plastics can be brittle—apply controlled force to avoid breaking adjacent parts. If unsure, consult this resource for part diagrams. During my last fix, I used a small flat-head screwdriver to gently pry off the clip, which freed the worn-out piece easily, saving me from costly replacements.
Replace with a Proper Part
Match your new part with the old one, ensuring compatibility. Place the new clip or insert carefully into its designated slot, pressing firmly until it snaps into place. This step is like installing the final piece of a puzzle—it must fit perfectly to restore stability and function.
Reassemble and Test
Reattach the kickplate panel and tighten all screws. Restore the water and power supply, then run a short wash cycle to verify that vibrations are gone. If the issue persists, double-check the part installation and examine other micro-components. Remember, a successful repair can be as satisfying as fixing a complex piece of machinery—like tuning a fine instrument to its perfect sound.
Keep Your Warranty in Mind
If your dishwasher is still under warranty, review the warranty policies before proceeding with parts replacement. Using genuine parts and following proper procedures ensures your claim remains valid, preventing any disputes over coverage.
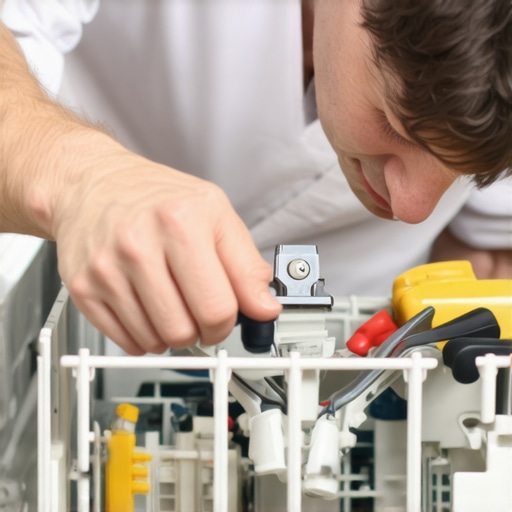
Many homeowners assume that following basic instructions and choosing the right parts guarantees a smooth dishwasher setup and valid warranty coverage. However, the reality is far more nuanced. A prevalent misconception is that all installer choices, parts, or warranties are interchangeable or self-explanatory. This oversimplification can lead to costly mistakes, including voided warranties or prolonged malfunctions. For instance, selecting generic parts over OEM (Original Equipment Manufacturer) components might seem economical initially, but expert insights reveal that compatibility issues and durability problems frequently arise, ultimately jeopardizing your warranty status. Dive into this guide on proper parts selection to understand the importance of choosing genuine components to safeguard your warranty.
Why Are Hidden Nuances So Critical in Dishwasher Care?
A common trap is underestimating the importance of micro-components during installation and maintenance. Someone might think that tightening a water inlet or drain connection suffices, but neglecting details like ensuring the correct sealing or verifying the installation height can lead to persistent leaks, which often aren’t covered under warranty. Additionally, many assume that warranty policies cover every issue related to parts or installation; however, understanding the fine print of warranty coverage reveals that improper installation or use of incompatible parts can void your claim. This underscores the importance of paying attention to expert-approved practices during setup and maintenance.
Moreover, misconceptions about warranty claims being straightforward are widespread. For example, some believe that simply providing a receipt is enough to secure coverage, but at an expert level, documentation of professional installation, detailed photos, and troubleshooting logs are often necessary to substantiate your claim. Without these, even legitimate warranty issues might be denied, wasting time and money. For a comprehensive overview of warranty processes, check out this resource on diagnosing warranty-period parts.
Advanced Tips: Avoid These Critical Mistakes
One significant, often-overlooked mistake is relying on outdated or cheap replacement parts that don’t meet the manufacturer’s specifications. This can impair not only the appliance’s performance but also invalidate your warranty. Always verify the compatibility and quality of parts, referring to this guide on parts for long-term performance. Additionally, many users neglect to document their repairs meticulously, which is crucial when filing warranty claims. Photographs before and after repairs, along with receipts and professional installation records, can make the difference between a successful claim and a denial.
Finally, it’s vital to recognize the distinction between manufacturer guidance and installer practices. While DIY fixes are tempting, they can inadvertently bypass warranty protections if not aligned with manufacturer instructions. Expert advice emphasizes consulting professional service or accredited technicians when uncertainties arise, as this can preserve your warranty rights and ensure proper operation.
Have you ever fallen into this trap? Let me know in the comments. Navigating the intricate details of installation and warranty claims requires more than just basic knowledge—it calls for an expert eye to avoid costly pitfalls and maximize your appliance’s lifespan.
Prioritize Precise Tools for Reliable Repairs
Building confidence in maintaining your dishwasher over time hinges on using the right equipment. I personally swear by a high-quality digital multimeter, such as the Fluke 117, because it provides exact measurements of heating elements and sensors, essential for diagnosing electrical issues accurately. Additionally, a set of fine-tipped needle-nose pliers allows me to handle tiny clips and micro-components with finesse, preventing accidental damage. Investing in a sturdy precision screwdriver set—including Phillips and Torx drivers—ensures you can access intricate panels and secure connections without stripping screws. These tools have become invaluable in my toolkit, enabling efficient, safe, and precise repairs that safeguard your appliance’s warranty and longevity.
Avoid Pitfalls with Quality Image-Enhanced Diagnostics
Using reliable tools extends beyond physical instruments. Incorporating a portable LED inspection torch helps illuminate those hard-to-reach areas, revealing cracks or dislodged parts that might otherwise go unnoticed. For example, examining the water inlet valve or the spray arm hinges becomes much easier. For more complex scenarios, a diagnostic code scanner compatible with your dishwasher model can decode error messages directly, saving time and effort. Regularly calibrating these tools and keeping them clean enhances their accuracy, leading to more effective troubleshooting and preventing unnecessary replacements. Remember, micro-components like sensors and micro-switches are delicate; handling them with precision tools avoids voiding warranties and extends the appliance’s lifespan.
Prepare for the Future with Smart Maintenance Strategies
Looking ahead, automation and smart diagnostics are set to revolutionize appliance care. Future tools may include AI-driven diagnostic apps that analyze error codes and usage patterns to recommend tailored maintenance routines—think of it as having a virtual technician by your side. For now, mastering fundamental equipment like multimeters and inspection torches provides a solid foundation. Implementing routine checks—like verifying the continuity of heating elements or testing sensor resistance—using these tools can prevent small issues from escalating into full-blown malfunctions. This proactive approach not only saves money but also preserves your warranty coverage, especially when documentation is needed to support warranty claims. To stay ahead, consider periodically reviewing your toolset and expanding it with advanced diagnostic equipment that’s compatible with your model.
How Do I Maintain My Tools and Keep Them in Top Shape?
Proper maintenance of your diagnostic tools is crucial for consistent accuracy. Store your multimeter in a protective case, keep test leads neatly coiled, and replace batteries as needed. Clean lenses and probes with soft cloths to prevent corrosion, and periodically check calibration accuracy against known standards. By doing so, your tools will provide reliable readings over many years, ensuring your troubleshooting remains precise and effective. Developing this habit will make every repair smoother, and you’re less likely to overlook critical micro-components, which can be vital for safeguarding warranties and achieving long-term performance. Ready to elevate your maintenance game? Try calibrating your multimeter before your next diagnosis, and see how much more accurate your readings become.
What I Wish I Knew Before Tackling Tiny Components
One of my biggest takeaways came from realizing that small parts like clips and inserts are often the silent heroes—or villains—in appliance performance. Overlooking them can lead to recurring issues and voided warranties. I learned that patience and attention to micro-details protect both my dishwasher and my warranty coverage, saving me time, money, and frustration.
I also discovered that relying solely on generic parts is a risky gamble. Genuine OEM components may cost a bit more upfront but give peace of mind through guaranteed compatibility and durability. The importance of meticulous documentation—photos, receipts, and installation records—cannot be overstated when pursuing warranty claims, ensuring your rights are protected.
Finally, I understood that using the right diagnostic tools, like a quality multimeter and LED inspector, transforms guessing into confident troubleshooting. Investing in these essentials is a game-changer for anyone committed to maintaining their dishwasher’s health long-term.
My Secret Arsenal for Troubleshooting Dishwasher Woes
Over the years, my toolkit has evolved to include a reliable digital multimeter, like the best-quality multimeter, precise needle-nose pliers, and a portable LED inspection torch. Each tool plays a pivotal role in diagnosing micro-component issues accurately and safely. Additionally, I trust detailed resources such as this comprehensive guide on parts inspection for step-by-step instructions that prevent costly mistakes.
Staying updated with advanced diagnostic equipment, like smart error code scanners compatible with newer dishwashers, further enhances my ability to catch problems early and protect warranties. Remember, equipping yourself with the right tools makes each repair a confident and rewarding experience.
Step Up Your Dishwasher Game Today
Taking control of your dishwasher’s maintenance isn’t just about fixing problems—it’s about becoming an informed advocate for your appliance. Embrace the micro-components, invest in quality tools, and stay diligent with documentation. Your dishwasher will thank you with reliable performance and an extended lifespan, and your warranty remains intact when you follow these best practices. Ready to turn those small parts into your secret advantage? Start today and watch your confidence grow.
Related Posts
How to Find Your Unit’s Hidden Model Number for Replacement Parts
I was flat on my back, a cold puddle of…
The Proper Way to Inspect a Second-Hand Dishwasher Before Buying
Ever found yourself deep in a thrift store or scrolling…

The Critical Difference Between Factory and Aftermarket Gaskets
Have you ever been in the middle of a dishwasher…