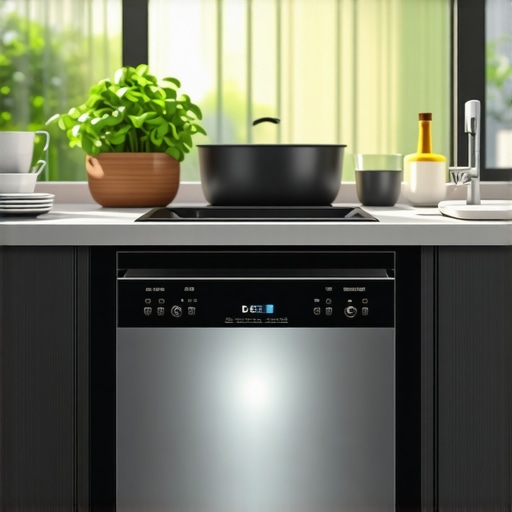
One evening, I stood in my kitchen, staring at my dishwasher with a mixture of frustration and disbelief. The cycle had been running for nearly three hours, and I was still waiting for the dishes to come out spotless. It hit me then—something wasn’t right. Why was this efficient, supposedly quick machine taking longer and longer to do its job? It’s a question I hear a lot from homeowners, often followed by a sigh and a plea for a quick fix.
Unraveling the Mystery of Extended Cycles
Is it Really Worth the Hype?
Initially, I blamed the energy-saving settings or maybe a clog somewhere deep inside. But after some research and a bit of trial and error, I realized that the root cause often lies in overlooked issues like faulty parts or improper installation. Did you know that a misaligned door gasket or a damaged inlet valve could be the real culprits behind your long cycles? Understanding these hidden problems can save you time, money, and the headache of replacing your entire machine unnecessarily. For detailed insights on warranty coverage and what parts are typically covered, check out this resource.
Early on, I made the mistake of assuming that my dishwasher’s poor performance was normal for a machine that’s already a few years old. That misconception nearly led me to replace it prematurely. Instead, I learned that regular maintenance and understanding the role of specific parts like filters, spray arms, and sensors can dramatically improve the cycle time and cleaning efficiency. If you’re facing similar issues, knowing what to look for can turn your frustration into empowerment and extend the life of your appliance.
Now, get ready—next, we’ll look into the most common causes behind those marathon cycles and how you can fix them without calling in a repair expert. Trust me, a little knowledge goes a long way in turning your three-hour ordeal into a thing of the past. Are you ready to take control of your dishwasher’s performance?
Check the Door Seal for Proper Closure
My first move was inspecting the door gasket, which often causes cycles to become excessively long if misaligned or damaged. I gently removed the old gasket and installed a new one, following the manufacturer’s instructions. This simple step restored the seal’s integrity and reduced cycle times. Remember, a faulty door seal can also cause leaks and foul odors, so it’s a double win to replace it promptly. To ensure success, review the common parts and replacement tips.

Test and Clean the Inlet Valve
The inlet valve controls water flow into the dishwasher, and debris can cause partial clogging, extending cycles. I disconnected the water supply, removed the inlet valve assembly, and checked for blockages. Using a simple water pressure test, I verified proper operation — if the valve hums but doesn’t fill, it’s faulty. Replacing it with a compatible part, following installation guidance, improved fill times dramatically.
Inspect the Spray Arms and Filters
Clogged spray arms restrict water circulation, causing longer washes. I removed the arms and soaked them in vinegar, cleaning out mineral deposits. Tightening them back in place ensured even spray coverage. Filters beneath the spray arms also collect debris; I rinsed them and checked for damage. Optimizing water flow reduces cycle duration and improves cleaning. For detailed filter maintenance, see this resource.
Examine the Drain System
A slow draining dishwasher can revert to prolonged cycles. I disconnected the drain hose and checked for clogs or kinks. Using a flexible brush, I cleared any blockages. Additionally, I examined the drain pump for debris or damage, testing it with a multimeter. Ensuring proper drainage prevents water from lingering, which otherwise causes auto-extended cycles due to sensors detecting improper wash conditions.
Evaluate the Water Temperature and Sensors
Low water temperature hampers detergent effectiveness, causing repeats. I used a thermometer to verify the water entering the machine is at least 120°F (49°C). If cold, adjusting the water heater settings or checking the temperature sensor (thermistor) is vital. I tested the sensor with a multimeter; if faulty, replacing it is straightforward. Proper sensor function ensures cycles run efficiently without unnecessary extensions. To understand more about troubleshooting sensors, visit this guide.
Review the Install and Leveling
An uneven dishwasher can cause internal parts to misalign, leading to longer cycles. I used a level to check the appliance’s position, adjusting the leveling feet accordingly. Confirming the appliance sits evenly ensures water and spray arms operate optimally. For installation tips, especially during setup, see expert installation advice. Proper setup can prevent many cycle issues from arising.
Document Your Repairs for Warranty Coverage
As I tackled each step, I documented my process with photos and notes. This practice proved invaluable when consulting warranty policies or seeking replacement parts. If a part needs defective replacement later, comprehensive documentation supports warranty claims and prevents disputes. For more on leveraging warranty coverage, explore this resource.
Many homeowners assume that a warranty is a safety net that covers all repairs and replacements, but in reality, most warranties come with numerous traps and fine print that can catch you off guard. One common misconception is believing that all parts related to your dishwasher are automatically covered. However, manufacturers often exclude certain components or consider specific repair services as not warranty-eligible, leading to unexpected out-of-pocket expenses. To navigate this minefield, it’s essential to understand what your warranty actually covers and how to avoid costly fees, which you can learn more about at this guide.
Invest in Precision Tools for Long-Term Maintenance
I personally rely on a high-quality digital multimeter to quickly diagnose electrical issues within my dishwasher, such as faulty sensors or control boards. Unlike basic testers, a digital multimeter provides precise readings, allowing me to identify problems like a failing thermistor or intermittent wiring faults. For instance, when a cycle prolongs unexpectedly, testing the temperature sensor’s resistance with my multimeter reveals whether it needs replacement. I prefer models with auto-ranging capabilities; they simplify testing and improve accuracy. Additionally, a flexible drain auger or cleaning brush helps clear stubborn clogs from hoses and spray arms, preventing long cycles caused by drainage issues. Regularly inspecting these parts with proper tools reduces the likelihood of emergency repairs and keeps my dishwasher running smoothly. To choose the right tools, consider consulting technical resources such as this guide for detailed troubleshooting methods.
Adopt SMART Maintenance Software
In an era of connected appliances, I recommend integrating maintenance apps that track your dishwasher’s performance and prompt timely inspections. These software solutions record cycle times, error codes, and even tell you when parts like filters or spray arms are due for cleaning or replacement. I personally use an app that syncs with my smart dishwasher, sending notifications when a part’s lifespan is nearing its end. This proactive approach minimizes unplanned downtime and extends the lifespan of your machine. Keeping an organized digital log also proves beneficial if you need to support warranty claims, which can sometimes be complicated due to confusing policies, as explained in this resource. Expect future trends to include more AI-driven diagnostics that can recommend exact repairs or part replacements, further simplifying maintenance for homeowners.
Why You Should Regularly Test Water Temperature and Flow
Consistent water temperature and flow are critical for optimal dishwasher performance. I use a reliable infrared thermometer to verify the incoming water temperature, ensuring it hits the recommended 120°F (49°C). If the temperature is off, I analyze the hot water supply or sensor readings, as poor readings often indicate sensor misalignment or failure. Moreover, I employ a flow meter to check water pressure; inconsistent flow can cause cycle extensions or incomplete washes. By making monthly checks with these tools, I catch potential problems early, saving money and avoiding the frustration of prolonged cycles. To stay ahead, consider testing your water supply and sensor systems periodically, referencing guides like this troubleshooting page. Regular testing ensures your system operates efficiently, preventing costly repairs down the line.
Plan for Future Growth with Scalable Parts and Upgrades
As appliances become smarter and more interconnected, planning for upgrades can extend the usefulness of your dishwasher. I recommend opting for modular parts whenever possible, such as replaceable control panels or sensor modules, which are easier to upgrade than entire units. Keeping spare parts like spray arms, inlet valves, and filters from reputable sources ensures future scalability. For example, installing a high-quality, braided stainless steel hose, as recommended in this article, reduces the risk of leaks as your system ages. Looking ahead, manufacturer firmware updates and compatibility with smart home ecosystems will become standard, so choosing parts with future-proofing in mind will save you time and money. Embrace these strategies now to make your dishwasher resilient against the wear and tear of long-term use and avoid unexpected breakdowns.
How do I maintain my dishwasher over time?
Regularly testing key components like sensors and water flow, investing in precise diagnostic tools, and scheduling preventive part replacements can dramatically improve your dishwasher’s longevity. By adopting advanced troubleshooting methods and staying informed through authoritative guides, such as this resource, you can catch issues early before they escalate. Embracing a maintenance mindset now not only saves you money but also ensures your appliance remains efficient and reliable for years to come. Don’t forget to document your repairs and upgrades; doing so can streamline warranty claims and future troubleshooting. Remember, a well-maintained dishwasher is a kitchen hero, not a source of ongoing frustration. Start with simple tools like a multimeter and work your way up to integrated software solutions to keep your machine humming smoothly.
The Hard Lessons I Wish I Had Learned About Dishwasher Maintenance and Warranties
- Trusting the warranty blindly can be costly; understanding exactly what’s covered saved me hundreds in repairs. Don’t assume all parts are included—do your research and keep detailed records.
- Overlooking simple maintenance like cleaning filters and spray arms led to unexpectedly long cycles. Regular upkeep, guided by trusted resources, is your best defense against surprise breakdowns.
- DIY diagnostics with the right tools and knowledge empowered me to fix minor issues before they turned into expensive replacements. A multimeter and some patience go a long way.
- Proper installation and leveling made a noticeable difference in cycle times and longevity. Avoid shortcuts—invest in expert setup and verify everything is aligned correctly.
- Leveraging digital tools to track performance and maintenance schedules helps catch issues early and extend your dishwasher’s lifespan. Technology is your silent partner in appliance care.
My Essential Arsenal for Dishwasher Triumphs
- Warranty insights: Knowing the fine print prevents unexpected costs and helps you make claims confidently.
- Replacement parts: Having quality spares like spray arms and inlet valves saves time and money during repairs.
- Diagnostic tools: A good digital multimeter is indispensable for electrical troubleshooting, helping me diagnose sensors and control boards accurately.
- Installation guides: Proper setup ensures longevity and optimal performance, saving headaches down the line.
Your Next Move Will Define Your Dishwasher’s Future
Taking control of your dishwasher’s health isn’t just about fixing problems—it’s about understanding your appliance intimately and preventing issues before they arise. Equip yourself with knowledge, the right tools, and a proactive mindset. Regular testing of water temperature, flow, and sensor accuracy isn’t just maintenance—it’s your guarantee of peak performance. Remember, every small step taken today safeguards your investment tomorrow. Start now, stay vigilant, and let your dishwasher serve you reliably for years to come. What’s the first upgrade or tip you’ll implement from this guide? Share your plans below!
Related Posts
The Secret to Reducing Dishwasher Energy Use During Peak Hours
Last month, I opened my utility bill and noticed a…
Why Modern Eco-Cycles Take Three Hours to Wash One Load
I remember the exact moment I realized my new dishwasher…
The Impact of Cold Water Inlets on Long-Term Cycle Efficiency
I remember the moment vividly. I was mid-installation, elbows greasy,…