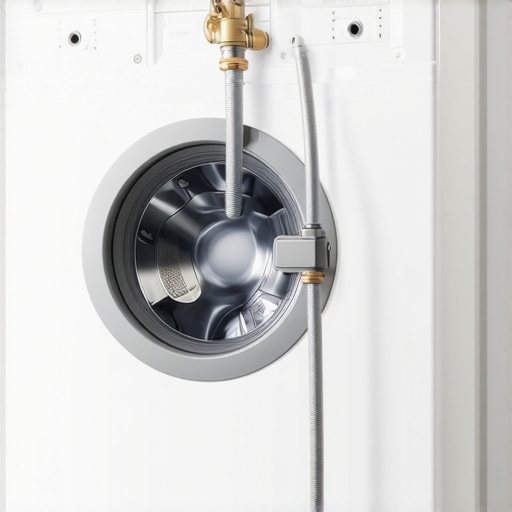
One afternoon, I leaned under my kitchen sink, ready to get my hands dirty with a simple plumbing fix. As I tightened the compression nut, I suddenly felt it give just a bit too much. Next thing I knew, water was squirting everywhere—on my face, the floor, and my new socks. That was my lightbulb moment: over-tightening isn’t just a bad habit; it’s a common culprit behind leaks and damaged parts.
Why Over-Tightening Your Compression Nut Is a Recipe for Trouble
Ever wonder why your dishwasher or faucet keeps leaking despite what seems like tight fittings? The answer often lies in how we tighten those little compression nuts. It’s tempting to think that more is better—especially when dealing with water—and in our eagerness to prevent drips, we crank them down until we can’t anymore. But here’s the thing: over-tightening can distort the fittings, crack the plastic or metal components, and ultimately cause even worse leaks. According to plumbing experts, a nut should be snug enough to prevent leaks but not so tight that it pinches or warps the sealing surfaces. Early on, I made the mistake of tightening until I felt resistance—that’s a common error that nearly cost me a flooded kitchen. To avoid repeating that mistake, I learned that the correct seating of a compression nut is a skill worth mastering.
Is It Really Worth the Fuss If I Loosen It Slightly Sometimes?
You might be skeptical, thinking, “If tighter is better, why would I loosen it?” Well, I learned this the hard way: snug isn’t tight. Over-tightening crushes the gasket or crushes the fitting itself, leading to leaks over time. Properly seating a compression nut involves a delicate balance—tight enough to seal, but not so tight that it damages the components. If you’ve faced persistent leaks or noticed your fitting’s threads are damaged, you know exactly what I mean. Remember, patience and the right technique are key. For comprehensive guidance on installation and the importance of using the correct parts, check out my step-by-step guide.
Get the Right Grip: Tightening the Compression Nut Efficiently
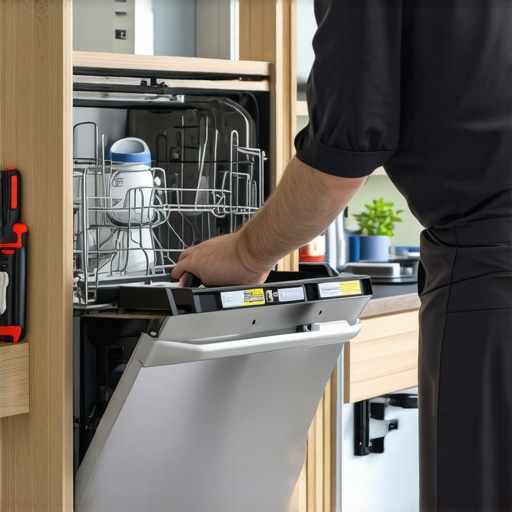
Once you’ve assembled your dishwasher’s water inlet connection, it’s crucial to tighten the compression nut correctly. I recall a time when I was replacing my supply line, and I was tempted to give the nut a few extra turns, thinking it would seal better. Instead, I ended up cracking the plastic fitting. To avoid that mess, use a basin wrench or adjustable pliers to hold the fitting steady while tightening the nut by hand until it’s snug. Then, give it a quarter-turn with a wrench—nothing more. This method ensures a secure seal without risking damage or leaks.
Use the Right Tools to Prevent Over-Tightening
Imagine trying to tighten a bolt with a wrench that’s too large; it’s easy to apply too much force without realizing it. Similarly, using the correct-sized tools makes it easier to feel when the nut is sufficiently tight. When installing the water supply, grip the nut with a 7/8-inch or adjustable wrench, and stand firm but gentle. Remember, the goal is to compress the gasket evenly—if it stops turning with minimal resistance, you’re there. Applying too much pressure can distort the gasket or crack the fitting, leading to long-term leaks. For detailed guidance, check out my step-by-step installation guide.
Recognize the Feel of Proper Tightness
Here’s a trick I learned after a few shaky attempts: tighten until you feel resistance, then stop. Think of it like screwing in a lightbulb—don’t force it until it screams for relief. Over-tightening often feels like twisting a screw until it’s cramped, which damages the threads or gasket. When you reach optimal tightness, the connection is firm but not strained—no water should seep out under pressure. I once fixed a leak this way after battling persistent drip issues, and it held up through multiple dishwasher cycles. Be attentive to how the connection feels—your hands are the best sensors for this task.
Keep Your Reaming Safe: Avoid Common Mistakes
During my first attempts, I made the mistake of wielding my adjustable wrench like a crowbar, which resulted in stripped threads and a leaky connection. Remember, patience beats brute force. Use gentle, consistent pressure, and periodically check for leaks by slowly turning on the water supply. If water escapes, tighten a little more—stop once it stops. To reinforce your confidence, explore additional tips on parts and installation techniques. Properly tightened compression nuts not only prevent leaks now but also extend the lifespan of your connection, saving you costly repairs later. When in doubt, consulting detailed guides or videos can help develop your feel for the right tightness, ensuring your dishwasher operates flawlessly without water damage risks.Many homeowners believe that understanding warranty policies and choosing the right parts for their dishwashers is straightforward, but the truth is far more nuanced. In fact, common assumptions can lead to costly mistakes and misunderstood limitations. Let’s dig deeper into these misconceptions and reveal what most people get wrong about warranties, installation, and parts.
A prevalent myth is that a manufacturer’s warranty covers everything related to the dishwasher’s performance. However, warranty coverage is often limited to specific parts that fail under normal use—like the pump or motor—while issues caused by improper installation or user error are usually excluded. According to appliance experts, reading the fine print is crucial; misconceptions here can result in denied claims and unexpected expenses. For detailed insights, visit my comprehensive parts warranty guide.
Another common trap is assuming that replacing parts with generic or third-party options never impacts warranty eligibility. While it might seem cost-effective initially, using non-OEM parts can violate warranty terms and affect the appliance’s longevity. Experts emphasize that the compatibility and quality of parts are vital—using the wrong gasket or valve might lead to leaks or damage, voiding your warranty. To understand the importance of selecting the right components, see my guide on parts selection for warranty safety.
Advanced installers know that insecure or improper installation techniques are hidden pitfalls many overlook. For instance, over-tightening fittings or neglecting to secure the high loop properly can cause leaks that appear to be appliance faults but are actually installation errors. These can be tricky because they fall outside the scope of warranty coverage. To avoid this, it’s essential to follow expert installation procedures outlined in my step-by-step installation guide.
Now, you might wonder about the impact of parts quality on warranty claims. Cheap, low-quality components can deteriorate quickly or fail prematurely, making it look like the appliance is at fault. Yet, warranty policies sometimes exclude coverage if the failure results from inferior parts. Therefore, understanding the subtle distinction between defect-related failures and poor maintenance or third-party parts use is essential. For a deep dive into this subject, check out my article on parts and maintenance.
Finally, many overlook the importance of proper documentation. Keeping detailed records, such as receipts for parts, photos of correct installation, and maintenance logs, can be the difference between a successful warranty claim and a denied one—especially when disputes arise over what caused the failure. Explore my tips on proving proper installation to prevent such issues.
Have you ever fallen into this trap? Let me know in the comments. Remember, mastering these nuances isn’t just about avoiding repairs—it’s about ensuring your dishwasher performs reliably for years to come.
Investing in the Right Tools for Long-Term Performance
If you’re serious about maintaining your dishwasher and ensuring it runs efficiently over the years, investing in the right tools is non-negotiable. I personally rely on a high-quality digital multimeter because it allows me to measure electrical components like thermostats and heating elements with precision. For instance, testing the thermal fuse or checking continuity in door switches become straightforward with a multimeter, helping diagnose potential issues before they turn into costly repairs. Additionally, a precision torque wrench is essential for tightening fittings to manufacturer specifications without risking damage—crucial when installing or replacing parts like inlet valves or spray arms. I prefer models with adjustable settings and clear torque indicators, which eliminate guesswork. For the DIY enthusiast, having these tools accessible streamlines maintenance and prevents over-tightening that could compromise seals or plastic fittings, a common cause of leaks.
Automating Maintenance with Software and Reminders
Beyond physical tools, embracing technology can make maintenance more manageable. I use a maintenance tracking app tailored for appliances, which notifies me of upcoming service intervals based on use cycles—saving me from unexpected breakdowns. These apps often integrate with manufacturer’s manuals and warranty details, providing quick access to troubleshooting guides. For example, setting reminders for periodic cleanings of filters and sensors—like turbidity sensors—ensures optimal performance and extends appliance lifespan. As the trend advances, AI-driven monitoring systems are emerging, offering predictive diagnostics that alert homeowners to potential issues before failure occurs. Keeping abreast of these innovations positions you to maintain your dishwasher proactively, rather than reactively.
How do I keep my dishwasher parts in top shape over time?
Regular inspection and proper handling of parts are vital. Always consult manufacturer guidelines when replacing or adjusting components. I recommend referring to detailed guides on parts replacement to avoid incorrect installations that can void warranties. Using the appropriate tools, such as a calibrated torque wrench, ensures fittings stay secure without risking damage. Moreover, when dealing with critical parts like the inlet valve or spray arms, check for signs of debris accumulation or wear and replace them promptly—delaying could cause leaks or poor cleaning performance. Remember, following the manufacturer’s recommendations and documenting each maintenance activity can simplify warranty claims and future troubleshooting. For more insights on selecting durable parts, visit my warranty-safe parts guide. Embrace these best practices, and you’ll enjoy a dishwasher that not only works longer but operates more efficiently, saving you money and frustration in the long run.
Lessons Only Experienced Plumbers Will Share
One personal breakthrough was realizing that even seemingly minor over-tightening can lead to major leaks, saving me from flooding my kitchen and endless cleanup. I learned that patience and gentle tightening are more effective than brute force, which often causes plastic fittings to crack. Another revelation was that using tools with the right torque settings prevents stripping threads or crushing gaskets, reminding me that investing in quality tools pays off long-term. Finally, understanding that proper positioning of supplies—like high loops—works hand-in-hand with correct tightening for a leak-free connection, a lesson that changed my approach to DIY plumbing projects.
Tools and Resources That Changed My Approach
- Digital Torque Wrench: Ensures you tighten fittings to manufacturer specs, preventing damage and leaks. I trust the brands that offer precise adjustments and durability.
- Step-by-Step Guides and Videos: The online tutorials from Appliance Doctorz provided clarity I couldn’t get elsewhere, turning my DIY into success stories.
- Quality Replacement Parts: Selecting parts like the most reliable dishwasher parts ensures longevity and reduces the risk of leaks and failures.
- Professional Consultation: Sometimes a quick call to an expert saves hours of trial and error, especially when dealing with tricky fittings or warranty questions.
Embrace Action—Your Dishwasher Will Thank You
The journey to leak-proof dishwasher connections might seem daunting at first, but with the right mindset and tools, you can become confident in your skills. Remember, proper tightening not only prevents costly water damage but also extends your appliance’s lifespan, making your home safer and more efficient. Keep learning, adjust your techniques, and don’t hesitate to revisit trusted guides to refine your craftsmanship. Your dishwasher’s performance and your peace of mind depend on it—so step up and take control today! And tell me, have you ever accidentally over-tightened a fitting and paid for it later? Share your story below.
Related Posts
Why Your Drain Hose High Loop Is Non-Negotiable for Safety
It was a frustrating Saturday when I discovered water pooling…
How to Align a Dishwasher Toe-Kick for a Flush Custom Finish
It was a moment of frustration that finally made me…
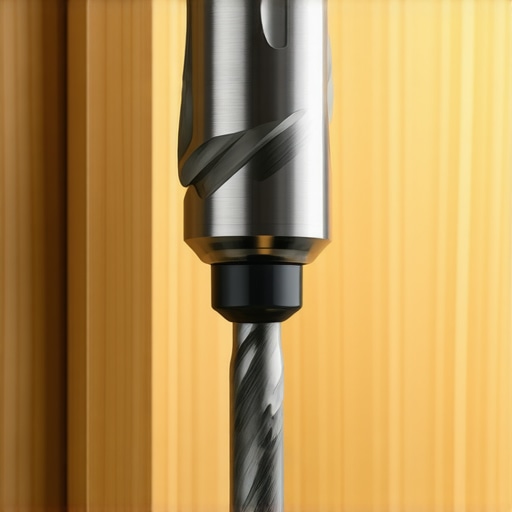
The Specific Drill Bit You Need for Cabinet Side-Mounting
I remember the first time I attempted to install a…