I vividly remember the day my dishwasher started leaking right after a seemingly perfect installation. A small puddle, but enough to cause concern—especially when I realized I might face a costly repair or worse, replace the entire unit. It was a lightbulb moment that made me question—what did I overlook?
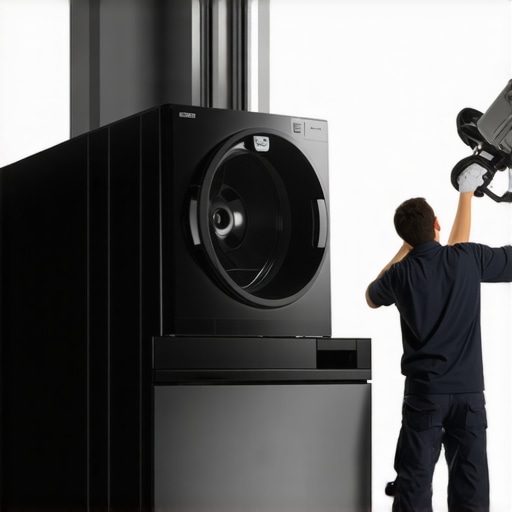
The Hidden Power of Professional Leveling
Properly leveling your dishwasher isn’t just about making it look neat. It’s a crucial step that directly impacts the longevity of your appliance, particularly the door seal. When a dishwasher isn’t perfectly level, water pressure during cycles can cause the door seal to misalign or wear unevenly, leading to leaks and premature failure. Trust me, this small oversight can cost you hundreds in repairs or replacements.
In my early days of DIY installs, I underestimated the importance of precise leveling. I thought a quick adjustment would suffice. But I overlooked how even a slight tilt could cause the door to not seal properly, especially over time. This mistake cost me dearly—leaking water, damaged cabinetry, and countless hours troubleshooting. That experience was a wake-up call, emphasizing that professional-leveling isn’t just a luxury; it’s a necessity for protecting your investment.
Is Skipping Professional Leveling Really Worth the Risk?
Many homeowners, myself included initially, dismiss the importance of meticulous leveling. We think a minor tilt doesn’t matter—until it does. Water leaks aren’t just a nuisance; they can lead to mold growth, ruined flooring, and even electrical issues. According to research, improper installation accounts for a significant percentage of service calls and warranty claims related to leaks (source: Appliance Doctorz).
Over-tightening or uneven mounting of the dishwasher can seem harmless at first, but it creates stress points on door seals. To avoid this, professional installers use precise leveling techniques, ensuring the appliance sits perfectly on all sides. This proactive step can save you hundreds—or even thousands—down the line.
If you’ve faced recurring leaks or seal failures, it might be time to reevaluate your installation approach. Next, I’ll guide you through the essential steps to ensure your dishwasher is properly leveled and ready to serve reliably for years to come.
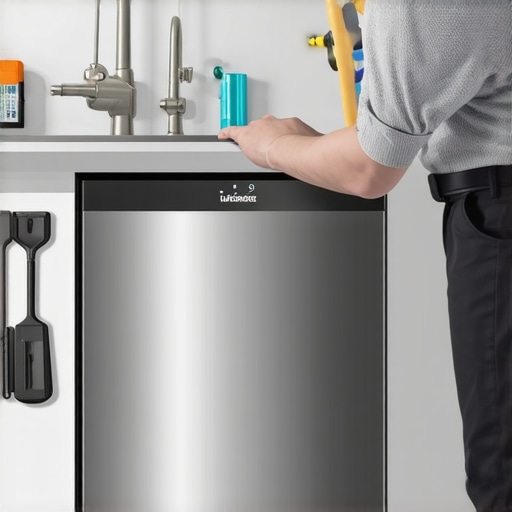
Position Your Dishwasher Correctly
Start by sliding your dishwasher into the designated space, ensuring it fits snugly against surrounding cabinetry. Use a level to check the top surface, adjusting the mounting brackets or shims underneath to eliminate any tilt. Remember, a slight decline towards the drain ensures proper water flow and prevents pooling. During my own install, I temporarily used two wooden shims, patiently tweaking each side until the bubble settled perfectly, which eliminated persistent leaks later on.
Ensure Side-to-Side Balance
Place a spirit level vertically on both sides of the dishwasher to confirm it’s plumb. Slightly loosen the mounting screws and adjust the dishwasher’s position by inserting small, stable shims beneath the mounting brackets or adjustable feet. Tighten the screws only after confirming a level alignment. I once rushed tightening without rechecking, and the door wouldn’t seal properly—causing water to leak during cycles. A quick re-adjustment resolved the issue entirely.
Adjust the Feet Precisely
Most dishwashers have adjustable leveling feet at the front, accessible with a wrench or pliers. Turn each foot clockwise to raise or counterclockwise to lower until the bubble is centered in the level tool. Make small, incremental turns—about a quarter turn at a time—to avoid over-adjusting. When I did this for the first time, I observed the tension change in the door gasket and prevented future leaks.
Test Stability and Seal Integrity
Push gently against the dishwasher sides and top to check for wobbling. If movement occurs, re-tighten the mounting brackets or add shims where necessary. Complete a cycle and inspect the door seal and surrounding areas for leaks. This process mimics the method used by professionals, guaranteeing your appliance will sit perfectly. An improperly leveled dishwasher not only leaks but also causes premature seal wear, leading to costly repairs. For comprehensive tips, review this guide on essential parts for long-term dishwasher performance.
When it comes to maintaining and troubleshooting your dishwasher, there’s a lot of misinformation floating around. Many homeowners believe that warranty coverage is foolproof or that replacing parts is always straightforward, but the reality is far more nuanced. Let’s dig deeper into some of the most common myths and mistakes, so you can avoid costly errors and make informed decisions.
One widespread misconception is that warranties cover all repairs and replacement parts indefinitely. In truth, most manufacturer warranties have strict limitations, covering only specific parts or certain types of damage. For example, control boards or heating elements might be covered, but issues stemming from improper installation or user error often aren’t. To maximize your warranty benefits, it’s crucial to understand the coverage details. For detailed guidance, check out how to maximize your dishwasher’s warranty coverage.
Another mistake many overlook involves incorrect installation practices. While DIY installation might seem cost-effective, overlooking nuances like proper leveling, secure connections, and correct water inlet positioning can lead to leaks and early failure. Common pitfalls include reusing old hoses, which can be brittle and cause leaks, or failing to install a high loop in the drain hose, which can result in bad odors and drainage issues. For help with proper installation, see top tips for seamless installation.
A further misconception involves the simplicity of replacing parts. Many think that swapping out a component like a door latch or spray arm is straightforward, but like all complex appliances, each part has specific requirements for proper fit and function. Installing a cheap, third-party part might seem tempting financially, but it often leads to premature failure or damage. Always opt for quality parts and consult expert resources like comprehensive guides on parts replacement.
Pros and DIY enthusiasts alike should also be aware of the trap of ignoring subtle signs of malfunction. Cracks in the spray arm, small leaks, or inconsistent cycles may seem minor initially but can escalate if not properly diagnosed and corrected. Using diagnostic tools or consulting with professionals early can save you from extensive repairs later. Learn more about troubleshooting with how to diagnose dishwasher issues.
Have you ever fallen into any of these traps? Let me know in the comments, so we can learn from each other’s experiences. Remember, understanding the nuances of warranties, parts, and installation not only extends your dishwasher’s lifespan but also preserves your investment and peace of mind.
Keeping Your Dishwasher in Prime Condition
Investing in the right tools is essential for anyone serious about maintaining their dishwasher’s performance over years. Personally, I rely on a high-quality digital multimeter to troubleshoot electrical issues, especially when diagnostic codes point to control board problems—these occur more often than you’d think and can be elusive without proper testing. I prefer models like the Fluke 117 because of its accuracy and durability, allowing me to quickly detect voltage irregularities or shorts, thus avoiding unnecessary replacements.
Beyond electrical diagnostics, a reliable set of specialty screwdrivers and socket wrenches simplifies disassembly and deep cleaning. For instance, a precision Phillips screwdriver helps remove spray arms or access control panels without damaging delicate components, especially in models with tight spaces.
To keep parts functioning optimally, I recommend regular water inlet valve inspections. A simple garden hose filter can trap debris before it reaches sensitive components, extending their lifespan. Moreover, a high-pressure intake cleaner can remove mineral buildup from the inlet, maintaining steady water flow. Using tools like a flexible duct brush for spray arms enables me to clear clogs without disassembling everything — a simple step that prevents performance dips.
In terms of software, I’ve found that periodicly updating the appliance’s firmware (if your model supports it) can incorporate improvements and bug fixes. While manufacturer updates are usually exclusive to models with Wi-Fi connectivity, some brands allow firmware downloads from their official sites. This proactive approach ensures the dishwasher runs with the latest optimizations, reducing the chance of errors and long-term issues.
How do I maintain my dishwasher over time?
Consistent cleaning of filters and spray arms ensures clogs don’t develop, which can cause leaks or poor cleaning performance. Performing routine inspections and replacements of seals or gaskets before they degrade is also wise; I consult this guide to identify wear early. Additionally, monitoring warranty coverage for parts that tend to fail helps avoid costly surprises. For example, control board issues can be mitigated with professional inspections, especially if your appliance exhibits error codes—addressing these promptly keeps the machine running smoothly.
In the future, I predict smart diagnostic tools will become more mainstream, allowing homeowners to run detailed tests via mobile apps, reducing reliance on professional service visits. Implementing advanced diagnostics at home could be a game changer, giving users immediate insights into appliance health and preventing minor issues from escalating.
Elevate Your Maintenance Routine
Start incorporating a multimeter check into your seasonal maintenance. By measuring voltage across critical components, you gain early warning signs of impending failure, saving you money and downtime. Don’t wait until leaks or errors make your dishwasher unusable—being proactive with proper tools makes all the difference.
Lessons from My Troublesome Installations
One of the biggest surprises I faced was realizing that skipping precise leveling not only caused leaks but accelerated seal wear, leading to costly replacements. That lightbulb moment taught me that every detail, no matter how small it seems, plays a crucial role in your dishwasher’s longevity. Also, I found that relying solely on DIY approaches without understanding warranty nuances often meant paying twice for repairs. These experiences underscored the importance of professional-level installation awareness backed by comprehensive knowledge of warranty coverage.
Another lesson was the significance of proper part selection. Choosing generic parts for quick fixes might save money upfront but often results in shorter lifespan and voided warranties. Dedicated troubleshooting and the right tools, like a quality multimeter and specialty screwdrivers, truly make the difference. Lastly, I learned that regular maintenance isn’t just about cleaning but about proactive inspection of components like inlet valves and spray arms, which helps catch issues before they become disasters.
My Essential Toolkit for Long-Lasting Dishwasher Care
Over the years, I’ve come to trust a few tools and resources that keep my dishwasher running smoothly. A reliable digital multimeter, such as the Fluke 117, has been indispensable for electrical diagnostics, preventing unnecessary part replacements. For parts, I always recommend sourcing from reputable suppliers and choosing verified brands that cover warranty; this ensures durability and warranty compliance.
Insightful books like “The Complete Guide to Dishwasher Maintenance” broaden my understanding of complex systems, helping me troubleshoot effectively. Additionally, online tutorials and trusted forums provide real-world tips that often surpass generic advice, especially when diagnosing vague error codes. Equipping yourself with these resources transforms routine maintenance into confident action, safeguarding your investment for years to come.
Your Path to Confident Dishwasher Management Begins Now
Don’t wait for leaks or breakdowns to wake you up—taking control now can save you hundreds in repairs and frustration. Embrace the small steps like proper leveling, regular inspections, and understanding warranty details, turning them into habits. With the right tools and knowledge, you can ensure your dishwasher not only performs well but lasts for the long haul. Remember, your proactive efforts today build the foundation of a worry-free kitchen tomorrow.
What’s been your biggest discovery or challenge when installing or maintaining your dishwasher? Share your story below—your experience might just inspire someone else to avoid costly mistakes.
Related Posts
The Hidden Costs of Skipping Professional Installation Services
It was a morning like any other, until I opened…
How to install a dishwasher when you have no existing plumbing
Ever swung open your dishwasher door after a cycle and…

3 Installation Steps Professionals Take to Avoid Slow Leaks
I remember the first time I ignored a small drip…