Ever opened your dishwasher after a cycle and wondered, “Why didn’t my dishes come out as spotless as I expected?” I remember my lightbulb moment vividly – after struggling with stubborn spots and lingering odors, I realized I wasn’t leveraging my rack loading properly. It was frustrating, but once I cracked the code, my cleaning results improved dramatically. If you’re tired of re-running cycles or torn between loading methods, you’re not alone. Many homeowners unknowingly make simple mistakes that hinder their dishwasher’s efficiency.
The Hidden Power of Proper Rack Loading
How you load your dishwasher can make or break its performance. I used to pile everything in haphazardly, thinking more dishes meant better use of space. Turns out, this approach diminishes water flow and leaves food residue untouched. After some trial and error, I discovered that thoughtful arrangement ensures water and detergent reach all surfaces. Proper rack loading isn’t just about fitting more plates; it’s about maximizing cleaning potential. This small change in technique can save you time, energy, and money in the long run. Want to learn exactly how to load like a pro? Stick around, and I’ll guide you through practical tips to optimize your rack loading for superior cleanliness.
Is Overloading Your Dishwasher Worth It?
One common fear I hear from skeptics is whether proper loading truly matters. The truth? Overloading can create blockages, prevent water from reaching all items, and cause unnecessary wear on your appliance. In fact, making the mistake of cramming too many dishes into the racks is a surefire way to compromise cleaning results. I learned this early on when my glasses came out streaky, despite using high-quality detergent. To avoid this pitfall, check out the important parts that influence cleaning and ensure your loading technique supports your dishwasher’s design. Proper rack management is simple but vital, and I promise, once you know how, you’ll wonder why you ever load any other way.
So, are you ready to transform your dishwashing routine? Let’s dive into practical steps to load your racks for maximum results, starting with understanding your dishwasher’s unique layout and capacity. By doing this, you’ll get sparkling dishes every time, with less hassle and more confidence in your machine’s capabilities—thanks to your smarter loading techniques.
Positioning Dishes Effectively
Start by placing larger items like pots, pans, and plates at the back of the rack, leaning them slightly forward to prevent water from pooling. For example, I once loaded a large baking dish sideways on a whim, expecting better coverage—results were disastrous, with water pooling and residue remaining. After that, I learned to angle items so water flows freely over all surfaces. Imagine your dishwasher as a racecar: the water spray is the steering and the dishes are the runners, needing clear paths to move efficiently. Proper positioning ensures each item gets the attention it deserves, allowing water and detergent to reach every nook and cranny.
Aligning Spray Arms
Next, check that spray arms spin freely without obstruction. Sometimes, small bits of food or broken utensil handles can block the nozzles. During my last load, I discovered a stray fork jammed between the arms, preventing rotation. To fix this, remove the spray arm (consult your user’s guide or check the installation parts), clear any debris, and reattach. Think of the spray arm as a gardener’s rotating sprinkler—if blocked, it can’t cover the entire garden, leading to uneven watering and dirty patches.
Placing Small Items Properly
Place cups and small utensils in the top rack, ensuring they are securely fastened upside down. During a recent load, I realized that cups placed upright and loose often collect water, leading to spots and odors. Using the designated racks with clips maintains stability and allows water to rinse thoroughly. Imagine hanging ornaments on a Christmas tree: hanging them correctly ensures they don’t fall or block water flow. Proper placement of small items prevents water pooling and guarantees a cleaner wash.
Optimizing Load Capacity Without Overcrowding
Overloading is a common mistake that blocks water pathways. I once tried fitting twice as many dishes, thinking more equals better. The result? Dishes came out streaky and unclean, and the cycle took longer. A good rule is to leave enough space for water to circulate freely—roughly 20% of space should remain open. Think of your dishwasher as a traffic junction: too many cars cause gridlock, preventing the flow of essential traffic—in this case, water and detergent. By loading efficiently, you maximize cleaning power while protecting your appliance’s lifespan.
Utilizing the Upper and Lower Racks Wisely
Arrange heavily soiled items on the bottom rack, facing the spray arm. Lighter, more delicate items like glasses should go up top, properly secured. I once placed a fragile crystal vase on the bottom and had to rewash after it got chipped due to jostling during the cycle. Ensuring that each item is accessible to water and detergent reduces re-washes and prolongs the life of your dishes. Remember, your dishwasher’s interior is like a well-organized workshop—each tool must be in its right place for optimal performance.
Final Checks Before Starting
Always double-check that nothing obstructs the spray arms or detergent dispenser. During my last load, I forgot to remove a large spoon from the bottom rack, which blocked the detergent door. This small oversight meant detergent didn’t dissolve properly, leaving residue on my dishes. Think of this step as a last-minute inspection—like a pilot checking the plane before takeoff—ensuring everything is in place for a smooth operation. Correctly loaded dishes not only come out cleaner but also extend the lifespan of your dishwasher, making each cycle more energy and water-efficient.
For more tips on maintaining your dishwasher’s parts and ensuring your warranty remains valid, visit this comprehensive guide.
Many homeowners believe that once a dishwasher is installed, their job is done, and that the manufacturer’s warranty will cover any unforeseen issues. However, I’ve seen numerous cases where improper installation practices, choice of parts, or neglecting warranty guidelines lead to costly damages or voided coverage. Let’s dig deeper into the nuanced mistakes behind this misconception, so you can avoid pitfalls that even seasoned DIYers often overlook.
Why the Right Parts Are More Than Just Compatibility
Many assume that using generic or inexpensive parts during installation won’t impact warranty coverage. In reality, manufacturers often specify particular components — like water inlet valves or spray arms — that meet strict quality standards. Using subpar or incompatible parts not only risks early failure but also potentially voids your warranty. For example, knowing the essential parts ensures you’re selecting only those that meet manufacturer specifications. Cutting corners here may seem like a saving, but in the long run, it’s a trap that leads to additional expenses and warranty disputes.
Are All Parts Created Equal When It Comes to Warranty?
Definitely not. Some parts, especially those prone to wear or damage, are often excluded from warranty coverage unless they meet the manufacturer’s standards. For example, an inferior plastic pump or non-approved spray arm isn’t just less durable — it could be the reason your warranty claim is denied. To better understand this nuance, review the detailed policies available at this guide and ensure you’re selecting parts that align with your warranty’s conditions.
Another common oversight involves improperly securing or installing critical components, which leads to early failures. Think of your dishwasher as a finely-tuned machine — if a part isn’t correctly installed, it can cause damage to other parts over time, jeopardizing the entire warranty coverege. Always double-check installation procedures, especially for parts like the drain pump or water inlet, by consulting resources such as this comprehensive guide.
When Setup Goes Wrong, Your Warranty Can Pay the Price
Placement and levelness during installation might seem trivial, but improper leveling can cause leaks, premature wear, or even electrical issues. Over-tightening connections or using non-approved sealants are classic traps. Such errors often lead to leaks or damage, which might be blamed on wear and tear rather than installation faults. Interestingly, these troubleshooting tips emphasize that proper installation is crucial for long-term warranty validity. Remember, many warranties require installation to be compliant with individual manufacturer guidelines; neglecting this can result in denied claims or expensive repairs.
What’s the Real Cost of Ignoring These Details?
Ignoring proper installation, parts selection, or neglecting warranty stipulations might save time or money upfront, but it often backfires. You may find yourself covering repair costs that could have been waived, or worse, losing warranty coverage altogether. A study by industry experts shows that up to 30% of warranty disputes stem from improper installation or the use of incompatible parts. Therefore, investing time in proper setup and understanding your warranty’s fine print isn’t just smart — it’s essential for protecting your investment.
Essential Tools for Reliable Dishwasher Care
Maintaining a dishwasher that performs optimally over the years requires not only understanding its crucial parts but also having the right tools at the ready. I personally swear by a high-quality multimeter when troubleshooting electrical components like thermostats or control boards, ensuring accurate readings and early detection of faults. For mechanical parts, a set of precision screwdrivers helps during routine inspections or when replacing worn-out parts such as door seals or spray arms. Invest in a tube of high-grade silicone grease, which I use specifically on wheel bearings and sliding rails to minimize wear and prevent squeaking. These tools have proven invaluable in prolonging the lifespan of my appliances and ensuring each cycle is as efficient as the first.
How do I maintain my dishwasher over time?
Regular maintenance is key to avoiding costly repairs and keeping your machine in top shape. Schedule bi-annual checks of spray arms and filters, and use a multimeter to verify electronic connections periodically. Cleaning the filter assembly with a soft brush removes trapped debris that can obstruct water flow. Applying a small amount of silicone grease to moving parts prevents rust and maintains smooth operation. For detailed procedures, consult expert advice on troubleshooting dishwasher parts. Keep an eye on seals and gaskets for signs of deterioration, replacing them proactively to prevent leaks and water damage.
Investing in Quality Parts Pays Off
Using premium, manufacturer-approved parts during replacements isn’t just about compatibility; it’s a strategic move to preserve your warranty and guarantee longevity. For instance, choosing OEM spray arms or water inlet valves, as detailed in parts selection guidelines, ensures your dishwasher maintains optimal pressure and spray coverage. When replacing components, I prefer to verify the part’s specifications with a digital caliper or multimeter to ensure precise fit and function before installation. This attention to detail helps avoid premature failures and keeps your warranty valid, especially as warranty policies become more stringent about part quality and installation standards.
Future Trends in Dishwasher Maintenance
Looking ahead, I anticipate a rise in smart diagnostic tools that connect directly to your smartphone, providing real-time alerts for component wear or inefficiencies. These innovations aim to reduce downtime and foster proactive repairs. As technology evolves, so will our ability to maintain these machines with greater precision and less effort, making lifelong appliance care both accessible and efficient.
What steps can you take today to improve your dishwasher’s long-term performance?
Start by investing in a reliable multimeter and learning to check your control board connections regularly. This small step can catch potential issues early — saving you money and stress. As you build confidence, incorporate routine filter and spray arm inspections into your maintenance routine, following expert guidance from this resource. Remember, a well-maintained dishwasher is not just about clean dishes; it’s about safeguarding your home from water damage and ensuring the appliance’s warranty stays intact for years to come.
What I Never Expected About Proper Loading
One of the most eye-opening lessons I learned was how critical the positioning of dishes truly is. Initially, I believed more was better, but I soon discovered that overcrowding actually hindered the cleaning process. This realization pushed me to experiment with spacing, leading to cleaner dishes and a longer-lasting machine. It taught me that patience and attention to detail can significantly enhance performance, saving time and money in the long run.
The Hidden Truth About Parts and Warranty Confidence
After replacing some parts with off-brand alternatives, I noticed a decline in performance and a complication with warranty coverage. It became clear that choosing manufacturer-approved parts isn’t just about compatibility—it’s about safeguarding my investment. Doing thorough research using trusted resources like this guide helped me make informed decisions and maintain warranty integrity, which I now realize is essential for long-term peace of mind.
Feeling Inspired to Improve Your Dishwasher Routine
Embarking on this learning journey transformed my approach from frustration to confidence. I now see every cycle as an opportunity to optimize, utilizing smarter loading techniques and understanding my machine’s anatomy. I encourage you to trust your intuition, keep educating yourself, and remember that even small adjustments can have a big impact. Your dishwasher isn’t just a appliance—it’s a reliable partner that rewards your care and attention.
Share Your Experience
Have you ever faced a surprising challenge with your dishwasher or parts replacement? What lesson changed the way you look after your appliance? Let me know in the comments below, and let’s learn together!
Related Posts

Ditch the Pods: Why Powder Detergent is Making a Comeback
It was a morning like any other—until I opened my…
How to Swap Your Plastic Tub for Stainless Steel Durability
It was a frustrating Saturday morning when I finally realized…
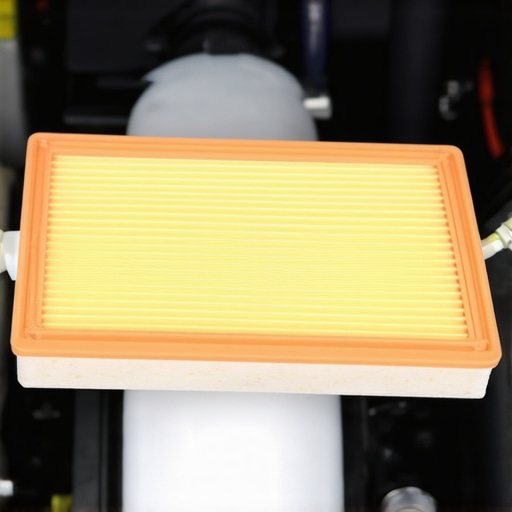
Why Your Filter Is the Most Important Part You’re Ignoring
I remember the moment it hit me—my dishwasher, a sleek…