Ever been in the middle of washing a huge load, only to hear that dreaded snap and see your dishwasher door sag or fall open? I’ve been there. That moment of frustration when your appliance suddenly becomes a makeshift drying rack instead of a spotless helper. It’s a familiar situation for many homeowners, and trust me, it’s more common than you’d think.
But here’s the good news: replacing a snapped door cable doesn’t have to turn into a full-blown renovation. In fact, with a little know-how, you can get your dishwasher back in shape in less than half an hour. No waiting around for repair services, no hefty bills. Just a straightforward fix that I personally vouch for. When I first faced this issue, I underestimated its simplicity. I thought I needed a professional, and I paid a steep price—until I realized how manageable it really was, especially if you understand the basic parts involved.
Today, I’ll walk you through a proven approach to replace that broken door cable quickly and effectively. We’ll cover the tools you need, the common mistakes to avoid, and some insider tips to ensure your repair is both durable and hassle-free. If you’ve ever wondered, “Can I fix my dishwasher door myself?” you’re in the right place. I’ll show you how to do it without fuss, saving you money and the inconvenience of a prolonged schedule.
Before diving into the step-by-step process, consider this: in many cases, a simple cable replacement can extend the life of your dishwasher significantly, avoiding premature upgrades. Plus, understanding how your dishwasher works—including the purpose of parts like the door cable—empowers you to handle other minor repairs around the house. For instance, if you’re curious about maintaining your appliance’s overall health, check out [understanding dishwasher parts](https://appliancedoctorz.com/understanding-dishwasher-parts-a-key-to-effective-maintenance). And if you’ve faced warranty questions or suspect a broader issue, mastering these basic repairs can help you avoid costly service calls.
Are you ready to take control and restore your dishwasher’s functionality swiftly? Great! Let’s start by understanding what exactly a door cable does and how you can replace it efficiently.
Prepare Your Workspace and Tools
Start by unplugging your dishwasher to ensure safety. Clear out the area around the unit for easy access. Gather essential tools: a Phillips screwdriver, needle nose pliers, and a new door cable compatible with your dishwasher model. Remember, using the correct tools makes the replacement smoother and prevents damage. I once attempted a repair with basic screwdrivers, which resulted in slipping and scratching the door; using the proper tools would have saved me time and frustration.
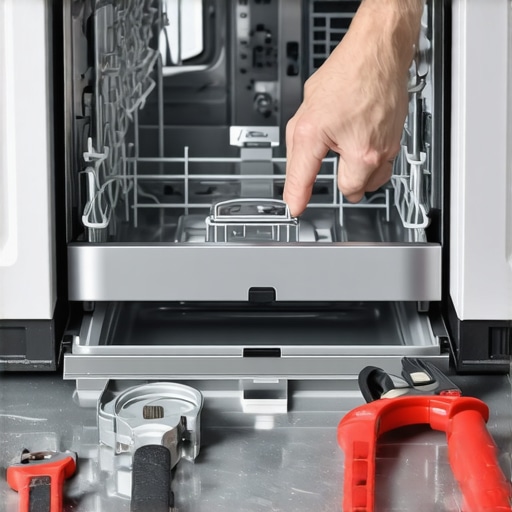
Access the Dishwasher Door
Open the dishwasher door fully and locate the screws securing the inner panel of the door. Using the screwdriver, carefully remove these screws without applying excessive force, as over-tightening can strip the threads. Keep the screws in a small container for reassembly. When I replaced my cable, I found it helpful to tape the screws to the panel to remember their positions, avoiding confusion later.
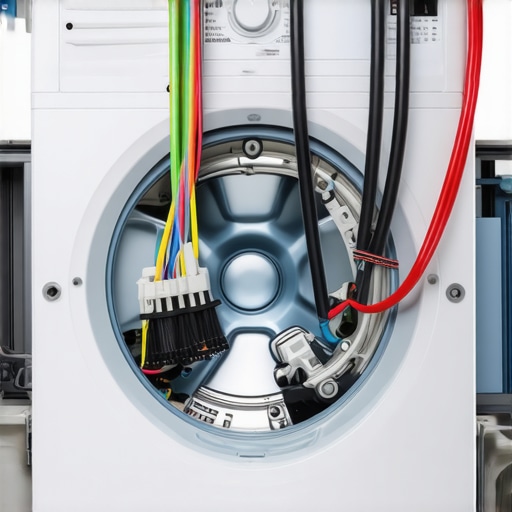
Identify the Broken Cable and Its Path
With the door panel removed, locate the existing cable. It usually runs from the door latch to the tub. Trace its path to understand how it connects at each end. If the cable is frayed or snapped, you’ll notice visible damage. Take a photo for reference, especially if your model has a complex routing. I did this during my repair; the picture proved invaluable when installing the new cable quickly and correctly.
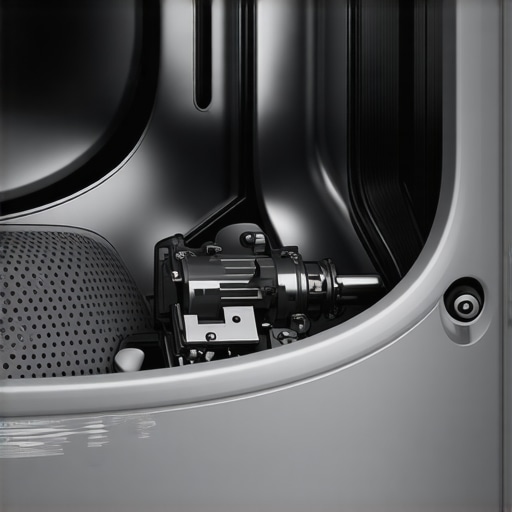
Remove the Faulty Cable
Using pliers, gently detach the cable from the pulleys and mounting points. Be cautious not to pull too hard, as neighboring parts are fragile. Some cables are secured with clips or hooks; release these carefully to avoid breaking the plastic. Remember, patience is key—rushing may cause additional damage or misalignment. During my fix, I learned that slow, steady movements prevent unnecessary strain on other components.
Transfer the New Cable into Place
Unpack your new cable and compare it with the old one to confirm compatibility. Route the new cable along the same path as the previous one, ensuring it sits correctly in pulleys and guides. Attach it at each connection point, tightening clips or hooks securely. It’s like replacing a road map—you want the new route to mirror the original for smooth operation. I found that loosely fitting the cable first before tightening allowed fine adjustments for perfect alignment.
Reassemble the Door Panel
Carefully replace the inner panel, aligning all screw holes with their respective positions. Reinstall the screws, tightening them firm but not excessive to prevent stripping. Double-check that the cable is free from tangles or twists. Once assembled, test the door by manually opening and closing to ensure the cable moves freely without obstruction. During my own repair, a quick test revealed a snag in the cable that I promptly corrected before final assembly.
Test the Dishwasher Door
Plug the machine back in and run a short cycle. Observe the door operation—look for smooth opening and closing, and listen for any unusual sounds. If the door lags or makes noise, re-examine the cable routing and connections. I once overlooked a pulley that was slightly misaligned, which caused the door to hang unevenly; rechecking resolved the issue instantly.
Prevent Future Problems with Proper Maintenance
Regularly inspect the door cable for signs of wear, such as fraying or slack. Keep pulleys and guides lubricated with a silicone-based spray to reduce friction. Avoid overloading the dishwasher, which strains the cable. For sustained performance, replace components with quality parts—this [guide to dishwasher parts warranty](https://appliancedoctorz.com/guide-to-dishwasher-parts-warranty-what-you-need-to-know) offers insights on selecting durable replacements. Proper care now prevents costly repairs later.
Many homeowners believe they understand the basics of dishwasher maintenance, but in reality, several misconceptions can lead to costly mistakes. One common myth is that all dishwasher parts are universally interchangeable, which isn’t true; compatibility varies significantly between brands and models. Relying on generic parts without verifying specifications can compromise performance and void warranties. For instance, knowing the key parts and their proper specifications ensures durability and warranty compliance. Additionally, many assume that warranties cover all repairs, but in reality, they often exclude certain issues like improper installation or misuse, making it crucial to maximize your warranty coverage through correct maintenance. The trap here is overlooking the fine print—believing that the warranty shields you from all costs, which is rarely the case. Moreover, some think installation is a straightforward task that doesn’t require attention to detail—this is a dangerous misconception. Improper installation, such as incorrect drain hose routing or inadequate grounding, can cause leaks or electrical hazards, significantly shortening the appliance’s lifespan. Following expert advice, like professional installation tips, helps prevent such issues.
How Much Does a Misstep in Parts or Installation Cost You Long Term?
It’s worth noting that a seemingly minor mistake—using an incompatible connector or neglecting to properly level the unit—can lead to bigger problems, including water damage or system failures. For an in-depth look, check out a comprehensive guide on parts and warranty. The key takeaway? Don’t overlook the nuances; understanding the specifics of parts compatibility and proper installation techniques can save you hundreds over the lifespan of your dishwasher. Remember, manufacturers often specify certain parts and installation procedures, which, if ignored, can void your warranty—training yourself on these details is essential for peace of mind.
Have you ever fallen into this trap? Let me know in the comments. Being aware of these hidden pitfalls will empower you to maintain your dishwasher effectively, avoid unnecessary expenses, and ensure it functions smoothly for years to come.
Invest in Precision Tools for Reliable Repairs
When it comes to maintaining and repairing your dishwasher, having the right tools can make all the difference. I personally rely on a high-quality magnetic screwdriver set with ergonomic handles, which allows me to work efficiently without strain during extended repair sessions. A digital multimeter is indispensable for diagnosing electrical issues, as it provides accurate voltage and continuity readings—saving time and preventing guesswork. For parts replacement, a pair of fine-tip needle nose pliers is crucial for maneuvering small components like clips and springs. Investing in a nylon plastic pry tool can help you remove panels without scratching, a method I highly recommend confirmed by expert maintenance guides. These tools not only facilitate swift repairs but also help preserve your appliance’s integrity over time.
Utilize Software and Smart Devices to Track Performance
Embracing technology can revolutionize how you keep your dishwasher functioning optimally. I recommend installing SMART home apps compatible with your model; for example, some high-end dishwashers allow remote diagnostics and maintenance alerts. These notifications can warn you of potential issues like low spray arm pressure or filter blockages before they escalate. Additionally, using diagnostic testing modes—often accessible via manufacturer-specific tools—enables you to identify hidden faults early. As the trend in appliance maintenance heads toward automation, staying current with software updates and firmware patches becomes vital, ensuring your dishwasher benefits from the latest bug fixes and performance enhancements. This proactive approach aligns with future developments aiming for smarter, more self-sufficient home appliances.
How do I maintain my dishwasher over time for peak performance?
Consistent maintenance is key to extending your dishwasher’s lifespan. Regularly inspecting and replacing worn-out parts like door seals, spray arms, and inlet valves prevents major breakdowns. Cleaning your filter monthly and ensuring the drain hose is free of obstructions helps maintain proper drainage and prevents odors. Incorporating routine software updates for compatible models keeps your device optimized and secure. Remember, taking small, deliberate steps now—like calibrating your water hardness settings or tightening hose connections—could save you hundreds on repairs later. For a detailed overview of long-term strategies, see this comprehensive guide. Also, using high-quality, compatible replacement parts from trusted sources ensures durability, as outlined in these expert tips. Take control of your appliance’s health, and check your dishwasher periodically for signs that complex issues might be developing—early detection is your best defense.
What I Didn’t Expect About Dishwasher Fixes That Saved Me
One of the most surprising lessons I learned was how often simple part replacements, like a door cable, can profoundly extend your dishwasher’s life. It’s easy to underestimate the power of these tiny components and how correctly addressing them prevents bigger headaches later on. Another revelation was how using quality tools and precise route planning during cable replacement reduces the likelihood of future mishaps. Lastly, I discovered that understanding your appliance’s warranty details—especially what it covers and what it doesn’t—can make or break your confidence when DIYing. This knowledge empowered me to avoid unnecessary costs and helped clarify when professional help is truly needed.
Related Posts
Stop the Hum: 3 Fixes for a Stalling Wash Motor
Have you ever stood in your kitchen, dishwasher humming along…
Why Your Drain Pump Is Making a Constant Grinding Noise
It was late at night, and I was about to…
How to Replace a Dishwasher Door Cable in Under 20 Minutes
There I was, mid-week chaos in my kitchen, and suddenly,…