
I’ll never forget the morning I walked into my kitchen to find a small lake pooling beneath my dishwasher. It was a combination of shock, frustration, and guilt—how did I let this happen? Turns out, one of the most overlooked but critical components was a cheap, worn-out water supply hose that finally gave way. That lightbulb moment pushed me into a world of research and, frankly, a bit of obsession—to find the most durable water supply hoses that could keep my home safe day after day.
Why Durable Water Supply Hoses Are a Homeowner’s Best Friend
To be honest, I didn’t realize how vital water supply hoses are until I experienced a leak firsthand. These hoses are the lifelines connecting your home’s water to appliances like dishwashers or washing machines. Their durability directly impacts your safety and your wallet—things you don’t want to gamble with. The good news? Picking the right hose can prevent costly water damage, mold growth, and even mold-related health issues. According to the Insurance Information Institute, water damage claims average around $10,000 per incident, so investing in long-lasting hoses isn’t just smart—it’s essential.
Are These Hoses Really That Important? You Bet.
Early on, I made the mistake of assuming all hoses are created equal. I went for the cheapest option, convinced that no-name brands would do just fine. Spoiler: they didn’t. Within a year, I was replacing it—and risking a leak every day until I did. That’s why I suggest considering hoses made from braided stainless steel or rubber with reinforced barriers, known for resisting burst, kinks, and external damage. Want to get serious? Check out my detailed guide on why reusing old supply lines can be disastrous and how to select the best replacements for long-term safety.
But I get it—this might seem a bit overwhelming. You might wonder, “Is all this effort worth it?” Well, let me tell you about a small mistake I made early: assuming that a flexible hose with a standard rubber seal was enough. It wasn’t. That tiny oversight nearly cost me thousands in water damage. So, in the following sections, I’ll walk you through what to look for in durable hoses, how to install them correctly, and when to replace them—empowering you to keep your home safe, just like I wish I had done from the start.
Choosing the Right Hose
Begin by selecting a braided stainless steel hose, which offers superior resistance to bursting and kinking compared to rubber options. Remember, it’s like choosing a robust garden hose over a flimsy plastic one—your dishwasher’s water supply needs durable material to prevent leaks. I once bought a cheap rubber hose brand and learned this lesson the hard way when it failed within a year, causing water damage. To avoid this, verify that the hose complies with local plumbing codes and comes with a manufacturer warranty.
Preparing for Installation
Turn off your home’s main water supply, then disconnect the existing supply line. Use a bucket to catch any residual water—think of it as a mini emergency kit for water spills. Inspect the connection points for corrosion or damage; replacing worn fittings is like replacing tires on a car—essential for safety. Before installing the new hose, lay out all necessary tools: adjustable wrench, Teflon tape, and new fittings if needed.
Proper Connection Techniques
Wrap the threaded fittings with Teflon tape clockwise to ensure a tight seal. Connect the hose to the water inlet valve on your dishwasher, tightening it securely with an adjustable wrench—don’t over-tighten, or you risk stripping the threads, similar to overtightening a bolt. Then, attach the other end to your home’s water supply, again ensuring a snug fit. A common mistake I encountered was leaving the hose loose, which led to leaks during operation; tightening properly eliminated this issue.
Routing the Hose for Safety and Efficiency
Position the hose in a gently rising loop, approximately 20 inches above the floor, and secure it with plastic clips. This prevents backflow and ensures proper drainage—matching the height standards for drainage loops. Avoid sharp bends or kinks, as they can compromise water flow or cause the hose to rupture over time. Remember, a badly routed hose can be as problematic as a faulty valve, leading to leaks or water pooling beneath your appliance.
Final Checks and Testing
Before restoring power, turn on the water supply and check for leaks at all connection points—think of this as a test drive for your new hoses. Run a short cycle on your dishwasher and observe for any signs of leakage or low water pressure. If leaks appear, tighten fittings slightly more and recheck. Once satisfied, monitor the water pressure over the next few days, ensuring your connection holds and no leaks develop. Regular inspections can catch issues early, saving you from costly repairs later.
Keep the Warranty in Mind
Using hoses that meet manufacturer specifications ensures your warranty remains valid, especially for extended coverage. Improper installation or third-party parts can void your warranty, much like a car insurance policy excludes coverage for unauthorized repairs. For detailed warranty insights, visit this comprehensive guide. Remember, proper installation not only prolongs your dishwasher’s lifespan but also preserves your peace of mind in case of future repairs.
Many homeowners operate under misconceptions when it comes to dishwasher components, installation practices, and warranty coverage. One common myth is that all parts are universally compatible and will last equally long—nothing could be further from the truth. For example, relying on generic, low-quality replacement parts can undermine your dishwasher’s performance and even void manufacturer warranties. In fact, understanding the nuance behind parts quality and compatibility is crucial for long-term reliability.
Another frequently overlooked aspect is proper installation. Many assume that DIY approaches are sufficient, but improper routing of hoses or incorrect electrical connections can cause persistent leaks or electrical hazards. According to expert advice, adhering to manufacturer specifications and consulting in-depth guides like this resource on installation essentials significantly reduces risk.
A critical mistake I’ve seen is neglecting the fine print of warranties. Many believe that simply registering the product guarantees full coverage; however, many warranties require professional installation and the use of approved parts to remain valid. As highlighted in this detailed guide on warranty maximization, failure to meet these conditions can mean costly repairs out of pocket.
But the most insidious trap involves how homeowners interpret warranty exclusions. Some assume that all repairs are covered, but exclusions often include labor costs, certain parts, or damages caused by improper use. For instance, a study from the Consumer Reports shows that over 60% of warranty claims are denied due to improper maintenance or installation errors. This demonstrates the importance of preventive measures and understanding what your warranty does—and doesn’t—cover.
In this context, knowing the nuances of repair processes, like how to diagnose parts during warranty periods, becomes invaluable. Being proactive can either save you money or help you navigate claims more effectively. Remember, smart maintenance isn’t just about fixing problems but also avoiding them altogether—often through choosing quality parts and adhering closely to installation instructions.
Finally, keep in mind the significance of manufacturer guidelines on parts compatibility and installation procedures, which are often glossed over. Ignoring these details can result in voided warranties and increased repair costs. It’s advisable to review comprehensive resources like this expert piece on warranty conditions to ensure compliance.
Have you ever fallen into this trap? Let me know in the comments. Remember, knowledge is your best tool for protecting your investment and maintaining optimal dishwasher performance!”}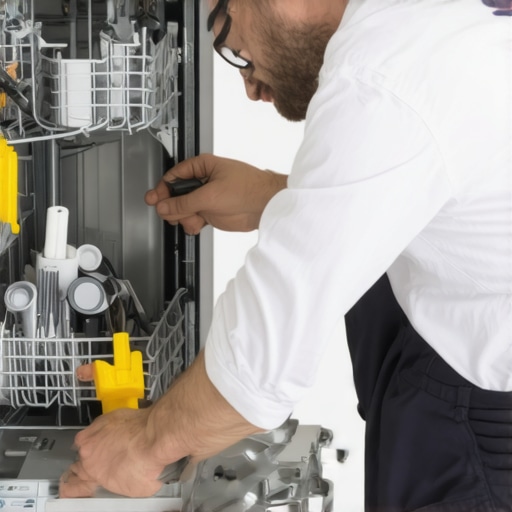
Invest in Quality Diagnostics Tools
One essential tool I personally rely on is the digital multimeter, which allows me to quickly check the electrical components like control boards and heating elements. This saves me time and helps prevent unnecessary replacements. For more advanced diagnostics, I use a clamp meter to verify current flow through water inlet valves and motors, ensuring everything is functioning within spec. These small investments in testing equipment can pay off when diagnosing tricky issues and verifying repairs.
Keep Spare Parts Organized and Accessible
Having an organized toolkit with frequently replaced parts—such as door seals, spray arms, and inlet valves—has saved me countless troubleshooting hours. I recommend storing spare parts in labeled containers based on their function, which helps during reassembly and enables quick swaps if a component fails unexpectedly. Regularly checking parts against this guide on common parts and replacements keeps your maintenance routine efficient.
Schedule Routine Checks for Long-Term Results
Over time, deposits and debris can clog filters and spray arms, reducing cleaning efficiency and possibly damaging components. I set calendar reminders to inspect and clean these parts every 6 months. This proactive approach preserves performance and extends the lifespan of your dishwasher. Use a combination of vinegar and a soft brush—avoiding harsh abrasives—to clear buildup without damaging seals or plastic components.
Leverage Smart Technology for Troubleshooting
Many modern dishwashers come integrated with smartphone apps, which I find invaluable for diagnostics. These apps often display error codes and maintenance alerts remotely, reducing the need for complicated on-site troubleshooting. Connecting your dishwasher to your smart home system enables alerts for leaks or malfunctions, giving you real-time monitoring and peace of mind. As technology evolves, expect these smart features to become even more intuitive and helpful, making maintenance easier than ever before.
Predicting the Future of Dishwasher Maintenance
As the industry shifts toward connected appliance systems, I predict that predictive maintenance will become standard. Future tools might analyze usage patterns to recommend ideal replacement timelines for parts like pumps or filters automatically, much like how car maintenance apps notify drivers of upcoming oil changes. This integration will allow homeowners to anticipate issues before they cause costly damage, leading to more proactive care routines.
How do I keep my dishwasher components working seamlessly over time?
To ensure your dishwasher continues to operate smoothly, focus on regular inspections, utilizing diagnostic tools, and staying ahead with scheduled maintenance. Using a multimeter to verify electrical health, replacing worn parts before failure, and cleaning filters routinely will go a long way. Remember, investing in quality parts—like the ones detailed in this resource—ensures longevity. Try adopting a monthly maintenance checklist and leveraging smart technology; these strategies keep your appliance efficient and reliable for years to come. For more comprehensive tips, visit this detailed guide on warranty maximization.
The Hardest Lesson I Learned About parts,dishwasher,installation,warranty
Initially, I underestimated the complexity of proper hose selection, believing that a simple rubber hose was sufficient—until a leak cost me thousands. That experience taught me that durability isn’t just about material but also about compliance with installation standards and warranty conditions. The moment I took the time to learn about reinforced hoses and correct routing, my confidence—and my home’s safety—improved dramatically.
I also realized that DIY installation isn’t always enough; understanding manufacturer specifications and local code requirements makes a significant difference. Ignoring these details can void warranties and lead to avoidable disasters. Embracing expert guidance and proven practices transformed my approach from reactive to proactive.
One lightbulb moment was recognizing the importance of regular inspections and early replacements—preventive maintenance saves money and stress. Using diagnostic tools like multimeters made troubleshooting more accurate, allowing me to address issues before they escalate. This approach, rooted in ongoing education and careful planning, became my secret to long-term dishwasher health.
My Essential Toolkit for Dishwasher Resilience
- Quality Braided Stainless Steel Hoses: Trusted for resisting bursting and kinks, I rely on these for peace of mind and longevity. Brands that meet local standards and come with warranties are my go-to choices.
- Multimeter and Diagnostic Gadgets: These tools empower me to verify electrical components with confidence; I highly recommend them for DIY repairs and routine checks.
- Reliable Installation Resources: Guides like this detailed advice help ensure that every connection is secure and compliant, avoiding costly mistakes.
- Organized Spare Parts Closet: Keeping parts like inlet valves and seals handy means I can act fast if something wears out, minimizing downtime and water damage risks.
The Joy of Taking Action and Keeping Your Dishwasher at Its Best
Embarking on the journey to understand your dishwasher’s parts, installation, and warranty might seem daunting at first, but the rewards are worth it. Every proactive step, from choosing durable hoses to scheduled inspections, directly impacts your peace of mind and home safety. Remember, knowledge and preparation are your best allies in protecting your investment and ensuring your dishwasher runs smoothly for years to come.
Are you ready to take control of your dishwasher’s longevity? What’s the first step you plan to implement today? Let me know below—your experience might inspire someone else to start their own journey toward smarter maintenance.
Related Posts
The $5 Component That Stops Your Dishwasher from Overfilling
Ever had that sinking feeling when you open the dishwasher…
The $10 Part That Stops Your Machine from Overfilling
It happened again. My dishwasher, usually the quiet hero of…
The $6 Plastic Drain Plug That Kills Your Pump
It was a quiet Saturday morning when I heard that…