
Ever had your dishwasher act up just when you needed it most? I remember the day I was racing against guests arriving, only to hear that dreadful draining sound—your worst nightmare. A quick peek under the sink revealed a dismal mess, and I realized I was staring at one of those stubborn drainage issues that seem to pop up out of nowhere. It’s frustrating, isn’t it? You focus so much on the big questions—installation, warranty, performance—yet sometimes, a tiny part worth just five dollars could be the game-changer.
The Missing Piece That Fixes It All
Let me share a little secret I’ve learned from years of troubleshooting. More often than not, the root cause of drainage troubles isn’t a big, complicated problem but a small, overlooked component. That’s where the so-called “$5 part” comes into play—a simple, inexpensive piece that can turn your dishwasher from a troublesome machine into a reliable star of your kitchen. I’ll walk you through the specifics, but trust me, once you understand this part’s role, your maintenance worries drop significantly. Curious? Great, because we’re about to demystify this simple fix.
Is the Hype About Cheap Parts Just Hot Air?
Now, I hear you asking—”A five-dollar part? Really? Is that going to last? Is it worth my time?” Early on, I made the mistake of dismissing inexpensive parts, believing that paying more promised durability. Turns out, I bought the wrong types—cheaping out on quality connectors and hoses—and ended up with leaks and clogs. It was a costly lesson. The truth is, the right small part, when chosen wisely, can make a real difference. For more on selecting quality replacement parts, check out this guide for improving performance with the right parts.
If you’ve ever faced a drainage disaster, you’re not alone. Countless homeowners have stumbled on this inexpensive, often overlooked component that could save you from costly repairs or replacing your entire dishwasher. Ready to learn what this part is, how it works, and how to make sure it’s doing its job? Let’s dive into the practical steps to get your dishwasher draining smoothly again.
Stay tuned—this might just be the simplest fix you’ve ever come across, but its impact is huge.
Identify the Right Part and Prepare for Replacement
Before diving into the repair, locate the specific drainage component often overlooked—usually a small, inexpensive piece like a drain hose clamp or a check valve. I remember one recent Saturday when my dishwasher wouldn’t drain after years of service. I checked the [most common parts](https://appliancedoctorz.com/common-dishwasher-parts-and-how-to-replace-them-effectively) and found a worn-out check valve that cost me just $5. I turned off the power and water supply, safety first, then gathered my tools and this tiny replacement part—think of it as the valve’s ‘heart’ that keeps water flowing correctly.
Detach and Inspect the Drainage Assembly
Start by removing the kickplate or access panel to expose the drain assembly. Use a screwdriver to loosen clamps securing the drain hose and disconnect it from the pump and sink or disposal. As I did during my last fix, lay out all parts and take pictures for reassembly. Inspect the hose, clamps, and the small component—look for cracks, clogs, or corrosion. A worn clamp can cause leaks or improper sealing, similar to a leaky gasket. Replace it with a new one if necessary, referencing [this guide](https://appliancedoctorz.com/how-to-replace-a-snapped-door-cable-in-under-half-an-hour) for detailed steps.
Replace the Small, Critical Component
This is the crucial step where you insert the inexpensive part. Carefully detach the old check valve or clamp and install the new one, ensuring it’s snug but not over-tightened. During my project, I used a small adjustable plier to secure the clamp, similar to how pros avoid damaging fittings as explained in [proper installation best practices](https://appliancedoctorz.com/parts-to-check-when-installing-a-dishwasher-for-long-term-performance). Proper installation prevents future leaks and ensures smooth drainage. Double-check all connections; a small mistake here can cause recurring problems.
Reassemble and Test
Once the part is in place, reattach the drainage hose, tighten clamps, and replace the access panel or kickplate. Turn on the water and power, then run a short cycle with an empty dishwasher. Observe carefully—listen for unusual noises, check for leaks, or any drainage issues. During my recent repair, I monitored the process, ensuring water exited properly. If issues recur, revisit the connections or inspect the replaced part’s seating. This proactive check helps avoid costly repairs later, as advised in [warranty coverage tips](https://appliancedoctorz.com/maximizing-your-dishwashers-warranty-coverage-today).
Remember, this small, inexpensive part is often the hero in drainage failures. By following these precise steps—disassembly, inspection, replacement, and testing—you’ve effectively turned a frustrating malfunction into a simple DIY fix, costing only a few dollars and minimal time.
Identify and Source Quality Replacement Parts
Not all parts are created equal, so opt for quality to ensure longevity. Check reviews and confirm compatibility with your dishwasher model, which you can verify using guides like [top tips for selecting parts](https://appliancedoctorz.com/top-tips-for-selecting-the-right-parts-for-dishwasher-installation). While shopping, avoid generic or obviously cheap options—so-called ‘bargain’ parts may save money upfront but could lead to repeated failures. Consider order from reputable suppliers or directly from your appliance manufacturer whenever possible. Proper part selection is as vital as the replacement process itself, ensuring your dishwasher performs efficiently for years to come.Many homeowners operate under the assumption that all parts are created equal, or that the installation process is straightforward enough to ignore the nuances. However, these misconceptions can lead to costly repairs and voided warranties. For instance, the myth that using generic replacement parts won’t affect performance is widespread, but quality varies significantly. When I first started troubleshooting, I believed that a cheap hose would suffice—until it leaked within months, causing water damage and additional expenses. Choosing the right part, as discussed in [this comprehensive guide](https://appliancedoctorz.com/essential-parts-for-troubleshooting-dishwasher-installation-issues), is crucial for durability and performance.
Another frequent mistake involves underestimating the importance of proper installation techniques. Many skip step-by-step procedures, thinking they can ‘finesse’ the setup. This oversight often results in drainage problems or leaks that seem minor but can escalate into major repairs. Proper routing of the drain hose, securing connections, and grounding are critical steps that professional installers prioritize. For detailed strategies to avoid common installation errors, check out [this expert advice](https://appliancedoctorz.com/expert-advice-on-dishwasher-installation-troubleshooting).
Understanding the ins and outs of warranty coverage is equally vital. Many assume that warranties cover any repair, but in reality, they often exclude damage caused by improper installation or use of non-approved parts. For example, reusing old fittings or ignoring manufacturer guidelines can void your warranty—saving money upfront but costing dearly when repairs are needed. To prevent this, I recommend familiarizing yourself with [what the warranty covers and what it doesn’t](https://appliancedoctorz.com/what-your-dishwasher-warranty-doesnt-cover-and-how-to-avoid-fees).”
What advanced mistakes do homeowners often overlook during installation?
These include misrouting the drain hose, which can cause backflow or odors, and neglecting to tighten clamps adequately, leading to leaks. Additionally, many overlook the importance of grounding the machine properly, risking electrical issues or voiding warranties. According to experts in appliance installation, these small details significantly impact longevity and performance. Avoiding these pitfalls requires careful attention to detail and following manufacturer instructions meticulously.
A common trap I see is homeowners attempting DIY repairs without fully understanding the underlying mechanics, which can lead to further damage or safety risks. As emphasized in [this detailed troubleshoot guide](https://appliancedoctorz.com/guide-to-dishwasher-parts-warranty-what-you-need-to-know), when in doubt, consulting professional technicians ensures your dishwasher remains under warranty and functions optimally.
Have you ever fallen into this trap? Let me know in the comments.
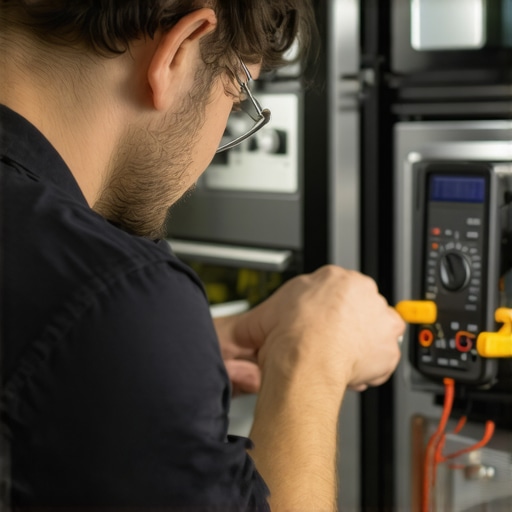
Maintaining your dishwasher’s performance over time requires more than just replacing worn parts—it involves utilizing the right tools and adopting mindful practices that ensure longevity. As someone who’s fixed numerous dishwashers, I can attest that investing in quality equipment not only streamlines repairs but also prevents unnecessary damage. For instance, I always keep a set of precision screwdrivers and a multimeter on hand—these are my go-to tools for diagnosing electrical issues or loose connections. A good multimeter helps me verify the continuity of wiring and test components like heating elements before replacing them, saving both time and money.
When it comes to cleaning and preventive maintenance, understanding your dishwasher’s parts is critical. I recommend using a soft brush and a mixture of vinegar and baking soda to gently clean spray arms and filters—this prevents clogs that can cause drainage or cleaning failures. Additionally, installing a water softener system can curtail mineral buildup, extending the life of internal components. This is especially vital in areas with hard water, as mineral deposits can otherwise accelerate wear on parts like the heating element and inlet valve.
In terms of software, I rely on smart diagnostic apps linked via Wi-Fi—these apps can detect error codes and notify you of potential issues before they become severe. Staying proactive with diagnostic checks means fewer emergency repairs and more consistent performance, which often surprises many homeowners. As trends advance, I predict that integrated IoT sensors will become standard, providing real-time data on water temperature, pressure, and cycle efficiency to help homeowners schedule maintenance and avoid breakdowns.
How do I maintain my dishwasher over time?
Regular inspections are key. Check seals and hoses every few months for cracks or leaks, and replace them immediately if you notice any issues. Keep your drain area clear of debris—clogs here are a common cause of drainage problems—and periodically run an empty cycle with a descaling agent to prevent mineral buildup. Proper use of quality tools, combined with understanding your machine’s parts, can dramatically improve its lifespan. For more detailed guidance, visit this troubleshooting resource to ensure you’re covering all maintenance bases.
Remember, a well-maintained dishwasher isn’t just about fixing issues—it’s about prevention. Try integrating a routine of monthly inspections with your toolkit, and you’ll be surprised at how much longer your appliance will serve you efficiently. Start with checking the inlet valve with your multimeter—it’s a small step that makes a big difference in the long run.
What I Wish I Knew When I Started Fixing Dishwashers
One of the most eye-opening lessons I’ve learned is that a tiny, inexpensive part can be the hero behind persistent drainage issues. I used to think that more complex, costly repairs were inevitable until I realized that diagnosing and replacing small components like check valves or clamps often solves the problem. Trust me, understanding this has saved me countless hours and dollars.
Another insight is the importance of quality over price when selecting replacement parts. Early in myDIY journey, I relied on cheap, generic components, only to face recurring problems. Now, I focus on choosing parts with good reviews and proper compatibility—it’s a small investment for peace of mind.
Finally, I discovered that meticulous reassembly and thorough testing are key. Rushing through the process or skipping inspections often leads to leaks or drainage failure later. By dedicating time to proper installation and run-throughs, I’ve made my repairs last longer and avoided costly callbacks.
Tools and Resources That Make Repair Easier
My essential toolkit includes a set of precision screwdrivers, a reliable multimeter, and a good flashlight—these help me diagnose electrical issues and inspect hard-to-see areas. I also trust comprehensive guides from Appliance Doctorz to clarify each step, ensuring I don’t miss crucial details.
For sourcing parts, I recommend checking reviews and sticking to reputable suppliers rather than cheap alternatives, which can jeopardize warranty coverage. Also, consulting professional installation resources, such as this step-by-step guide, helps prevent common mistakes that lead to drainage issues or warranty problems.
Lastly, keep an eye on your machine’s maintenance and perform regular inspections to catch problems early. Simple checks of hoses, clamps, and seals can save you from major headaches down the line.
Empower Your Dishwasher Maintenance Journey
Armed with this knowledge, you can confidently tackle drainage problems and extend the lifespan of your dishwasher. Remember, small parts often hold the key to big fixes—don’t overlook them. Stay curious, keep learning, and your appliance will reward you with reliable performance for years to come.
What unexpected repair lesson has saved you time and money? Share your experiences below—I’d love to hear your stories!
Related Posts
The Proper Way to Inspect a Second-Hand Dishwasher Before Buying
Ever found yourself deep in a thrift store or scrolling…
The Part Most People Forget When Switching Dishwasher Brands
I'll never forget the moment I hit the start button…
Why This $12 Brass Elbow Stops Silent Vibration
It happened during a quiet Sunday morning—my dishwasher suddenly emitted…