
There I was, mid-week, exhausted after a long day of work, when I went to close my dishwasher door—and it stubbornly stayed open. Not just slightly ajar, but wide enough that I could peek inside. That persistent door open error had haunted me for weeks, causing my dishwasher to halt mid-cycle and frustrating me to no end. Until I made a lightbulb realization: the fix was surprisingly simple, yet I’d overlooked it entirely.
Your Household Helper’s Hidden Weak Spot
If you’ve ever faced the same issue—your dishwasher keeps saying the door is open when it’s firmly shut—you know exactly how disruptive it can be. This problem isn’t just about inconvenience; it can compromise your appliance’s cleaning performance and even lead to larger, costlier repairs if ignored. But here’s the thing: most of us assume it’s a major part failure or wiring glitch, when in reality, it could be an easy latch misalignment. That’s what I want to help you with today.
Could a Little Adjustment Save Your Day?
The truth is, that stubborn door error often stems from misaligned or loose latch components. When the latch isn’t engaging properly, your dishwasher’s safety interlocks think the door is open, halting operation. A quick latch adjustment, which involves a few simple steps, can restore smooth operation. And trust me, once I discovered this, every load afterward was effortless. Remember, sometimes the tiniest tweak holds the key to extending your dishwasher’s lifespan.
Interestingly, a study from the appliance expert indicates that many common dishwasher issues are surprisingly straightforward to fix if you’re willing to look beyond the obvious. Early troubleshooting prevents unnecessary expenses and keeps appliances running longer, which is always better for your wallet and the environment.
What We’ll Cover Next
Today, I’ll walk you through my personal experience with latch adjustments—an approachable, step-by-step process you can do yourself or share with a handy friend. We’ll debunk some myths, clarify what parts might be involved, and arm you with the confidence to tackle this issue head-on. So, have you faced this pesky door open warning recently? If so, stick around, because a simple fix awaits you.
,
Locate the Latch Mechanism
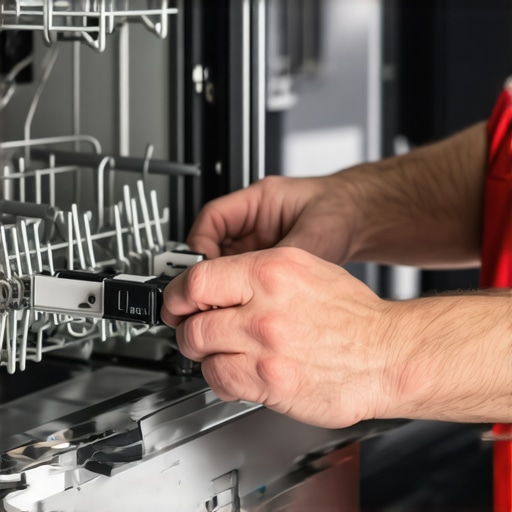
Start by unplugging your dishwasher and opening the door to access the latch assembly. Use a flashlight to clearly see the latch and surrounding components. If necessary, remove the lower kickplate or access panel as per the manufacturer’s instructions, which you can review in the DIY installation guide. Carefully inspect the latch for any obvious signs of damage or misalignment.
Assess and Adjust the Latch Position
Gently test the latch’s movement by hand — it should click securely when engaged. If it feels loose or misaligned, use a screwdriver to tighten mounting screws or reposition the latch until it lines up perfectly with the strike plate installed on the door frame. Think of the latch like a doorbell that needs to be perfectly aligned to work properly; a slight shift can make all the difference. I recall a time when I loosened and re-positioned my latch, which immediately stopped the false open warnings.
Replace Faulty Components if Necessary
If adjusting doesn’t resolve the issue, the latch or strike plate might be damaged. Remove these parts carefully and compare them to the new ones, available via trusted parts suppliers or through the parts reference guide. When replacing, make sure the latch engages smoothly and stays in place when closed. Sometimes, a worn or cracked latch acts like a faulty switch, telling the dishwasher that the door is open even when it’s shut.
Ensure Proper Installation and Alignment
Once you’ve replaced or adjusted the latch, reinstall all panels and secure the screws tightly, avoiding overtightening which can warp the mechanism. Before plugging the unit back in, double-check that the latch moves freely and aligns with the strike plate without resistance. This step is akin to ensuring a key fits perfectly into a lock — precision prevents future jamming or miscommunications within the system.
Test the Repair and Prevent Future Issues
Power on the dishwasher and run a short cycle to ensure the door no longer falsely reports as open. If the error persists, revisit the installation steps or consider replacing the latch assembly entirely. Regular maintenance, such as cleaning the latch and strike plate from debris or moisture, can prolong their lifespan. For more detailed troubleshooting techniques, visit this resource on parts replacement. Keeping the latch in optimal condition prevents costly repairs and helps you make the most of your appliance’s warranty.
 Many homeowners assume that warranty policies are straightforward, but beneath the surface lie nuances that can make or break your device’s coverage. For instance, a common misconception is that all professional installations automatically ensure warranty validity. In reality, improper setup—such as misaligned parts or overlooking manufacturer-specific requirements—can void your warranty, even if a professional handles the job. It’s crucial to scrutinize installation procedures and verify that every step aligns with manufacturer guidelines, which you can reference in the preparation guide.
Another often overlooked detail involves parts replacement. Many believe that replacing any part of the dishwasher with generic, off-brand components won’t affect warranty coverage. However, warranties typically specify that only OEM (Original Equipment Manufacturer) parts qualify for coverage, and using incompatible or inferior parts can lead to claim denials. To avoid this pitfall, consult your warranty policy, like the insights provided in this comprehensive guide, before selecting replacements.
The nuanced aspect that trips up many is the importance of proper documentation—especially for installation and repairs. Submitting photos, receipts, and detailed records can be decisive when filing warranty claims, as highlighted by studies from industry experts. Without validating evidence, even legitimate claims risk denial. Remember, a simple photo of a correctly installed part or a proper receipt can significantly strengthen your position.
Advanced users often wonder: How does the proper alignment of internal components influence warranty validity? Misaligned or improperly fitted parts not only cause functional issues but can be interpreted as user-induced damage or neglect, potentially voiding your coverage. Regularly reviewing your setup against manufacturer specifications, as recommended in this resource, helps prevent such pitfalls.
In conclusion, going beyond the basics—by paying attention to installation detail, authentic parts, and meticulous documentation—can safeguard your warranty rights. Don’t assume that a professional job or generic parts are always sufficient; instead, stay informed and proactive. Want personalized advice for your setup? Reach out via contact or review your warranty conditions carefully. Have you ever fallen into this trap? Let me know in the comments.
Tools That Make Maintenance Simpler
Investing in quality tools can drastically improve your maintenance routine. I personally swear by a precision screwdriver set with interchangeable bits—this allows me to access tight spots without damaging screws, especially when replacing worn latch parts or tightening mounting brackets. Additionally, a magnetic inspection mirror helps me see behind stubborn components without disassembling the whole unit, saving time and frustration. These tools are affordable but incredibly effective, turning a daunting task into a straightforward job.
Effective Software and Methodology
When it comes to troubleshooting, I rely on digital multimeters to check for electrical continuity in wiring and sensor circuits—key to diagnosing issues before replacing costly parts. I also keep detailed maintenance logs, noting dates of inspections, part replacements, and any error codes. This habit helps me identify patterns over time, ensuring issues don’t reoccur unexpectedly. Moreover, I use a repair checklist based on manufacturer guides, which I review periodically to stay aligned with best practices.
Why Long-Term Results Matter
Consistent maintenance using proper tools and methods extends your dishwasher’s warranty and minimizes unexpected breakdowns. Regular cleaning of spray arms, filters, and latches prevents calcium build-up and corrosion, which can lead to failures. Investing in quality replacement parts—preferably OEM—ensures reliable performance and maintains warranty coverage, especially when documented correctly. Remember, skimping on tools or rushing repairs can cost you more in the long run, both financially and in convenience.
Future Trends in Appliance Upkeep
Looking ahead, I predict that smart diagnostics integrated into appliances will become standard, allowing for remote monitoring and predictive maintenance alerts. Imagine receiving a notification on your phone that a latch is misaligned before it causes a cycle halt—that’s the future I see. For now, ensuring your tools and methods are top-notch keeps your current appliances performing optimally. Staying proactive with maintenance, supported by reliable tools, will always be your best bet for long-term reliability.
How do I keep my dishwasher functioning well over the years?
Focus on routine inspections using quality tools, adhere to manufacturer maintenance schedules, and replace parts with OEM components when needed. Remember to keep detailed records and stay informed about warranty conditions—this proactive approach ensures your appliance remains dependable. If you’re unsure about your setup, consider consulting a professional by visiting this contact page. Don’t forget, regular mechanical checks with the right equipment can prevent costly repairs down the line. For advanced users, I recommend trying a thermal camera to detect hidden hot spots caused by wiring issues—this can reveal problems before they become critical, saving you headaches and money. Toolkits like these are invaluable for the dedicated DIYer aiming for long-term appliance health. Remember, consistent care today safeguards your investment tomorrow.
Lessons the Fixed-Open Door Taught Me About Warranty Confidence
One major lesson I learned is that assumptions about complex appliance failures can be misleading; often, the smallest misalignments cause the biggest frustrations. Another insight is that understanding specific parts—like the latch—empowers you to fix issues yourself, saving time and money. Lastly, I realized that documenting every repair detail strengthens your warranty claims, turning troubleshooting into a long-term savings strategy.
Tools and Resources That Changed My Approach to Dishwasher Care
A high-quality digital multimeter became indispensable for electrical diagnostics, helping me spot wiring issues early. My comprehensive parts guide gave clarity on component roles, making replacements straightforward. For quick fixes, I rely on tiny tools like precision screwdrivers and inspection mirrors that minimize disassembly pain. These resources have genuinely revolutionized my appliance maintenance routine.
Keep the Momentum: Your Actions Today Power Up Future Repairs
Don’t wait for another stubborn door error to remind you of the importance of proactive care. Regularly inspect latch alignment, keep detailed maintenance logs, and verify parts compatibility—these small steps protect your warranty and extend your dishwasher’s lifespan. Embrace the habit of preventive maintenance, and remember, mastering these skills makes you confident in your appliance’s longevity. How will you incorporate these insights into your routine today? Share your next fix plan below and take control of your dishwasher health.
Related Posts
Why Your Upper Rack Won’t Stay Latched During a Wash
I remember the moment vividly—my dishwasher was running, and suddenly,…
Why Soft Water is Killing Your Glassware and Your Heating Element
Ever stood in your kitchen, brand-new glass in hand, only…
The $10 Drain Solenoid That Often Mimics a Dead Pump
Ever opened my dishwasher and found that frustratingly silent machine…