Ever stood in your kitchen, dishwasher humming along smoothly, then suddenly heard a strange clunk or saw water pooling on the floor? That lightbulb moment of realizing your trusty appliance might be on its last legs is frustrating. I’ve been there more times than I care to admit, and let me tell you—poor installation or neglecting key parts can turn a simple fix into a costly repair or replacement. But here’s the good news: understanding the ins and outs of smart dishwasher parts and proper installation can save you a lot of headaches and money in the long run.
Why Proper Parts and Installation Matter
If you’ve ever rushed through a DIY dishwasher install or replaced a part without doing your homework, you know how quickly things can go sideways. A tiny mistake—like misaligning the spray arm or using the wrong gasket—can cause leaks, poor cleaning, or even damage your machine’s electronics. I learned this the hard way early on. I once replaced a pump without checking if I had the correct model. Turns out, that led to a leak that damaged my kitchen cabinet. Trust me, it’s a mistake you don’t want to repeat. For a comprehensive understanding of how different parts work together, I recommend reading this guide on understanding dishwasher parts.
What We Will Cover Today
In this post, I’ll share expert tips on selecting the right parts, ensuring proper installation, and maintaining your dishwasher’s long-term reliability. Whether you’re a seasoned DIYer or just want to be an informed homeowner, these insights will help you keep your dishwasher running smoothly for years to come. Ready to dive into the secrets of durable, efficient dishwasher maintenance? Let’s get started.
Is Cutting Corners Worth the Risk
Early in my journey, I made the mistake of skipping on quality parts or rushing through the installation process. It seemed harmless at the time, but it quickly became clear that cheap or incompatible parts can lead to frequent breakdowns—costing you more in repairs than if you’d invested upfront. For trustworthy advice on how to choose parts that are both reliable and covered under warranty, check out this expert guide. Remember, your smart dishwasher isn’t just a convenience; it’s an investment. Treat it with the care it deserves, and it will reward you with years of trouble-free service.
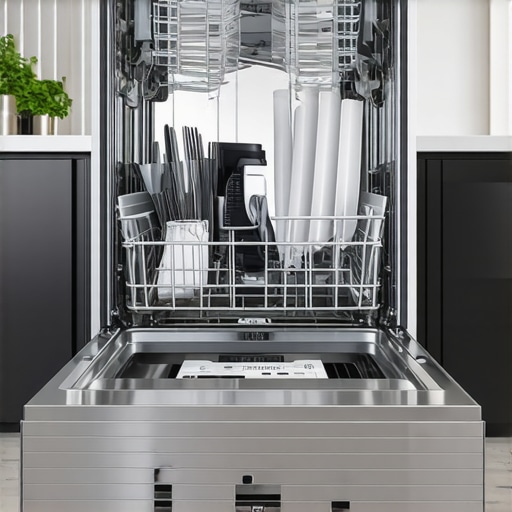
Choose the Right Parts for Your Dishwasher
Start by identifying the specific model of your dishwasher and consult the manufacturer’s specifications. Avoid generic or incompatible parts, as these may fail prematurely or void your warranty. When selecting replacement components, prioritize OEM (Original Equipment Manufacturer) parts, which are designed to fit and function perfectly. For guidance, review this expert advice on reliable part selection. I once replaced a door latch with a generic part, which caused my dishwasher to stop mid-cycle—learning the importance of OEM parts saved me future headaches.
Prepare for a Proper Installation
Before starting, clear the workspace and shut off the water supply. Carefully read the installation manual, paying close attention to the connection points for water inlet, drain, and power. Use a level to ensure the dishwasher sits perfectly flat; an uneven placement can cause leaks and improper operation. During my first install, I neglected to level the unit, resulting in water pooling at the door seal—making me realize how critical proper positioning is. For a detailed checklist, see this installation guide.
Secure Connections for Long-Term Performance
Attach water supply hoses tightly but avoid overtightening, which can damage fittings. Use new gaskets if the old ones are cracked or deformed; these are vital for preventing leaks. When connecting the drain hose, ensure it is secured and positioned to allow gravity flow—no low spots or kinks. In my experience, a loose clamp or a misaligned hose can cause water backflow or leaks, leading to costly repairs. Always double-check each connection and refer to this resource for key connection points.
Test Before Finalizing
Once installed, turn on the water and power, then run a short cycle to check for leaks and proper operation. Watch for drips around connections and listen for unusual noises. I once missed a loose clamp during my first test run, which caused water to drip onto my floor—an easy fix once spotted. Use this trial to verify everything is sealed and functioning correctly, and make adjustments as needed. For troubleshooting tips, see this troubleshooting guide.
Maintain Your Dishwasher for Extended Service
Regularly inspect and replace worn parts, especially gaskets and filters, to keep your machine running efficiently. Clean the spray arms and filters to prevent clogs, which can impair cleaning performance. I schedule biannual maintenance, including part checks, which has helped me avoid unexpected breakdowns. For detailed maintenance routines, visit this maintenance article. Proper care and timely parts replacement are key to extending your dishwasher’s lifespan and ensuring it performs at its best.
Many homeowners believe that replacing a dishwasher part is straightforward—simply swap out the faulty component and you’re done. However, this misconception can lead to serious issues down the line. Let’s dig deeper into the nuances most people overlook, and how mastering these can extend your dishwasher’s lifespan and performance.
Why Most DIY Fixes Fail to Last
It’s common to think that any compatible part will do, but in reality, the devil is in the details. Using non-OEM (Original Equipment Manufacturer) parts might save money upfront, but they often lack the precise fit and durability of genuine components. This can result in leaks, poor cleaning, or even damage to sensitive electronics. For example, a misaligned spray arm or a faulty gasket installed incorrectly can cause water to pool or leak, leading to costly repairs. Always refer to this guide on understanding dishwasher parts to ensure you’re choosing the right components.
The Trap of Overtightening Connections
One of the most common mistakes during installation or replacement is overtightening hoses and fittings. This might seem like a good idea to prevent leaks, but it can deform gaskets or crack fittings, creating tiny leaks that are hard to detect initially. These leaks can cause water damage over time, especially if overlooked during routine checks. To avoid this, tighten connections snugly and use new gaskets where needed, following this resource on proper connection techniques.
How Advanced Users Can Overcome Installation Myths
For those with more experience, a common myth is that a quick, ‘good enough’ installation will suffice. However, even seasoned DIYers should double-check that the dishwasher is perfectly level. An uneven installation can cause door seals to fail prematurely, leading to leaks and poor wash performance. Use a spirit level during setup, and verify all connections after initial testing. For detailed tips, see this guide on long-term installation checks.
Have you ever fallen into this trap? Let me know in the comments.
Keep Your Dishwasher Running Smoothly With the Right Tools
Maintaining your dishwasher over time requires more than just replacing parts; it demands the right tools to ensure a precise, secure, and effective repair or upgrade. Personally, I swear by a few essential tools that make the job easier and help prevent common mistakes. For example, a high-quality digital multimeter is invaluable for diagnosing electrical issues, allowing me to quickly verify if a circuit is live or if a component is faulty without guesswork. I also use a set of precision screwdrivers—specifically, a Phillips and flat-head with magnetic tips—to handle tiny screws in tight spaces, which are common in dishwasher interiors.
Another tool I rely on heavily is a spray bottle filled with a mixture of vinegar and water. This helps in cleaning spray arms and filters without the need for harsh chemicals. Additionally, a reliable level is essential for ensuring the dishwasher is perfectly aligned during installation; an uneven setup can cause leaks and wash cycle issues. When I’m replacing hoses, I always keep a set of adjustable wrenches and a torque wrench to tighten fittings just enough—overtightening can deform gaskets or crack fittings, leading to leaks over time. Using the correct tools for each task not only extends the lifespan of your appliances but also saves you money by avoiding damage caused by improper repairs.
Future Trends in Dishwasher Maintenance and Tools
As smart appliances become more advanced, I predict a shift towards integrated diagnostic tools that connect directly to your smartphone, providing real-time data on parts health and maintenance needs. Wireless sensors embedded in critical components could alert homeowners before a failure occurs, allowing for proactive maintenance. Staying ahead of these trends means investing in versatile, future-proof tools today, such as multi-functional digital multimeters with Bluetooth capabilities or app-controlled diagnostic devices. Adapting to new technology will help maintain your dishwasher’s performance and extend its warranty coverage, ensuring long-term reliability.
How do I maintain my dishwasher’s performance over time?
One of the best ways to keep your dishwasher functioning optimally is by establishing a regular maintenance routine. This includes inspecting and replacing worn parts like gaskets and filters before they fail, cleaning spray arms and filters to prevent clogs, and checking connection tightness. Using specialized tools like a multimeter for electrical checks, or a torque wrench for fittings, ensures that repairs are done correctly the first time. Additionally, consulting expert resources such as this guide on understanding dishwasher parts can help you identify which components need attention and when. By integrating these tools and practices into your routine, you’ll maximize your dishwasher’s lifespan and maintain peak performance for years to come.
Don’t hesitate to try out a diagnostic multimeter or a quality level during your next maintenance session—these investments will pay off in reliability and peace of mind. Remember, proactive maintenance is the key to avoiding costly repairs and ensuring your dishwasher continues to serve your household efficiently.
The Hardest Lesson I Learned About Dishwasher Parts
One painful realization was that even a small misstep, like installing a gasket incorrectly, can lead to persistent leaks that damage cabinets and require costly repairs. Precision matters more than I initially thought.
3 Myths About Dishwasher Maintenance That Held Me Back
I used to believe that using generic replacement parts was fine, but it often resulted in poor fit and early failure. Trusting OEM parts and following proper installation tips saves money and headaches in the long run.
What Experts Won’t Tell You About Ensuring Long-Lasting Performance
Many overlook the importance of leveling the dishwasher perfectly during installation. A tiny tilt can cause door seals to fail prematurely, so always double-check with a reliable level before sealing the unit.
My Essential Toolkit for Reliable Dishwasher Repairs
Investing in a high-quality digital multimeter, precision screwdrivers, and a torque wrench has transformed my repair process. These tools help me diagnose electrical issues accurately and tighten connections just right, preventing leaks and damage.
Your Next Step Toward Dishwasher Confidence
With the right knowledge and tools, you can prevent common pitfalls and extend your dishwasher’s lifespan. Regular maintenance, proper parts selection, and careful installation are your best allies for long-term durability. Ready to put these tips into action and enjoy a leak-free, efficient dishwasher for years to come?
Related Posts

5 Essential Parts for a Leak-Proof 2026 Dishwasher Installation
I vividly remember the first time I installed my new…

Ultimate Guide to Dishwasher Installation & Parts for Reliable Performance
My First Dishwasher Experience: A Lesson in Installation and PartsI'll…
Best Parts & Installation Tips for Reliable Smart Dishwashers
Ever had that sinking feeling when your dishwasher suddenly stops…