Ever had that sinking feeling when your dishwasher suddenly stops working right after a seemingly simple repair or installation? I sure have. One time, I thought I was saving a few bucks by skimming through a DIY guide, only to find my dishwasher leaking and refusing to start. That lightbulb moment taught me the hard way: cutting corners on dishwasher parts and installation can cost you more in the long run. But here’s the good news — with the right knowledge, you can avoid those costly mistakes and ensure your dishwasher runs smoothly for years to come.
Why Proper Parts and Installation Matter More Than You Think
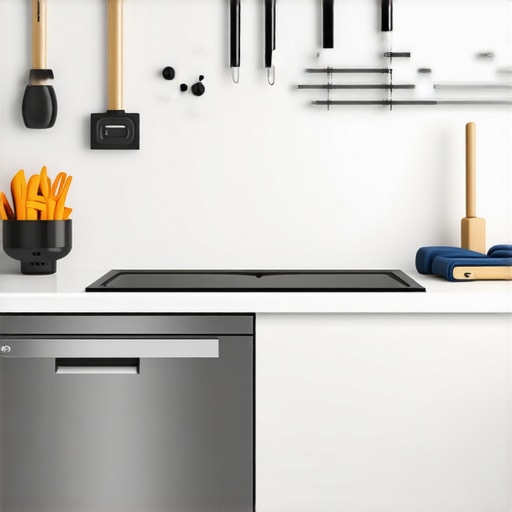
Your dishwasher is a complex machine with delicate components that need to work in harmony. Using subpar or incompatible parts can lead to frequent breakdowns, water damage, or even safety hazards. Proper installation isn’t just about following a checklist; it’s about understanding which parts to trust, how to install them correctly, and how to maintain the system over time. If you’re wondering whether tackling this yourself is worth it, rest assured — the right parts and techniques can save you money and stress, especially if you know where to look for expert advice.
Have you faced recurring dishwasher problems that never quite go away?
That was my experience until I learned the importance of selecting the right warranty-covered parts and understanding the nuances of installation. Early on, I made the mistake of ignoring the warranty details, which led to paying for repairs that could have been covered. Trust me, knowing what parts are warranty-covered and how to troubleshoot during the warranty period can make all the difference. For more insights, check out this guide.
Choose the Right Parts for Your Dishwasher
Start by identifying key components like the water inlet valve, spray arms, and door latch. When selecting these parts, prioritize warranty coverage and compatibility. I once replaced a faulty water inlet valve using a warranty-covered part I found through this guide. This not only saved me money but also ensured long-term performance.
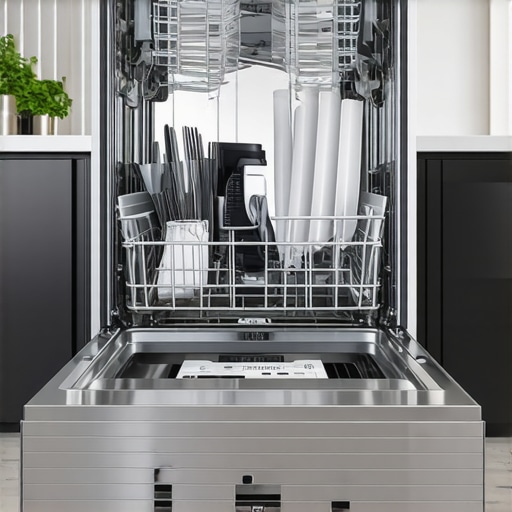
Inspect and Prepare Before Installation
Before installing, thoroughly inspect your existing setup. Check for blockages, worn hoses, or damaged brackets. During my first DIY installation, I made the mistake of ignoring these details, leading to leaks. Following the step-by-step advice in this troubleshooting guide helped me avoid common pitfalls.
Follow Proper Installation Procedures
Securely connect the water supply, ensuring the inlet valve is tightly fitted. Use a level to verify the dishwasher is perfectly aligned, which prevents door misalignment and leaks. I learned this the hard way when my door wouldn’t close properly because I skipped leveling. For detailed tips, check this expert advice.
Test Before Finalizing
Once installed, run a short cycle to check for leaks or unusual noises. During my first test run, I noticed water dripping from the base, prompting me to tighten the hoses further. This step is crucial; it’s easier to fix issues early than after the dishwasher is fully operational. For more troubleshooting techniques, see this diagnostic guide.
Maintain Your Setup for Longevity
Regularly inspect and clean filters, spray arms, and seals. Replace worn parts promptly using warranty-covered options. I schedule bi-annual inspections, which have prevented major failures. To maximize your warranty benefits, explore these maintenance tips.

Many homeowners believe that choosing the cheapest parts or skipping detailed installation steps won’t impact their dishwasher’s performance. However, these misconceptions can lead to costly repairs and reduced lifespan of your appliance. Let’s dig deeper into what most people get wrong and why paying attention to the nuances matters so much.
Why the Quality of Parts Truly Makes a Difference
It’s a common myth that all replacement parts are created equal. In reality, using subpar or incompatible components can cause leaks, poor cleaning, or even safety hazards. For example, a cheap water inlet valve might seem like a savings upfront, but it could fail prematurely, leading to water damage. Experts recommend prioritizing warranty-covered parts and verifying compatibility, which you can do by consulting this comprehensive guide.
The Hidden Trap of Skipping Proper Installation Checks
Many DIYers focus on connecting hoses and ignoring the importance of leveling or inspecting existing components. This oversight can result in leaks, misaligned doors, or uneven wear. For instance, I once installed a dishwasher without leveling it accurately, and the door wouldn’t close properly. Regularly inspecting and preparing your setup, as outlined in this troubleshooting resource, can prevent such issues.
Advanced Tips for Ensuring Long-Term Reliability
One advanced mistake is neglecting warranty policies and the importance of proper parts selection during installation. Many overlook that warranty coverage can be voided if incompatible or non-warranty parts are used, which can be costly in the long run. Knowing when to replace parts and how to maximize warranty benefits is crucial. For example, consulting this guide helps ensure your dishwasher remains reliable over time.
Have you ever fallen into this trap? Let me know in the comments!
Investing in Precision Tools
Every seasoned DIYer knows that having the right tools makes all the difference. I personally rely on a high-quality cordless impact driver for quick, secure screw tightening during dishwasher repairs. Its versatility allows me to work efficiently in tight spaces, reducing the risk of damaging delicate components. Additionally, a digital multimeter is indispensable for diagnosing electrical issues, verifying that the water inlet valve and control board are functioning correctly. I prefer models with auto-ranging capabilities because they simplify measurements and improve accuracy, saving time and preventing misdiagnoses.
Mastering Basic Maintenance
Keeping your dishwasher in top shape involves regular checks and cleaning routines. I recommend inspecting spray arms for clogs, which can be easily done with a small brush and some vinegar solution. Regularly cleaning filters prevents buildup that can impair cleaning performance. Also, don’t forget to examine door seals for wear or cracks; replacing these early can prevent water leaks that cause long-term damage. These small but crucial steps extend the lifespan of your appliance and ensure consistent performance. For detailed guidance, consider reviewing this resource.
Leveraging Diagnostic Software
Modern dishwashers often come with diagnostic modes accessible via the control panel. I’ve found that running diagnostics periodically helps catch issues before they escalate. For older models, a simple visual inspection paired with a multimeter can reveal faulty sensors or wiring problems. As technology advances, I predict that AI-powered diagnostic apps will become standard, guiding homeowners through troubleshooting steps more intuitively. Embracing these tools now can facilitate quicker repairs and reduce downtime.
How do I maintain long-term reliability?
Consistent maintenance hinges on understanding your dishwasher’s components and keeping detailed records of repairs and part replacements. I keep a maintenance log, noting dates of filter cleanings, part replacements, and performance issues. This habit helps identify recurring problems and plan proactive replacements, especially for parts nearing the end of their warranty coverage. Additionally, staying informed about warranty policies by consulting this comprehensive guide ensures you maximize your coverage and avoid unnecessary expenses. Regularly calibrating your machine and replacing wear-prone parts like door latches or seals before failure can save you from costly repairs down the line.
Try implementing a scheduled maintenance routine using these tools and tips, and watch your dishwasher’s longevity improve significantly. Remember, investing a little time now leads to smoother operation and fewer surprises in the future.
When it comes to maintaining a dishwasher that works flawlessly year after year, there’s a lot more than meets the eye. The lessons I’ve learned through trial, error, and a few costly mistakes have transformed how I approach dishwasher repairs and installations. Let me share some insider wisdom that can save you time, money, and frustration in the long run.
The Hardest Lesson I Learned About Dishwasher Parts
One of my biggest takeaways is that not all parts are created equal. Early on, I was tempted by bargain prices and skipped verifying warranty coverage or compatibility, only to face leaks and breakdowns soon after. I realized that investing in quality, warranty-covered parts and understanding what fits my specific model made all the difference. It’s like giving your dishwasher a reliable foundation to perform on.
What I Wish I Knew About Proper Installation
It’s tempting to rush through installation, but taking the time to level the unit and inspect existing components can prevent a cascade of issues later. I once ignored leveling my dishwasher, which led to door misalignment and water leaks. Now, I always follow a detailed checklist, consulting trusted guides on this resource to ensure every step is precise.
Why Choosing Warranty-Covered Parts Matters
Warranty coverage isn’t just a safety net; it’s a crucial factor in avoiding costly repairs. I learned to verify warranty policies before purchasing parts, which often meant a few extra minutes of research but saved hundreds in repairs later. For example, using warranty-covered water inlet valves helped me avoid premature failures and water damage, providing peace of mind during the appliance’s lifespan.
My Secret Weapon for Troubleshooting
Having the right tools can make or break your repair success. I rely on a high-quality cordless impact driver for secure screw fastening and a digital multimeter for electrical diagnostics. These tools, paired with a methodical approach, allow me to diagnose issues quickly and effectively, ensuring long-term reliability for my dishwasher.
How Small Maintenance Habits Pay Off
Regular inspections of spray arms, filters, and door seals can extend your dishwasher’s life significantly. I schedule bi-annual maintenance to clean filters and check for wear, which prevents minor issues from turning into major repairs. Trust me, these small habits save money and keep your dishwasher performing at its best.
Curious to Learn More About Safe Parts and Installation
For a deep dive into selecting the right parts and maximizing warranty benefits, I recommend exploring this comprehensive guide. It’s packed with tips to help you avoid pitfalls and ensure your dishwasher’s longevity.
Keep Your Dishwasher Running Smoothly for Years to Come
Remember, the key to reliable dishwasher performance lies in choosing quality parts, installing them correctly, and maintaining the system proactively. With these insights, you can confidently tackle repairs and installations, transforming your approach from reactive to proactive. Your appliance will thank you with years of trouble-free service.
2 Replies to “Top Dishwasher Parts & Installation Tips for Long-Lasting Trust”
Leave a Reply
Related Posts
Smart Dishwasher Installation & Parts: Ensuring Long-Lasting Trust Today
My Journey into Smart Dishwasher Installation and the Power of…
Best Parts & Installation Tips for Reliable Smart Dishwashers
Ever had that sinking feeling when your dishwasher suddenly stops…

Dishwasher Installation Mistakes: 5 Parts to Replace in 2026
It was a morning like any other, until I stepped…
Reading through this post really hit home for me because I’ve also had my fair share of DIY dishwasher mishaps. It’s tempting to go for cheaper parts, but I’ve learned firsthand that quality and warranty coverage really do make a huge difference in the long run. I especially appreciated the emphasis on proper installation and regular maintenance; small steps like leveling the unit and inspecting door seals can prevent a lot of headaches. One tip that has worked well for me is keeping a maintenance journal—tracking when I replace filters or seals helps me stay proactive and avoid reactive fixes. I’m curious, have others found that investing in certain specialized tools simplifies these tasks? I recently bought a digital multimeter, and it’s been a game-changer for diagnosing electrical issues quickly. Would love to hear what tools or routines others swear by to keep their dishwashers running smoothly year after year.
This post really resonates with me because I’ve experienced a few of those costly DIY mistakes myself. The importance of using warranty-covered parts and proper installation can never be overstated. I especially liked the tip about leveling the dishwasher; I once ignored that step and ended up with a leaking door, which was a headache to fix. Over the years, I’ve learned that investing in quality tools, like a good impact driver and a reliable multimeter, makes all the difference—especially when working in tight spots and diagnosing electrical faults. I also keep a detailed maintenance schedule, which has helped me catch issues early, saving time and money. That said, I wonder what others think about the balance between DIY and professional installation, especially for complex setups or older appliances. Do you recommend always calling in a pro, or are there certain situations where a skilled DIYer can handle the installation without issues? Would love to hear your thoughts and experiences.