
I remember standing in my kitchen at 10 PM, staring at a cluster of ‘clean’ plates that still had dried-on lasagna crust. I had used the ‘ultra-platinum-extra-shiny’ pods that cost a small fortune, but there it was: a half-melted, gooey plastic skin stuck to the bottom of the tub. It felt like I was paying a premium just to do the dishes by hand anyway. For years, I fell for the marketing. I thought those colorful little squares were the pinnacle of cleaning technology. I even made the embarrassing mistake of doubling them up once when the load was extra greasy, which led to a sudsy nightmare on my kitchen floor. But after a particularly frustrating week of re-washing ‘clean’ bowls, I had a lightbulb moment. My machine wasn’t the problem; the fancy packaging was. Today, I’m going to show you why the humble box of powder is the secret weapon your kitchen has been missing and how it can actually extend the life of your appliance.
Why I Finally Threw Away Those Expensive Little Pods
The truth is, pods are a one-size-fits-all solution for a machine that is designed to be customizable. When you toss a pod into the tub, you lose control over how much soap is used and, more importantly, when it gets released. I spent months wondering why my detergent pod was still whole after a full cycle, only to realize my machine’s water temperature and cycle length weren’t aligned with the pod’s thick plastic coating. This isn’t just about clean plates; it’s about your machine’s health. Using the wrong amount of soap can lead to buildup that eventually requires you to replace internal parts prematurely. If you have ever noticed that your eco-cycle leaves a chalky residue on everything, you are likely seeing the effects of a pod that couldn’t quite keep up with the machine’s smarter, water-saving sensors.
Is Powder Detergent Actually Just a Messy Step Backward?
I get it—you’re worried about the mess and the measuring. You might think that going back to powder is like trading in your smartphone for a rotary dial. But here is the kicker: modern dishwashers are actually built for powder. Most units have a pre-wash cup for a reason. According to the American Cleaning Institute, the pre-wash phase is essential for breaking down heavy soils before the main wash begins, and pods simply cannot participate in this initial strike. When you stop buying expensive pods and switch to the powder alternative, you gain the ability to put a little bit of detergent in that pre-wash tray. This ensures that the first blast of water actually does something rather than just rinsing grit around. Have you ever felt like you’re paying more for less performance with your current detergent? You aren’t alone, and the solution is cheaper than you think.
The Hidden Science of the Pre-Wash Cycle
By using powder, you can adjust the dose based on how dirty your dishes are or how hard your water is. I used to think my dishwasher loading technique was the culprit behind my dirty plates, but once I started using powder in both the pre-wash and main wash compartments, the results were night and day. It turns out that those ‘smart’ sensors in your machine are much more effective when the water has a little bit of soap to help carry the grime away right from the start. We are going to dive into how to calibrate your powder usage to save money and keep your machine out of the repair shop.
Stop Guessing How Much Soap You Need
The biggest mistake I made when switching back to powder was thinking I needed to fill the dispenser to the brim. With pods, you have no choice, but powder is like seasoning a steak; you have to adjust for the ‘meat’ of the load. If you are washing a light load of salad plates and coffee mugs, you only need about two tablespoons. I once made the mistake of overfilling the cup during a particularly greasy lasagna night, thinking extra soap equaled extra clean. Instead, I opened the door to a cloudy mess of undissolved grit that took three extra rinse cycles to clear. Every dishwasher has essential parts every dishwasher owner should know about, and the detergent dispenser is the gatekeeper. Using too much powder creates a slurry that can actually clog the small holes in your spray arms.
The Two-Stage Pour That Changes Everything
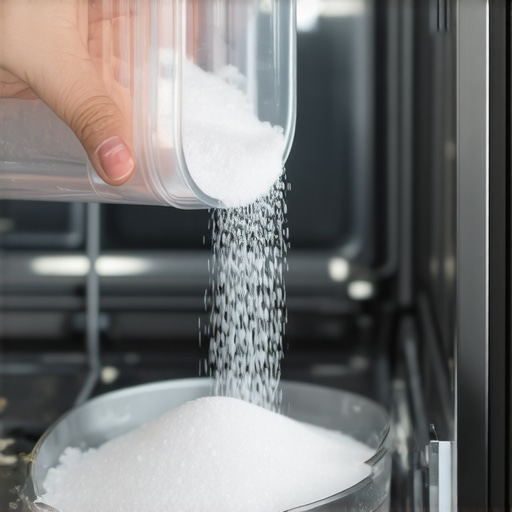
Here is the absolute game-changer: the pre-wash cup. Look at your detergent door. See that smaller, open indentation next to the main sliding door? That is your secret weapon. When you start a cycle, the machine almost immediately drains the initial standing water and then fills up for a ‘pre-wash’ phase. If you use a pod, that soap is locked behind a door that won’t open for another twenty minutes. By putting just a teaspoon of powder in the pre-wash tray, you ensure that the very first blast of hot water is actually scrubbing. This prevents grit from just being recirculated. I noticed that when I started doing this, I didn’t have to spend twenty minutes on cleaning the hidden filter under the spray arm nearly as often because the food particles were being broken down and flushed away immediately.
Why Your Machine Stays Healthier With Loose Powder
Think of your dishwasher’s internal plumbing like the arteries in your body. Pods often contain waxes and plastic binders that don’t always fully dissolve, especially if you prefer eco-modes or lower temperatures. Over time, these can create a ‘cholesterol’ of sorts inside your drain lines. When you use powder, it’s a simple abrasive that dissolves completely and rinses clean. This is vital for understanding dishwasher parts and their longevity. I’ve seen drain pumps fail prematurely simply because they were struggling to push thick, soapy sludge through the line. If your machine starts making a weird groaning sound, check the 10 dollar fix for a dishwasher that wont drain before you call a pro, but usually, preventing that buildup with powder is the better long-term strategy.
Adjusting for Your Specific Water Type
Your local water chemistry is the final boss of dishwashing. If you have hard water, you need slightly more powder to neutralize the minerals so the soap can actually work. If you have soft water, you need very little. Pods can’t adapt to this, which is often why your warranty policy excludes damage from hard water scale—they expect you to manage the chemistry. By using powder, you are essentially becoming your own chemist. You can dial it in until your glasses come out crystal clear without that white haze. I found that by cutting back my powder usage by just 25% in my soft-water home, I saved thirty dollars a year and my internal machine parts stayed looking brand new without any chalky buildup.
Don’t Block the Path of the Water
Even the best soap fails if it can’t reach the dishes. I used to pack my bottom rack so tightly that the detergent door couldn’t even pop open. You have to ensure the correct way to load a dishwasher for maximum water flow is followed. A tall baking sheet placed directly in front of the dispenser door is a classic ‘rookie’ move that results in a half-dissolved pile of soap at the end of the cycle. Give that soap door room to breathe, and let the powder do the heavy lifting for you.
I have learned the hard way that the mistake most people make isn’t just about the soap they pick; it is often the ‘set it and forget it’ attitude toward the machine’s actual hardware. Most homeowners believe that as long as the machine turns on, they have succeeded. But in my years of tinkering, I have found that a ‘successful’ install and a ‘warranty-compliant’ install are two very different things. For instance, many people ignore the nuances of understanding dishwasher warranty policies for peace of mind, assuming that a leak is always a manufacturer defect. In reality, if you did not pay close attention to the common dishwasher parts and their role in proper installation, the manufacturer might leave you hanging when a component fails.
One huge trap is the water supply line. I have seen countless DIYers reuse an old copper line or a cheap plastic one just to save twenty bucks. This is a nightmare waiting to happen. According to the Association of Home Appliance Manufacturers (AHAM), a significant percentage of appliance-related property damage stems from improper installation rather than internal component failure. If that line bursts, you will find that maximizing your dishwashers warranty coverage today becomes impossible because the fault lies in the external connection, not the machine itself. You have to treat the installation as the foundation of the machine’s health.
Can Your Local Water Temperature Actually Void Your Coverage?
It sounds like a myth, but it is a cold, hard fact. Most warranties require a specific incoming water temperature—usually around 120°F—to ensure the internal heaters are not overworked. If your home water heater is set too low, the dishwasher’s heating element has to run twice as long to reach sanitizing levels. This leads to premature burnout. When you start maximizing your dishwashers warranty through proper parts selection, you have to consider the plumbing environment as part of that ‘part’ ecosystem. I once dealt with a reader who was denied a heater replacement because their ‘eco-friendly’ water heater setting was only outputting 105°F, causing the dishwasher to work outside its design parameters. This is exactly why your warranty claim depends entirely on your water temperature.
The Drain Hose Mistake That Destroys Modern Motors
Let’s talk about the ‘oops’ factor that causes the infamous swamp smell and eventual motor failure. People often skip the critical importance of the high loop in your drain line. They just shove the hose into the disposal and call it a day. Without that loop, dirty sink water siphons back into your ‘clean’ dishwasher. It is a nuance that separates a pro from an amateur. Don’t be fooled by the truth about those 10 year motor stickers on the door; that motor will not last ten months if it is constantly fighting backflow and grit from your kitchen sink. Before you tighten the last bolt, make sure you have audited the parts to check when installing a dishwasher for long term performance. It is the difference between a machine that lasts fifteen years and one that becomes a very expensive paperweight in three. Have you ever fallen into this trap where a small installation oversight cost you a fortune? Let me know in the comments.
Once I got the installation quirks handled, I realized that the real secret to longevity isn’t just a good install—it’s having the right diagnostic mindset. I stopped being a passive user and started acting like a caretaker. The first thing I did was buy a digital multimeter. It sounds intimidating, but it is the single most important tool in my kitchen drawer. If my machine fails to start, I don’t call a repairman anymore; I check for continuity. According to technical bulletins from RepairClinic, a significant portion of ‘broken’ appliances are simply suffering from a blown thermal fuse or a loose wire connection. By learning how to diagnose dishwasher parts during warranty periods, I’ve managed to get replacement components shipped to me for free, avoiding the $150 service call fee.
The One Tool That Saves Hundreds on Repairs
Most people rely on their ears to tell them if something is wrong, but by the time you hear a grinding noise, the damage is often done. I use my multimeter to test the heating element every fall. It takes two minutes and tells me if the part is resisting current properly or if it is on the verge of burning out. This proactive approach is essential for understanding dishwasher parts and their actual health rather than just their outward appearance. I also keep a small kit of the replacement parts every dishwasher owner should keep on hand, like a spare door gasket and a set of rack wheels. These are the high-wear items that always seem to break on a Sunday night when you have a house full of guests.
#IMAGE_PLACE_HOLDER_D#
Use Your Smartphone as a Diagnostic Eye
I’ve also started using a trick that sounds a bit ‘spy-movie’ but works every time: I use my smartphone’s slow-motion video to find leaks. I’ll slide the phone under the machine, turn on the flashlight, and record the bottom of the tub during a high-pressure cycle. It is the best way to test for a slow leak behind the kickplate that usually goes unnoticed until the subfloor starts to rot. If you catch a drip early, you can usually fix it with the 5 dollar gasket that prevents a 500 dollar floor repair. I’ve even used the voice memo app on my phone to record the motor’s hum to compare it to online database sounds; it’s a brilliant way of how to use your smartphone to diagnose a failing motor before it completely seizes up.
How do I keep my machine running for a decade?
The goal isn’t just to fix things when they break, but to prevent the failure entirely. Looking ahead, I see a trend where our appliances will become even more integrated with our home networks, providing real-time health scores. Until that’s standard, however, you have to be the brain of the operation. Keep your paper trail organized, too. I always make sure I know how to verify your professional installation receipt for insurance just in case a catastrophic failure occurs. Choosing the most reliable dishwasher brands for long term use is half the battle, but your maintenance routine is what wins the war. I strongly suggest you try the smartphone camera trick this weekend—just one minute of recording could save you a decade of floor damage headaches.
What the Big Box Stores Won’t Tell You About Your New Machine
After years of trial and error, the hardest lesson I learned was that a brand-new dishwasher is only as good as its last maintenance check. Most people wait for a puddle on the floor to care about their appliance, but the real pros know that silence is the best time to act. I discovered that simple understanding dishwasher parts is actually the best insurance policy you can have. One of my biggest lightbulb moments was realizing that a ‘broken’ machine is often just a neglected one. I once spent a whole afternoon panicking over a motor that wouldn’t start, only to find out it was a simple float switch that had become stuck with a piece of plastic. Knowing parts to check when installing a dishwasher for long term performance before you even run the first load can save you from a decade of minor headaches. It isn’t just about the soap; it is about the chemistry of the water and the integrity of the seals.
The Three Tools I Use to Outsmart Professional Repairmen
I have narrowed my maintenance strategy down to three specific resources that I trust implicitly. First, a simple digital multimeter is non-negotiable for anyone who wants to avoid the ‘appliance replacement’ trap. Second, I always keep a stock of the replacement parts every dishwasher owner should keep on hand, specifically a spare door gasket and water inlet valve. These are the front-line soldiers that fail most often. Third, I highly recommend keeping a digital copy of your installation manual on your phone. Most people toss it, but that manual contains the specific torque and temperature requirements that prevent you from falling into the trap of what your dishwasher warranty doesnt cover and how to avoid fees. I trust these tools because they move you from being a passive victim of technology to an active operator of your home.
Your Path to a Decade of Sparkling Plates
Taking control of your dishwasher doesn’t require a degree in engineering. It just requires you to look at your machine as a collection of parts that need a little love. By switching to powder, ensuring a proper high loop, and keeping an eye on your seals with the 5 dollar gasket that prevents a 500 dollar floor repair, you are effectively extending the life of your kitchen’s hardest worker. Don’t let the marketing pods or the ‘set it and forget it’ mindset fool you. You can how to fix a dishwasher that will not drain without calling a plumber if you just take the time to learn the basics today. Your future self—and your bank account—will thank you every time you open that door to perfectly clean, dry dishes. Have you ever found a mysterious piece of plastic or a coin at the bottom of your tub that you couldn’t identify? Let me know in the comments below!
Related Posts
How to Use Vinegar Safely Without Damaging Rubber Seals
I remember the moment I realized my favorite cleaning hack…

The Best Eco-Friendly Alternatives to Traditional Rinse Aids
I vividly remember the moment I realized my dishwasher wasn't…

Why Your Eco-Cycle Is Taking Longer Than Usual
There I was, kneeling beside my dishwasher, cursing softly as…