
It was 11:30 PM on a Tuesday when I heard it—a soft, rhythmic ‘slap-slap-slap’ of water hitting my hardwood floors. I’d just finished a ‘perfect’ DIY installation of a high-end unit, or so I thought. My feet were soaked, my ego was bruised, and the kitchen looked like a swamp. When I finally called a pro, he didn’t even need his tools to find the culprit. He just pointed at the drain hose. I had skipped a simple five-minute step, and that tiny oversight was about to cost me my entire warranty claim.
Your Warranty Won’t Save You From a Bad Setup
Look, I get it. You want the machine in, the dishes clean, and the manual buried in a junk drawer. But I’ve spent years talking to the guys who do this for a living, and they see the same heartbreaking blunders every single week. One of the biggest offenders is the water supply line. Many people try to save ten bucks by reusing an old one, but why professional installers refuse to use plastic water lines is a lesson usually learned the hard way—with a flood. These pros aren’t being picky; they’re trying to prevent your kitchen from rotting from the inside out. You have to realize that understanding dishwasher warranty policies for peace of mind starts the moment you pull the unit out of the box. According to the Insurance Institute for Business & Home Safety, appliance-related water damage is a top source of property loss, and most of it is preventable. If the manufacturer sees a kinked hose or a missing bracket, they’ll deny your claim faster than you can say ‘leak.’ I remember staring at my ruined floor thinking how much cheaper a professional install would have been compared to the refinishing costs. Have you ever opened your dishwasher after a cycle only to find a pool of stinky, grey water sitting at the bottom?
Does a DIY Install Actually Void the Whole Policy?
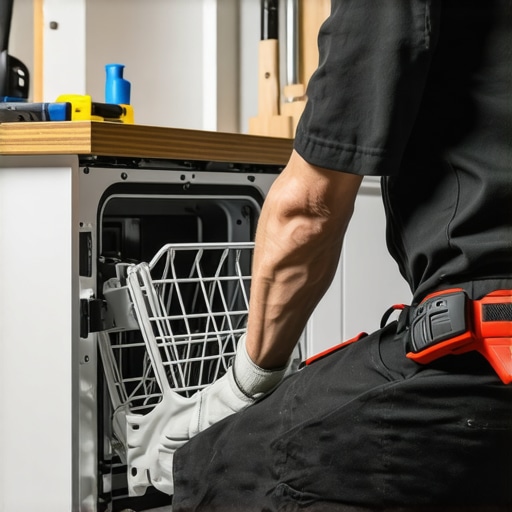
This is the fear that keeps most of us from touching a wrench. The truth is, installing it yourself doesn’t automatically kill your coverage, but using the wrong parts or skipping the critical importance of the high loop in your drain line certainly will. [image_placeholder] When I messed up my first install, I used a ‘universal’ kit that didn’t actually fit the pressure requirements of my machine. I thought I was being thrifty. In reality, I was just building a ticking time bomb. You need to know which common dishwasher parts and their role in proper installation are non-negotiable before you even slide that unit into the cabinet. It’s not just about getting the machine to turn on; it’s about making sure it stays running for the next decade without ruining your subfloor. Every time a pro walks into a kitchen and sees a unit secured with drywall screws instead of the proper side-mount dishwasher brackets, they know a service call is coming in six months. Let’s make sure that’s not you.Installing a dishwasher isn’t just about sliding a box into a hole; it’s about managing three distinct systems—water, electricity, and drainage—without letting them fight each other. Before the machine even touches the floor, you need to know how to prepare your kitchen for dishwasher installation by clearing out old debris and checking your cabinet dimensions twice. If the space is too tight, you’ll pinch a line. If it’s too loose, the machine will rattle. I once ignored a half-inch discrepancy, and the resulting vibration made the unit sound like a freight train was passing through my pantry. To avoid this, follow the top tips for seamless dishwasher installation in 2025, starting with the water inlet.
Execute a Setup That Protects Your Warranty
The first physical step is the water line. You want the most durable braided steel hoses for long term safety because they resist the pressure spikes that burst those cheap plastic alternatives. When you connect the 90-degree elbow to the inlet valve, don’t over-tighten it. I’ve seen DIYers crack the plastic housing of the valve because they thought ‘tighter is better.’ It’s like a jar of pickles; snug is enough. Once the water is ready, you have to tackle the electrical. Ensure you know the correct way to route wiring through a kitchen cabinet so it’s not rubbing against the sharp metal frame of the machine. A frayed wire is more than a warranty issue; it’s a fire hazard.
Leveling is the Secret to a Quiet Life
Most people think the legs are just for height. They’re wrong. If the machine isn’t perfectly level, the door won’t seal properly, and the spray arms won’t distribute water evenly. There is the one-bolt you must check before leveling your machine—usually the rear leveling leg adjustment bolt located at the front. I spent an hour on my hands and knees once, trying to reach the back legs with a wrench, not realizing there was a screwdriver-driven gear at the front meant specifically for this. #IMAGE_PLACE_HOLDER_B# When I finally got it level, the ‘mysterious’ leak at the door gasket magically vanished. You should also take a moment to look at the parts to check when installing a dishwasher for long-term performance, like the mounting brackets and the insulation blanket.
Defeat Backflow With the Right Drain Route
The drain is where most DIYers fail the warranty test. You must use the drain hose trick that stops sink water from backflowing, which involves securing the hose as high as possible under the counter before it drops back down to the disposal or tailpiece. Without this ‘high loop,’ your dishwasher becomes the lowest point in your plumbing, and dirty sink water will eventually pool in your clean machine. It’s a simple fix that requires one plastic zip tie or a bracket, yet skipping it is the fastest way to invite a swampy smell into your kitchen. Use the essential parts for troubleshooting dishwasher installation issues if you encounter resistance while routing these lines. This isn’t just about functionality; it’s about making sure you never have to argue with a warranty adjuster over ‘improper installation.’I’ve heard it a thousand times: “The manufacturer just wants you to buy their overpriced branded parts.” While that’s occasionally true for a plastic rack clip, it’s a dangerous game to play with the functional guts of your machine.
The Dangerous Myth of the Universal Part
Most DIYers assume that if a hose fits the thread, it’s good to go. However, in my experience, the problem with universal hoses for high-end European models is far more than just a physical connection issue. These machines are calibrated for specific flow rates and back-pressures. When you swap in a generic component, you’re essentially asking the computer to run a program with the wrong hardware. This leads to the ‘ghost’ errors that drive people crazy. I’ve seen homeowners spend weeks trying to figure out why your smart app is reporting a leak that is not there, only to realize the third-party sensor they installed has a 5% variance that the motherboard interprets as a flood.
Can You Swap Components Yourself Without Killing the Warranty?
This is the advanced question that separates the pros from the hobbyists. According to a report by the Association of Home Appliance Manufacturers (AHAM), improper third-party parts are a leading cause of secondary failures. If a technician opens your unit and sees a non-certified pump, they don’t even have to prove it caused the leak; they can simply cite the use of unauthorized components to deny your claim. You need to know the parts you can swap yourself without voiding your protection versus the ones that require a certified touch. For example, the real difference between aftermarket and factory gaskets is often the grade of silicone used. A $5 savings on a gasket can lead to a $500 floor repair when that seal degrades six months early. #IMAGE_PLACE_HOLDER_C# Always be wary of the ‘too good to be true’ deals on major marketplaces. Learning how to spot a fake replacement pump on online marketplaces is a skill every modern homeowner needs. It’s not just about the money; it’s about maximizing your dishwasher’s warranty through proper parts selection so you aren’t left holding the bill for a lemon. Have you ever fallen into this trap of buying a ‘compatible’ part only to have it fail? Let me know in the comments. Before you tighten that last screw, make sure you’ve checked what your dishwasher warranty doesn’t cover and how to avoid fees that can double the cost of your ‘cheap’ DIY fix.That cost-saving mindset usually fails because it ignores the long game of maintenance. I’ve spent a lot of time on my knees peering into dark cabinet corners, and if there is one thing I’ve learned, it’s that your eyes will lie to you when you’re tired. That’s why I never tackle an install or a deep maintenance session without a telescopic inspection mirror and a high-lumen headlamp. You might think it’s overkill, but using these to find the best way to test for a slow leak behind the kickplate has saved my flooring twice in the last three years. Most people wait until they see a puddle, but by then, the subfloor has already started acting like a sponge. I also keep a digital multimeter in my kit. It’s the only way to accurately know how to diagnose dishwasher parts during warranty periods without guessing. I personally use a model with non-contact voltage detection, which is a literal lifesaver when you’re working around water and electricity. If the heating element isn’t drawing the right resistance—usually between 10 and 30 ohms depending on the model—I don’t wait for a total failure; I call for a warranty replacement immediately while I still have the paperwork handy.
The Professional Tools I Won’t Start Without
A simple multimeter and a mirror aren’t just for the pros; they are for anyone who values their Saturday afternoons and their hardwood floors.
How do I keep my machine running like new for a decade?
The secret isn’t a magic chemical; it’s consistency with the small stuff. Every three months, I pull the spray arms to check for seeds or plastic bits. I also use a specific routine for the easiest way to clean calcium from your heating element because even a thin layer of scale makes the machine work 20% harder, shortening its lifespan. Beyond the physical cleaning, you should be aware of the essential parts every dishwasher owner should know about, like the check valve and the turbidity sensor. According to the technical documentation from Bosch Home Appliances, maintaining a water pressure between 30 and 120 PSI is non-negotiable for the internal valves to seat properly over time. If your home’s pressure is too high, you’re basically sandblasting the delicate seals every time a cycle starts. I’ve actually installed a pressure regulator on my main line specifically to protect my appliances from these hidden spikes.
The Future of Dishwashers involves Predictive Repairs
We are moving toward a world where your machine will tell you it’s going to leak before the first drop hits the floor. This isn’t science fiction; it’s the scaling of IoT technology. I’ve already started experimenting with this by learning how to set up your smart home to alert you of a leak using specialized sensors placed right under the water inlet. Eventually, manufacturers will bake this directly into the firmware, potentially lowering insurance premiums for homeowners who use them. For now, you have to be the ‘smart’ part of the system. I recommend when to replace dishwasher parts for optimal performance based on a calendar schedule, rather than waiting for a catastrophic breakdown. My advanced tip for you this week: grab a wrench and check the tightness of your water supply line every six months. Vibration from the high-rpm motors acts like a slow-motion wrench that loosens everything over time. If you can catch a quarter-turn of looseness today, you avoid a total disaster tomorrow.
The Hardest Lessons My Flooded Floor Taught Me
After years of tinkering, I’ve realized that the small details are usually what sink a warranty claim. One of the most vital lightbulb moments I had was realizing that paperwork is as important as the plumbing. If you ever hire a contractor, you must know how to verify your professional installation receipt for insurance because a vague invoice is a one-way ticket to a denied claim. Additionally, I learned that electrical surges are the silent killers of new units; knowing how to reset your dishwasher control board after a power cut can save you an unnecessary service call fee. Finally, never ignore a slow drain. Most drainage catastrophes start as minor issues that can be solved with the $10 fix for a dishwasher that won’t drain, preventing backflow that ruins your cabinetry.
The Tools That Keep My Kitchen Bone Dry
You shouldn’t approach an appliance with just a standard screwdriver. My personal toolkit has evolved to include items that specifically target common failure points. First, I always keep a guide on common dishwasher parts and how to replace them effectively bookmarked on my phone for quick reference. [image_placeholder] I also recommend stocking the replacement parts every dishwasher owner should keep on hand, such as a spare high-loop bracket and a quality gasket. I trust my digital multimeter above all else because it provides objective proof of a part’s health, which is essential when you need how to diagnose dishwasher parts during warranty periods without the manufacturer giving you the runaround.
Take Charge of Your Kitchen’s Longevity
Mastering your appliance maintenance is about more than just saving money; it’s about the confidence that your home is safe. By committing to a proper dishwasher installation and staying vigilant about the components you use, you ensure your machine serves you for a decade rather than just a few years. Don’t be afraid to get your hands dirty—with the right parts and a bit of patience, you can outsmart the most common appliance failures. Using a DIY dishwasher installation step-by-step guide is the best way to start your journey toward appliance independence.
Have you ever discovered a leak only after it had already caused damage to your floor? Let me know your experience in the comments below so we can help others avoid the same mistake.
Related Posts
How to Align a Dishwasher Toe-Kick for a Flush Finish
Ever stood in your kitchen, eyes fixed on that gap…

How to Document a Professional Install for Future Warranty Security
Imagine finally finishing a professional dishwasher installation only to face…

Why Professional Leveling Is More Than Just Aesthetics
It was mid-morning, and I stepped into my kitchen only…