
I stood there in my kitchen at 11 PM, staring at a plate that was supposed to be clean but looked like it had been used for a mud-wrestling match. My dishwasher’s fancy LED screen flashed a cheery ‘Complete’ green light, yet the grit on my silverware told a different story. It was a total betrayal. I had spent good money on a machine that promised to ‘sense’ the soil level, and here it was, completely blind to the lasagna remains staring it in the face. I felt like the victim of a very expensive marketing prank. I realized that my reliance on technology had made me lazy about the actual mechanics of the machine. If you have ever felt like your dishwasher was gaslighting you with a ‘Clean’ light when the dishes were clearly still filthy, you are not alone. Today, we are going to fix that blindness and get your machine’s ‘eyes’ back in working order.
Your High-Tech Dishwasher Is Lying To You
Most modern machines rely on a tiny component called a turbidity sensor. This little guy shines a beam of light through the wash water to see how much light makes it to the other side. If the water is murky, the sensor tells the brain to keep washing. If the water is clear, it ends the cycle to save energy. But here is the kicker: that sensor can’t tell the difference between dirty water and a dirty lens. I learned this the hard way after a month of re-washing plates. I discovered that I had neglected the basics of understanding dishwasher parts a key to effective maintenance. A thin film of grease or a calcium deposit from hard water can coat that sensor, making it think the water is always clean or always dirty, regardless of what is actually happening in the tub. I even made the classic rookie mistake of thinking a bit of extra vinegar in the detergent cup would dissolve the film, but the truth about using vinegar as a rinse aid is that it can actually damage the rubber seals before it ever cleans a sensor lens.
Is All This Smart Tech Actually Worth the Hype?
You might be tempted to rip the whole control board out and go back to a 1985 model with a manual dial. I get it. But these sensors are actually brilliant when they work; the Association of Home Appliance Manufacturers (AHAM) notes that sensor accuracy is the primary driver of modern energy ratings, potentially saving thousands of gallons of water over the life of the machine. The problem usually starts with the most common mistakes professional installers see, like failing to account for local water hardness that eventually clouds the optics. Sometimes the issue isn’t even the main turbidity sensor, but rather the hidden sensor that tells your dishwasher when to drain which gets blocked by a stray piece of plastic wrap or a pea. If you have been seeing grit left behind, it’s often because the machine ‘timed out’ the wash cycle too early because it thought the job was done. Have you noticed your machine finishing its cycle surprisingly fast lately, only to leave you with a mess to clean by hand? If so, your sensors are likely the culprit. We are going to dive into how to locate these essential parts every dishwasher owner should know about and clean them without voiding your warranty.
Find the Hidden Eye in Your Machine
To get your machine’s brain back on track, you first have to find where it’s looking. The turbidity sensor is usually tucked away near the sump assembly, right where the water enters the circulation pump. I remember the first time I went looking for mine; I was convinced I’d have to pull the whole unit out of the cabinet and perform surgery. In reality, on most models, you just need to pop out the lower rack and remove the filter assembly. I spent forty minutes wrestling with a wrench before I realized I just needed to twist a plastic cap by hand. Once you are in there, look for a small, translucent plastic component that looks a bit like a tiny lighthouse. This is one of the essential parts every dishwasher owner should know about. If it’s covered in a white haze or a slimy film of old detergent, that’s your culprit. It’s trying to see through a fogged-up window while trying to decide if your plates are clean. 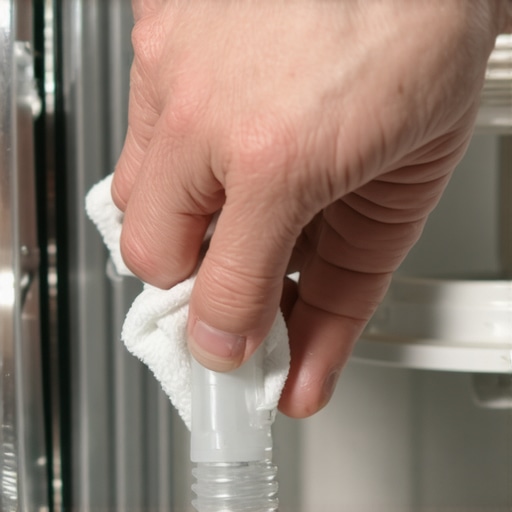
Gently Scrub the Fog Away
Once you’ve located the sensor, don’t go at it with a steel wool pad. You aren’t trying to sand it down; you are trying to restore its vision. I once used a heavy-duty scouring pad on an old Whirlpool, thinking I was being thorough, only to permanently scratch the plastic lens. The scratches scattered the light beam, and the machine never ran a cycle shorter than four hours again. Instead, use a soft microfiber cloth dipped in warm, soapy water. If there is heavy calcium buildup, a tiny drop of citric acid cleaner works wonders, but keep it away from the rubber seals. While you are down there, you should also focus on the best way to clean the hidden filter under the spray arm. A clogged filter allows debris to recirculate, which means the sensor is constantly seeing ‘dirty’ water even if the dishes are actually getting rinsed. It’s a vicious cycle that wears out your motor prematurely.
Clear the Path to the Drain
Sometimes the sensor is fine, but the water it’s measuring is staying ‘dirty’ because it isn’t draining fast enough. I’ve seen cases where a tiny piece of a broken wine glass or a stray toothpick gets lodged in the impeller. This creates a backwash effect where old, murky water stays in the tub for the next phase. You might find the 10-fix for a dishwasher that wont drain is simply clearing a clog in the air gap or the garbage disposal connection. Check the drain line clog that is actually in your garbage disposal before you start buying expensive replacement electronics. If the water can’t leave, the sensor will always report a failed cycle.
Work Within Your Protection Rules
Before you start unscrewing wires or pulling out the sensor housing, you need to think about your paperwork. It is incredibly easy to accidentally unplug a wire and trigger a fault code that you can’t clear without a technician. If your machine is relatively new, maximizing your dishwashers warranty coverage today means knowing where the ‘user-serviceable’ line is drawn. Generally, cleaning the lens is fine, but if you have to start removing the pump housing, you are entering the territory where common dishwasher parts and how to replace them effectively might actually be a job for a pro to keep your coverage intact. I always keep my phone handy to take photos of how things look *before* I take them apart, just in case I need to prove I didn’t break a clip during my ‘maintenance’ session.Speaking of keeping records, there is one ‘best practice’ that might actually be ruining your machine’s performance. Most people are convinced they need to scrape and pre-rinse every plate until it is nearly spotless. I used to do this religiously, thinking I was helping the machine. However, modern detergent enzymes actually require food particles to latch onto. When you put in ‘clean’ dishes, the turbidity sensor gets a false reading, and the detergent ends up scouring your plastic sensor lenses and glass finishes instead. According to experts at the American Cleaning Institute (ACI), enzymes like amylase and protease are formulated to break down specific food soils; without them, the chemistry of your wash cycle is fundamentally unbalanced.
Stop Pre-Rinsing if You Want Your Sensors to Work
If you hand-wash your dishes before putting them in the machine, you are essentially blinding the ‘brain’ of the unit. The sensor sees clear water in the first five minutes and decides to shorten the cycle, lower the temperature, and reduce the water pressure. Then, twenty minutes later, when a bit of stuck-on cheese finally loosens, the machine has already moved on to the rinse phase. This is often why your dishes are still dirty after a deep clean. In my experience, a simple scrape is better than a rinse. Also, consider the case for using powder detergent over pods, as powder allows the machine to dispense cleaning agents more effectively during the pre-wash, giving the sensors a more accurate reading of the soil levels.
The Stealthy Grease Trap of Constant Eco-Cycles
We all want to save on the utility bill, but running your machine exclusively on ‘Eco’ or ‘Quick Wash’ is a recipe for a service call. These cycles use lower water temperatures that fail to fully melt animal fats. Over time, a waxy sludge coats the turbidity sensor and the internal drain lines. I call this the ‘dishwasher fatberg.’ It’s the primary reason why your machine is taking 4 hours to finish a load; the sensor is so coated in grease that it constantly ‘sees’ dirty water even when the load is clean. To prevent this, run a heavy-duty cycle with the hottest water setting at least once a week to thermally shock the system and clear the sensors. 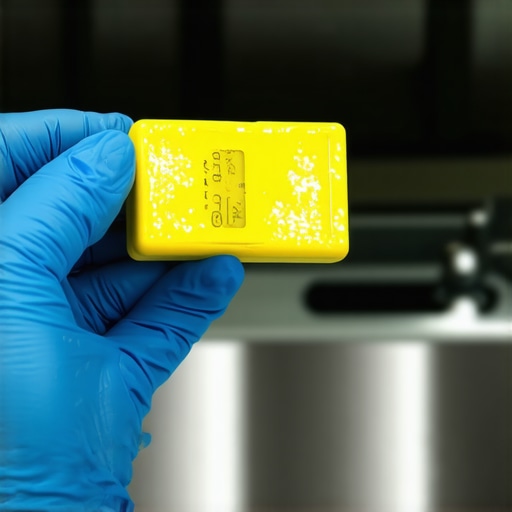
Why Is My Dishwasher Suddenly Taking Four Hours?
If you notice your cycle times creeping up, it’s rarely a software glitch and usually a hardware cry for help. Beyond grease, the impact of hard water on your warranty eligibility is a major factor here. Calcium carbonate creates a cloudy film on the optical sensor that no amount of ‘Eco’ cleaning will fix. If you’re at this stage, you might need to look into the difference between oem and generic water inlet valves if your water pressure has also dropped, as a restricted flow makes the sensor’s job even harder.
Look Beyond the 10-Year Motor Sticker
Manufacturers love to put a giant ’10-Year Warranty’ sticker on the door, but this is a classic marketing trap. Usually, that only covers the brushless motor itself—one of the least likely parts to fail. The truth about those 10-year motor stickers on the door is that they don’t cover the sensors, the control board, or the labor to fix them. To protect your investment, ensure you don’t fall for the risks of skipping the professional installation receipt. If a leak occurs because the unit wasn’t level, many brands will deny a claim even if you have that 10-year sticker. Remember, why professional leveling prevents your door from leaking is just as much about the sensors as it is about the water; an unlevel machine causes water to pool away from the sensor, leading to dry-burn on the heating element. Have you ever fallen into the ‘pre-rinse trap’ only to find your dishes came out worse? Let me know in the comments.
Stop Buying Parts You Don’t Actually Need
When my dishwasher stopped heating last year, I almost dropped $200 on a new control board. I was convinced the ‘brain’ had fried because I had been skipping the advice on how to diagnose dishwasher parts during warranty periods. Before you click ‘buy’ on an expensive assembly, you need a $15 digital multimeter. I use mine specifically to check for ‘continuity’ on the thermal fuse and the heating element. It takes two minutes and prevents you from becoming a ‘parts-changer’ who spends more than the machine is worth. Instead of guessing, the most reliable way to test a thermal fuse is to touch the probes to the metal terminals; if the meter doesn’t beep, the fuse is blown, and you just saved yourself a massive repair bill for a ten-dollar part. I’ve found that when to replace dishwasher parts for optimal performance often comes down to these tiny electrical gatekeepers rather than the big, scary components.
The Hidden Drain Trick Professional Installers Won’t Mention
I once walked into a friend’s kitchen that smelled like a swamp. They were ready to throw out a three-year-old Bosch because of the stench. I looked under the sink and realized the installer had skipped the ‘High Loop.’ Without it, dirty sink water literally flows backward into your ‘clean’ dishwasher. This is why your installer insists on a high loop drain—it creates a gravity-based barrier. If you’re smelling rot, check that hose. While you’re at it, inspect the 5-gasket-that-prevents-a-500-floor-repair. A slow drip from a degraded motor gasket can rot your subfloor for months before you ever see a puddle. As the International Association of Certified Home Inspectors (InterNACHI) notes, many major appliance failures are actually secondary results of poor plumbing connections rather than mechanical defects. 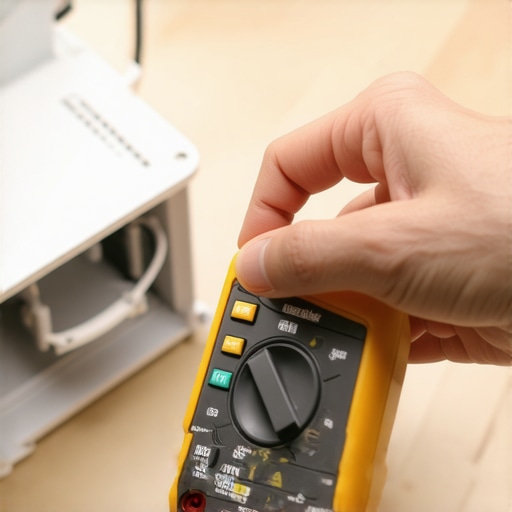
How Can I Keep My Dishwasher from Dying Young?
The secret to a ten-year lifespan isn’t luck; it’s proactive component management. I personally keep a spare water inlet valve in my junk drawer. Why? Because the 10-part that stops that annoying high-pitched-whistle is often the first thing to fail when hard water builds up. I’ve noticed that maximizing your dishwashers warranty through proper parts selection means using OEM components whenever possible; third-party valves often have slightly different pressure tolerances that can stress your internal seals. Looking ahead, I predict we are less than five years away from every machine having an ‘internal health monitor’ that pings your phone with the exact part number needed before the machine even stops working. We’re moving toward a world of ‘predictive’ rather than ‘reactive’ repairs. If you haven’t done it lately, go pull your kickplate and look for those tiny salt-like deposits around the pump. It’s a five-minute check that could save your kitchen. Try testing your thermal fuse this weekend just to see how easy it is—you’ll feel like a pro technician instantly.
Lessons My Wet Kitchen Floor Taught Me
I’ve spent years looking at appliances, and the biggest realization I ever had was that most ‘broken’ machines are just neglected. If you take the time for understanding dishwasher parts a key to effective maintenance, you realize the machine isn’t your enemy. My hardest lesson was learning that common dishwasher parts and their role in proper installation can make or break the life of the unit. I once ignored a small clicking sound only to find a bone fragment had shredded my wash motor impeller. Always listen to your machine—it’s trying to tell you where it hurts before the failure becomes expensive. I also learned to be wary of fine print; what your dishwasher warranty doesnt cover and how to avoid fees usually includes damage from things you could have easily cleaned yourself, like that gritty sensor. #IMAGE_PLACEHOLDER_E#
The Essential Gear I Keep in My Utility Drawer
When it comes to my workbench, I don’t go fancy. I rely on a few specific items that allow me to handle expert advice on dishwasher installation troubleshooting without calling a pro. First, a digital multimeter is non-negotiable; the most reliable way to test a thermal fuse is with one of these, and it prevents you from throwing away a good machine. I also swear by citric acid over vinegar to avoid seal damage while handling the easiest way to remove hard water buildup from the tub. Finally, if you’re doing any move or new setup, ensure you have the most durable braided steel hoses for long-term safety to prevent the nightmare of a burst line.
Take Back Control of Your Kitchen’s Hardest Worker
You don’t need a degree in mechanical engineering to keep your home running smoothly. By taking these small steps, you are maximizing your dishwashers warranty coverage today simply by being a responsible owner. Don’t let the complex sensors or the high-tech marketing intimidate you. You now have the knowledge to see what the machine sees and fix the blindness that leads to dirty plates. It’s time to stop re-washing by hand and let your dishwasher do the job it was built for. Have you ever found a strange object stuck in your pump that almost caused a disaster? Let me know in the comments below!
Related Posts

Why Your New Smart Machine Refuses to Start Without the App
This morning, I finally unboxed my latest smart dishwasher. Excited…
Why Your Smart Dishwasher App Is the Best Maintenance Tool
Ever had that sinking feeling when your brand-new dishwasher starts…
How Smart Leak Sensors Can Save Your Hardwood Floors
I'll never forget the sinking feeling in my stomach when…