
It started with a faint whiff of pickles every time I opened the door. I felt like a domestic hero, bypassing those chemical-heavy blue liquids for a two-dollar bottle of white vinegar. I was convinced I was being eco-friendly, frugal, and frankly, smarter than the average homeowner. Then, the drip started. It wasn’t a flood at first—just a slow, rhythmic tap-tap-tap onto my expensive hardwood floor that ended up costing me way more than a lifetime supply of Jet-Dry ever would. I realized far too late that my “natural” hack was slowly dissolving the very parts that kept the water inside the machine. I spent a whole Saturday morning mopping up a mess that could have been avoided if I hadn’t been so stubborn about my DIY solutions.
Why I Stopped Dumping White Vinegar in My Rinse Aid Dispenser
I thought I was outsmarting the system. For years, I told anyone who would listen that big detergent companies were just selling us overpriced chemicals in fancy bottles. I even ignored the warnings in the user manual because I figured they were just in cahoots with the rinse aid manufacturers to keep us buying more products. But after I had to spend hours looking for the gasket that prevents a 500 dollar floor repair, I had a massive reality check. The truth is, vinegar is an acid. While it is an absolute miracle worker for cleaning a coffee pot or descaling a showerhead, it is not designed to sit inside your dishwasher’s delicate internal components for hours on end, cycle after cycle. I made the classic mistake of using high-concentration cleaning vinegar—which has a significantly higher acidity than the culinary stuff—and it basically turned my door seal into a gummy, useless mess. This wasn’t just a small repair; it was a wake-up call that “natural” doesn’t always mean “safe” for complex appliances.
Is vinegar actually going to melt my dishwasher seals?
This is the big question I get every time I bring this up at backyard BBQs or in the comments section. People love their vinegar, and I get it! But here is the technical catch: most modern dishwashers rely on specific types of rubber and plastic—like EPDM—that aren’t always acid-resistant. According to appliance experts at major manufacturers like Whirlpool, the acetic acid in vinegar can actually degrade the rubber parts in the pump and the seals over time, leading to leaks and total mechanical failure. If you are dealing with cloudy glasses, you might think you are fighting hard water that is killing your heating element, but dumping vinegar into the rinse aid hole is a risky way to fix it. There is a very specific secret to using vinegar without damaging your rubber seals, and it involves never, ever putting it in the dispenser. Have you ever noticed your dishwasher door feeling a bit sticky or seen tiny black flakes in your tub after a cycle? That might be your seals literally disintegrating right before your eyes. Let me know in the comments if you’ve seen this happen—I really want to know if I’m the only one who learned this the hard way! Today, I want to show you how to get those sparkling, spot-free dishes without voiding your protection or ruining your kitchen floor. It is all about a balance of knowing your machine’s limits and understanding why your warranty policy excludes damage from hard water scale if you use the wrong DIY methods. Stick with me, and we’ll save your machine together.
Switch to Citric Acid for a Safer Deep Clean
If you want to ditch the chemicals but save your machine, stop reaching for the vinegar bottle and start looking for citric acid. I learned this the hard way after my third dishwasher leak. Citric acid is a powerhouse at removing hard water deposits, but it is much gentler on the EPDM rubber gaskets found in modern machines. Think of it like this: vinegar is a wild sledgehammer, while citric acid is a precision chisel. To do this right, buy food-grade citric acid and place about two tablespoons in the detergent cup. Run the machine empty on a hot cycle. This is the eco-friendly way to descale your machine with citric acid without worrying about your door seal melting away. I once tried to super-clean my unit by mixing vinegar and baking soda—a classic DIY fail that just resulted in a volcano of foam and a clogged pressure sensor. Stick to the acid that professionals actually recommend.
Inspect Your Door Gasket for This One Warning Sign
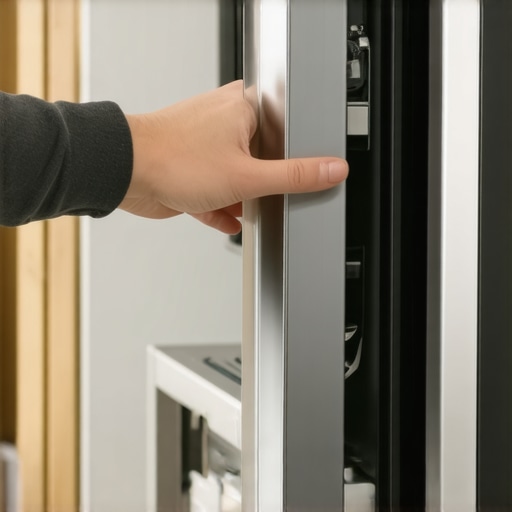
Before you run another load, I want you to perform a simple sticky test. Open your dishwasher door and run your finger along the black rubber seal that wraps around the tub. If your finger sticks even slightly, or if you see a black residue on your skin, your seal is already beginning to fail due to chemical exposure. This is often the 5 part that prevents your kitchen floor from rotting, and once it goes soft, water will find its way into your subfloor. Replacing it isn’t a massive ordeal if you catch it early. You can find many common dishwasher parts and how to replace them effectively online, but the trick is to ensure the new seal is seated perfectly in the channel without any stretches or gaps. I remember my first attempt at this—I pulled the old one out like a kid with a piece of licorice, only to realize I hadn’t noted which direction the lip faced. Take a photo first!
Pick the Right Parts to Keep Your Warranty Valid
One thing no one tells you when you start swapping out components is that your manufacturer is watching. If you use a cheap, third-party seal that wasn’t designed for your specific model, you might be maximizing your dishwashers warranty through proper parts selection or, more likely, voiding it entirely. Manufacturers are very picky about the materials used in their machines. When I replaced my pump after the vinegar incident, I made sure to check the serial number three times. It is also worth establishing the filter habit that adds years to your dishwasher life by cleaning the mesh screen every single week. This prevents debris from putting extra pressure on those already weakened seals. When you realize understanding dishwasher parts a key to effective maintenance is the secret to a long-lasting kitchen, you start to see that a tiny bit of prevention is worth more than a dozen gallons of natural cleaner.
Most homeowners think as long as the bubbles in the spirit level are centered, their installation is a success. But leveling is the easy part. The real nuance—the stuff that keeps technicians employed—is the hidden tension in your supply lines and the literal chemistry of your gaskets. I once spent three hours trying to figure out why a brand-new unit was humming but not filling, only to realize the installer hadn’t checked the water pressure. Too much pressure doesn’t just make a noise; it slams your inlet valve until it cracks, leading to a frantic search for how to diagnose dishwasher parts during warranty periods before the floor gets soaked.
Stop Obsessing Over the Spirit Level
Everyone tells you that a level machine is the key to a quiet wash. While that is true for vibration, the most critical part of installation is actually the vertical geometry of your drain. If you don’t understand the importance of the high loop in your drain line, you are essentially inviting sink sludge to backflow into your clean dishes. It is a common myth that the check valve will handle everything. In reality, gravity is the only thing that never fails. I have seen hundreds of ‘mysterious’ odors that were solved simply by zip-tying a hose to the top of the cabinet. Have you ever fallen into this trap? Let me know in the comments because I certainly did on my first apartment install.
The Silent Valve Killer
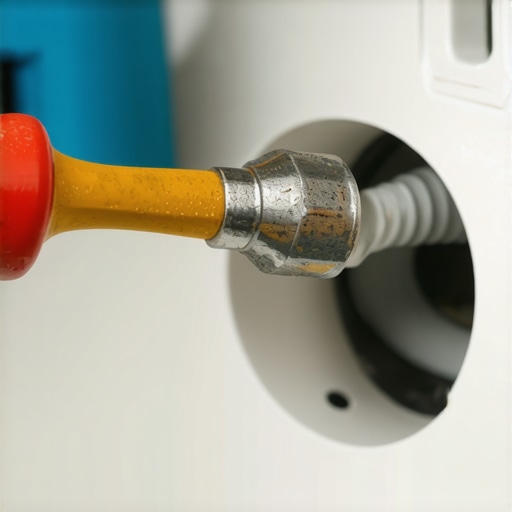
Here is the ‘Oops’ factor no one talks about: the garbage disposal knockout. If you are installing a new disposal alongside your dishwasher, there is a plastic plug inside the drain port. If you don’t bash that thing out with a screwdriver, your machine will never drain, and the back-pressure can blow out the pump seals. This hidden drain plug that kills your motor is the number one reason for first-day service calls. Furthermore, if you are doing the plumbing yourself, make sure you use the proper tool for tightening your water supply compression fit. Hand-tightening leads to slow drips, while over-tightening with a pipe wrench can warp the brass fittings, creating a leak that only appears when the water gets hot.
Can high water pressure actually void my entire protection plan?
This is a sophisticated nuance that most people miss: your warranty is not a blanket insurance policy. According to data from the Association of Home Appliance Manufacturers (AHAM), water inlet valves are typically rated for 20 to 120 PSI. If your home’s pressure is at the high end, the constant ‘water hammer’ effect can be classified as ‘environmental damage’ rather than a manufacturer defect. This is why your warranty claim fails more often than you would think. Technicians can see the physical evidence of high-pressure stress on the valve housing, and they will use it to deny a claim faster than you can say ‘lemon law.’
Why Universal Parts Are Anything But
We all love a bargain, but when it comes to the seals that keep 15 gallons of hot water out of your cabinetry, ‘universal’ is a dirty word. There is a real difference between aftermarket and factory gaskets that goes beyond just the price tag. Factory-spec EPDM rubber is tested for specific chemical resistances that generic kits ignore. If you use a third-party seal, you are gambling with the integrity of your machine’s ‘brain’ (the control board), which sits just inches away from those steam vents. I’ve seen generic seals melt during a high-heat sanitize cycle, turning a $10 savings into a $400 repair bill. Stick to OEM, and keep your kitchen dry.
Maintaining a dishwasher isn’t just about cleaning the filter once a blue moon; it is about keeping a meticulous paper trail. I learned this the hard way when a service tech denied my claim because I couldn’t prove I’d been descaling regularly. Now, I keep a digital folder for every appliance because I know why your warranty claim fails without this specific maintenance log. It takes five minutes to snap a photo of a receipt or a clean filter, but it saves hundreds in the long run. I also make it a point to verify your professional installation receipt for insurance the moment the job is done. If that paper says the installer used a plastic line instead of braided steel, you want to know before the leak happens, not after.
My Personal Save-My-Sanity Toolkit
I don’t own a massive garage full of tools, but I have a few ‘golden’ items specifically for the kitchen. First is a telescopic inspection mirror. This little $10 tool lets me see behind the unit and under the motor without pulling the whole machine out. I use it to check for the first signs of moisture near the pump. I also keep a small stash of the replacement parts every dishwasher owner should keep on hand, like a spare drain hose and extra rack clips. These are essential parts every dishwasher owner should know about because they are the first to fail and the easiest to fix yourself. According to the Association of Home Appliance Manufacturers (AHAM) DW-1-2020 standard, the performance of your machine is heavily dependent on the thermal energy of the water. If your water heater isn’t hitting 120°F at the tap, your detergent won’t activate. I use an infrared thermometer to verify this because why your warranty claim depends entirely on your water temperature is a technicality that catches most people off guard.

How do I keep my dishwasher parts from failing early?
The secret is consistency and the right tech. Every six months, I use a multimeter to check the continuity of my heating element. It sounds technical, but it takes thirty seconds and tells me if I’m about to have a ‘clean but cold’ cycle. If you aren’t comfortable with a multimeter, you can actually how to use your smartphone to diagnose a failing motor just by recording the sound of the pump and comparing it to healthy cycles. Most of the time, knowing when to replace dishwasher parts for optimal performance is simply a matter of listening for changes in the hum or vibration of your machine.
Smart Sensors are Changing the Repair Game
Looking ahead, I see a shift toward predictive maintenance. We are already seeing high-end models that alert your phone when the filter is 50% clogged. In the next few years, I predict we won’t even be guessing about leaks; internal moisture sensors will shut off the water supply automatically. For now, we have to be the smart sensors. I’ve started using understanding dishwasher parts a key to effective maintenance as my personal mantra. If you know how the float switch looks when it is clean, you’ll recognize the gunk that causes an overflow before it ruins your day. Go check your kitchen sink right now—run the hot water and use a meat thermometer to see if it hits at least 120°F. If it doesn’t, your dishwasher is fighting an uphill battle before you even press start.
Why My Best Intentions Almost Cost Me a New Kitchen
The hardest lesson I learned wasn’t that vinegar is acidic—I knew that from high school chemistry. It was that modern appliances are far more specialized than the rugged machines our parents owned. I used to think I was saving money by sourcing random bits online, but I realized that the one part you should never buy used on eBay is usually the one that protects your subfloor. My biggest ‘lightbulb moment’ happened when I saw a technician deny a neighbor’s claim simply because they used a non-spec hose. It turns out that what happens to your coverage if you use third-party parts is often a total loss of protection, leaving you on the hook for expensive repairs.
The Gear That Actually Saved My Machine
I’ve trimmed my maintenance kit down to just the essentials that provide real data, not guesswork. I trust my digital multimeter because it doesn’t lie about a heating element’s health, and I rely on the official AHAM standards to guide my temperature checks. For specific repairs, I always keep a list of the parts you can swap yourself without voiding your protection. This allows me to handle the small stuff—like rack wheels or spray arms—while keeping my warranty intact for the high-ticket items like the control board or motor.
Building a Relationship with Your Appliances
Your dishwasher isn’t just a box that hides dirty plates; it’s a complex system of hydraulic pressure and thermal energy. When you stop fighting the machine with DIY ‘hacks’ and start respecting its engineering, it will reward you with a decade of service. Mastering the nuances of dishwasher installation and keeping up with genuine dishwasher parts isn’t just a chore—it’s a form of home security. I hope my trial-and-error journey helps you skip the mop-and-bucket phase and go straight to the sparkling-glassware phase.
Have you ever found a ‘universal’ part that actually didn’t fit your machine or caused a bigger headache? Let me know in the comments below—I’d love to hear your experience!
Related Posts
The Filter Habit That Adds Years to Your Dishwasher Life
Ever had that sinking feeling when your brand-new dishwasher suddenly…
How to Check Your Spray Arm for Calcium Deposits
Ever had a dishwasher that suddenly stops cleaning your dishes…
Why the third rack is not always the best place for silver
I remember the first time I loaded my brand-new dishwasher.…