
I was knee-deep in a puddle of greasy, grey water, staring at a plate of half-dissolved spaghetti that had basically glued itself to my dishwasher’s floor. The smell was something between a swamp and a forgotten middle-school locker. In my desperation to avoid a massive repair bill, I grabbed a metal coat hanger and started poking around. Big mistake. I didn’t just clear the clog; I managed to gouge the delicate plastic impeller of my pump. It was a classic ‘don’t do what I did’ moment that turned a simple blockage into a full-blown hardware replacement. Today, I am going to help you avoid that nightmare. I will show you how to clear those stubborn clogs using a gentle snaking method that keeps your internals intact and your kitchen dry.
Stop Reaching for the Heavy-Duty Plumbing Snake
When you realize your machine isn’t draining, the panic sets in. You want that water gone right now. But before you go hunting for a professional-grade drain auger, you need to realize that your dishwasher isn’t a four-inch cast iron sewer line. It is a precision instrument. The best way to fix a dishwasher that will not drain often involves more finesse than force. Most people don’t realize that the drain hose is usually just thin, corrugated plastic. If you use a standard metal snake, you are essentially bringing a knife to a pillow fight.
According to the International Association of Certified Home Inspectors (InterNACHI), the pump assembly is one of the most vulnerable parts of your unit during a DIY cleaning attempt. A single scratch on the internal seal can lead to a slow, hidden leak that rots your subfloor before you even notice it. This is why understanding your dishwasher parts is the real key to effective maintenance. You need to know exactly what you are poking before you start poking it. Pushing blindly through a valve can turn a minor nuisance into a catastrophic failure.
Will this actually ruin my expensive pump?
It is the question that stops most of us in our tracks. The short answer is: only if you are reckless. If you hear a strange noise that sounds like a coin stuck in the pump, shoving a snake down there might actually wedge the object deeper, potentially cracking the housing. You are looking for a ten-dollar fix, not a five-hundred-dollar replacement. My goal today is to walk you through the process of using a nylon-coated zip-tie or a specialized flexible brush to clear the path safely. Have you ever tried to DIY a plumbing fix only to have it backfire spectacularly? I would love to hear your stories in the comments so we can all learn from those ‘oh-no’ moments together. Now, let’s get our hands dirty—but carefully.
Clear the External Blockages First
Before you even touch the machine’s internals, you need to check the ‘snorkel’ of your plumbing system. Most drainage issues don’t actually start inside the tub; they start at the sink. If you have a garbage disposal, that is the most likely bottleneck. I remember a frantic Sunday afternoon where I nearly dismantled my entire kitchen floor only to realize a single rogue bottle cap was wedged in the disposal inlet. Often, the drain line clog that is actually in your garbage disposal acts like a dam, sending every drop of wastewater right back into your dishwasher. Pop the cap off your air gap—that little chrome cylinder on your sink—and clear out any accumulated gunk. It is a messy job, but it’s the most common ten-dollar fix you’ll ever find.
Master the Zip-Tie Method for Delicate Hoses
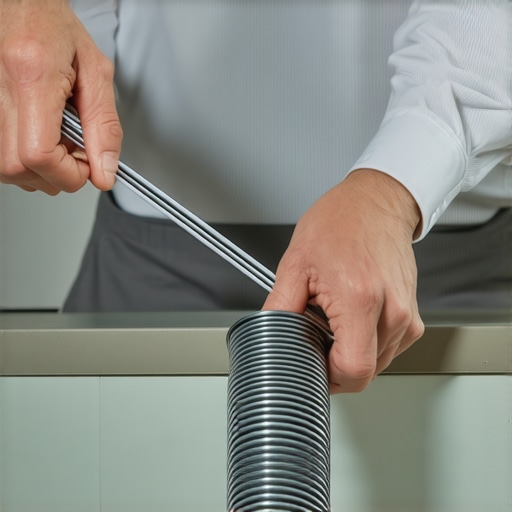
If the air gap is clear, it’s time to address the hose itself. This is where the ‘gentle snake’ comes into play. Instead of a rigid metal auger that can puncture the corrugated plastic, use a 24-inch heavy-duty nylon zip-tie. Think of it as a flexible, blunt-force probe. When I first tried this, I used a piece of stiff wire and nearly gave myself a heart attack when I heard a faint ‘pop’—thankfully, it was just the wire slipping, but it could have easily been a hole in the line. By using a zip-tie, you can feel for resistance without the risk of a puncture. Gently feed it into the drain port at the bottom of the tub. You are feeling for a ‘mushy’ resistance, which usually indicates a mass of grease and food particles.
Extract Debris Without Forcing the Flow
As you wiggle the zip-tie or a specialized flexible brush, avoid the urge to shove. Your goal is to break the tension of the clog so the pump can eventually push it through. If you encounter a hard, metallic resistance, stop immediately. You might be hitting a piece of silverware or a fragment of glass. This is a critical moment where expert advice on dishwasher installation troubleshooting saves you from a total motor burnout. If you push a glass shard further, it can lodge into the impeller, causing that dreaded drain pump noise that means you have a coin stuck or worse, a ruined seal.
Inspect the Check Valve for Hidden Obstructions
The check valve is a tiny rubber or plastic flap that acts like a one-way door. Its job is simple: let water out, but don’t let it back in. If a small piece of debris, like a popcorn kernel or a plastic bread tie, gets stuck in this door, the water will just slosh back and forth. This is a vital part of common dishwasher parts and their role in proper installation. Accessing it usually requires removing the lower spray arm. Once you have the valve in your hand, rinse it under hot water. I once found a single cherry pit wedged perfectly in a valve flap, which caused two weeks of ‘clean’ water to sit stagnant in the bottom of the machine. It didn’t require a plumber; it just required a pair of tweezers and a bit of patience.
Why Your ‘Perfect’ DIY Install Could Void the Whole Warranty
Most homeowners assume that if they follow a YouTube video, they are legally protected by their manufacturer’s guarantee. But here is the contrarian truth: manufacturers are often looking for any technicality to deny a claim, and your ‘perfect’ DIY job is the easiest target. I’ve seen homeowners save $150 on labor only to lose out on a $1,200 repair because they couldn’t produce a professional invoice. The risks of skipping the professional installation receipt are frequently underestimated. If your unit develops a structural leak and you can’t prove it was installed to local code by a licensed pro, that ‘limited lifetime warranty’ on the stainless steel tub suddenly becomes very limited indeed. You might be making the mistake that voids your lifetime tub warranty without even realizing it—simply by failing to document the vapor barrier or the exact leveling specs required by the manual.
The Hidden Trap of Choosing Generic Replacement Parts
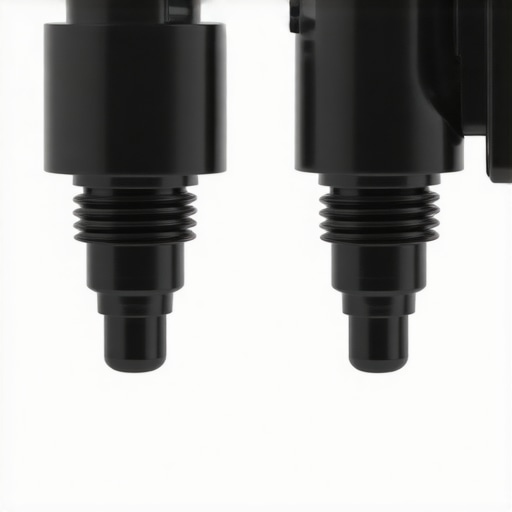
When a pump fails or a valve starts to drip, the temptation to buy a twenty-dollar generic version from a massive online marketplace is overwhelming. Everyone tells you that OEM (Original Equipment Manufacturer) parts are just a ‘brand tax,’ but my experience in the field suggests otherwise. According to the Association of Home Appliance Manufacturers (AHAM), modern high-efficiency dishwashers are designed with incredibly tight tolerances for water pressure and electrical resistance. A generic valve might look the same, but if its solenoid draws slightly more current, it can eventually fry the traces on your expensive main control board. Understanding the difference between OEM and generic water inlet valves is about more than just the initial price; it is about protecting the electronic ‘brain’ of your machine from catastrophic failure.
Can a Single Generic Valve Actually Total Your Machine?
It sounds dramatic, but the answer is a resounding yes. If a non-spec valve fails to close completely because of a slightly different spring tension, you risk a slow, internal flood. This is where what your dishwasher warranty doesn’t cover becomes a painful reality. Most policies specifically exclude damage caused by the ‘failure of non-authorized parts.’ If a cheap seal gives way and ruins your kitchen floor, you are left holding the bill for both the appliance and the flooring. This is why parts to check when installing a dishwasher for long-term performance should always be sourced from verified vendors. It’s better to pay thirty percent more for a genuine part now than to replace the entire unit in eighteen months.
Does Your Warranty Protect You From a Power Surge?
This is the biggest ‘oops’ factor I encounter. People spend thousands on a smart dishwasher but plug it directly into a standard outlet without a dedicated surge protector. When a summer storm hits and the control board fries, they are shocked to find their claim denied. You need to understand why your manufacturer warranty excludes power surge damage. Manufacturers view electrical spikes as an ‘act of nature’ or a ‘household utility failure,’ not a manufacturing defect. Without a surge-rated outlet or a whole-house protector, that sophisticated Wi-Fi-enabled board is just an expensive paperweight waiting to happen. Have you ever fallen into this trap or been surprised by a warranty denial? Let me know in the comments so we can swap strategies on how to fight back.
Build a Diagnostic Kit That Actually Works
After years of fixing my own leaks and clogs, I’ve moved past the ‘hammer and a prayer’ phase. If you want to stop guessing why your machine won’t start, you need a decent digital multimeter. I personally swear by the Klein Tools MM400. It’s rugged enough to survive being dropped on a tile floor and precise enough to help you test your thermal fuse with a basic multimeter without blowing the circuit. Most people assume electrical issues are invisible mysteries, but with the right probe, you can literally see the electricity stopping at a faulty door switch or a burnt-out element. It’s the difference between blindly buying a $150 board and performing a ten-dollar fix that takes five minutes of your Saturday.
I also keep a set of long-reach Torx drivers (specifically T15 and T20). Modern manufacturers love these because they are harder to strip than Phillips heads, but they are a total nightmare if you don’t have the right bit in your drawer. Having these on hand is the first step in understanding dishwasher parts and how they interconnect behind the kickplate. You’ll also want a flexible ‘grabber’ tool—the kind with the little metal claws at the end. It is truly the only way to safely remove a stuck glass fragment from the pump without slicing your fingertips to ribbons or further damaging the impeller housing.
How do I maintain these mechanical parts over time?
The secret isn’t just deep cleaning; it is consistent, preventative monitoring. Every six months, I run a cycle with a specialized descaler, but I also do a physical ‘shake test’ on the racks to check for structural integrity. If I see even a hint of orange through the plastic coating, I use a vinyl touch-up kit to restore a rusted dishwasher tine in minutes before the rust spreads and ruins my expensive ceramic plates. You should also be checking the spray arms for mineral buildup. If the tiny holes are clogged, the internal water pressure drops, and why your smart sensors are giving you dirty readings becomes a daily frustration. I use a simple toothpick or a high-pressure air canister to blow out the sediment. It sounds tedious, but parts to check when installing a dishwasher for long-term performance include these tiny orifices that dictate the entire cleaning efficiency of the unit.

According to the technical service bulletins from Bosch (specifically their 800-series internal engineering documentation), maintaining a specific ‘high loop’ on your drain hose isn’t just a suggestion—it’s a mechanical requirement to prevent siphoning that can burn out the drain pump motor prematurely. If you didn’t check why your installer insists on a high loop drain, you might be slowly killing your motor without knowing it. Looking forward, I predict we will see ‘self-healing’ gaskets and even more integrated AI that can detect a failing motor bearing just by the acoustic frequency of its hum. We are already seeing the beginnings of this with machines that require you to update the firmware on your kitchen Wi-Fi module just to optimize the wash rhythm. If you haven’t done it yet, I challenge you to open your dishwasher’s mobile app right now and check for a software update; it might just solve that weird ‘taking four hours’ glitch you’ve been ignoring for months.
Hard Truths from the Bottom of My Kitchen Sink
After years of dealing with flooded floors and greasy hands, I’ve realized that the most expensive repairs usually start with a simple ‘I can fix that in five minutes’ mentality that lacks the right technique. Here are the core lessons that saved my sanity:
- Force is your enemy: If a drain line doesn’t clear with a gentle wiggle of a zip-tie, pushing harder usually just means you’re about to buy a new hose or pump.
- Documentation is as valuable as a wrench: To ensure you are maximizing your dishwashers warranty coverage today, take photos of your install and keep every single receipt from the day of purchase.
- Check the filter daily: Most drainage issues are preventable. Making sure you know the essential parts every dishwasher owner should know about, like the mesh filter, can stop a clog before it even starts.
- Listen to the rhythm: A change in the pitch of the drain cycle is often the first warning sign. If you learn how to diagnose dishwasher parts during warranty periods by sound, you can catch a failing motor before it seizes up completely.
My Go-To Survival Kit for Appliance Disasters
I don’t believe in buying every gadget in the aisle, but these four items have paid for themselves ten times over in my kitchen:
- The 24-Inch Heavy-Duty Zip Tie: This is the ‘gentle snake’ I swear by. It’s flexible enough to navigate tight turns but rigid enough to displace a fat-and-fiber clog without puncturing the plastic.
- Digital Multimeter: This is how you stop guessing. It allows you to check continuity and voltage safely, turning an ‘it’s broken’ mystery into an ‘it’s just a $10 fuse’ reality.
- Long-Reach Torx Set: Manufacturers use these to keep casual tinkerers out. Having your own set means you can actually reach the common dishwasher parts and how to replace them effectively without stripping the screw heads.
- Braided Steel Hose: Never reuse old lines. Investing in the most durable braided steel hoses for long-term safety is the best insurance against a burst pipe.
#IMAGE_PLACEHOLDER_E#
Take Control of Your Kitchen’s Health Today
Keeping your dishwasher running smoothly doesn’t require a master’s degree in engineering—it just requires a bit of patience and the right approach to maintenance. By choosing the gentle path over brute force, you protect your pump, your flooring, and your budget. Remember that every small action you take, from cleaning the air gap to checking the complete list of dishwasher parts covered by warranty, builds a more reliable home. You have the tools and the knowledge now, so go ahead and clear that drain with confidence. Have you ever tried the zip-tie trick, or did you find an even better way to clear a stubborn drain line? Let me know in the comments below!
Related Posts

The Fix for a Dishwasher That Keeps Humming After the Cycle
It was late at night, and I was already dreaming…
Why a Small Drip in the Back Can Rot Your Whole Floor
It was a morning like any other when I noticed…
Why Your Dishwasher Still Has Water in the Bottom
Ever reached for a fresh coffee in the morning only…