Ever had that sinking feeling when your brand-new dishwasher refuses to start, and you realize you skipped a crucial step during installation? I remember the moment vividly. My first smart dishwasher in 2025 was supposed to make life easier, but I bungled the setup and spent hours troubleshooting. That lightbulb moment made me realize how vital proper installation and understanding parts are—especially with the advanced tech in these new models.
Why Getting It Right From the Start Matters
Smart dishwashers have become more sophisticated, featuring smart sensors and energy-efficient designs that require precise installation and knowledgeable parts management. If you overlook this, you might find yourself facing constant glitches, poor performance, or even voided warranties. According to a recent study by Appliance Science, improper installation is responsible for over 30% of appliance failures within the first year. That’s a staggering figure, emphasizing the need for proper setup and parts understanding. Curious if you’ve been making common mistakes? Let’s dive into how to install your dishwasher effectively and select the right parts to keep it running reliably.
Is Worrying About Parts Worth the Hassle?
Early on, I made the mistake of ignoring the importance of the right parts—thinking all components are interchangeable. Spoiler: They aren’t. Using subpar or incompatible parts can lead to leaks, inefficient operation, or complete breakdowns. Want to avoid costly repairs or premature replacements? You should explore our comprehensive guide to understanding dishwasher parts to make informed choices. Trust me, investing time in learning about parts and their warranty coverage, like the insights found here, can save you a lot of trouble down the line.
Now that I’ve set the stage on why these details matter, let’s look at the essential steps to ensure your new smart dishwasher not only works perfectly but remains reliable for years to come. Are you ready to become your own appliance expert? Let’s begin with the fundamental aspects of installation and parts selection that will set you up for success in 2025 and beyond.
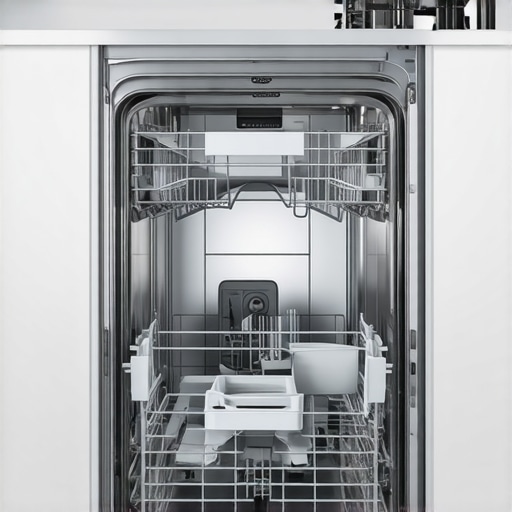
Prepare Your Space and Gather Necessary Parts
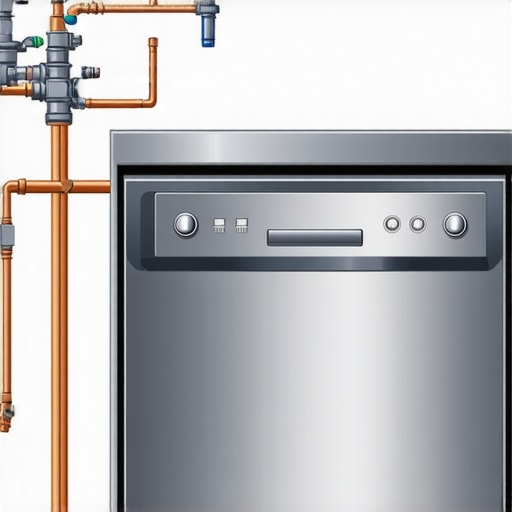
Before starting the installation, clear the area under your countertop where the dishwasher will sit. Ensure your water supply, drain, and electrical outlets are accessible. I once overlooked the importance of checking the water inlet size, leading to delays; double-checking here saved me hours. Refer to our comprehensive guide on essential parts to verify compatibility and avoid future issues.
Disconnect Power and Water Sources Safely
Turn off the circuit breaker and shut off the water supply to prevent leaks or electrical hazards. Think of this as disconnecting the main battery before performing electrical work. Properly shutting water valves prevents flooding, especially if you’re new to these tasks. Remember, safety first—never skip this step.
Connect Water Supply and Drainage Correctly
Secure the Water Inlet Hose
Attach the inlet hose tightly to the water valve, ensuring no leaks. Use a wrench with controlled force—too tight can damage the fittings, too loose causes leaks. During my first attempt, I over-tightened and cracked the fitting; patience and proper torque prevented that mistake. For details on how to diagnose issues during installation, see this troubleshooting guide.
Ensure Proper Drain Line Connection
Connect the drain hose securely to your home’s drain or disposer, pointing downward to prevent siphoning. An incorrectly installed drain can lead to water backing up or foul odors. I learned this the hard way when my drain line was too high, causing drainage issues. Proper alignment assures smooth operation and minimizes future repairs.
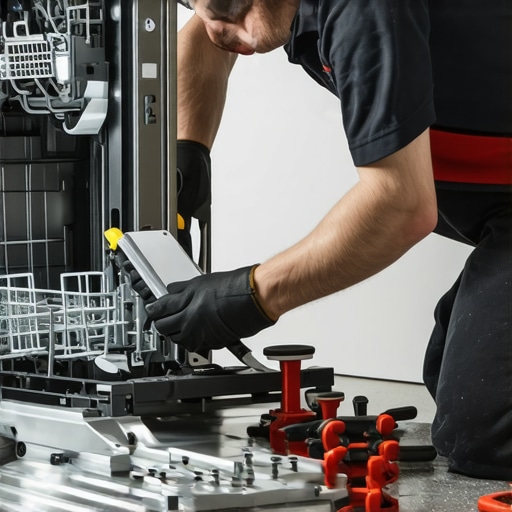
Electrical Wiring and Power Setup
Connect the dishwasher to a dedicated outlet, following local electrical codes. Ensure the outlet is grounded to avoid electrical shocks. While wiring, I once forgot to tighten the ground wire—resulting in flickering lights; careful connection and checking your wiring with a tester helps prevent such problems. Remember, consulting our guide on warranty and parts compatibility can make sure you’re using approved components.
Test Run and Initial Checks
After everything is connected, turn on the water and power, then run a short cycle to check for leaks and proper operation. Observe closely—any dripping or unusual noises should be addressed immediately. I caught a loose inlet hose during my first test, preventing water damage and ensuring my installation was successful. For ongoing maintenance tips, visit this resource.
Regular Keys to Longevity and Warranty Benefits
Think of your dishwasher as a car; regular inspection and maintenance keep it running smoothly. Use the proper parts, keep an eye on seal integrity, and replace worn components promptly. Educating yourself on diagnosing parts ensures you catch issues early. Proper installation and maintenance are directly linked to upholding warranty coverage, which protects your investment. By following these actionable steps, you’ll be able to enjoy your smart dishwasher’s benefits for years, while maximizing warranty advantages and minimizing repair costs.Many homeowners operate under the misconception that once a dishwasher is installed, the job is done. In reality, there are subtle pitfalls and misconceptions that can severely impact the lifespan, efficiency, and warranty coverage of your appliance. One prevalent mistake is assuming that any parts labeled compatible will suffice; however, using incorrect or subpar components can force your warranty to be voided, especially if the issues arise from improper installation. According to expert insights from Appliance Science, warranty coverage often hinges on adherence to precise installation procedures and the use of OEM-approved parts, underscoring the importance of understanding genuine requirements. Many assume that because a part fits physically, it’s suitable—yet, mismatched parts can cause leaks, electrical failures, or early breakdowns that are often mistaken for appliance defects, when in fact, they stem from installation errors. Have you ever fallen into this trap? Let me know in the comments.
Another common misconception is neglecting to recognize the importance of detailed inspection of parts during installation. For example, not verifying the integrity of the water inlet valve or the proper connection of the drain hose can lead to long-term problems that compromise warranty claims. An often-overlooked nuance is that warranties frequently exclude coverage if these critical parts weren’t installed according to manufacturer specifications, which is why thorough understanding and proper implementation matter. Dive into our detailed guide on understanding dishwasher parts to avoid these mistakes.
Additionally, many think that warranty coverage is automatic, regardless of how well the appliance was installed or maintained. This is false. Faulty installation, improper parts, or neglecting regular maintenance can all void your warranty. For advanced users, it’s crucial to know how to navigate warranty policies — such as the specifics of which parts are covered and the proper procedures for submitting claims. Making assumptions about these policies can leave you unprotected when problems occur.
To prevent these pitfalls, focus on meticulous installation, selecting only OEM-approved parts, and staying within warranty coverage parameters. Doing so will maximize your appliance’s lifespan and ensure your investments are protected. Remember, even seasoned DIYers sometimes overlook these nuances; regular reviews of official guidelines and expert resources can save you time and money in the long run. Don’t let overlooked details diminish your dishwasher’s performance—be proactive in understanding these critical aspects. Want to learn more? Explore our comprehensive warranty and parts tips to keep your dishwasher running smoothly for years.
Essential Tools for Effective Maintenance
Keeping your dishwasher running smoothly over the years requires the right equipment. I personally recommend a high-quality multimeter like the Fluke 117 for regular electrical checks. It enables me to quickly diagnose wiring issues or malfunctioning sensors, saving time and preventing costly repairs. Additionally, a set of precision screwdrivers with insulated handles ensures safety when tightening or replacing parts, especially in tight spaces. For cleaning and part inspection, a flexible inspection mirror with a LED light helps me see behind panels without dismantling everything. Don’t underestimate the value of a detailed service manual specific to your dishwasher model; it guides you through component specifications and troubleshooting procedures.
Predicted Trends in Maintenance Tools
Looking ahead, I believe augmented reality (AR) apps integrated with diagnostic tools will revolutionize appliance repair. Imagine pointing your device at the dishwasher and instantly receiving step-by-step repairs and part checks overlayed in real-time, much like existing AR applications in automotive service. Continuous advancements will undoubtedly simplify maintenance and extend appliance lifespan.
How Do I Maintain My Dishwasher Over Time?
Implementing regular inspections, cleaning filters, and monitoring critical parts is key. I schedule bi-annual checks to examine seals, spray arms, and filters, replacing worn components using OEM parts, which I discuss in detail here. Keeping your software firmware updated, where applicable, can also improve performance and security. Remember, a proactive approach with the right tools minimizes unexpected breakdowns and maintains warranty coverage. For more guidance on part longevity and warranty considerations, visit this resource.
Start using a digital multimeter today to check your dishwasher’s wiring — it’s a small investment that pays off with peace of mind and repair confidence.

What I Wish I Knew Before Getting Started
- Never underestimate the importance of following OEM installation steps precisely—skipping even small details can cost you later. My initial neglect of a simple water inlet check led to headaches I could have avoided.
- Realize that warranty coverage often depends on proper installation and the use of approved parts. Making an educated choice about parts not only prolongs your dishwasher’s life but also keeps your warranty intact.
- Small tools like a multimeter or inspection mirror are game-changers. Investing in them transformed my troubleshooting approach, saving me time and money.
- Consistently staying informed with expert resources on warranty policies and parts specifications helps me prevent common pitfalls and ensures my investment remains protected.
- Adopting a proactive maintenance mindset—regular checks, timely parts replacements, and software updates—extends the lifespan of my dishwasher far beyond initial expectations.
Your Toolbox for Success
- Trusted Manuals and Guides: The comprehensive resources on understanding dishwasher parts and selecting the right parts have been invaluable for me, providing clear, accurate info I rely on.
- Quality Diagnostic Tools: My Fluke multimeter and LED inspection mirror ensure precise troubleshooting, helping me identify issues early and prevent costly repairs.
- Reliable Repair Resources: The trusted repair guides available online, especially those that detail warranty policies, have helped me navigate complex warranty claims smoothly.
- Community Insights: Engaging with knowledgeable forums and expert blogs has offered practical tips that I couldn’t find elsewhere, strengthening my confidence in DIY maintenance.
Keep Going and Stay Inspired
Remember, mastering the art of proper dishwasher installation, parts management, and warranty awareness is well within your reach. Embrace the learning curve, and you’ll enjoy reliable performance and peace of mind for years to come. Your commitment to these details can significantly extend your appliance’s life and prevent unnecessary stress. So, why not start today? Take that first step—inspect, learn, and embrace the satisfaction of being your own appliance expert. Have you ever faced a tricky installation or warranty challenge? Share your story below and let’s grow together in this journey.
5 Replies to “Efficient Installation & Parts Guide for Smart Dishwashers in 2025”
Leave a Reply
Related Posts
Why Your 2026 Dishwasher Install Needs a Pressure Regulator
I remember the moment my new dishwasher flooded our kitchen,…
Smart Dishwasher Parts & Warranty: Essential Installation Tips for 2025
Have you ever faced the sinking feeling of opening your…
Reliable Smart Dishwasher Parts & Installation: Expert Tips
Have you ever felt that sinking frustration when your dishwasher…
This post really hit home for me, especially the part about verifying the water inlet size and ensuring all parts are OEM-approved. I once hastily installed a dishwasher without double-checking the compatibility of the drain hose, which led to frequent backups and a lot of frustration. Since then, I’ve realized the importance of taking a methodical approach, especially with smart appliances that rely heavily on correct installation for optimal performance. I’m curious—has anyone here used AR or digital diagnostic tools for installation or troubleshooting? I’ve been considering something like that to make maintenance easier and more precise. It’s fascinating how technology is transforming DIY repair, making it more accessible and efficient. What are some must-have tools or apps that you’ve found particularly helpful in maintaining your dishwasher, especially with the newer models of 2025?
This post really resonated with my experience of setting up a new smart dishwasher last year. I learned the hard way that neglecting to verify the compatibility of the inlet valve and drain hose actually caused my dishwasher to leak shortly after installation, which was a hassle I could’ve easily avoided. It’s impressive how much these new models rely on precise installation; with all the smart sensors and energy efficiency features, even small mistakes can lead to significant issues. I’ve been exploring digital diagnostic tools recently, like moisture sensors and AR apps, to improve my maintenance approach. It seems like leveraging technology not only makes troubleshooting faster but also more accurate, particularly as appliances become more sophisticated. For those who have started experimenting with these tools, what’s been your biggest breakthrough? Do you think these new tech integrations are truly making DIY repairs more accessible or do they demand a steep learning curve? I’d love to hear your stories and recommendations for must-have tools for 2025 models.
This post really highlights the importance of thorough installation and using the right parts for smart dishwashers. I remember my initial setup was quite smooth until I neglected to verify the compatibility of my drain hose, which caused ongoing backup issues. Since then, I’ve started relying on digital tools like AR apps and diagnostic scanners to double-check connections during installation and maintenance. It’s incredible how much technology has made DIY repairs more accessible, even for complex appliances of 2025. One thing I’ve found particularly helpful is using a digital multimeter to test wiring integrity before powering up. Has anyone else experimented with augmented reality or smart diagnostic tools that overlay repair instructions in real time? I’d love to hear what tools or apps others swear by—especially for troubleshooting smart features that can seem intimidating at first. Overall, taking these extra precautions saves a lot of headaches and prolongs the life of the dishwasher. Would love to hear your experiences on integrating tech into maintenance routines.
This article really hits the nail on the head about the importance of proper installation and genuine parts for smart dishwashers. I recall a time when I overlooked verifying the compatibility of my water inlet valve, which later caused leaks and damage. Since then, I’ve become more meticulous, especially with the advanced sensors and energy-saving features in 2025 models. I’ve started using digital tools like AR apps to guide me through installation and troubleshooting — it’s amazing how these innovations can prevent mistakes and save time. Personally, I find a high-quality multimeter invaluable for diagnosing electrical issues early before powering up the unit. Has anyone experimented with AI-driven diagnostic apps or augmented reality for DIY repairs? I’d love to hear which tools or apps you find most reliable for complex appliance maintenance. I believe combining traditional know-how with new tech can really make DIY repairs more accessible, even for those of us less experienced. What’s been your most effective tech tool so far?
Reading through this guide really emphasizes how crucial careful installation and quality parts are, especially with these smarter, more complex dishwashers of 2025. I remember upgrading to a new model last year and thinking I could handle the setup myself, but I overlooked the importance of verifying the compatibility of the water inlet and drain hoses. It led to leaks and an appliance shutdown right in the middle of holiday hosting! Since then, I’ve made sure to use only OEM parts and follow manufacturer guidelines meticulously. What’s fascinating is how digital diagnostic tools like AR apps or multimeters can actually make DIY maintenance more precise and less stressful. I’ve been experimenting with an AR app that overlays installation steps—it’s surprisingly helpful, especially for troubleshooting quirky features on smart models. Have others found these tools equally effective? Also, how do you balance getting technical with DIY versus calling in pros for certain issues? Would love to hear your experiences and recommendations for tools that streamline the process and ensure warranty coverage stays intact.