
I’ll never forget the squelch of my slippers on the linoleum at midnight last Tuesday. It wasn’t a huge flood, just a persistent, rhythmic drip-drip-drip coming from the bottom corner of my trusty dishwasher. We’ve been through a lot together, this machine and I—ten years of birthdays, holiday dinners, and enough coffee mugs to fill a stadium. But there I was, staring at a leak that felt like the beginning of an expensive end. Most folks would have just pulled the plug and started shopping for a shiny new model. Not me. I knew the core of the problem wasn’t a dead motor; it was just a tired, brittle door gasket that had finally given up the ghost. Today, I’m going to show you how to breathe another five years of life into your veteran appliance without calling a pro or tossing a perfectly good machine into the landfill. Have you ever noticed a tiny drip and ignored it until it became a full-blown puddle? Let me know in the comments below!
The Night My Kitchen Became a Pond
I stood there, staring at the steady stream of water, and felt that familiar pang of dread. My dishwasher has been a workhorse, but age catches up to everything. I’ve learned the hard way that common dishwasher parts and how to replace them effectively isn’t just a hobby—it’s a survival skill for homeowners. When I first started DIYing my repairs, I made a massive mistake: I bought a cheap, generic seal from a discount site that didn’t quite fit. I ended up having to figure out how to swap a grungy door seal without removing the unit twice because I was stubborn and tried to save five bucks on a non-OEM part. Don’t be like younger me; quality matters when you are fighting water damage. According to the Association of Home Appliance Manufacturers (AHAM), the average life of a dishwasher is about 9 to 12 years, so hitting the decade mark is exactly when these rubber components start to fail.
Is Sinking Money into an Old Machine a Total Waste?
You might be thinking, ‘It’s ten years old, why bother?’ I get it. The temptation to buy a smart machine with Wi-Fi is real. But a gasket costs less than a fancy steak dinner, while a new unit is a mortgage payment. Unless your motor is screaming, a seal is almost always worth the effort. Plus, you avoid the massive headache of top tips for seamless dishwasher installation in 2025 which, let’s face it, is never as ‘seamless’ as the brochure claims once you actually get behind the cabinets.
That Tiny Strip of Rubber is Your Best Friend
The door gasket is the unsung hero of your kitchen. Over a decade, it survives extreme heat, harsh detergents, and the occasional trapped fork. Eventually, it loses its elasticity and gets brittle. If you’ve been wondering why your warranty claim for a door gasket was denied in the past, it’s often because manufacturers consider these ‘wear and tear’ items. They expect them to fail, much like the tires on your car. The good news is that this is one of the essential parts every dishwasher owner should know about because it is incredibly simple to swap. You don’t need a degree in engineering; you just need about twenty minutes and a bit of patience to get that seal seated perfectly in its channel.
Find Your Model Number Before You Shop
To get this repair right, you cannot guess on the part. Think of your dishwasher like a vintage car; you wouldn’t put a Ford gasket on a Chevy. I once spent an hour wrestling with a seal that was only half an inch too long because I didn’t take the time to find your units hidden model number for replacement parts. Usually, you’ll find it printed on a sticker just inside the door or on the frame near the top. Once you have that number, prioritize getting an original equipment manufacturer (OEM) part. While it’s tempting to save money, maximizing your dishwashers warranty through proper parts selection is only possible when you use the components the engineers actually designed for the machine. Using a generic knock-off can lead to a poor fit, which eventually leads to more water on your floor.
Pull the Old Gasket and Prep the Surface
Removing the old seal is surprisingly satisfying—it’s like pulling a long piece of cooked spaghetti out of a groove. Start at one of the bottom corners and simply pull the rubber strip upward and out of the channel. But here is where most people fail: they try to shove the new seal in immediately. I remember trying to speed-run a repair on an old Bosch unit once. I skipped the cleaning step, thinking the tiny bit of gunk in the channel didn’t matter. Five minutes into the ‘Heavy’ cycle, I heard a pop and then the familiar splash. The seal had slipped because the soap scum acted like a lubricant. You must learn how to clean the gasket without damaging the seal or the channel it sits in. Use a mixture of warm water and a tiny bit of mild dish soap to scrub that channel clean. If there is stubborn calcium buildup, the trick to removing hard water scale without chemical descalers is often just a soft toothbrush and some patience. 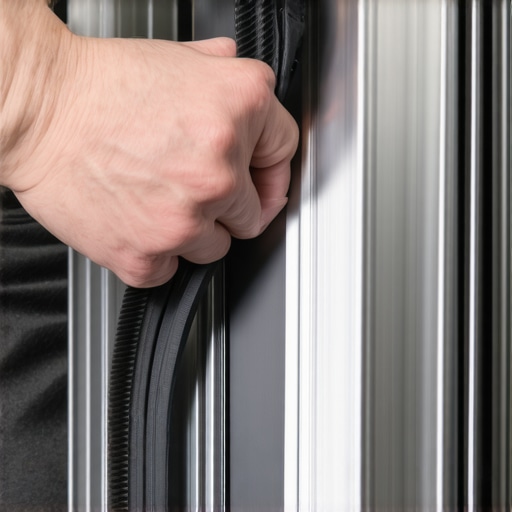
Seat the New Seal Like a Pro
Now for the ‘meat’ of the job. To ensure a perfect fit, find the midpoint of your new gasket and align it with the top center of the dishwasher door frame. Press it in at the top first, then work your way down the sides evenly. Think of it like sealing a giant Ziploc bag; you want firm, consistent pressure. Whatever you do, do not stretch the rubber. If you pull on it as you go, you’ll end up with ‘extra’ gasket at the bottom corners that won’t fit into the track. If the rubber feels too stiff, soak it in a sink of warm water for a few minutes to make it more pliable. This is the core of how to swap a grungy door seal without removing the unit effectively. Once the seal is in, close the door and leave it latched for a few hours. This ‘sets’ the memory of the rubber against the door flange, ensuring a watertight fit for the next few thousand cycles. Understanding dishwasher parts a key to effective maintenance starts with these small, tactile tasks that save you hundreds in labor costs.
While the door seal is a straightforward fix, I’ve seen countless DIYers—and even some ‘handyman’ neighbors—trip over the more technical nuances of appliance longevity. Most people believe that if a part isn’t actively spraying water across the floor, it’s still good to go. However, in my years of wrestling with these machines, I’ve adopted a contrarian stance: if you are opening up the unit for a ten-year-old seal, you should almost always replace the water inlet valve as well. It sounds like an upsell, but why your professional installer insists on a new water valve isn’t about profit; it’s about the fact that internal springs and diaphragms lose tension over time. A valve that doesn’t close fully can lead to a slow, silent leak that rots your subfloor long before you see a puddle.
Why Your Old Fittings Are Ticking Time Bombs
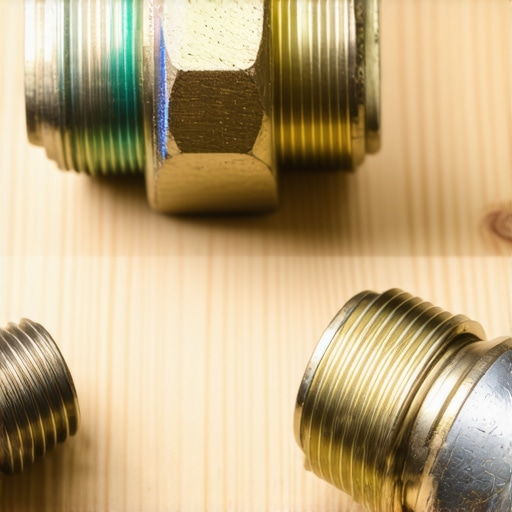
One of the biggest traps you can fall into is the ‘thriftiness trap’ of reusing old hardware. I’ve seen people spend $800 on a top-tier machine only to connect it using a five-year-old brass fitting or a crusty old supply line. This is where the ‘oops’ factor hits hard. Old brass becomes brittle through a process called dezincification, and once you disturb it to swap a part, it rarely reseals perfectly. It’s the same reason why your installer refuses to reuse your old brass fittings during a fresh install. Beyond the hardware, there is the debris issue. Every time you shut off the main water to perform a repair, you loosen sediment in the pipes. If you don’t know the critical reason to flush your water lines before hooking up a new machine (or an old one you just serviced), that grit will fly straight into your new solenoid valve, jamming it open and causing a flood. I learned this the hard way after a ‘simple’ repair turned into a $3,000 floor restoration project. Have you ever fallen into this trap of trying to save a few bucks on small parts only to have it backfire? Let me know in the comments!
Can a Simple DIY Part Swap Actually Void Your Coverage?
This is the question that keeps savvy homeowners up at night. We all want to save on labor, but the fine print in modern warranties is a minefield. You might think that buying a genuine component is enough to stay protected, but maximizing your dishwashers warranty through proper parts selection is only half the battle. Many manufacturers now stipulate that certain ‘functional’ parts must be installed by a certified technician. According to a report by the National Association of Home Builders (NAHB) on appliance life cycles, improper installation remains a leading cause of premature failure in high-efficiency units. If you handle a complex repair yourself, the risks of skipping the professional installation receipt are real; if the machine fails later due to a related issue, the manufacturer may deny your claim by blaming your ‘unauthorized’ labor. Always check what your dishwasher warranty doesnt cover and how to avoid fees before you start pulling apart the motor housing or control board. For simple things like racks or seals, you are usually safe, but for anything involving the electrical or water-carrying systems, document every step and keep every receipt.
If you’re serious about moving from ‘guy with a leak’ to ‘master of the kitchen,’ you need a specialized toolkit. I don’t mean a massive chest of drawers, just two specific items that I keep in my kitchen ‘junk’ drawer for emergencies. First is a decent digital multimeter. I can’t tell you how many times I’ve seen folks toss a machine because the display went dark, when they could have simply used how to test your thermal fuse with a basic multimeter to find a $10 part was the only culprit. It’s about precision, not guesswork. According to technical documentation from the major manufacturers, such as Whirlpool’s service literature, a simple continuity test is the most reliable way to rule out electrical failures before you start buying expensive control boards. If you want to save yourself the ‘idiot tax’ of unnecessary service calls, learn the most reliable way to test a thermal fuse right now.
The Two Tools That Saved Me Thousands
The second item is a high-quality set of channel locks, but specifically ones with smooth jaws so you don’t chew up your plastic fittings. You’ll need these to ensure the most durable braided steel hoses for long-term safety are tightened just enough to seat the rubber washer without crushing it. I’ve seen DIYers go ‘Hulk-mode’ on a hose and crack the plastic inlet on the machine—a mistake that turns a $15 upgrade into a $150 repair bill. Precision matters when you are dealing with water pressure. If you are already under there, remember the critical reason to flush your water lines before hooking up a new machine is to keep that tiny sediment from ruining your brand-new valve.
Stop the Gunk Before it Stops Your Machine
Maintenance isn’t a ‘once-a-year’ spring cleaning event; it’s a monthly habit. The biggest killer of modern high-efficiency machines isn’t the motor—it’s grease. If you aren’t using the best way to clean a filter that is coated in grease, that fatty buildup eventually makes its way into the pressure switch. When that happens, you’ll start seeing error codes because why your smart sensors are giving you dirty readings usually comes down to physical blockage rather than a software glitch. I make it a point to check my spray arms for debris every 30 days. It takes two minutes, and it ensures the pump isn’t working overtime against a clogged hole. This proactive approach is essential for understanding dishwasher parts a key to effective maintenance and extending the life of your unit well past that twelve-year average.
How can I keep my dishwasher running like new for years?
Consistency is king. Beyond the filter, you need to be aware of when to replace dishwasher parts for optimal performance. Don’t wait for a failure. If your racks are starting to show rust, don’t ignore it; small rust flakes can enter the pump and destroy the impeller. If you catch it early, you can learn how to restore a rusted dishwasher tine in minutes rather than replacing the whole rack. 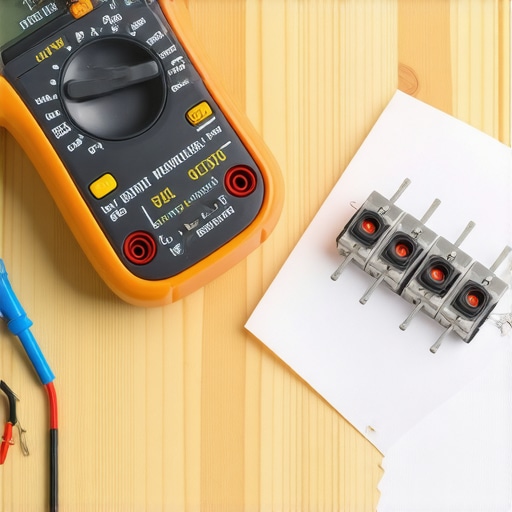
The Future of Your Kitchen is Self-Diagnosing
Looking ahead, I see the industry moving toward even more aggressive ‘smart’ integration. We are already seeing the 20 smart sensor that detects leaks before your kitchen floods becoming standard equipment rather than an aftermarket add-on. I predict that within five years, machines will use AI-driven vibration analysis to tell you exactly common dishwasher parts and how to replace them effectively before the part even breaks. It’s an exciting time to be a homeowner, but until the robots fix themselves, you still need to know how to swing a wrench. Go grab your multimeter today and run a continuity test on a spare fuse just to get the hang of it—you’ll feel like a genius when the lights finally come back on.
The Hard Truth About Those ‘Universal’ Repair Kits
One thing I’ve learned after a decade of skinning my knuckles behind kickplates is that ‘universal’ fits are rarely universal. I once wasted an entire Saturday trying to force a generic kit into a high-end unit, only to realize that those few dollars saved cost me eight hours of frustration. Always check common dishwasher parts and their role in proper installation before you buy. Another lightbulb moment? Photos are your best friend. Before you pull a single wire or clip, take three pictures from different angles. It sounds simple, but when you’re staring at a nest of grey wires an hour later, you’ll thank your past self for the roadmap. Also, don’t overlook the floor; knowing how to prepare your kitchen for dishwasher installation or even a minor repair can save your cabinetry from silent rot.
My Personal Troubleshooting Go-To List
If you’re building your ‘fix-it’ arsenal, I highly recommend picking up a pair of smooth-jawed pliers—they are the only way to tighten plastic nuts without leaving gouges. I also swear by the ‘RepairClinic’ YouTube channel for visual walkthroughs and the ‘ApplianceBlog’ forums for when a weird error code has you stumped. For those worried about the fine print, reading up on understanding dishwasher warranty policies for peace of mind is a must-read before you start any major surgery. These resources, combined with the most popular dishwasher parts and how they improve performance, will give you the confidence to handle almost anything.
#IMAGE_PLACEHOLDER_E#
Why Your DIY Skills Are Better Than a New Warranty
You don’t need to be a master plumber to keep your home running smoothly. Every time you swap a filter or seat a gasket, you’re gaining a skill that makes you more independent. It’s about more than just a leak; it’s about the satisfaction of hearing that quiet hum of a perfectly running machine that you fixed with your own two hands. If you hit a snag, remember that how to get your warranty claim approved on the first try is usually just a matter of documentation and using the right components. Go ahead, dive into that repair—your dishwasher and your wallet will thank you for the effort. Have you ever attempted a repair and found a ‘surprise’ left behind by a previous installer? Let’s swap stories in the comments below!
Related Posts
Why Generic Spray Arms Ruin Your Cleaning Performance
I remember the first time I spent hours trying to…
Why This $8 Zinc Leveling Foot Prevents Your Tub from Warping
I remember the moment I realized my bathtub was slowly…

Why Your Silverware Basket Is Melting and How to Replace It
Have you ever opened your dishwasher only to find melted…