
I remember the exact moment I opened my utility bill last July and nearly choked on my morning coffee. It had spiked by nearly forty percent, and for the life of me, I couldn’t figure out why. I hadn’t installed a pool, my AC was set to a modest 75, and I wasn’t running a secret server farm in my basement. Then I looked at my dishwasher. I’d been on a bit of a germaphobe kick, hitting that Sanitize button on every single load—breakfast plates, coffee mugs, you name it. I thought I was being the gold standard of home hygiene, but in reality, I was just burning money to turn my kitchen into a miniature sauna. It was a classic new homeowner mistake, and honestly, one of many I’ve made while understanding dishwasher parts and their role in proper maintenance. [image-placeholder]
My Electricity Bill Doubled and I Only Had Myself to Blame
The hard truth is that your dishwasher is one of the few appliances that has to create its own heat. When you select a standard cycle, your machine mostly relies on the hot water coming from your tap. But the Sanitize cycle? That’s a whole different beast. To meet NSF/ANSI Standard 184, a residential dishwasher must reach a final rinse temperature of 150°F to kill 99.999% of bacteria. According to the Department of Energy, heating water accounts for about 80% of the total energy used by a dishwasher. When you force that internal heating element to crank up the temperature by another 20 or 30 degrees for a prolonged period, your meter starts spinning like a top. I learned this the hard way after a month of sanitizing everything from toddler toys to dog bowls. I even went as far as how to set up your app for off-peak energy savings just to offset the cost, but the damage was already done. Today, I’m going to show you exactly why this cycle is such an energy hog and, more importantly, when you actually need to use it versus when you’re just throwing cash down the drain. Have you ever noticed a massive jump in your bill after changing your cleaning habits? I’d love to hear if I’m not the only one who fell for the more heat is always better trap.
Is the Sanitize Button Actually Just a Marketing Gimmick?
It’s easy to get cynical and think manufacturers just add buttons to make the control panel look more pro. While it isn’t a gimmick, it is often misused. For most daily loads, a standard or even a heavy cycle is actually better for your machine health without the extreme thermal stress of the sanitize setting. Early on, I thought I was deep cleaning the machine itself, but I was really just stressing out my common dishwasher parts and aging the heating element prematurely. We’re going to break down the science of that heating element and how to tell if yours is working too hard—or if it’s about to quit on you entirely.
Check Your Heating Element Before It Quits
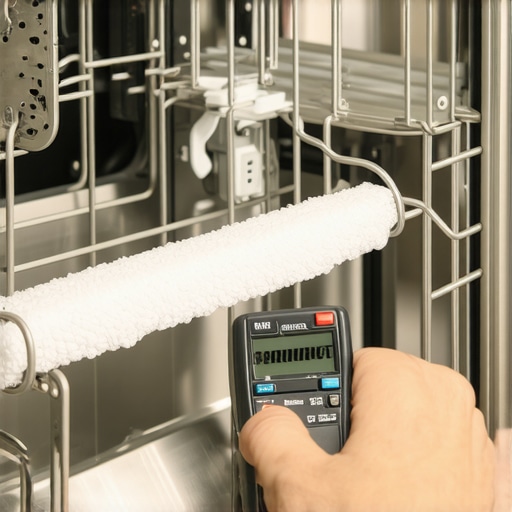
Think of your dishwasher’s heating element like an old-fashioned electric kettle. It’s designed to get hot quickly, but it’s not meant to stay at 150°F for two hours every single day. When I finally crawled under my unit with a flashlight, I noticed the element had developed a nasty layer of calcium, making it work twice as hard to reach those high temperatures. If you’re worried you’ve already overtaxed your machine, you should learn how to test your thermal fuse with a basic multimeter. This little component acts as a safety guard; if the machine gets too hot from constant sanitizing, the fuse blows to prevent a fire. Testing it takes five minutes and can tell you if your energy-hogging habits have pushed the hardware to its limit.
Reserve the Sanitize Cycle for Real Biological Threats
I used to think “Sanitize” meant “Extra Clean,” but that’s an expensive misconception. In reality, you only need that extreme heat in three specific scenarios: when someone in the house is sick with a contagious virus, when you’re washing baby bottles, or after you’ve prepared a massive meal involving raw poultry. For everything else, you are just causing thermal stress. I once tried to “deep clean” my unit by running a sanitize cycle with a bowl of vinegar—a total rookie move. The heat combined with the acid started to warp a plastic gasket, which is a prime example of the mistake that voids your lifetime tub warranty. High heat makes plastics more porous and rubber more brittle over time, so using it sparingly is actually a maintenance strategy.
Protect Your Investment From Thermal Fatigue
If you have a high-end machine, it likely uses smart sensors to decide when the water is hot enough. However, constant high-heat cycles can actually “bake” grime onto these sensors, leading to “dirty” readings. This is why knowing when to replace dishwasher parts for optimal performance is so critical. You aren’t just saving on your electricity bill; you’re extending the life of your common dishwasher parts and how to replace them effectively. I found that switching to a high-quality detergent and using the “Normal” cycle with a rinse aid gave me the same sparkling results as the Sanitize cycle, but without the $40 monthly premium on my utility bill. If your dishes aren’t getting clean without that extreme heat, the problem likely isn’t the cycle—it’s a clogged filter or a failing spray arm.
It’s easy to assume that if a component fails, the manufacturer automatically has your back. However, after years of tinkering with these machines, I’ve realized a contrarian truth: a warranty is often a legal minefield designed to protect the manufacturer’s bottom line as much as your appliance. Most homeowners think a ‘limited warranty’ covers everything for a year, but in reality, skipping a single professional step can render that paper worthless. For instance, I’ve seen dozens of claims denied simply because the owner couldn’t produce a paper trail. This is the primary reason why your warranty claim fails without an authorized receipt. You might feel like a hero for completing a weekend DIY installation, but if a leak occurs six months down the line, the lack of a professional installer’s signature is often used as proof of ‘improper installation,’ leaving you to foot the bill for both parts and labor.
The Tiny Sediment Mistake That Kills New Machines
The most common ‘oops’ factor I encounter doesn’t happen during the wash; it happens before the machine even turns on. When you’re swapping units, you absolutely must recognize the critical reason to flush your water lines before hooking up a new machine. Even in modern homes, the process of disconnecting an old appliance can knock loose pipe scale or construction debris. If you don’t flush those lines into a bucket first, that grit goes straight into your new water inlet valve. A single grain of sand can prevent the valve from seating properly, leading to a slow, silent flood. 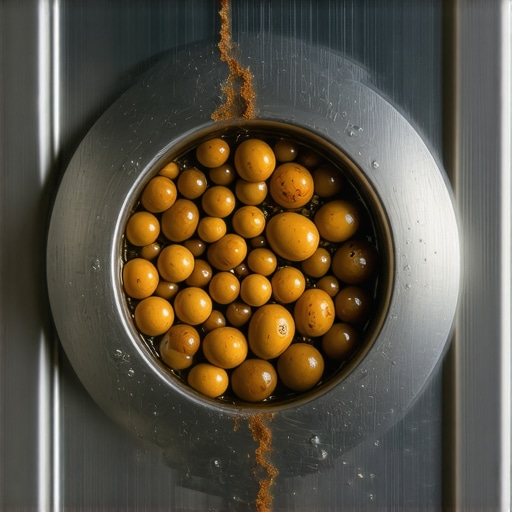
Why did my claim get rejected when the part was clearly defective?
Often, the rejection isn’t about the part itself, but the environment in which it was installed. The Association of Home Appliance Manufacturers (AHAM) points out that modern high-efficiency machines are engineered with razor-thin tolerances for voltage and water pressure. If you’ve been trying to save money with ‘universal’ components, you are likely playing a dangerous game with your logic board. You need to be aware of what your dishwasher warranty doesn’t cover and how to avoid fees, particularly when it comes to secondary damage caused by non-certified parts. While the price tag on a generic pump is tempting, the reality of why OEM pumps outlast cheap alternatives every time comes down to the grade of the internal seals and the precision of the motor windings. A knock-off pump can actually backfeed electrical ‘noise’ into your smart control board, leading to a much more expensive failure. Learning how to spot a fake replacement part before it fries your control board is the ultimate pro-level skill for any homeowner. Have you ever had a warranty claim denied for a technicality or fallen into the ‘universal part’ trap? Let me know in the comments below.I’ve spent too many hours on my knees under a sink to tell you that the right tool isn’t just about convenience—it’s about preventing a catastrophic leak. Most guys grab a standard crescent wrench and call it a day, but that’s how you end up with a hairline fracture in a brass fitting. I always reach for a dedicated basin wrench; it’s the proper tool to use when tightening your water supply line because it reaches those impossible angles without stripping the threads. This is exactly what the International Association of Plumbing and Mechanical Officials (IAPMO) emphasizes in their technical manuals like the Uniform Plumbing Code: torque precision in tight spaces is the only way to ensure a seal that lasts ten years instead of ten months. 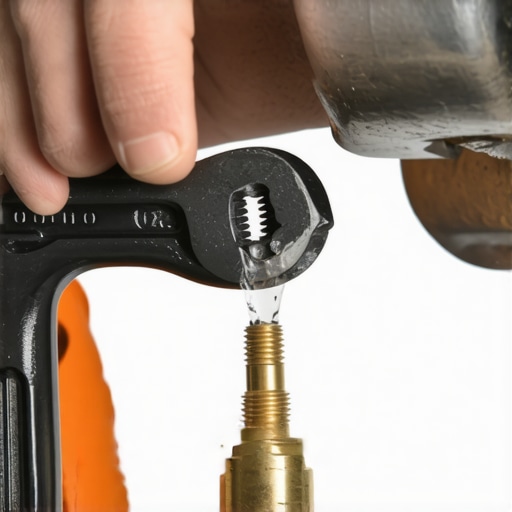
Stop Stripping Your Fittings with the Wrong Wrench
If you’re serious about the long-term health of your machine, you need to think like a technician rather than just an owner. I started keeping a log of every cycle error and pressure drop, which felt like overkill until I realized my motor was struggling against a partial blockage in the sink. This is why your professional installer checks your sink drain for clogs first before even unboxing the unit. If the drain is slow, the pump works at 120% capacity, and you’ll find yourself understanding dishwasher parts and their role in proper maintenance much sooner than you intended. I once ignored a slight thumping sound, only to realize later that a loose mounting screw was vibrating against the frame, eventually leading to a cracked housing. Now, I make it a habit to check every mounting point once a year.
How can I make this appliance last twice as long?
It’s simpler than most experts make it out to be, but it requires consistency. First, stop treating your door gasket like it is invincible. I spend five minutes every month wiping mine down with a damp microfiber cloth to remove acidic food residue; it is the one maintenance task that doubles the life of your gasket. Second, you have to be obsessive about your filters. If you notice a film on your glasses, don’t just reach for more detergent. Check the filter for grease buildup. I recommend the best way to clean a filter that is coated in grease using a soft-bristled brush and degreasing soap.
The Near Future of Self-Diagnosing Kitchens
Looking ahead, I predict we are less than five years away from every mid-range dishwasher having built-in vibration analysis. We’re already seeing high-end brands implement software that can detect a failing bearing before you even hear the first squeak. If you’re tech-savvy, you can actually get ahead of this now by learning how to recover data logs from your smart control board. It sounds intimidating, but it gives you the raw data on cycle temps and pump RPMs that the front panel hides from you. This level of data is the best way to prove to a manufacturer that a part was truly defective, not just worn out. My advice for this weekend? Grab a cheap multimeter and try the most reliable way to test a thermal fuse. It’s the ultimate way to prove you’re in control of your machine’s health.
Hard-Won Lessons from My Under-the-Sink Sessions
After years of tinkering with appliances, I’ve realized that being proactive is significantly cheaper than being reactive. I spent way too much time in the beginning assuming a ‘warranty’ was an all-access safety net, but in reality, maximizing your dishwashers warranty coverage today requires a level of documentation most homeowners overlook. I started keeping a dedicated ‘appliance diary’ to track every filter clean and cycle error, which felt obsessive until I had to prove a motor failure wasn’t due to neglect.
- The ‘Receipt Rule’ is absolute: Don’t just rely on your unit’s serial number. Knowing how to get your warranty claim approved on the first try often hinges on having a paper trail from an authorized seller or installer.
- Heat is a specialized tool: Treat the Sanitize cycle like a heavy-duty power tool. You don’t use a sledgehammer to hang a picture frame, so don’t use 150-degree water for lightly soiled mugs. Your rubber gaskets will last twice as long.
- Read the fine print before parts break: Reviewing the complete list of dishwasher parts covered by warranty can prevent you from paying out of pocket for a component the manufacturer is actually required to fix.
The Essential Toolkit for Any Serious Homeowner
You don’t need a plumber’s van to keep your machine in top shape, but you do need precision. I always recommend having a basin wrench on hand because it is the proper tool to use when tightening your water supply line—it allows you to reach behind the unit without cross-threading those sensitive brass valves. I also keep a digital multimeter nearby for quick electrical checks. These simple tools, combined with understanding dishwasher parts and their role in proper maintenance, can turn a potential $400 repair bill into a five-minute DIY fix.
Own the Health of Your Home One Cycle at a Time
Taking care of your kitchen shouldn’t be a source of anxiety. Once you stop viewing your dishwasher as a mysterious ‘black box’ and start treating it as a precision machine that responds to careful maintenance, you’ll see the results in both your clean dishes and your bank account. You have the data, the tools, and the logic to keep your machine running for a decade or more. Have you ever been blindsided by a utility bill spike or had a warranty claim denied over a tiny technicality? I’d love to hear about your experiences in the comments below!
Related Posts
Why Modern Machines Take Three Hours to Wash One Load
It was late on a quiet weekday evening when I…

Why Water Hardness Settings Matter for Energy Efficiency
It was a frustrating Saturday afternoon when I finally realized…
How to Save Energy by Disabling the Heated Dry Cycle
It was a morning like any other, until I opened…