
I remember the exact moment I realized my ‘clean freak’ habit was a financial disaster. It was a Tuesday night, and I had exactly three dinner plates, two coffee mugs, and a single greasy spatula sitting in the sink. I couldn’t stand the sight of them. I tossed them into the machine, popped a pod in, and hit the heavy cycle. I felt like a productivity king until I got my water bill and realized my machine was sounding more like a jet engine than a home appliance. I was treating my high-end unit like a glorified rinsing station, and I eventually paid the price when I had to learn how to find a hidden leak under the motor housing far sooner than any homeowner should. Today, I’m going to pull back the curtain on why that ‘quick’ half-load is actually a silent budget killer and show you how to keep your machine—and your wallet—in tip-top shape.
Why I Stopped Pressing Start on Those Tiny Loads
I used to think I was being efficient by keeping the sink empty, but the reality is that your dishwasher doesn’t know (or care) if there are two plates or twenty inside. It’s going to pull the same amount of water and use the same amount of electricity to heat it. Early in my journey as a DIY enthusiast, I made the classic mistake of thinking more frequent, smaller washes were ‘gentler’ on the system. I was wrong. In fact, I was putting unnecessary cycles on my water inlet valve, leading me to research the difference between OEM and generic water inlet valves much earlier than expected. Running half-empty loads means you are doubling the wear and tear on your pump and motor for the same amount of clean dishes. According to the U.S. Department of Energy, a standard dishwasher uses roughly the same energy and water regardless of the load size, meaning a half-full machine is twice as expensive to operate per dish. Have you ever felt that ‘guilty itch’ to run a cycle just to clear a few items off the counter?
Is running a half-load actually that bad for the machine?
Many neighbors ask me if the machine really suffers or if it’s just about the utility bill. The truth is a bit of both. When you run a machine under-capacity, the spray arms are often hitting the stainless steel walls or the racks with more force than if they were being baffled by a full load of dishes. This can lead to faster degradation of the rack coating. I’ve found that how to reduce your water usage without sacrificing cleaning power starts with patience; wait for that full load.
Stop Burning Cash with Every Rinse
The real sting comes from the heating element. Most of the energy used by your dishwasher goes into heating the water to 140 degrees or higher. If you’re running that heater for three plates, you’re essentially burning cash. I once ignored this and ended up wondering the reason your energy bill spikes when you use the sanitize cycle, only to find out my ‘small load’ habit was the culprit. Beyond the bill, you’re also risking your coverage. Many people don’t realize that excessive, unnecessary use can sometimes be flagged during service calls. It’s vital to be understanding dishwasher warranty policies for peace of mind before you find yourself paying for a repair that could have been avoided by simply waiting until breakfast to run the machine. We are going to dive into the specific parts that fail first when you overwork your machine, and how you can spot the warning signs before a flood hits your kitchen floor.
Fill the Racks Like a Pro to Save Water and Energy
Think of your dishwasher interior like a game of high-stakes Tetris, but one where the blocks need breathing room to get clean. I learned the hard way that shoving everything in at odd angles doesn’t just leave grit on my spoons; it actually forces the machine to work harder. You want to angle your bowls downward and toward the center so the water jets can actually reach the interiors. If you stack things too flat, you create a ‘shield’ that blocks the water from reaching the top rack. This is a common cause of the spray arm alignment error that leaves the top rack dirty, which often leads people to think their pump is failing when it’s really just a loading issue. 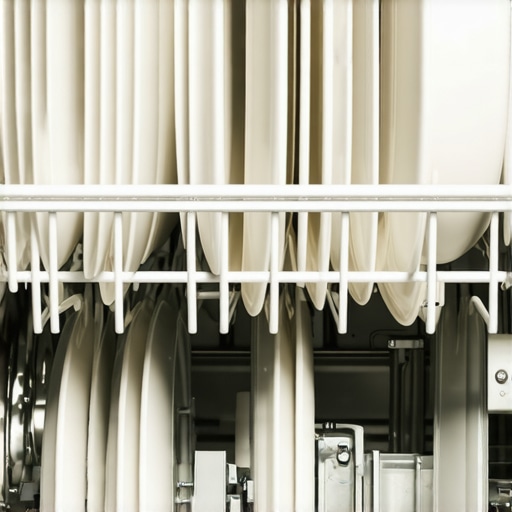
Stop the Pre-Rinse Madness
I used to spend ten minutes scrubbing every plate before it hit the machine. It’s a total waste of time and resources. Modern detergents actually need a bit of food debris to latch onto so they can work effectively. By pre-rinsing with hot water in the sink, you’re essentially paying for the same job twice. I once had a month where I didn’t pre-rinse a single dish and my water bill dropped by nearly fifteen percent. Instead of rinsing, just scrape the solids into the trash. If you’re worried about the ‘heavy lifting’ of the wash, you might find that why the heavy cycle is actually better for your machine health is because it uses higher temperatures to fully dissolve fats and oils that would otherwise clog your lines.
Does Your Filter Pass the Smell Test?
If you’ve noticed a lingering ‘ocean’ scent in your kitchen, your filter is likely the culprit. This is the heart of your machine’s drainage system. I remember a Saturday afternoon where I finally pulled mine out and found a layer of grey sludge and—I kid you not—a tiny piece of a broken wine glass. If I hadn’t found it, I would have been looking for how to safely remove a stuck glass fragment from the pump after the motor burned out. Take five minutes every month to soak the filter in warm, soapy water. Learning the best way to clean a filter that is coated in grease is the single most effective way to prevent the standing water issues that ruin kitchen flooring.
Choose Replacement Parts That Actually Last
When a part finally does give out—and they all do eventually—don’t just grab the cheapest thing on the internet. I once tried to save twenty bucks on a generic spray arm, and within three weeks, the plastic had warped under the high heat of the sanitize cycle. Now, I focus on maximizing your dishwashers warranty through proper parts selection by sticking to components that match the manufacturer’s specs. There is a massive gap in quality when you look at the truth about third-party replacement spray arms, and saving a few dollars today isn’t worth the risk of a leak tomorrow. By treating the machine with the respect it deserves, you aren’t just cleaning dishes; you’re maintaining a complex piece of engineering.
The Surprising Danger of Water That’s Too Clean
I see it all the time in DIY forums: homeowners bragging about their zero-grain water hardness. While soft water is great for your skin, it is often a nightmare for your dishwasher’s interior. Everyone tells you that hard water is the enemy, but in my experience, water that is too soft is far more aggressive. When water lacks minerals, it becomes chemically ‘hungry’ and starts leaching minerals from your glassware and even the metal components of the machine. This results in permanent cloudiness known as etching. According to the Water Quality Association, over-softened water combined with high temperatures accelerates the corrosion of glass surfaces and can even degrade specialized seals. This is exactly why soft water is ruining your dishwasher interior faster than hard water in many modern homes. If you are noticing a white film that won’t wash off, you might actually need to dial back your softener or reduce the amount of detergent you use. 
How can I keep my smart control board from frying during a storm?
One of the biggest ‘traps’ I see people fall into is assuming their dishwasher is protected just because it is plugged into a standard GFCI outlet. Modern machines are basically computers that happen to wash dishes, and they are incredibly sensitive to voltage spikes. I’ve seen countless owners forced into how to spot a fake replacement part before it fries your control board because a simple summer thunderstorm sent a surge through their lines. A GFCI is designed to prevent electrocution, not to protect delicate microchips. This is a common reason why your manufacturer warranty excludes power surge damage, leaving you with a $400 repair bill for a part that costs the manufacturer twenty bucks. I always recommend a whole-house surge protector or a specialized single-appliance suppressor behind the unit to save your electronics.
Don’t Let a Missing Receipt Kill Your Warranty
Another nuance most people miss is the ‘Authorized Service’ loophole. You might think you’re being smart by fixing a small leak yourself, but if you don’t document it correctly, you could be voiding your entire protection plan. I’ve had neighbors lose out on a full machine replacement because they couldn’t produce a receipt from a certified technician for a previous minor repair. It’s critical to understand why your warranty claim fails without an authorized receipt and how that impacts your long-term coverage. Even if you are a master at how to test your thermal fuse with a basic multimeter, keep a paper trail of every part you buy. Most people don’t realize that the ‘lifetime’ warranty mentioned on the box often only applies to the stainless steel tub, not the motors or valves that actually do the work. By learning how to get your warranty claim approved on the first try, you save yourself hours of frustration on the phone with customer service. Have you ever fallen into this trap where a DIY fix ended up costing you your warranty? Let me know in the comments.I used to think a screwdriver and a prayer were all I needed to manage my kitchen appliances. But after three flooded floors and a motor replacement that cost as much as a new unit, I realized that maintenance is about precision, not just persistence. The first thing I tell anyone who wants to take their DIY game seriously is to stop treating a clog like a plumbing emergency and start treating it like a physics problem.
Why a Shop-Vac Beats a Plunger Every Time
When your machine refuses to drain, most people reach for a plunger or, worse, some caustic chemical that eats through your seals. I stopped doing that years ago. Instead, I use a wet/dry vac. It’s the most effective way to create a clean seal against the drain line and pull out the debris that your filter missed. This is exactly why a shop-vac is the best way to clear a clog without risking damage to the delicate internal check valves. I’ve pulled out everything from cherry pits to forgotten bread ties using this method, and it saves me from having to dismantle the entire pump assembly every time a drain error pops up on the screen.
Stop Guessing and Start Using a Multimeter
If your machine won’t start or isn’t heating, don’t just start ordering common dishwasher parts and how to replace them effectively. You need to verify the failure first. I keep a basic digital multimeter in my kitchen junk drawer specifically for this. By checking for continuity, I can tell within sixty seconds if a $15 thermal fuse is the culprit or if the main control board has fried. Learning how to test your thermal fuse with a basic multimeter is the literal difference between a ten-minute fix and a three-day wait for a technician who will charge you $200 just to walk through the door. 
How do I maintain my dishwasher’s efficiency over time?
The secret isn’t in the soap; it’s in the seals and the springs. Once a year, I perform what I call the ‘gasket gauntlet.’ I wipe down the entire door seal with a damp cloth and apply a tiny amount of food-grade silicone lubricant to keep the rubber from cracking. This is the one maintenance task that doubles the life of your gasket and prevents those annoying ‘mystery drips’ that eventually rot out your subflooring. While I’m at it, I check the tension on the door. If the door feels heavy or drops too quickly, I’ve learned how to replace the door hinge springs yourself to avoid putting extra stress on the mounting brackets.
The Rise of the Software-Driven Dishwasher
Looking ahead, the trend is moving away from purely mechanical failures and toward digital maintenance. According to the Association of Home Appliance Manufacturers (AHAM), smart appliances now account for over 30% of new sales, meaning the ‘wrench’ of the future is actually a Wi-Fi connection. I recently discovered that why your new machine requires a firmware update before the first wash is often to calibrate the turbidity sensors that detect how dirty your water is. If you ignore these updates, you’re basically running an unoptimized engine. I highly recommend that you go to your kitchen right now, pull out your multimeter, and test your thermal fuse just for practice—getting comfortable with your machine’s ‘vitals’ today is the best way to prevent a disaster tomorrow.
What My Flooded Kitchen Taught Me About Maintenance
I used to think a dishwasher was a ‘set it and forget it’ appliance until a supply line failure cost me thousands in flooring repairs. I learned that understanding dishwasher parts a key to effective maintenance isn’t just for mechanics; it’s for anyone who wants to avoid a kitchen crisis. Second, never underestimate the power of the paper trail. I realized too late why your warranty claim fails without an authorized receipt. Keep every service record and digital receipt in one folder to save your sanity later. Finally, performance starts with part quality. I’ve seen cheap plastic spray arms melt in high heat, which is why maximizing your dishwashers warranty through proper parts selection is the only way I handle my machine repairs now.
Three Tools That Stop Leaks Fast
To handle these issues yourself, you need the right gear in your utility drawer. I trust a digital multimeter to how to diagnose dishwasher parts during warranty periods without calling for a professional every time a light flashes. #IMAGE_PLACE_HOLDER_E# I also recommend a wet/dry vac for stubborn clogs and a small tube of food-grade silicone for the door seal. This simple lubricant is the one maintenance task that doubles the life of your gasket and keeps your floor dry for years. These aren’t just gadgets; they are the frontline defense for your home.
Master Your Machine Today
Taking care of your dishwasher doesn’t have to be a chore. It’s an investment in your home’s efficiency and your own peace of mind. By spending just ten minutes a month on these simple checks, you ensure your appliance stays in peak condition for a decade or more. Don’t wait for a flood to start your maintenance journey; grab your tools and start today. Have you ever had a simple cleaning fix a ‘broken’ dishwasher? Let me know in the comments below!
Related Posts
Why Your Energy Bill Spikes When You Use Heated Dry
I remember the moment I realized my energy bills were…
The Impact of Load Size on Your Machine’s Lifetime Wear
It was a frustrating weekend. My dishwasher suddenly started acting…
How to Save Energy by Disabling the Heated Dry Cycle
It was a morning like any other, until I opened…