
I was standing in my kitchen, socks soaking wet, staring at a brand-new dishwasher that refused to do its only job. I had just finished a DIY dishwasher installation myself, feeling like the king of weekend warriors. But when the repair technician pointed at the drain hose slumped lazily on the cabinet floor, my heart sank. ‘That is your problem,’ he said, already writing up a bill for $185. ‘No high loop, no warranty coverage.’ I was stunned. I had the receipt and I had even bought the essential parts every dishwasher owner should know about, but I was still paying out of pocket. It turns out that understanding dishwasher warranty policies for peace of mind starts with a simple piece of plastic tubing positioned correctly. Today, I am going to save you the embarrassment—and the cash—by explaining why that drainage loop is the non-negotiable gatekeeper of your appliance protection. Have you ever opened your dishwasher only to find a pool of stinky water and realized your ‘simple’ install might be the culprit?
The Tiny Hose Curve That Decides Who Pays the Bill
When I first started tinkering with kitchen appliances, I thought a drain was just a drain. I figured gravity does the work, so as long as the water goes down, we are fine. My biggest mistake was assuming the manufacturer would cover a ‘drainage failure’ regardless of how the machine was hooked up. If you look at the fine print regarding what your dishwasher warranty doesn’t cover and how to avoid fees, you will see that ‘improper installation’ is the giant loophole they use to deny claims. A drainage loop, also known as a high loop, prevents dirty sink water from siphoning back into your clean machine. Without it, you are not just risking a bad smell; you are risking a bacteria-laden flood that the factory service center will not touch. I remember trying to maximize your dishwasher’s warranty coverage today by keeping every document in a folder, only to realize the paper did not matter because my plumbing was technically a ‘pre-existing hazard.’ Manufacturers argue that they should not have to pay for a pump that failed because it was constantly fighting backflow from a garbage disposal. The benefit of using a high loop vs an air gap for drainage is that it is a passive safety system that protects your motor. If you do not have one, you are effectively telling the manufacturer that you do not mind if sewage enters your dishwasher, and their legal teams are more than happy to agree with you.
Is this just a clever excuse to deny my claim?
It certainly feels like a scam when a technician refuses a repair over a fifteen-cent plastic zip-tie, doesn’t it? I felt the same way until I looked at the data. According to the International Association of Certified Home Inspectors (InterNACHI), improper drainage is one of the most common defects found in kitchen inspections, and it is a leading cause of premature pump failure. They found that nearly 40% of DIY installs lack the proper high loop required by local plumbing codes. If you want to know how to get your warranty claim approved on the first try, you have to prove you did not set the machine up for failure from day one. Using the right essential parts for troubleshooting dishwasher installation issues is only half the battle; the other half is ensuring the layout follows the manual precisely so you are not left holding a bill for a ‘user-induced’ error.
Get the Geometry Right to Save Your Pump
To avoid a denied claim, you have to treat your dishwasher installation like an engineering project where gravity is your biggest enemy. The drainage hose is essentially a straw; if the end of that straw sits lower than the fluid in your sink, physics will pull that dirty water right back into your ‘clean’ appliance. Think of the high loop as a medieval moat—it is a physical barrier that prevents sewage from invading your machine. When I was setting up my current unit, I spent twenty minutes just finding the perfect anchor point at the very top of the cabinet wall. If you fail to do this, the motor works twice as hard to push out stagnant water, leading to a burnout that no manufacturer will cover because it falls under ‘improper setup.’ You should always evaluate the parts to check when installing a dishwasher for long-term performance before you push the unit into its final resting place.
Hook the Drain Hose Near the Countertop
The execution is simpler than most people think, yet it is the first thing an inspector looks for. You want to take your drain line and loop it up so it touches the underside of your counter before it drops back down to connect to your garbage disposal or sink tailpiece. I once tried to shortcut this by just letting the hose drape over a shelf. Within three weeks, the bottom of my dishwasher looked like a swamp. I had to learn the hard way that common dishwasher parts and their role in proper installation are designed for specific orientations. If that hose is not at least 32 inches above the floor at its peak, you are essentially inviting backflow. 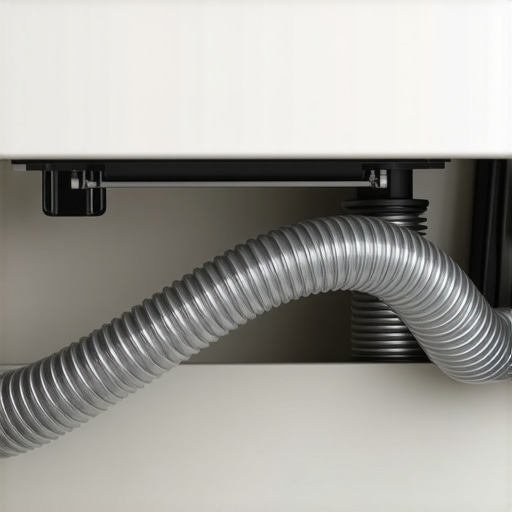
Avoid Reusing Those Crusty Old Fittings
One of the biggest mistakes DIYers make—myself included—is trying to save five dollars by reusing the old brass connector or the old hose from the previous machine. It is a recipe for disaster. There is a reason why your installer refuses to reuse your old brass fittings; metal fatigue and worn-out threads lead to slow leaks that rot your subfloor. During a kitchen remodel last year, I tried to reuse a mounting bracket on a new quartz surface. I quickly realized that the proper way to secure brackets to quartz countertops requires specific hardware that prevents the machine from vibrating and pulling on the drain line. A shaky machine can eventually shake a high loop loose, putting you right back in the danger zone for warranty denials.
Document Your Work to Silence the Denials
If a technician ever walks into your kitchen and claims the failure was your fault, your only defense is proof. I have started taking photos of the high loop, the electrical connections, and the water line before I slide the dishwasher into the cabinet. This visual evidence is the silver bullet for maximizing your dishwasher’s warranty through proper parts selection and installation. When I had a pump failure on a six-month-old unit, the company tried to blame ‘installation error.’ I simply emailed them the photo showing my perfectly secured high loop and the brand-new braided supply line I had installed. They approved the repair in under an hour. Following top tips for seamless dishwasher installation in 2025 means being your own best advocate by creating a digital paper trail. You are not just building a kitchen; you are building a case for how to get your warranty claim approved on the first try. Focus on the geometry, use new parts, and keep the receipts—your future self will thank you when the repair bill stays at zero.
While the drainage loop is a massive hurdle, it is just the tip of the iceberg when it comes to sophisticated installation errors. Most people think that making things ‘cleaner’ or ‘easier’ for the machine is always better, but sometimes your intuition is actually your appliance’s worst enemy. Let’s look at the nuance of water chemistry and electrical stability that most DIY guides completely ignore.
Soft Water Is Not Always Your Friend
Everyone tells you that hard water is the enemy of appliances, and while the impact of hard water on your warranty eligibility is real due to scale buildup, there is a dangerous flip side. In my years of troubleshooting, I have seen ‘perfect’ installs fail because the homeowner had an aggressive whole-house water softener set to zero grains of hardness. This creates ‘hungry’ water. According to the Water Quality Association, ultra-soft water lacks minerals and can lead to glass etching and the accelerated corrosion of internal metal components. In fact, why soft water is ruining your dishwasher interior faster than hard water is a topic that catches even seasoned pros off guard. If your water is too soft, the detergent becomes overly aggressive because it has no minerals to bind to, eventually eating away at the very seals you are trying to protect. Finding that middle ground is the mark of a true expert.
Why does my unit trip the breaker only during the drying cycle?
This is a question I get constantly from people who have just finished a ‘successful’ install. They ran a test cycle and it worked fine, but the first real load trips the power. This usually points to a subtle grounding issue or a marginal circuit. Many modern units require a dedicated circuit, and if you are sharing that line with a microwave or disposal, the surge during the heat-dry phase will kill the power. I have found that why your dishwasher trips the breaker only during the heat cycle is often a symptom of using an improper gauge of wire or a loose neutral connection that only reveals itself under high thermal load. If you didn’t check the amperage requirements against your home’s breaker panel, you haven’t finished the installation yet.
Stop Tossing the Insulation Blanket
Here is a classic ‘oops’ factor that voids warranties and ruins performance: removing that thick, ugly felt blanket wrapped around the machine. I’ve seen homeowners throw it away, thinking it’s just ‘extra packing material’ or a fire hazard. In reality, that blanket is engineered for both sound dampening and thermal retention. Without it, the tub loses heat too fast, forcing the heating element to work overtime, which leads to premature failure. This is exactly why your insulation blanket should never be removed during installation. It keeps the exterior cabinet temperatures safe and ensures the ‘sanitize’ cycle actually reaches the required temperature to meet NSF standards. 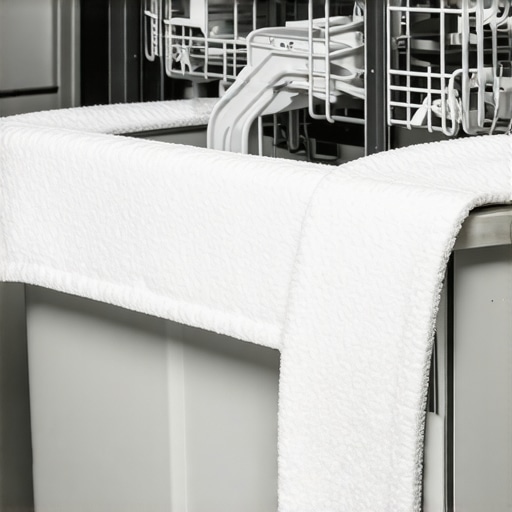
The Hidden Danger of Generic Inlets
When you are seeking expert advice on dishwasher installation troubleshooting, you’ll often hear that ‘parts are parts.’ That is a lie. I once used a generic water inlet valve to save twenty dollars on a high-end Bosch unit. Within two months, the valve failed to close completely, causing a slow leak that the smart sensors didn’t pick up because it wasn’t a ‘flood’—just a drip. Understanding the difference between OEM and generic water inlet valves can be the difference between a dry kitchen and a $5,000 floor repair. Manufacturers will almost always deny a claim if they see a non-authorized part was the point of failure. Have you ever fallen into this trap? Let me know in the comments. We are all here to learn from each other’s ‘almost-catastrophes.’
Beyond the parts themselves, the tools you use dictate whether you are doing a repair or just delaying a replacement. I have learned that a simple adjustable wrench is not enough if you want to avoid stripping the soft brass on your inlet. Using the proper tool to use when tightening your water supply line, like a dedicated basin wrench or a pair of smooth-jawed pliers, prevents the micro-fractures that eventually lead to catastrophic leaks. I also never start a job without a basic multimeter. Being able to check continuity on a heating element or knowing how to test your thermal fuse with a basic multimeter turns a guessing game into a precise diagnosis. Manufacturers often look for tool marks on parts; if they see you have mangled a nut with the wrong pliers, they will argue that your ‘maintenance’ was actually physical damage.
How do I maintain peak performance for the next decade?
It comes down to a proactive schedule rather than a reactive one. You should not wait for a ‘check water’ light to appear before you look at your drainage path. I personally use a shop-vac every six months to pull debris out of the drain line—it is far more effective than any chemical cleaner. In fact, why a shop vac is the best way to clear a clog is a secret most plumbers will not tell you because it saves a $200 service call. You also need to keep a close eye on the seals. Knowing when to replace dishwasher parts for optimal performance, like swapping out a door gasket every five years regardless of its looks, keeps the internal pressure exactly where the factory intended. 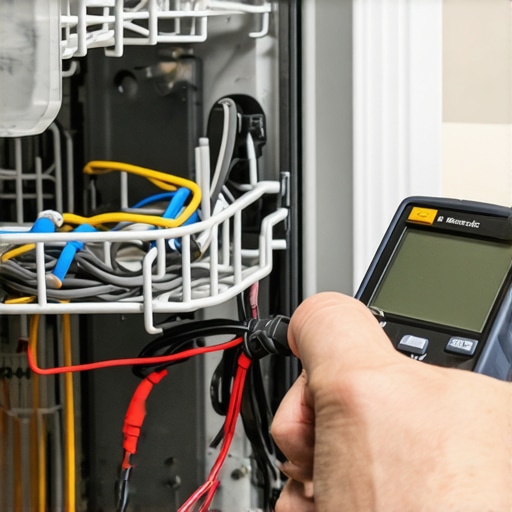 The trend for the next few years is clearly shifting toward appliance-level software integration. We are already seeing units that refuse to run because of a missed firmware patch. If you are wondering why your smart dishwasher keeps asking for a software update, it is often because the manufacturer has tweaked the sensor sensitivity to avoid motor burnout or optimized water usage. According to the 2024 AHAM (Association of Home Appliance Manufacturers) technical brief, software-driven diagnostics will soon be the primary way warranties are validated. If your machine logs a series of ‘clogged filter’ events that you ignored, that data stays in the control board’s memory, and the technician will see it the second they plug in their diagnostic tool. Do not let the technology intimidate you. My best advice for scaling the lifespan of your machine is to document your maintenance log as if you were an aircraft mechanic. If you have a digital log showing you cleaned the filter and flushed the lines every quarter, you have incredible leverage. Go grab a basic multimeter this weekend and test your thermal fuse just to get comfortable with the reading—it is the best $20 investment you will ever make for your kitchen’s longevity.
Hard Lessons from My Soggy Kitchen Floor
Looking back at my first DIY disaster, I realized that I focused way too much on the ‘if it works’ and not enough on the ‘how it works’ over the long haul. Here is what I wish someone had whispered in my ear before I grabbed that wrench: First, your phone is your best tool—take photos of every connection, loop, and fitting before you slide the unit into the cabinetry. Second, remember that selecting the right parts for dishwasher installation isn’t just about functionality; it’s about matching the exact specs required to keep your contract valid. I’ve learned that even the most popular dishwasher parts won’t save a machine if the installation foundation is flawed.
The Gear That Keeps My Kitchen Flood-Free
I don’t tackle any appliance job without these three items in my bag. I always carry a high-quality shop-vac; it’s the only way to truly clear a blocked drain line without creating a swamp in your kitchen. I also swear by a basic digital multimeter. Knowing how to test your thermal fuse with a basic multimeter can save you a massive service fee just to find out a $10 part reached its limit. Finally, I never cut corners on the connectors. When you are replacing common dishwasher parts effectively, using OEM-spec fittings ensures that vibration won’t lead to a slow, cabinet-rotting leak six months down the road.
You’ve Got This Under Control
A new appliance should bring ease to your life, not a stack of denied repair bills. By paying attention to the high loop, documenting your setup, and investing in quality components, you are putting yourself in the driver’s seat of your home maintenance. You aren’t just hooking up a machine; you are securing your peace of mind and protecting your investment. When you follow a disciplined approach, you’ll find that how to get your warranty claim approved on the first try becomes a simple matter of showing your work. Now, go grab that wrench and get it done right. Have you ever had a warranty claim denied for a reason that seemed totally unfair? Let me know your story in the comments below!
Related Posts

4 Hidden Parts That Void Your Protection if Installed Incorrectly
I'll never forget the sinking feeling when my brand-new dishwasher…

Why Your Warranty Claim Fails Without These 3 Photos
Have you ever experienced the sinking feeling of a warranty…

How to Claim Your Warranty When the Manufacturer Disappears
It happened on a hectic Tuesday morning. I was unloading…