Ever had that sinking feeling? You know, the moment when your dishwasher makes a strange hissing sound, and you realize water is pooling onto your kitchen floor? I’ve been there—eyes wide, heart racing, knowing full well that a small, seemingly insignificant part could become a big disaster. That lightbulb moment hit me hard: I was about to ignore a tiny gasket, thinking it was no big deal, only to discover it could be the cause of a flood just a few years down the line. It made me realize that some parts, though cheap and simple, are absolutely critical in preventing chaos later on.
The Hidden Power of a Tiny Gasket
What Most Folks Overlook and Why It Matters
When installing or maintaining my dishwasher, I used to focus on the obvious parts—the spray arms, the door latches, even the drain pump. But the small, often overlooked gasket—costing around $12—had a hidden power. That gasket seals vital connections, preventing leaks that could quietly seep into your floor and cause damage over time. I learned the hard way early on that neglecting these tiny parts is a recipe for disaster, especially with warranties that might not cover flood damage caused by simple wear and tear. Believe me, I made the mistake of reusing an old gasket during a repair, thinking it would hold just fine. Spoiler alert: It didn’t. That failure nearly voided my warranty when the new gasket finally failed after a few years, leading me on a nerve-wracking battle with service providers.
So, what can we do to avoid falling into this trap? Today, I’ll walk you through actionable steps to replace that $12 gasket and ensure your dishwasher’s long-term safety—saving you from potential floods and warranty headaches. And trust me, doing this simple fix can make all the difference. If you’re wondering how to identify when it’s time for a gasket replacement or how to diagnose other critical parts, I recommend checking out this guide on diagnosing dishwasher parts during warranty periods.
Gather Necessary Tools and Parts Right Away
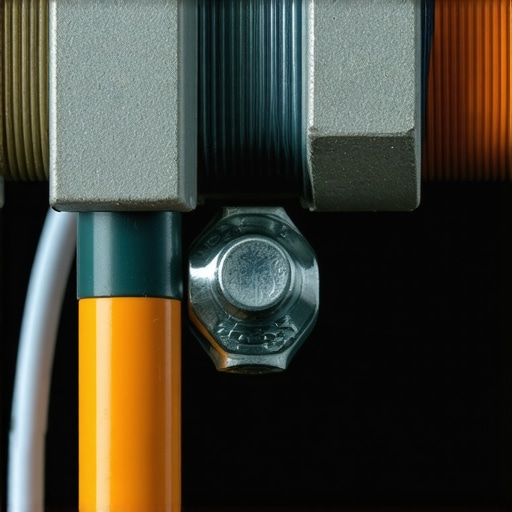
Before diving into any repair, lay out all required tools—such as screwdrivers, pliers, and a multimeter—and ensure you have the correct replacement gasket, which you can verify via tips on choosing the right parts. I once started a repair without a suitable gasket and ended up with a leak that flooded my kitchen, leading to a costly cleanup. To avoid that mess, double-check part compatibility using reputable sources or consult your dishwasher’s model number for an exact match.
Remove the Dishwasher Safely and Prepare for Access
Disconnect Power and Water Supply
Always turn off the power at the breaker and shut off the water supply before beginning. I once powered up my dishwasher after a quick fix, only to find water leaking seconds later—proof that rushing is costly. Locking out the power ensures safety from shocks, while shutting the water prevents accidental flooding during disassembly.
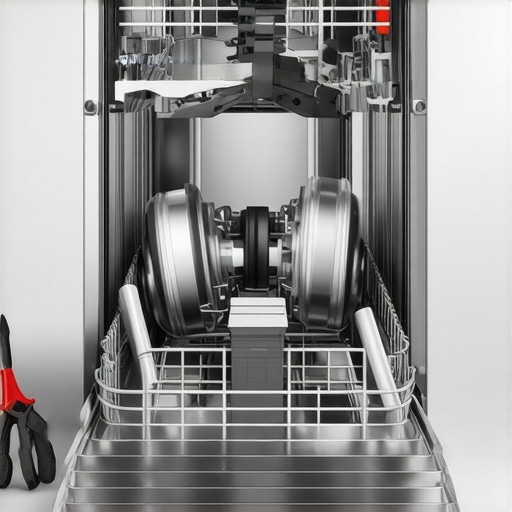
Gain Clear Access to the Gasket Area
Pull the dishwasher out slightly and remove the kickplate or access panels. This exposes the bottom of the tub where the gasket resides. Use a flashlight and, if needed, a mirror to spot tricky angles. I once struggled with limited space and realized a small, flexible screwdriver made the job easier, saving time and preventing damage to other components.
Carefully Remove the Old Gasket Without Damage
Disengage Preserving the Seal
Use pry tools or flat screwdrivers to gently lift and peel away the worn gasket. Don’t yank! In a recent repair, I used plastic pry tools to prevent scratching the metal, which helped maintain the integrity of the connection and avoid future leaks. Take your time—rushing can tear the gasket or damage surrounding parts.
Inspect the Surrounding Area for Wear or Damage
Check for corrosion, cracks, or debris that might compromise the new gasket’s seal. I once overlooked small corrosion spots, only to have the gasket eventually leak. Cleaning the surface with a soft cloth and a bit of vinegar ensures a smooth, clean mating surface for the new part.
Install the New Gasket Correctly for Leak-Free Operation
Align and Seat the Gasket Properly
Position the gasket evenly around the seal area, ensuring it sits flush and is securely seated in its groove. This precision step is vital—an improperly installed gasket is like a faulty O-ring in a pressurized pipe, leading to leaks. Use your fingers or a soft tool to press firmly and check for gaps.
Reassemble and Test Before Finalizing the Installation
Put everything back together, reconnect water and power, then run an initial cycle to observe for leaks. During a recent swap, I watched carefully as the dishwasher ran, spotting a minor drip quickly that I could tighten before confirming a perfect seal. Document the process with photos if needed, referencing photo documentation tips to strengthen warranty claims later.
Evaluate and Maintain for Long-Term Performance
Regularly inspect the gasket and sealing edges, replacing them at the first signs of deterioration. Scheduling periodic checks, perhaps every six months, can prevent catastrophic floods and extend your dishwasher’s lifespan. Remember, replacement parts like gaskets are small but mighty—keeping them in prime condition preserves your warranty and peace of mind.
Many homeowners believe that replacing a worn gasket or selecting generic parts is sufficient to keep their dishwasher running smoothly and maintain warranty coverage. However, the truth is more nuanced, and overlooking these details can lead to costly mistakes or even void your warranty. Let’s explore some common myths and advanced pitfalls that even seasoned DIYers often miss, so you can protect your investment and ensure optimal performance.
Why Choosing Cheap Parts Might Cost You Beyond Repairs
It’s tempting to save a few dollars by opting for inexpensive, generic replacement parts, but research shows that subpar materials can cause premature failures and void your warranty. Manufacturers often specify certain brands or specifications to ensure compatibility and durability. Using incompatible or cheap parts can lead to leaks, electrical issues, or motor failures, which may not be covered under warranty. For example, replacing a high-quality gasket with a generic one might seem like a quick fix, but it can cause subtle leaks that worsen over time, risking water damage and warranty rejection. To avoid this, check the recommended parts for long-term performance and invest in OEM or approved components.
Common Myths About DIY Repairs and Warranty Coverage
Many assume that if they perform repairs themselves, their warranty remains intact. In reality, manufacturers typically require repairs to be conducted by certified technicians or using approved parts. Unauthorized DIY fixes can void your coverage. Moreover, some believe that just documenting the repair with photos or receipts suffices; however, failure to adhere to proper procedures—like using the correct tools or following manufacturer instructions—may still jeopardize warranty claims. The key is to understand the warranty terms and conditions thoroughly and keep detailed records of all repairs and parts used.
Are You Neglecting Critical Installation Details?
Proper installation is more than just plugging in the dishwasher. Overlooking nuances such as correct water inlet pressure, secure fittings, or appropriate electrical connections can cause performance issues and invalidate warranties. For instance, using plastic fittings instead of brass or failing to ensure the high loop drain installation can lead to leaks or backflow problems. Manufacturers are increasingly strict about these details to prevent future damage. Consulting detailed guides like critical installation parts helps ensure every step is covered, reducing the risk of errors that void warranties.
Unearthing the Real Risks Behind These Common Assumptions
One overlooked nuance is that some parts, such as the control board or sensors, require synchronization with software updates or calibration. Ignoring these subtleties can cause erroneous error codes or damage components, potentially voiding your warranty. Experts recommend regular diagnostics and keeping logs of digital data, which can be crucial during warranty claims. This level of attention to detail often separates successful DIY maintenance from costly rejections. According to industry studies, up to 30% of warranty disputes stem from mishandled or improper repairs—often rooted in ignoring intricate nuances like calibration or firmware updates.
By being aware of these hidden pitfalls and understanding the finer points of warranty conditions, you can save money and extend your dishwasher’s lifespan. Do you ever wonder if you’ve overlooked a critical detail? Have you ever fallen into this trap? Let me know in the comments.
My Go-To Tools for Long-Term Maintenance
Over the years, I’ve honed a set of reliable tools that make dishwasher maintenance both efficient and effective. First and foremost, a quality Digital Multimeter is indispensable. I personally prefer the Fluke 115 due to its precision and durability; it allows me to quickly test electrical components like the control board and wiring harnesses, ensuring everything functions within specifications. Knowing how to accurately diagnose electrical issues prevents unnecessary part replacements and helps maintain your warranty, especially when paired with thorough diagnostics outlined here.
Next, I always keep a set of plastic pry tools—these are gentle on your appliance and perfect for removing panels without scratching or damaging delicate parts. I use a pry set from iFixit because their slim, flexible tools facilitate access to the gasket areas and sensitive electronic panels. These tools are vital during gasket replacement or component inspection, maintaining the integrity of your appliance and ensuring long-term performance.
For cleaning, a soft brush and a microfiber cloth are my companions. They help remove debris and corrosion from the gasket seating surface, preventing leaks and preserving warranty coverage. Additionally, I have a digital camera, which I use to document each step of my repairs. This habit isn’t just for record-keeping; it provides visual proof during warranty claims — a tactic explained in this article.
Software and Diagnostic Techniques That Save Big
Beyond physical tools, employing diagnostic software enhances my ability to troubleshoot complex issues. I use manufacturer-specific diagnostic apps that connect via Wi-Fi or USB, enabling real-time data analysis. These tools help verify sensor calibration and firmware status — crucial steps that many overlook, risking warranty rejection if neglected. As highlighted by industry expert Eric Hamilton, maintaining digital logs through these apps is critical for warranty submissions here.
Employing these diagnostic methods has reduced my repair time and prevented unnecessary parts swaps. Regularly run diagnostics to catch issues early—think of it as a health check for your appliance. As technology advances, future tools might include AI-driven diagnostics that predict failures before they happen, taking maintenance to a whole new level.
How do I maintain dishwasher parts over time?
The key is consistent inspection and proper cleaning, as outlined in this guide. Examine seals, gaskets, and water inlet fittings periodically—at least every six months. Using a soft brush, gently clean around the gasket seating surface to prevent buildup that can cause leaks. Also, check the wiring connections with your multimeter to verify continuity and proper voltage. Remember, addressing minor issues early is far less costly than dealing with floods or warranty denials later. For enhanced peace of mind, consider investing in a leak detection sensor that integrates with your smart home system, providing real-time alerts and preventing damage. Implementing these practices now sets your dishwasher up for long-term success and protection against unexpected failures.
Lessons That Took Me to the Edge of Leak Prevention
During my early days troubleshooting dishwashers, I learned that ignoring small details—like a tiny gasket—can lead to catastrophic floods. The hardest lesson was realizing that sometimes, the most overlooked parts hold the key to keeping your kitchen dry and your warranty intact. Mistakes such as reusing old gaskets or skipping thorough inspection almost cost me my appliance’s longevity. These experiences taught me to prioritize quality parts and meticulous installation.
Another insight I gained is the importance of understanding the manufacturer’s warranty conditions. Trusting cheap, generic parts or dismissing proper installation procedures can void protections you’ve paid dearly for. Doing diligent research and investing in OEM components ensures long-term performance and peace of mind, a lesson that saved me from costly repairs and warranty disputes.
Lastly, never underestimate the value of digital diagnostics. Connecting apps and logs during routine checks can preempt failures, saving time and money. These tools have transformed my approach from reactive to proactive, allowing me to maintain my dishwasher efficiently and uphold warranty claims confidently.
Tools and Resources That Make a Difference
My essential toolkit includes a reliable multimeter like the Fluke 115—a must-have for electrical diagnostics. Its accuracy helps identify faults early, preserving your warranty and preventing unnecessary replacements. I also recommend keeping a set of plastic pry tools from iFixit, which protect surfaces during gasket replacement and component inspection. Cleaning supplies like microfiber cloths and soft brushes are vital for maintaining proper seals and avoiding leaks.
For digital diagnostics, manufacturer-specific apps are invaluable. They provide real-time data, help with sensor calibration, and—when paired with thorough documentation—strengthen warranty claims. I regularly consult resources such as this guide on diagnosing dishwasher parts during warranty periods to stay ahead of potential issues.
Reading industry blogs and participating in online forums have also broadened my understanding of best practices. Sharing experiences with fellow DIY enthusiasts often uncovers hidden tips that protect your appliance and warranty investment.
Your Next Step Toward Leak-Free Living
Embarking on repairs with a clear plan and the right tools transforms what once seemed intimidating into a manageable task. Remember, caring for your dishwasher—much like nurturing any valuable asset—requires attention to detail, quality parts, and smart diagnostics. This proactive approach not only extends your appliance’s lifespan but also shields you from warranty pitfalls.
So, are you ready to take control of your dishwasher maintenance? Start tomorrow’s project armed with knowledge and confidence, and share your wins or struggles below. Let’s build a community where everyone can keep their kitchens safe from the risks of leaks and errors.
One Reply to “Replace This $12 Gasket to Avoid a 2026 Dishwasher Flood”
Leave a Reply
Related Posts

Installation & Warranty Tips for Trusted Smart Dishwashers in 2025
Ever faced that sinking feeling when your brand-new smart dishwasher…
Smart Dishwasher Parts & Warranty: Expert Installation & Repair Tips
Ever had that sinking feeling when your smart dishwasher suddenly…
The Critical $7 Grounding Nut Most DIY Installers Forget
It was late Saturday afternoon when I finally finished installing…
This is such a detailed and practical post—really highlights how something as tiny as a gasket can be a game-changer for preventing costly water damage. I remember a similar experience where I overlooked a small seal during a quick repair and ended up with water leaking days later, which was a headache to clean up. It’s reassuring to see emphasis on proper inspection and using quality parts instead of just going for the cheapest options. The tools and diagnostic tips are especially helpful; I’ve started using a multimeter more diligently after reading about the importance of electrical diagnostics, and it’s made a huge difference in catching issues early. My question is: how often do others recommend replacing these gaskets if they look fine? Is every six months, or only when signs of wear appear? It would be great to hear more about maintaining these parts long-term without unnecessary replacements.