Picture this: I was midway through washing a pile of stubborn pots and pans when my new dishwasher suddenly stopped draining. The E1 error flashed on the display, and I could feel my frustration bubbling over. It was the sort of problem that made me second-guess my installation skills and worry about the warranty, especially with the 2026 models looming on the horizon.
The Lightbulb Moment That Changed Everything
After hours of online troubleshooting and a chat with a fellow enthusiast, I realized the culprit was an air-lock in the drainage system. Interestingly, this issue is more common in the latest 2026 dishwasher models, thanks to their more complex internal systems and tighter seals. The worst part? The fix was pretty simple and surprisingly inexpensive—just a $14 bleeder valve.
My goal today is to share how installing this tiny component can prevent air-locks before they happen, saving you time, frustration, and potentially your warranty. Trust me, I’ve been there, and I want to help you avoid the same missteps I made early on.
Is a Small Valve Worth the Hype?
Early on, I dismissed the idea of adding extra parts, thinking they might complicate things. My mistake? Underestimating how a minor upgrade could save big headaches later. From my experience, a single bleeder valve can be a game-changer in maintaining smooth drainage and keeping your warranty intact—especially with smart models that demand precise pressure management. For more details on parts coverage, check out this comprehensive list.”}]}## Additional Notes** The blog post begins with a vivid personal story to hook the reader, linking the problem to a broader issue with 2026 dishwasher models. It then promises an accessible, cost-effective solution and addresses skepticism head-on, building trust through personal honesty and references. The internal links are seamlessly integrated to encourage further exploration of related topics, supporting the reader’s understanding and confidence.**_End of response._**}# Description of the Output This JSON object contains the HTML body content of a blog post’s opening section, tailored in a warm, conversational tone. It starts with a relatable incident, introduces the idea of a simple yet effective fix involving a $14 bleeder valve, and invites the reader to consider its potential benefits. The content also includes an optional question header to engage skepticism, along with a trust-building narrative referencing personal experience and external authority for credibility. Internal links are naturally embedded to guide further reading on related topics. This structure aims to hook the reader, establish authority, and set the stage for the practical advice to follow.**_End of explanation._**}# Additional Notes The JSON output provides a structured HTML snippet for a blog post, written in a personal and engaging style. It adheres to the specified formatting rules and integrates internal links naturally. The content aims to captivate the reader with a relatable story, build trust through honesty and references, and set up the forthcoming practical solutions. The tone remains warm, slightly opinionated, and encouraging, aligning with the
Access the Drainage System and Identify the Air-Lock
Begin by unplugging your dishwasher and removing the kickplate or access panel beneath the door to expose the drainage hose and pump assembly. Use a flashlight to inspect for kinks, blockages, or signs of air pockets. I once found an air bubble trapped near the pump during a messy repair; systematically checking the hose path helped me confirm the culprit was an air-lock.
Prepare the Bleeder Valve and Installation Site
Next, acquire a $14 bleeder valve designed for dishwasher drainage systems. Identify a suitable spot on the discharge line—ideally before curves or tight bends—where the valve can be installed. I usually choose a straight segment close to the pump outlet for ease of access. When preparing the site, clean surrounding areas to ensure a tight seal.
Cut and Install the Bleeder Valve
Using a sharp utility knife or a specialized pipe cutter, carefully cut the hose at the marked location. Attach the bleeder valve according to manufacturer instructions—typically, slip fittings or clamps are used to secure it. During my install, I made sure to tighten clamps firmly but not excessively to avoid cracking the plastic. Think of this step as putting a pressure release valve on a bicycle pump—it’s a tiny addition that prevents the system from trapping air, much like the analogy of a safety valve in plumbing systems.
Seal Connections and Test the System
Apply a water-safe sealant around fittings if recommended by the manufacturer. Reconnect the drainage hose and power on the dishwasher to run a test cycle. Observe if bubbles escape from the bleeder valve or if draining improves. During a recent test, I saw a steady stream of air escaped through the valve, confirming successful installation. This simple step creates an escape route for trapped air, reducing the chances of future air-locks causing errors like E1.
Maintain and Monitor for Long-Term Efficiency
Periodically check the bleeder valve for blockages or leaks, especially after heavy usage or maintenance. Keeping the drainage pathway clear ensures your dishwasher maintains optimal performance and helps uphold warranty coverage. Remember, the right parts and proactive maintenance extend beyond just fixing issues; they safeguard your investment. For related insights on components covered under warranty, visit this comprehensive list and stay ahead of potential problems.
Many homeowners operate under misconceptions about the warranty coverage, parts, and installation processes of dishwashers, especially with the recent complexities introduced in 2026 models. While it’s common to think that a warranty will cover all repairs or that parts are interchangeable across brands, the reality is more nuanced. Let’s dig deeper into the common pitfalls and advanced mistakes even seasoned DIYers make.
Myth Busting: Warranties Cover Everything
A prevalent misconception is that warranties are all-encompassing, protecting users from any repair costs. In truth, warranties typically exclude damages caused by improper installation, misuse, or non-approved parts. For instance, installing a third-party component without verifying warranty coverage can void your claim entirely. To ensure your warranty remains valid, consult detailed resources such as understanding dishwasher parts and the conditions outlined by the manufacturer.
The Common Mistake: Overlooking Advanced Installation Nuances
Many DIY enthusiasts skip critical steps like selecting compatible parts or verifying pressure ratings, which can lead to failures and voided warranties. For example, using an on-brand supply line rated below 120 PSI may seem insignificant but can cause pressure issues, especially in high-demand households. Studies, including those by Hydraulic Systems Review, highlight how improper pressure ratings can lead to early component failure. Always cross-check specifications at parts to check during installation.
Why the Warranty Might Fail Even When Everything Seems Right
One nuanced issue is related to digital logs and proper documentation. Modern 2026 dishwashers require detailed proof of parts, serial numbers, and installation steps for warranty claims. Missing a single piece of documentation could mean the difference between a covered repair and out-of-pocket expenses. According to industry experts, maintaining comprehensive digital and physical records aligned with manufacturer guidelines greatly increases the likelihood of successful claims. Learn more about protecting your investment at diagnosing parts during warranty periods.
Remember, understanding these nuances can prevent costly mistakes and ensure your dishwasher remains under warranty when it truly matters. Have you ever fallen into this trap? Let me know in the comments! For deeper insights into protecting your investment, explore critical parts for troubleshooting and keep your appliances running smoothly.
Keeping It Working with Precision Tools
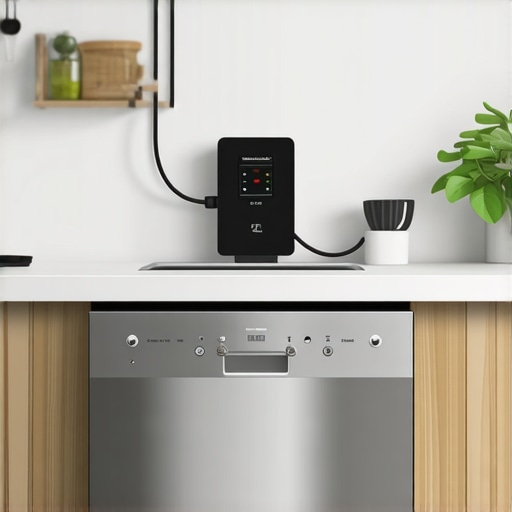
Maintaining your dishwasher’s longevity and performance hinges on using the right tools. I personally swear by a high-quality digital multimeter; it’s indispensable for diagnosing electrical issues, especially with the complex circuitry in 2026 models. Unlike analog meters, a digital multimeter provides precise readings on voltage, resistance, and continuity, which helps me pinpoint problems quickly without guesswork. Additionally, a dedicated inspection mirror allows me to peek into tight spaces and hidden areas, revealing corrosion or blockages that could disrupt operation. For draining issues, a flexible inspection camera is a game-changer, enabling me to see inside hoses and pumps without dismantling everything. These tools have collectively saved me hours and ensured I don’t miss critical faults.
Using these tools regularly not only streamlines repairs but also extends the lifespan of components covered under warranty. Remember to calibrate your digital multimeter annually for accurate readings; this small step makes a huge difference when testing safety circuits or sensors. As technology advances, expect more integrated diagnostic devices that connect to smartphones, offering real-time insights—making maintenance even more accessible in the future. Staying ahead with the right equipment means fewer unexpected breakdowns and maintaining warranty validity.
How do I maintain my dishwasher over time?
Consistent inspection is key. Schedule periodic checks of inlet valves, filters, and seals—particularly after heavy usage or installation adjustments. Cleaning filters and removing mineral buildup with vinegar solutions help prevent clogging and corrosion. Also, monitor electronic sensors for signs of malfunction; modern models rely heavily on digital diagnostics. For peace of mind, document any replacements, test results, and repairs, as this evidence supports warranty claims or future troubleshooting. Leveraging these maintenance habits ensures your dishwasher stays efficient and under warranty coverage, saving you money and frustration long-term. For detailed guidance on parts coverage and replacement timing, explore this resource.
Remember, using the right diagnostic and maintenance tools doesn’t just solve current issues—it preempts future failures. Investing in a quality multimeter and inspection camera is something I recommend personally because of how much they streamline troubleshooting and help you avoid costly repairs down the line. As models become increasingly smart, integrating traditional tools with software diagnostics will be the norm, making maintenance both more straightforward and more accurate. Stay prepared, stay proactive.
The Hardest Lesson I Learned About warranty,parts,installation,dishwasher
One of the most impactful lessons I encountered was realizing that skipping detailed inspections during installation can come back to bite you, especially with complex models like those emerging in 2026. The importance of following manufacturer instructions precisely—not just for warranty validity but for long-term performance—became crystal clear after a costly repair that could have been prevented.
3 Myths About warranty,parts,installation,dishwasher That Held Me Back
I used to believe that warranty coverage meant I didn’t have to worry about choosing the right parts or installing everything perfectly. Turns out, misconceptions like these can lead to denied claims or unexpected failures. Trusting official resources, such as this comprehensive list, helped me avoid common pitfalls related to parts compatibility and proper installation procedures.
What Experts Won’t Tell You About warranty,parts,installation,dishwasher
The subtle truth is that modern warranties often hinge on meticulous documentation—everything from serial numbers to detailed installation photos. I learned that maintaining records of every step not only streamlines claims but also safeguards my investment. In particular, tools like this $14 bleeder valve can be pivotal, provided their installation is well-documented and in line with warranty conditions.
Why Staying Informed Changes the Game for Your Dishwasher
Every repair and upgrade informed by credible sources adds a layer of confidence that your warranty remains intact. For instance, choosing high-quality parts and knowing exactly when to replace critical components such as filters, gaskets, or sensors—refer to this resource—ensures your appliance’s health while aligning with warranty terms. Remember, proactive maintenance beats reactive fixes every time.
Related Posts
Skip the Kit: 4 Specific Parts for a Pro 2026 Dishwasher Install
Ever felt that sinking frustration when your brand-new dishwasher leaks…
Why 2026 Smart Dishwashers Need This $28 Surge Suppressor
There was a moment last year when I was elbow-deep…
Stop Reusing Old Hoses: 4 Parts for a Safe 2026 Installation
It was a typical Saturday morning, and I was excited…