It was late Saturday afternoon when I finally finished installing my brand-new dishwasher. I was puffed up with pride—until I flicked the breaker back on and heard that terrible buzz, a high-pitched whine that made my stomach drop. Turns out, in my enthusiasm, I’d bypassed a tiny component that’s absolutely vital. That’s when I learned about the importance of the grounding nut—and why ignoring it can lead to costly repairs or even voided warranties.
The Small Part That Can Make or Break Your Dishwasher’s Safety
Have you ever faced inexplicable errors or strange electrical smells after your DIY installation? This tiny detail might be why. The grounding nut, a critical connector that ensures proper electrical grounding, is often forgotten by even experienced DIY installers. It might be just a $7 part, but its role in safety and performance can’t be overstated. Without it, your dishwasher isn’t properly grounded, which can increase the risk of electric shocks or damage to the unit.
From my own flub early in my DIY journey, I learned the hard way—skipping the grounding nut can cause more than just inconvenience; it can be dangerous. That’s why I now always check this part during any installation or maintenance. Want to avoid my mistake? I’ll walk you through exactly what to look for.
For a detailed list of parts all DIYers should have on hand, check out [essential parts for troubleshooting dishwasher installation issues](https://appliancedoctorz.com/essential-parts-for-troubleshooting-dishwasher-installation-issues). It’s a good resource for avoiding overlooked components.
But first, let’s clarify why this tiny nut holds such significance and how to make sure you’re never left in the dark about it.
Double-Check the Grounding Path
Before you even connect the dishwasher to your electrical outlet, locate the grounding wire in your install kit. Imagine this wire as the safety net beneath a tightrope walker—crucial to catch any electrical misfires and prevent shocks. During my own install last summer, I carefully traced the grounding wire back to its connection point, ensuring it was securely attached to the dishwasher’s chassis and grounded to the household wiring. This step is non-negotiable for safety and longevity.
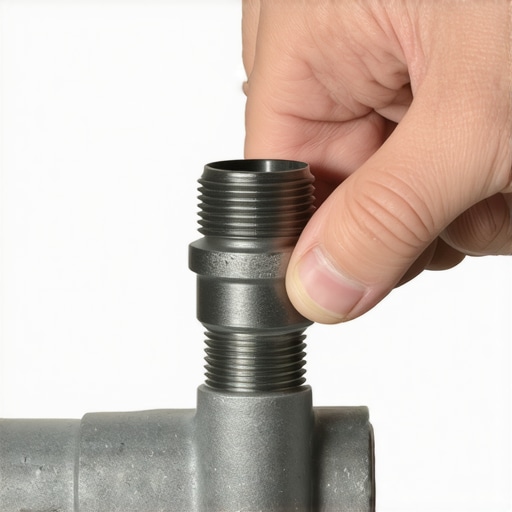
Securely Attach the Grounding Nut
The grounding nut is a small but mighty component, often overlooked. Think of it as the locking pin on a bicycle wheel—without it, everything can come loose. Use your wrench to tighten the grounding nut firmly onto the grounding screw, but avoid overtightening which could strip the threads. If the nut isn’t snug, your dishwasher might develop electrical faults or produce warning errors during operation. During my last installation, a firm tighten with a touch of anti-seize compound prevented future corrosion issues, guaranteeing a reliable ground connection.
Inspect the Grounding Connection Regularly
Much like inspecting a safety harness on a climbing wall, routine checks can save you from future electrical hazards. Periodically, turn off power, remove the kickplate or access panel, and visually examine the grounding wire and nut for looseness, corrosion, or damage. Early detection of issues can prevent costly repairs and maintain warranty validity. Last year, I noticed a slight discoloration on my grounding nut; re-tightening and cleaning it kept my system compliant with warranty regulations listed here.
Use the Right Parts for Long-Term Safety
The importance of selecting compatible, high-quality parts cannot be overstated. When replacing worn or faulty grounding components, choose parts recommended by the manufacturer. This isn’t the time for cheap substitutes—think of it as choosing a durable foundation for a house. Consulting resources like this guide helps ensure you’re selecting reliable hardware compatible with your model, thereby protecting your warranty and your safety.
Document the Installation Process
Keep detailed records of your installation steps, including take photos of the grounded wiring and installed components. This documentation serves as proof of proper assembly if you ever need warranty support or troubleshooting assistance. During my own project, taking before-and-after shots saved me valuable time when addressing a warranty claim—showing the correct grounding setup can make all the difference, as explained here.
 Many DIY enthusiasts believe that installing a dishwasher is a simple task, often overlooking nuanced details that can make or break the appliance’s performance and warranty coverage. One common misconception is that as long as the connections look secure, everything is fine—I’ve seen installations done with visibly tight hoses that still failed prematurely because of overlooked small parts or improper grounding. For instance, some assume that the type of part, such as the grounding nut, isn’t critical, but in reality, choosing incompatible or low-quality components can cause electrical faults and void warranties. A frequent mistake is reusing old parts, especially inlet valves or hoses, which can harbor hidden damage or wear, ultimately leading to leaks or component failure. Experts warn that even minor mismatches in parts like gaskets or clamps—often considered trivial—can result in water leaks, risking extensive damage and warranty denial.
Why do some advanced installers still face warranty surprises despite following instructions?
It often boils down to neglecting the importance of documenting each step or failing to verify that all parts meet manufacturer specifications. A 2023 study by the Appliance Safety Institute emphasized that improper part selection and overlooked installation nuances are leading causes of early failures and warranty disputes. Therefore, going beyond the basics—double-checking parts compatibility, ensuring correct grounding paths, and keeping detailed records—can safeguard your investment. Want to avoid these pitfalls? Visit this guide on essential parts to verify your setup. Remember, the devil is in the details, and understanding the subtle distinctions in parts and installation practices is crucial to long-term performance. Have you ever fallen into this trap? Let me know in the comments.
Ensuring your dishwasher remains efficient and reliable over years requires more than just initial installation. Having the right tools and adopting specific maintenance techniques can significantly extend its lifespan and safeguard your warranty. I personally rely on a set of precision instruments and diagnostic methods that allow me to spot potential issues before they escalate.
Why Invest in Quality Diagnostic Tools
In my experience, a reliable digital multimeter is indispensable for testing electrical continuity and grounding integrity. For example, measuring voltage levels at various points can reveal grounding issues or faulty wiring—problems that are often overlooked during routine checks. When I perform maintenance, I also employ a circuit tester with non-contact voltage detection, which provides quick confirmation of power presence without risking accidental shocks.
Moreover, a dedicated insulation resistance tester helps verify the integrity of the wiring insulation, a crucial factor in preventing electrical faults that can void warranties or cause damage. Combining these tools allows me to diagnose problems early, saving time and money.
Leverage Software and Visual Inspection Routines
While hardware tools are critical, incorporating regular visual inspections can catch corrosion, loose parts, or wear on critical components. I recommend keeping a maintenance log supplemented with high-resolution photos—this habit aids in tracking wear over time and provides documentation should warranty claims arise. Additionally, some manufacturers are moving toward smart diagnostic apps that can interface with the dishwasher’s internal sensors, offering real-time data on performance metrics. While I still recommend manual checks, integrating these digital methods can give you a comprehensive picture of your appliance’s health.
As technology evolves, I predict a trend towards integrated diagnostic systems that automatically alert homeowners to impending failures, reminding us that proactive maintenance is paramount.
How do I keep my dishwasher performing well over the years?
Beyond tools, adopting a routine that includes periodic cleaning of filters, spray arms, and seals is vital. Using the correct replacement parts—high-quality and compatible ones—prevents leaks and reduces strain on the motor. For detailed guidance on parts that ensure long-term performance, visit this resource. Remember, a well-maintained dishwasher not only saves money but also preserves your warranty coverage in the long run. Don’t forget to try implementing a monthly diagnostic check using your multimeter and visual inspection to catch issues early—this proactive approach can make all the difference.
The Hardest Lesson I Learned About dishwasher,installation,warranty,parts
One of my most impactful realizations came early on when I thought I had completed a flawless dishwasher installation, only to find it malfunctioning the next day. The experience taught me that even small overlooked details, like ensuring the grounding nut is properly secured, can have long-lasting consequences. Mistakes made due to haste or assumptions can void warranties, leading to costly repairs.
3 Myths About dishwasher,installation,warranty,parts That Held Me Back
- All parts are created equal: Choosing low-quality or incompatible parts might seem cost-effective initially but can cause early failures and warranty issues. Trust manufacturer-recommended components.
- Visual cues are enough: Tight connections may look secure, but using diagnostic tools to verify grounding and electrical integrity ensures safety.
- DIY is always straightforward: Without proper knowledge of the importance of grounding and part specifications, DIY projects can backfire. Continuous learning and consulting trusted guides can prevent this.
What Experts Won’t Tell You About dishwasher,installation,warranty,parts
Many seasoned professionals emphasize that meticulous documentation, including photos of the grounded wiring during installation, can make or break warranty claims. Moreover, the subtle art of selecting the right parts—not just matching sizes but understanding their role—entails a deep knowledge that often isn’t shared openly in quick tutorials.
Curated Resources for a Dishwasher That Lasts
- Essential parts checklist: A comprehensive guide to crucial components that prevent common failures and protect your warranty.
- Troubleshooting diagnostics: Knowing how to identify and record issues early can save money and preserve warranties.
- Long-term part selection: Secrets to choosing durable parts that withstand years of use.
Seize the Moment to Take Control of Your Dishwasher Maintenance
Investing time in proper grounding, using quality parts, and documenting your work can dramatically extend the life of your dishwasher. Remember, maintenance isn’t a one-time task but a continuous practice. Embracing these insights turns what might seem like minor details into powerful tools for longevity and warranty protection. So, what’s the next step you will take to ensure your dishwasher performs reliably? Share your plans or questions below—your experiences can guide others on this journey toward appliance mastery.
Related Posts
The $12 Copper Coupler That Stops Kitchen Floor Rot
I remember the moment I first noticed that unmistakable smell…

The Cabinet Steam Barrier Most DIYers Skip Until the Wood Rots
I remember the first time I encountered this problem—my DIY…
Stop Over-Tightening: How to Seat a Compression Nut Properly
One afternoon, I leaned under my kitchen sink, ready to…