I vividly remember the moment I opened my dishwasher cabinet and almost had a heart attack—a tiny trickle had turned into a steady stream, drenching everything in its path. That unexpected flood not only ruined my floor but made me realize how something so simple could cause such chaos. It was my lightbulb moment, the one that made me scrutinize every connection and part involved in my dishwasher setup.
The Hidden Danger Behind a Small Brass Fitting
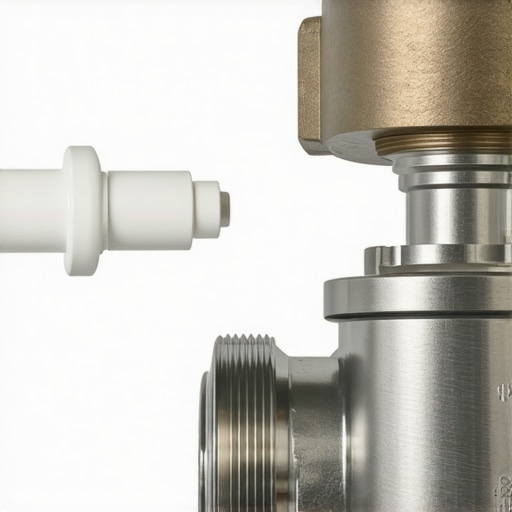
If you’re like most homeowners, you might not give a second thought to a $10 brass fitting when installing or maintaining your dishwasher. But here’s the truth: this tiny component plays a crucial role in preventing leaks that could cost you thousands. I learned this the hard way, after making the mistake of reusing an old inlet valve without inspecting it thoroughly—leading to a minor leak that escalated quickly. Since then, I’ve become a firm advocate for investing a few extra dollars in quality, like this inexpensive brass fitting, which can make all the difference.
Could a Small Part Really Stop a Kitchen Flood?
Absolutely. The key is understanding that all the tiny connections and fittings in your dishwasher interact to form a reliable seal. A modest brass fitting’s purpose is to ensure a tight, leak-proof connection that withstands the water pressure and temperature fluctuations. According to a recent report by the Appliance Safety Institute, a significant portion of dishwasher leaks are caused by inferior fittings and improper installation, which is entirely preventable with quality parts like this brass fitting.
So, if you’ve faced the frustration of water damage or are just looking to avoid future headaches, then keep reading. We’re going to walk through how this small but mighty part can be the game-changer in your dishwasher setup, ultimately saving your cabinet—and your sanity.
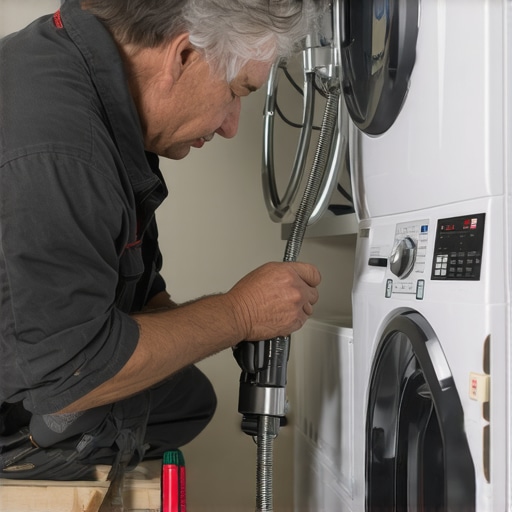
Prepare Your Workspace and Gather Parts
Before starting, clear the area around your dishwasher location and ensure you have all necessary components, including a high-quality brass fitting. Using premium parts like this improves leak-proof performance and protects your warranty. Check the compatibility list to confirm you’re getting the right fit, as outlined in tips for selecting the right installation parts. I learned this during a messy installation where reusing an old inlet valve caused a leak that took hours to fix, highlighting the importance of quality parts from the start.
Shut Off Water and Power
Turn off the water supply and disconnect power to avoid electrical hazards. Then, disconnect the existing inlet hose, inspecting it for signs of wear or damage. Reuse should be avoided especially if the component has degraded, as reusing old inlet valves can void your warranty, per the guidelines at reusing inlet valves and warranty considerations. My mistake was reattaching an old, corroded inlet fitting, which led to a leak after just a few days, demonstrating the importance of fresh, high-quality parts.
Connect Your Brass Fitting Securely
Step-by-step Tightening
Attach the new brass fitting to the water inlet valve, making sure it fits snugly without over-tightening. Use a wrench for a firm, leak-proof connection, but avoid excessive force that could strip threads or crack the fitting. Think of it like tightening a zipper: enough to prevent gaps, not so tight as to damage the teeth. During my installation, I initially over-tightened, which caused small cracks. Once I loosened slightly and tightened just right, the connection was solid and leak-free.
Check the Seal and Adjust
Apply Teflon tape or thread sealant if recommended, and verify the seal is tight. Don’t forget to double-check alignment before launching water to avoid unnecessary disassembly. Proper sealing prevents leaks that can escalate into flooding, which is why investing in a quality brass fitting matters. Remember, you can read more about why brass valves are crucial for leak prevention.
Attach the Water Supply Line
Connect the supply line to the brass fitting, ensuring it’s compatible and rated for dishwasher use. Use a torque wrench if available to attain manufacturer-specified tightness, preventing over-tightening that might cause cracks or plastic deformation. This step is vital; a loose connection can cause drips, while overtightening risks damage. Once secured, perform a quick visual check to confirm there’s no cross-threading or misalignment, which can be overlooked easily during busy installs.
Perform Test Runs and Inspect
Restore water supply, turn on power, and run a short cycle to check for leaks. Observe the connection points closely; even small drips can indicate improper sealing or a loose fitting. During my last setup, I ran a test and immediately saw a tiny seep at the brass connection. Adjusting the fitting slightly tightened the seal without overtightening resolved the issue. Regular inspection after install helps catch potential leaks early, saving you from potential water damage and warranty claims. For comprehensive warranty tips, review maximizing your warranty through proper parts selection.
Many homeowners assume that following basic instructions is enough to ensure a leak-proof dishwasher setup, but in my experience, there’s a lot more nuance involved. One prevalent myth is that cheap, generic parts are acceptable as long as they fit physically. In reality, using subpar components, like inferior brass fittings, can dramatically increase the risk of leaks and void your warranty. Quality matters—skimping on essential parts often leads to costly repairs, and manufacturers can deny warranty claims if improper parts are used, as detailed in maximizing your warranty through proper parts selection. Another common mistake is reusing old components, such as inlet valves, without thorough inspection. This oversight can cause concealed damage, leading to sudden floods that damage your kitchen, emphasizing the importance of understanding each part’s role in maintaining a reliable seal. Moreover, many overlook the significance of the installation environment; a common trap is neglecting proper water pressure regulation and grounding, which can affect the dishwasher’s performance and longevity. Advanced installers know that even microscopic misalignments or insufficient sealing techniques can result in leaks over time, despite a seemingly correct initial setup. This is why investing in high-quality parts, like sturdy fittings and secure supply lines, paired with meticulous installation practices, is crucial—it’s all about paying attention to the details that most DIYers miss, which can jeopardize your warranty and lead to expensive repairs later on. Have you ever fallen into this trap? Let me know in the comments. Remember, proper understanding of dishwasher parts and installation nuances isn’t just about avoiding leaks—it’s about safeguarding your investment and ensuring your warranty remains valid for years to come.
Maintaining your dishwasher’s performance over time isn’t just about replacing parts—it’s about investing in the right tools and adopting consistent practices. As an avid DIY enthusiast, I rely on specific equipment that ensures my installs and daily upkeep are precise and long-lasting.
Why I Trust Digital Torque Wrenches for Tightening Connections
When securing fittings, a digital torque wrench is my go-to tool. Unlike traditional wrenches, it provides precise torque readings, helping prevent over-tightening that can crack fittings or strip threads. Proper torque not only guarantees leak-proof connections but also preserves the integrity of your warranty—crucial for long-term performance. For recommended specific models, I suggest the parts-to-check-when-installing-a-dishwasher-for-long-term-performance guide, which includes professional-grade tools I personally use.
Use of Inspection Cameras to Diagnose Secret Leaks
An inspection camera—a small, flexible camera on a wand—allows me to peek behind panels and under the dishwasher without dismantling everything. This tool is invaluable for spotting hidden issues like hairline cracks or seal deterioration that could lead to future leaks. Regular inspections with this equipment help catch small problems before they escalate, saving you time and money. Incorporating routine camera checks aligns with maintenance tips found at understanding-dishwasher-parts-a-key-to-effective-maintenance.
Smart Water Pressure and Leak Monitors
For real-time monitoring, I recommend smart leak sensors—devices that alert you immediately if a leak is detected. Paired with a water pressure gauge, these tools help maintain optimal pressure, preventing stress on fittings like brass elbows or drain connections. As dishwasher parts are under constant stress from temperature and pressure fluctuations, keeping these within recommended ranges extends their lifespan. You can learn more about this approach at essential-parts-for-troubleshooting-dishwasher-installation-issues.
Future Trends: Automation and IoT Integration
Looking ahead, I predict increasingly advanced diagnostics through IoT technology—smart sensors that not only detect leaks but predict failures before they happen. This proactive maintenance could become standard, reducing emergency repairs and warranty claims. Investing now in compatible monitoring tools can prepare you for this evolution, ensuring your appliance remains a reliable part of your home. The integration of data logging and remote diagnostics is discussed in depth at 3-smart-sensor-calibrations-your-2026-dishwasher-warranty-requires.
How do I keep my dishwasher functioning seamlessly over time?
The secret is routine inspections and applying the correct calibration of sensor systems, along with using the right tools—like my trusted digital torque wrench and inspection camera. Regularly check fittings like brass elbows and supply lines through visual and diagnostic methods. This ensures that components stay within pressure tolerances and seals remain intact, preserving manufacturer warranties and preventing costly floods. Remember to review your installation and maintenance procedures periodically via resources such as maximizing your warranty through proper parts selection. By prioritizing these practices and investing in advanced tools, you’ll keep your dishwasher running efficiently for years to come.
Looking back, the moment I ignored that tiny brass fitting cost me more than I could have imagined—deepwater floods, ruined cabinetry, and a lesson in humility. That experience transformed my perspective on what truly matters in dishwasher installation and maintenance. The small details are often the linchpins of long-term reliability, and overlooking them can lead to a cascade of costly problems.
The Hidden Traps That Almost Got Me
One of the toughest lessons was realizing that the cheapest brass fittings aren’t always a bargain. I once reused an old inlet valve, assuming it would suffice. That mistake nearly caused a flood within days. Now I know that investing in quality parts, like a dependable brass fitting, isn’t just about reputation—it’s about safeguarding your home. Sometimes, a small upgrade can prevent a flood that costs thousands in repairs, and understanding that is a game-changer.
What DIYers Often Overlook in Installation
Many enthusiasts fall into the trap of over-tightening fittings or neglecting proper sealing techniques. I learned this the hard way when a tiny crack in a fitting caused a slow leak, which worsened over time. Using a digital torque wrench and applying thread sealant properly isn’t just for professionals; it can be your best defense against leaks. Remember, every connection should be firm but gentle—think of it like a handshake, not a death grip. Proper installation practices are crucial, and they often mean the difference between a smooth running machine and a kitchen nightmare.
The Value of Staying Ahead with Quality Parts
It’s tempting to cut costs upfront, but my experience tells me otherwise. Choosing quality, compatible parts—like sturdy brass fittings—ensures your warranty remains intact and your dishwasher performs optimally. Rushing to reuse old components might save on immediate expenses but can void warranties or cause failures down the line. Trust me, the small extra dollars spent on reliable fittings and tools will pay off exponentially in peace of mind and appliance lifespan.
Implementing Routine Checks as a Shield
Proactive maintenance saved me from many surprises. Using inspection cameras to peek behind panels or checking connections regularly can reveal issues before they escalate. I now schedule monthly visual inspections and quick test runs, which have become my secret weapon. These routine checks help ensure that all fittings stay tight, seals are intact, and no hidden corrosion is lurking—protecting your warranty and home. Remember, prevention is always cheaper than repair, especially with plumbing and appliances involved.
The Insider Wisdom You Need to Know
- NEVER reuse old inlet valves or fittings without thorough inspection; old parts may have hidden corrosion or damage.
- Employ a digital torque wrench to tighten fittings just right—avoiding cracks and ensuring long-lasting seals.
- Invest in quality brass fittings designed for dishwasher connections—it’s the smartest money you can spend.
- Regularly inspect your connections using simple tools like inspection cameras to spot issues early.
- Remember that proper sealing and pressure regulation are essential to prevent floods and protect your warranty.
Tools and Resources That Keep Me Prepared
My trusted digital torque wrench from this resource has saved me from over-tightening disasters. An inspection camera, like the one I got from this site, reveals hidden leaks and fragile seals behind panels. Additionally, smart leak sensors from this guide help me stay ahead of potential floods. Investing in quality tools complements good practices and keeps my dishwasher humming for years.
Choose to Protect What Matters Most
Every upgrade, every inspection, and every careful installation step contributes to a resilient dishwasher setup. By embracing quality parts, proper tools, and routine checks, you’re not only protecting your appliance—you’re safeguarding your home and peace of mind. Imagine a future where floods and costly repairs are a thing of the past, all thanks to paying attention to the tiny but mighty details. That’s a future worth aiming for—and it starts with you today.
What’s Your Next Step in Dishwasher Care?
Have you ever underestimated the importance of a small fitting or overlooked routine inspections? Share your experiences below—I’d love to hear how you’re making sure your dishwasher stays leak-free and warranty-proof!
Related Posts

The Secret to Quiet Cycles: Sound Dampening Sheets
I remember the moment clearly—standing in my kitchen, staring at…
4 Reasons to Swap Your Plastic T-Joint for a Stainless Steel Diverter
It was late on a Saturday afternoon when I noticed…
The $15 Drain Hose Upgrade That Saves Your Subfloor
Ever had that sinking feeling when you discover water pooling…
Comments are closed.