
It was 2:14 AM on a Tuesday when the phantom started calling from the kitchen. A sharp, rhythmic beep cut through the silence of my house like a dull saw. I stumbled out, eyes half-shut, only to find my dishwasher’s touch panel flashing like a miniature disco. No matter how many times I pressed ‘Cancel’ or ‘Reset,’ it just kept screaming. It wasn’t just annoying; it felt like a personal betrayal by a machine I thought I’d mastered. That night, I realized that while touch controls look sleek, they are sensitive little divas. I spent hours digging through manuals, only to find that the fix was simpler—and weirder—than I expected. Let’s get that noise stopped before it drives you as crazy as it drove me.
Stop the Constant Beeping for Good
The truth is, most of us ignore the early signs of a failing interface. Maybe it’s a flickering light or a button that requires a second tap to register. I made the classic mistake of thinking it was just ‘getting old’ and didn’t bother to check how to diagnose dishwasher parts during warranty periods until the warranty had actually expired. By the time I looked at the hidden fuse that controls your smart display panel, I had already spent a week losing my sleep. Today, I’m going to show you how to identify if your panel is actually failing or if it’s just a victim of moisture or bad installation. We’ll look at the common culprits, from steam-damaged sensors to mechanical vibrations that can actually shake the internal wiring loose. Have you ever stood in your kitchen and felt like your dishwasher was talking back to you with those endless chirps? Drop a comment and tell me I’m not the only one who has considered unplugging the whole house just to get some peace.
Are these smart panels just a gimmick that breaks?
You might be thinking that we should all just go back to the old mechanical dials. And honestly, after my third attempt to reset the firmware, I almost agreed with you. However, the problem usually isn’t the ‘smart’ tech itself; it’s the environment we put it in. According to research from the Association of Home Appliance Manufacturers (AHAM), electronic control boards are among the most common points of failure in modern appliances due to heat and humidity exposure within the kitchen environment. If your machine wasn’t sealed correctly during the diy dishwasher installation step by step guide process, that steam is a silent killer for your electronics. We aren’t just looking for a temporary fix; we are looking to bulletproof your kitchen.
Why Your Panel Thinks You’re Pushing Buttons
One thing I learned the hard way is that moisture is the absolute enemy of any touch interface. I once thought a deep clean with a dripping wet rag was the best way to maintain my kitchen, but I was actually pushing water into the microscopic gaps around the capacitive sensors. This creates ‘ghost touches’—the panel literally thinks a finger is there when it’s just a droplet of water. Before you go out and buy a whole new control unit, check if you’ve recently used a heavy steam cycle or if the one maintenance task that doubles the life of your gasket has been neglected, allowing steam to escape upward toward the display. Often, a simple hairdryer on a low, cool setting can dry out the interface and save you a $200 repair bill. We need to distinguish between a common dishwasher part replacement and a simple 5-minute DIY drying session.
Force a Brain Reset by Cutting the Juice
The first thing I tell everyone who emails me about a “possessed” dishwasher is to perform a hard reset. Modern control boards are essentially small computers, and like your phone or laptop, they can get caught in a logic loop. A power surge—even a tiny one—can scramble the instructions and cause buttons to fire off at random. I remember a storm last summer where the power didn’t even go out, but my dishwasher suddenly thought it was in “Demo Mode.” I panicked, thinking the board was fried, until I realized why your manufacturer warranty excludes power surge damage and decided to try the free fix first. Go to your breaker box and flip the switch for the dishwasher to ‘Off.’ Leave it there for at least ten full minutes. This allows the capacitors on the board to fully discharge, clearing the memory. When you flip it back on, the system reboots from scratch, often clearing those phantom beeps instantly.
Why Sticky Residue Mimics a Human Finger
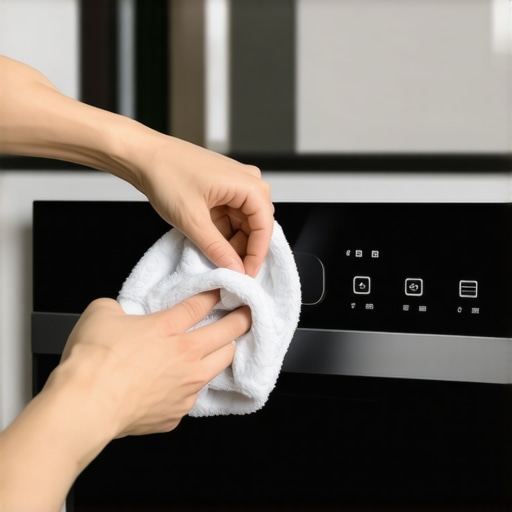
Capacitive touch screens work by sensing the electrical properties of your skin. Unfortunately, a dried drop of soda or even a thin film of grease from cooking can have the same effect. I once spent forty-five minutes trying to figure out why my “Start” button was unresponsive, only to find a nearly invisible smear of maple syrup from my kids’ breakfast had hardened over the sensor. It was essentially “holding” the button down for me. Use a microfiber cloth slightly—and I mean slightly—dampened with isopropyl alcohol to wipe the entire panel. Don’t use window cleaner or kitchen sprays; the chemicals can degrade the plastic overlay. If the buttons are still wonky, you might need to check the the 15-sensor that stops your smart dishwasher from overfilling because sometimes an internal error code is what’s actually triggering the UI to lock up as a safety feature.
Inspect the Ribbon Cable Before Buying a Replacement
If the surface is clean and the reset didn’t work, we have to look behind the curtain. The touch pad connects to the main control board via a thin, plastic ribbon cable. During a common dishwasher parts and their role in proper installation, this cable can sometimes be pinched or not seated fully into its slot. Vibrations from years of heavy cycles can wiggle it loose. You’ll need to remove the inner door panel—usually just a few Torx screws—to see it. I once opened mine up and found that steam had actually caused a tiny bit of corrosion on the copper “teeth” of that ribbon. I used a pencil eraser to gently scrub the contacts until they were shiny, pushed it back in, and the machine has been silent for two years. Before you dive in, make sure you know how to test your thermal fuse with a basic multimeter while the door is open, just to rule out other power issues.
Keep Your Warranty Intact While You Tinker
I’m all for a DIY win, but you have to be smart about your coverage. If your machine is less than a year old, opening that control box might leave a trace that a technician will spot. I always suggest checking how to get your warranty claim approved on the first try before you start unscrewing internal components. If you see a “void if broken” sticker, stop and call the manufacturer. However, many issues are actually software-related. I’ve seen cases where a simple update via a mobile app fixes button lag. If you’re curious why your smart dishwasher keeps asking for a software update, it’s often because they’ve patched a bug that causes the touch panel to become oversensitive to steam. Always check for an update before you assume you have a hardware failure that requires a technician.
Stop trusting the Eco Mode label blindly
Most people think they are doing their wallet and the planet a favor by running ‘Eco’ cycles every night. I used to be that person until a repair tech showed me the inside of a pump from a machine that was barely two years old. It looked like a clogged artery. The hard truth is, why the heavy cycle is actually better for your machine health comes down to simple physics: fat emulsification. Without a regular high-heat blast, grease from your dinner plates solidifies into a wax-like substance that coats the internal sensors and slows down the impeller. This leads to what experts call ‘ghost readings,’ where why your smart sensors are giving you dirty readings becomes a recurring nightmare. If you want your touch panel to stop acting up, you need to clear the internal blockages that are confusing the system’s logic.
Why does my smart sensor keep failing even after a deep clean?
It’s often not the sensor itself, but a lack of calibration. According to technical bulletins from the Association of Home Appliance Manufacturers, modern sensors are calibrated to the water hardness of your initial setup. If you’ve recently added a water softener or moved to a new area, how to calibrate your machine for high altitude or different water conditions is a step most DIYers skip. Furthermore, I’ve found that why soft water is ruining your dishwasher interior is a real phenomenon; it can lead to ‘etching’ that looks like dirt but is actually permanent glass damage. Don’t assume the machine is ‘dirty’ when it’s actually over-cleaning with the wrong chemical balance.
Protect your floors by ditching the old brass fittings
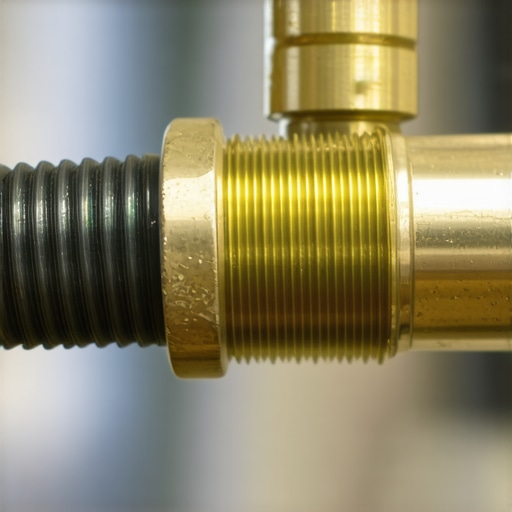
One of the biggest ‘oops’ factors I see is the temptation to save twenty bucks by reusing old hardware. When you are following a diy dishwasher installation step by step guide, the very first thing you should throw away is the old water supply line and those tarnished brass fittings. Metal fatigue is invisible to the naked eye. I’ve heard horror stories of people finishing an install, only to have a hairline fracture in an old valve flood their kitchen at 3 AM. There is a specific why your professional installer refuses to reuse your old brass fittings: the rubber seals inside those lines have a memory, and once they are compressed and released, they rarely seal perfectly a second time. This is also why why your home insurance might not cover a diy installation leak if they find you used salvaged parts.
The hidden cost of ‘free’ warranty repairs
Here is the nuance that catches everyone off guard: a ‘parts and labor’ warranty is rarely actually free. You might find that why your warranty covers parts but not the 150-service trip fee is a standard clause in the fine print. I once spent three hours on the phone arguing over a $12 sensor that was covered, only to be hit with a massive bill for the technician’s drive time. To avoid this, you need to know how to get your warranty claim approved on the first try by documenting everything—from the error codes on your screen to the serial number of the failing part. Also, be aware that why your kitchen flooring might void your installation guarantee; if a tech can’t slide the machine out because you tiled it in, they will likely walk away and still charge you for the visit. Have you ever fallen into the ‘Eco mode’ trap or been blindsided by a hidden service fee? Let me know in the comments below!
Grab the Right Gear Before You Strip a Screw
I’ve learned the hard way that a standard screwdriver and a pair of pliers are the fastest way to ruin a $900 appliance. If you want to handle your own repairs without crying over a stripped bolt, you need a dedicated set of nut drivers—specifically 1/4″ and 5/16″ sizes. These are the ‘keys to the kingdom’ for most major brands. I also never touch a control board without my basic digital multimeter in hand. If you’re wondering the most reliable way to test a thermal fuse, it’s not by looking at it; it’s by checking for continuity. This tool has saved me from buying expensive parts I didn’t actually need because it can distinguish between a dead motor and a $15 blown fuse. Using the proper tool to use when tightening your water supply line prevents the micro-fractures in plastic housings that lead to slow, hidden leaks behind your cabinets.
How do I maintain my dishwasher’s electronic brain over time?
Maintenance isn’t just about cleaning the filter; it’s about digital hygiene. According to the International Electrotechnical Commission (IEC) standard 60335-2-5, household dishwashers are increasingly reliant on complex electronic monitoring systems to manage water pressure and temperature safety. To keep these systems from glitching, I make it a habit to check for firmware updates through the manufacturer’s app every quarter. It sounds overkill, but why your smart dishwasher keeps asking for a software update is often linked to critical sensor recalibrations that prevent the heater from burning out. Beyond the digital, understanding dishwasher parts a key to effective maintenance means knowing that your spray arms can be cleaned in seconds. Use a toothpick or a small wire to poke out the calcium deposits in the nozzles to ensure the water pressure stays consistent and the ‘brain’ doesn’t think the pump is failing when it’s actually just a blockage.

The Future of Kitchen Tech is Predictive
I predict that within the next five years, we won’t be guessing why a machine is beeping. We are moving toward ‘acoustic monitoring,’ where internal microphones detect the specific frequency of a bearing starting to wear out before you ever see a leak. Until then, we have to be the sensors. This is why I always suggest parts to check when installing a dishwasher for long-term performance, like high-quality vibration pads. These don’t just make the kitchen quieter; they protect the delicate solder joints on the control board from the constant rhythmic shaking of the heavy-duty wash cycles. If you want to stay ahead of the curve, start treated your dishwasher like a computer that happens to get wet. Keep the ‘OS’ updated and the ‘Hardware’ clean. If you’re feeling bold, try the multimeter test on your thermal fuse today—it’s the best way to move from a ‘user’ to a ‘master’ of your kitchen. Don’t wait for the next 2 AM beep to realize you don’t have the right tools in your drawer.
What I Learned After Three Cold Nights With a Beeping Machine
If there is one thing that 2 AM dishwasher ghost-hunt taught me, it is that logic often fails where physics begins. I used to think a quick wipe was enough, but I learned that even invisible mineral films from ‘clean’ water can conduct just enough electricity to trick a capacitive sensor. I also discovered that understanding dishwasher warranty policies for peace of mind is your best defense against the dread of a dying control board. Don’t let the machine intimidate you; most of these glitches are environmental, not terminal. Another hard lesson? You must stop using vinegar in your high-end smart machine because the acetic acid vapors can actually accelerate the corrosion of those delicate ribbon cable connectors we talked about earlier. Lastly, always keep your paperwork in order, because I found out the hard way about the risks of skipping the professional installation receipt when I tried to claim a failed panel under a secondary insurance plan.
The Essential Gear for Every Smart Kitchen Owner
You don’t need a degree in electrical engineering to keep your appliance running, but you do need the right toolkit. First, a high-quality microfiber cloth is non-negotiable for keeping the touch interface free of the oils that cause ‘phantom’ button presses. Second, I cannot recommend a basic digital multimeter enough. It is the only way to truly know if a component has failed or if you’re just dealing with a software hiccup. I trust my multimeter because it gives me data, not guesses, which is vital when you are learning how to test your thermal fuse with a basic multimeter. Finally, download your manufacturer’s official app. It might seem like more ‘smart’ clutter, but it is the direct line for those firmware updates that patch the very bugs causing your panel to lag or beep unnecessarily.
Master Your Machine Before the Next Ghost Touch
Living with a modern appliance is a partnership. When you take the time to learn the quirks of your dishwasher, warranty, parts, and installation, you move from being a frustrated owner to a confident master of your home. You’ve seen how steam, residue, and even a simple power surge can disrupt the peace of your kitchen. Now, you have the roadmap to silence the beeps and get back to what matters: a clean kitchen and a full night’s sleep. Don’t wait for the next error code to pop up; check your gaskets and clean that panel today to ensure your dishwasher, warranty, parts, and installation remain in peak condition for years to come. Have you ever had your dishwasher start a cycle all by itself in the middle of the night? Let me know in the comments below!
Related Posts
How to Fix a Dishwasher That Won’t Stop Filling with Water
It was late one evening when I finally realized what…
Why Your Dishwasher Drain Smells Like Old Socks After a Cycle
Ever opened my dishwasher after a cycle and been hit…

Why Your Heating Element is Burning Your Favorite Bowls
Have you ever gone to prepare a warm meal or…