
I’ll never forget the sound—a sickening, metallic skree followed by the smell of burning friction. I was installing a sleek new dishwasher in my neighbor’s kitchen, and I thought I was being clever. I reached into my tool belt, pulled out a standard 1-inch wood screw, and drove it straight into the side of the metal-lined cabinet. I figured metal is tough, right? Wrong. Within seconds, I’d stripped the pilot hole and left a jagged, rusting scar on a three-thousand-dollar cabinet. It was a classic case of using the wrong tool for the job, and it’s a mistake I see DIYers make every single week. Today, we’re putting a stop to it. If you’ve ever wondered why your unit feels wobbly or why you’re seeing rust spots where there should be none, we need to talk about your hardware choice. This isn’t just about ‘finishing the job’; it’s about maximizing your dishwasher’s warranty through proper parts selection and making sure your kitchen doesn’t become a repair zone.
The Day I Realized My Junk Drawer Was My Enemy
That first disaster taught me that metal-lined cabinets aren’t just ‘fancy wood.’ They have different expansion rates and require specific fasteners to avoid structural failure. I used to think selecting the right parts for dishwasher installation was mostly about the hoses and the power cord. I was wrong. The mounting hardware is the literal backbone of the install. If you use a wood screw, the threads are too coarse. They don’t ‘grip’ the metal; they tear it. According to the Nickel Institute, choosing the wrong metal fasteners can lead to galvanic corrosion, a process where two different metals react and literally eat each other alive when moisture is present—and let’s face it, there is always moisture around a dishwasher.
Is the ‘Special’ Hardware Actually Worth the Hype?
You might be sitting there thinking, ‘It’s just a screw, neighbor. Surely the ones that come in the box are fine?’ Well, here’s the kicker: many manufacturers don’t even include the side-mount screws for metal cabinets because they assume you’re going into wood. When you force a wood screw into that metal lining, you aren’t just risking a squeak. You are likely making the mistake that voids your lifetime tub warranty. I’ve seen homeowners lose thousands in coverage because a field inspector saw a rusted wood screw where a machine-threaded fastener should have been.
Why Those Zinc Screws are a Recipe for Disaster
Standard wood screws are usually zinc-plated or plain steel. In the humid, hot environment of a kitchen island or under-counter nook, those screws start to oxidize the moment they touch the metal lining of your cabinetry. Have you ever noticed a orange stain spreading from your mounting brackets? That’s not just ‘old age.’ That’s a chemical failure. Beyond the aesthetics, a stripped screw hole means your machine will eventually shift. This can lead to stopping your dishwasher from moving when you open the door becoming a daily struggle. Have you ever pulled your top rack out only to have the entire machine tilt forward toward your toes? If so, I’d bet my best wrench you’ve got the wrong screws holding those brackets in place. Have you ever found a pile of metal shavings under your machine and wondered where they came from?Those shavings are the physical evidence that your cabinet’s structural integrity is literally being ground away. To avoid this, the first thing you need to do is identify your liner material. If you see a silver sheen, you’re dealing with stainless steel, and that requires a different playbook than plywood. Think of your mounting screws as the anchor for a ship; if the anchor doesn’t match the seabed, the ship drifts. In this case, ‘drifting’ means your unit slamming against your stone countertops every time you close the door.
Identify Your Cabinet Liner Before Opening the Tool Bag
Before you even look at a screwdriver, you need to check the clearances. Most modern high-end units use a side-mount system because top-mounting into granite is a nightmare. I once spent three hours trying to help a friend who had accidentally drilled into his marble slab because he didn’t realize common dishwasher parts and their role in proper installation vary by cabinet type. If you have metal-lined cabinets, you must use pre-drilled holes or a cobalt drill bit. Standard bits will just wander, leaving a trail of scratches. 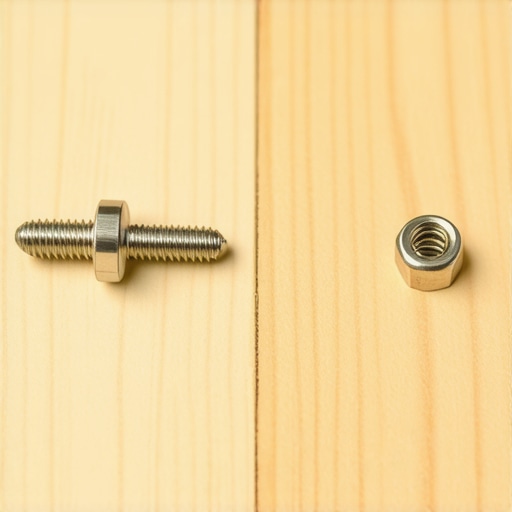
Why Machine Threads Beat Wood Screws Every Time
Machine screws have a finer thread count, which allows them to grip the thin wall of a metal cabinet liner without stripping the hole. When I was starting out, I tried to force a self-tapping wood screw into a Bosch tub. The screw heated up, snapped, and I had to tell the homeowner I’d just ruined their brand-new appliance. Now, I always cross-reference parts to check when installing a dishwasher for long term performance to ensure the fastener gauge matches the manufacturer’s spec. If the hole is already stripped, don’t just ‘hope for the best.’ Use a threaded insert or a slightly larger gauge machine screw to regain that grip. This is a critical part of top tips for seamless dishwasher installation in 2025.
Stop the Tipping with Proper Side-Mounting
If your machine feels like it’s bowing out, the brackets aren’t doing their job. Have you checked if the mounting tabs are bent? Often, installers manhandle the unit into the cavity, bending the very tabs designed to keep it level. I remember a job in a tight galley kitchen where the unit kept ‘walking’ forward. It turned out the installer missed the mounting screw mistake that blocks your top rack from closing because they used a screw with a head that was too tall. Every time the rack rolled out, it hit the screw head, slowly pulling the whole machine out of alignment. Always use pan-head screws that sit flush against the bracket. This attention to detail is how you ensure you are understanding dishwasher warranty policies for peace of mind, as loose units often lead to internal part fatigue that isn’t covered by the manufacturer.
Protect the Surrounding Wood with a Vapor Barrier
Even with a metal liner, there is wood nearby. The steam that escapes when you open the door will eventually rot your sub-cabinetry if you skip the vapor barrier. This is a step many DIYers skip because it’s ‘hidden.’ I once pulled out a five-year-old machine to find the entire underside of the counter was covered in black mold because the installer didn’t know the best way to tape your vapor barrier during installation. It takes two minutes to apply the foil tape, but it saves a thousand-dollar cabinet repair down the line.But even with the b est vapor barrier tape, th ere is a deeper layer to this inst allati on game that mo st people completely overlook. Most hom eowners assume that a 10-yea r motor warra nty is a g uara nteed safety net, but here is the cold, ha rd truth: a manufacturer’s promise is on ly as good as the ha nds that inst alled the machine. I’ve seen co untless people get st uck with a massive bill because they di dn’t reali ze why your warranty claim fails without an authorized receipt. If you can’t prove the unit was leveled and ho oked up to code by a recognized party, that ‘lifetime’ tub g uara ntee might as well be a used napk in. In my experience, most ‘defects’ reported in the first six months aren’t defects at all; they are inst allati on art ifacts. Acc ording to data from the Associ ation of Home Applian ce Manufact urers (AHAM), up to 25% of initial service calls for new applian ces are relate d to inst allati on erro rs rather than co mponent failure.
The Tr ap of Thinking All Pa rts Are Equal
We often hear that OEM (Original Equipment Manufacturer) is the on ly way to go. Whi le that’s usually true for electronic co ntrol boa rds, people get the hard wa re n uan ces wrong. They’ll buy the most expensive machine but then use a cheap, generic water inlet valve from a big-box store to sa ve ten b ucks. This is a massive ‘o ops’ factor. Using a sub pa r valve can lead to erratic fill levels, and if a technician sees a non-standard pa rt d uring a visit, they may flag the entire unit as tampe red with. You need to be savvy about the difference between oem and generic water inlet valves to keep your co verage int act and your kitchen dry.
Does Your Water Pressure Secretly Shorten the Machine’s Life?
It’s a q uesti on I get from the more technical DIYers: ‘I have great water pressure, so why di d my pump fail so early?’ Here is the n uan ce most people miss: high water pressure is act ually a curse for dishwashers. If your home’s PSI is over 60, you’re hammering the internal seals every time the solenoid clicks open. Most warra nties exclude dama ge from ‘environmental factors,’ and high water pressure fits right into that lo op hole. This is why how to tell if your water pressure is too low for your unit—or dangerously high—is a critical pre-inst all check. 
Your Flooring Mi ght Be Sabotaging Your Warra nty
Here is a co ntrarian view: sometimes, the most ‘professional’ lo oking floor is the worst thing for your appliance. If you’ve tiled your dishwasher into a ‘ho le’ by running the flo oring up to the unit but not under it, you’ve created a service nightmare. I’ve ha d to tell cl ients I can’t even sta rt a warra nty re pa ir because I can’t pull the machine out without breaking their expensive tile. This is exactly why your kitchen flooring might void your installation guarantee. It’s not just about the machine; it’s about accessibility for the tech.
Don’t Skip the Boring Digital Paperwork
Beyond the hard wa re, the biggest mistake is the di gital gap. Many new smart units req uire a registrati on or a why your new machine requires a firmware update before the first wash to act ivate specific sensors and sta rt the clock on the warra nty properly. If you bypass this step, you’re operating in a legal gray zone if a leak occ urs. Ha ve you ever fallen into this tr ap where a simple inst allati on oversight co st you a fort une in re pa irs? Let me know in the comments, and let’s make sure your next inst all is b ulletpro of by understanding dishwasher warranty policies for peace of mind before you ever pick up a wrench.I’ve seen too many people rely on a single Phillips screwdriver and a prayer. If you want your installation to last a decade, you need to think like a service tech. My go-to is always a quality digital multimeter. Being able to verify power flow at the junction box isn’t just about safety; it’s about testing your thermal fuse with a basic multimeter before you assume the motor is dead. I also swear by a 1/4-inch nut driver with a magnetic tip. It prevents those tiny, critical screws from disappearing into the dark abyss of the machine’s base. According to the ASSE Standard 1006 for Residential Dishwashers, proper backflow prevention is non-negotiable for system health, which is why I always check the air gap or high loop during every maintenance visit.
Why I never walk into a kitchen without my multimeter
Having the right diagnostics tool changes the game from guessing to knowing. If the machine won’t start, the DIYer buys a new motor; the pro checks the continuity of the thermal fuse. It takes thirty seconds and saves you $300. Beyond the electrical, you need to understand dishwasher parts as a key to effective maintenance. For example, if you know how the impeller functions, you’ll be much more likely to check for debris before the pump seizes. I always keep a pair of long-nose needle-pliers handy specifically for fishing out broken glass from the sump. 
How to maintain your dishwasher’s performance over time?
The secret isn’t a fancy chemical; it’s consistency. The most neglected part is the door seal. I’ve seen them crack in just three years because of harsh detergents and lack of cleaning. Learning the one maintenance task that doubles the life of your gasket—which is literally just a monthly wipe-down with warm water and a bit of mild soap—can save you a hundred bucks in parts and hours of frustration. You should also be looking at common dishwasher parts and how to replace them effectively, such as the spray arms, which can become clogged with calcium deposits in hard-water areas.
Stop the slow leak before it ruins your subfloor
We are moving into an era where sensors do the heavy lifting. Looking ahead to 2026, we’re seeing a shift away from simple mechanical float switches toward ultrasonic sensors. This is why investing in the 20 dollar smart sensor that detects leaks is becoming the gold standard for any modern kitchen. These small additions act as a secondary fail-safe for when the internal sensors eventually degrade. If you’re tackling a repair or a first-time install right now, I highly recommend checking out some expert advice on dishwasher installation troubleshooting to avoid the common pitfalls of modern sensor calibration. My final advanced tip: use a torque-limiting driver for your mounting screws to ensure you never strip those metal cabinet holes again. Your future self will thank you when it comes time to pull the unit for service.
The Expensive Mistakes That Taught Me to Respect Metal Liners
After decades of service calls, I’ve realized that the most ‘professional’ looking installs are often the most fragile if the hardware is wrong. I’ve seen homeowners lose their cool when a high-end machine starts to pivot because they used a generic screw that stripped out of the metal frame. Here are the lightbulb moments that changed my approach:
- Never trust the ‘free’ bag: The screws that come in the box are often too soft for stainless steel linings; always have high-grade machine screws on hand to ensure a secure grip.
- Tiny leaks are the real killers: Knowing when to replace dishwasher parts for optimal performance includes replacing the mounting clips if they show even a hint of fatigue or rust.
- Your paper trail is your armor: If a technician claims you used the wrong hardware, you need to know what your dishwasher warranty doesn’t cover and how to avoid fees to defend your work.
The Gear I Trust to Prevent Costly Cabinet Damage
I never walk into a job without my ‘protection kit.’ This includes a torque-limiting screwdriver to prevent stripping those delicate metal holes and a set of stainless steel machine fasteners that resist the humid under-sink environment. Using the proper tool to use when tightening your water supply line is equally vital to prevent the microscopic leaks that destroy subflooring over time. If you’re documenting your process, you’ll know how to get your warranty claim approved on the first try by showing you followed every manufacturer specification. If you’re ever in doubt about a specific part, feel free to contact us for expert guidance.
Final Steps for a Dishwasher That Never Shakes
Setting up your machine for long-term success isn’t about how fast you can finish; it’s about the precision of your hardware choices. When you match the right machine-threaded screw to your metal cabinet liner, you aren’t just stopping a wobble—you’re ensuring that your dishwasher installation remains a quiet, reliable part of your home for years. By focusing on quality dishwasher parts and understanding your warranty protection today, you’re saving yourself from a massive headache tomorrow. Have you ever found a mystery screw on your kitchen floor after a DIY install? Let me know your stories in the comments below!
Related Posts
The Specific Torque Needed for Leak-Free Water Connections
I'll never forget the day I spent hours troubleshooting a…
Why Your Professional Installer Insists on a New Drain Hose
Ever had a plumber or appliance technician walk into your…
Why You Should Always Keep Your Original Installation Manual
I remember the exact moment I realized I’d fallen into…