
I was standing ankle-deep in a puddle of lukewarm, greasy water on a Tuesday night, staring at a mountain of dirty plates. My dishwasher had just given up the ghost, or so I thought. I was seconds away from calling a repairman—or worse, dragging the whole unit to the curb—because I assumed the motor had seized. It turns out, I was about to make a very expensive mistake by ignoring one tiny, submerged component. I spent years thinking that if I just scraped my plates well enough, the machine would handle the rest. I was wrong. Most of us focus on the big stuff like the racks or the spray arms, but there is a silent hero (or villain, if neglected) tucked away beneath the surface. Today, I am going to show you exactly how to find the drain pump filter you probably didn’t know existed, saving you from a massive repair bill and the frustration of a flooded kitchen.
Stop Blaming the Motor for Your Drainage Problems
If your machine won’t drain, your first instinct is likely to panic about the pump failing. I’ve been there. In my early days of DIY home maintenance, I actually replaced an entire pump assembly—costing me a small fortune—only to realize later that a single cherry pit was jammed in a secondary filter I hadn’t even looked at. It’s one of those common dishwasher parts that people overlook because it isn’t always mentioned in the ‘quick start’ guide. You might be surprised to learn that according to data from Consumer Reports, nearly 30% of dishwasher repairs could be avoided with regular filter maintenance. This isn’t just about avoiding a mess; it’s about maximizing your dishwasher’s warranty by proving you’ve actually taken care of the unit. If you don’t clean this specific spot, the back-pressure can eventually burn out the real pump, and that is a much harder conversation to have with your wallet.
Do I really need to take my machine apart for this?
I know what you’re thinking: ‘I already clean the mesh screen at the bottom, isn’t that enough?’ Unfortunately, no. While the hidden drain screen catches the big chunks, there is often a secondary fine-mesh filter or a pump-guard specifically designed to protect the impeller. Have you ever noticed a weird humming sound or a ‘check water’ light that won’t go away? That’s your machine screaming for help. I once found a tiny stuck glass fragment wedged so deep in this secondary filter that it was purely a miracle the plastic didn’t shatter. It’s a simple fix, but it requires knowing where to look. Have you ever opened your dishwasher after a cycle only to find two inches of greywater staring back at you? Tell me about your most frustrating ‘why won’t you drain’ moment in the comments below, because I bet we can fix it right now without calling a pro.
Take Control of the Sump and Pump Assembly
To fix a drainage issue without spending a dime, you have to get comfortable with the floor of your machine. Most people stop at the surface, but the real trouble usually hides in the sump. Before you touch anything, make sure the power is off—either unplug it or flip the breaker—because you’ll be working near electrical components. I remember helping a friend who was convinced her three-year-old machine was a lemon. We spent twenty minutes bailing out the water with a turkey baster just to see the floor of the tub. Once we reached the sump, I found a single toothpick wedged horizontally across the pump intake. It had caught every bit of hair and lint passing through, creating a waterproof plug. Learning how to diagnose dishwasher parts during warranty periods starts with these basic physical inspections. If you can prove the part failed due to a defect rather than a toothpick, you’re in a much better position for a claim.
Pop the Spray Arm and Screen First
Start by removing the bottom dish rack and setting it aside. Most lower spray arms simply pop off with a firm tug or a quarter-turn counter-clockwise. Underneath that, you’ll see the coarse filter—the one you probably already know. Remove it and set it in the sink. This is a great time to evaluate common dishwasher parts and how to replace them effectively if you notice the plastic is cracked or the mesh is torn. If that screen is compromised, debris will bypass it and head straight for the pump impeller, which is exactly what we want to avoid. 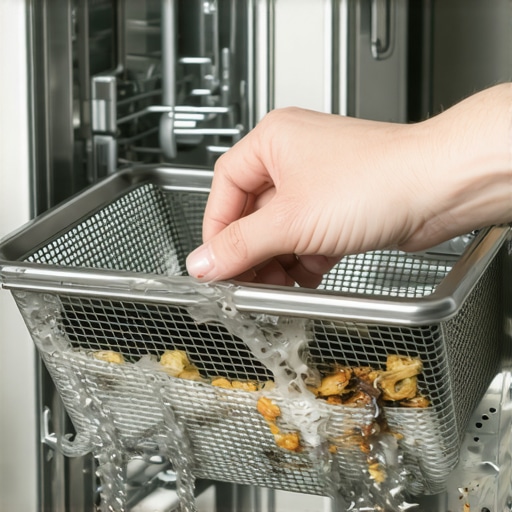
Dig Deeper into the Filter Housing
Once the main screen is out, look for a small plastic cover or a secondary fine-mesh cylinder. This is the hidden drain screen you probably forgot to clean. In many modern units, there is a single screw or a locking tab holding a plastic ‘puck’ over the pump intake. Remove this carefully. I once found a fragment of a porcelain plate that had shattered weeks prior; it was sitting right against the pump blades, preventing them from spinning. If you find something similar, you’ll need to know how to safely remove a stuck glass fragment from the pump without slicing your fingers or damaging the delicate plastic impeller.
The 30-Second Scrub That Saves Your Motor
Once you have the filters out, don’t just rinse them. Fats and proteins from your food can create a waxy buildup that looks clean but is actually waterproof. Use a soft toothbrush and some degreasing dish soap. Knowing the best way to clean a filter that is coated in grease ensures that water can actually flow through the mesh. If the mesh is blinded by grease, the pump has to work twice as hard to pull water through, leading to premature failure. This simple cleaning habit is one of the most essential parts every dishwasher owner should know about because it directly affects the longevity of the motor. By keeping these passages clear, you are actively maximizing your dishwasher’s warranty by preventing ‘user-error’ clogs that technicians love to charge for. Reassemble everything in the reverse order, ensuring the locking tabs click into place, or you’ll find the filters floating in the middle of your next cycle.
Stop cleaning your dishes before you wash them
Most people think they’re doing the machine a favor by rinsing every scrap of food off their plates. In reality, you’re likely making the machine perform worse. Modern units use turbidity sensors to measure how much ‘gunk’ is in the water during the first few minutes of a cycle. If you’ve already rinsed everything away, why your smart sensors are giving you dirty readings becomes clear: the machine thinks the load is light and shortens the cycle, often skipping the high-heat phase needed to sanitize. A technical report from the Association of Home Appliance Manufacturers (AHAM) confirms that detergents are chemically engineered to attach to food particles; without them, the soap just bounces around, potentially causing sudsing issues or even why your high efficiency detergent is actually clogging your pipes because it doesn’t have enough organic matter to break down. This ‘pre-wash’ habit can lead to cloudy glasses and a buildup of undissolved film that eventually restricts water flow. 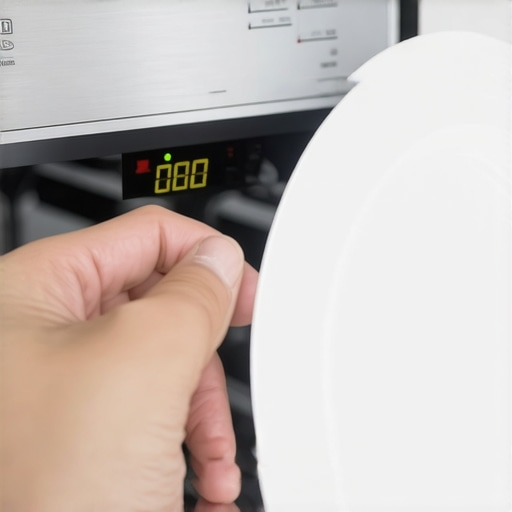
The expensive trap of the ‘good enough’ old part
When it comes to installation, the biggest ‘oops’ I see is people trying to save twenty dollars by reusing their old supply line or brass elbow. It’s a classic mistake. Those rubber seals have been compressed for years; once you break that seal, they rarely seat properly again. This is exactly why your professional installer insists on a new water valve and fresh fittings. I once saw a DIYer flood their entire basement because they used a garden hose adapter instead of a proper 90-degree dishwasher elbow. Reusing old components is the fastest way to experience the risks of skipping the professional installation receipt, as any subsequent water damage will be blamed on your refusal to replace a ten-dollar hose. Have you ever fallen into this trap of trying to save a few bucks only to have it backfire? Let me know in the comments below.
Will your choice of flooring kill your warranty?
This is the nuance most homeowners miss: your kitchen remodel might actually make your appliance unserviceable. If you lay new tile or hardwood after the dishwasher is installed, you might ‘trap’ the unit in place. This is a nightmare for technicians. In fact, many professional service agreements have clauses explaining why your kitchen flooring might void your installation guarantee if the machine cannot be pulled out for repair without damaging the floor. You should also be aware of the ‘fine print’ regarding service calls. Many people are shocked to find out why your warranty covers parts but not the 150 dollar service trip fee. Knowing how to get your warranty claim approved on the first try often involves documenting that the machine was installed with proper clearance and new parts from the start. If you want to protect your investment, maximizing your dishwashers warranty coverage today means keeping every receipt and ensuring your installation is up to code. Don’t let a small installation oversight stand between you and a free repair.
The Toolkit That Keeps My Kitchen Dry
I’ve learned the hard way that you can’t fix a 2025-era appliance with a 1980s-era screwdriver set. If you’re serious about DIY maintenance, you need a dedicated kit. My go-to is a digital multimeter—not because I’m an electrician, but because how to test your thermal fuse with a basic multimeter is the single most valuable skill you can learn. I use a Klein Tools MM300 because it’s reliable and fits right behind the kickplate. Most people assume a dead display means a fried control board, but often it’s just a fifteen-dollar fuse that you can swap in ten minutes. Keeping a few essential parts every dishwasher owner should know about on hand, like extra mounting clips or a spare drain hose, has saved my sanity more than once during a holiday dinner.
How do I keep my machine running like day one for a decade?
The secret isn’t a fancy chemical; it’s consistency. I perform the one maintenance task that doubles the life of your gasket every three months: a simple wipe-down with food-grade silicone grease. This prevents the rubber from becoming brittle and failing. I’m a firm believer that understanding dishwasher parts a key to effective maintenance is the only way to avoid those ‘ghost leaks’ that seep into your subfloor. If you wait until you see water on the floor, the damage is already done. 
Your machine is becoming a computer on wheels
We are entering an era where your dishwasher is as much about code as it is about cams and gears. I predict that in the next few years, manual troubleshooting will be almost entirely replaced by remote diagnostics and integrated AI sensors. We’re already seeing why your new machine requires a firmware update before the first wash to calibrate the sensors correctly. According to the Bosch Technical Training manual for high-efficiency models, even a 1/8th-inch deviation in the level of the machine can cause the turbidity sensor to misread the water clarity, leading to poor cleaning results. This level of precision is why knowing when to replace dishwasher parts for optimal performance is becoming a data-driven task rather than a guessing game.
Don’t let the fine print drain your bank account
I always tell my friends to read their contracts carefully because what your dishwasher warranty doesnt cover and how to avoid fees is usually the most expensive part of the manual. If you use the wrong detergent and it clogs the sensors, that’s on you. If you don’t use the proper tool to use when tightening your water supply line and it drips, they won’t pay for the plumber to come back and fix the leak. I’ve seen homeowners lose hundreds because they didn’t realize why your warranty covers parts but not the 150 dollar service trip fee. Take ten minutes today to find your multimeter and test your thermal fuse—it’s the best way to prove you’re in control of your kitchen’s destiny.
The Hardest Lessons I Learned While Dealing With Floods and Fees
After years of tinkering with kitchen appliances, I realized that most heartbreak comes down to the tiny details we ignore. For instance, I used to think any replacement part was fine until I saw a generic impeller melt under high heat. I now know why OEM pumps outlast cheap alternatives every time, and that extra investment is always worth the peace of mind. Another tough pill to swallow was realizing that why your warranty covers parts but not the 150 dollar service trip fee is standard industry practice, making your own diagnostic skills a literal paycheck in your pocket. Lastly, never underestimate the power of a paper trail; why your warranty claim fails without an authorized receipt is the number one reason manufacturers deny coverage when things go south.
The Survival Kit I Keep Tucked Under My Sink
If you want to stop calling for help every time a light blinks on your console, you need a few specific items in your toolkit. First, grab a basic multimeter; learning the most reliable way to test a thermal fuse will save you from replacing an entire machine when you just had a minor power spike. Second, don’t neglect your door seals—performing the one maintenance task that doubles the life of your gasket with food-grade silicone takes two minutes but prevents thousands in subfloor damage. I also highly recommend upgrading your hardware during any move; why your professional installer insists on a new water valve is rooted in preventing the slow drips that cause hidden mold growth behind your cabinets.
Give Your Machine the Respect It Deserves
Your dishwasher works harder than almost any other appliance in your home, battling grease and boiling water daily. When you take the time to embrace understanding dishwasher parts a key to effective maintenance, you aren’t just saving money; you’re becoming a more self-reliant homeowner. You have the power to extend the life of your unit by a decade simply by paying attention to the filters and sensors that others ignore. Have you ever attempted a simple repair only to realize you were missing one tiny, crucial part? Tell me about your DIY successes or struggles in the comments below!
Related Posts
The Difference Between OEM and Generic Water Inlet Valves
The metallic 'click-click-click' followed by the ominous sound of rushing…
4 Reasons to Swap Your Plastic T-Joint for a Stainless Steel Diverter
It was late on a Saturday afternoon when I noticed…
The $5 Component That Stops Your Dishwasher from Overfilling
Ever had that sinking feeling when you open the dishwasher…