
I remember the day I finally moved into my dream condo on the 24th floor. The floor-to-ceiling windows were a dream, but the swampy, stagnant smell coming from my brand-new dishwasher was a total nightmare. I thought I was being smart and followed every top tip for seamless dishwasher installation in 2025 that I could find online. I even spent extra on the braided steel lines. But every single morning, I’d open the door to find a nasty, grey inch of standing water at the bottom of the tub. It was frustrating, gross, and honestly, a bit embarrassing when guests came over. I made the classic mistake of assuming that the rules for a suburban ranch house applied to a skyscraper. They don’t. I spent a week thinking I had a defective unit or a major clog, but the reality was much simpler: physics was working against me. Today, I’m going to share how I fixed it and why your high-rise unit absolutely demands a vacuum break to function properly.
Gravity Works Differently on the 20th Floor
Living in a high-rise means you aren’t just an island; you’re part of a massive, interconnected plumbing ecosystem. When your dishwasher tries to pump out water, it’s fighting against the air pressure of the entire building’s waste stack. In my early DIY days, I didn’t realize that the velocity of water falling down dozens of stories creates a powerful suction. If your setup isn’t perfect, that suction—often called the ‘siphon effect’—can pull dirty waste water from the main line right back into your clean machine. I once spent three hours trying to snake a dishwasher drain because I was convinced there was a blockage. There wasn’t. The drain was clear, but the lack of a vacuum break meant the building was literally ‘inhaling’ dirty water back into my appliance. While many people believe a high loop drain is the ultimate fix, it often falls short in tall buildings where pressure fluctuations are violent and unpredictable. To get it right, you have to be very intentional about selecting the right parts for dishwasher installation to ensure you aren’t just inviting the building’s sewage onto your dinner plates.
Is This Extra Hardware Actually Necessary?
You might be looking at your manual and seeing that it only requires a high loop, which might make you think I’m overcomplicating things. I get it; nobody wants to buy more parts. However, when you have hundreds of residents using the same vertical pipes, the airflow in those lines is chaotic. A vacuum break is a specialized dishwasher part designed to let air into the hose at the peak of its cycle, which instantly breaks the suction. Without it, the siphoning continues long after the pump stops. According to the International Association of Plumbing and Mechanical Officials (IAPMO), proper backflow prevention is the only way to guarantee that non-potable water doesn’t contaminate your cleaning environment. It’s a health issue as much as a mechanical one. If you’ve ever noticed your dishes coming out with a weird film or heard a ‘glugging’ sound in your sink, your system is likely gasping for air. Have you ever felt like your dishwasher was actually making your dishes dirtier?
Stop the Backflow with an Air Gap
Think of an air gap as a snorkel for your dishwasher. In a high-rise, your drain line shouldn’t just be a tube; it needs a physical break from the building’s plumbing to prevent siphoning. To install one, you’ll need to cut a hole in your sink or countertop (if one isn’t already there) and mount the air gap device. Connect the dishwasher’s discharge hose to the smaller leg of the air gap and a larger 7/8-inch hose from the larger leg down to your garbage disposal or sink tailpiece. I once thought I could skip this and just use a high loop, but the pressure in my building was so high that it sucked the dirty water right over the loop. Once you have it installed, make sure you know how to clean the gunk out of your air gap device regularly, or you’ll end up with water spraying all over your counter during the drain cycle. 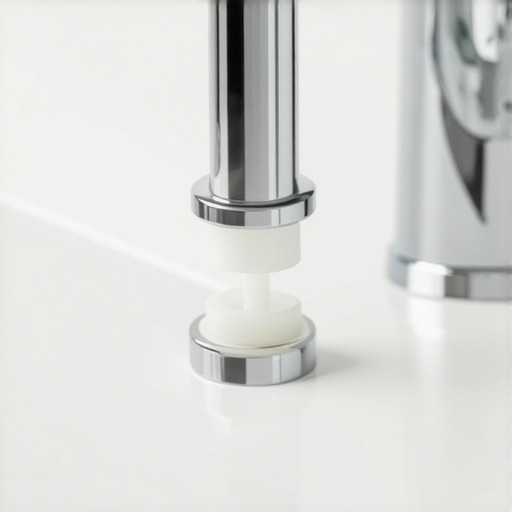
Fresh Hardware is Cheaper than a New Floor
It’s tempting to look at the old brass fittings from your previous machine and think they look ‘fine.’ They aren’t. In my second year of condo living, I reused a compression fitting that looked pristine. Three months later, a pinhole leak developed while I was at work. By the time I got home, my kitchen floor was warped. This is exactly why your installer refuses to reuse your old brass fittings—metal fatigue is real. Always start with a fresh installation kit. This includes using the most durable braided steel hoses for long term safety. These hoses are designed to withstand the sudden pressure spikes common in multi-unit buildings.
Check Your Building’s Water Pressure First
High-rises often use massive pumps to get water to the upper floors, and if the pressure regulator in your unit is failing, it will fry your new machine. If the pressure is too high, it blows out the inlet valve; if it’s too low, the cycle will timeout. You should learn how to tell if your water pressure is too low for your unit before you even hook up the supply line. I keep a small pressure gauge in my toolbox now because ‘feeling’ the flow at the tap isn’t accurate enough for modern smart sensors.
Keep Your Warranty Intact While You Work
Most people don’t realize that a DIY mistake can kill their protection before the first load is even finished. If you’re following a diy dishwasher installation step-by-step guide, pay close attention to the mounting brackets. If you screw them in too tight or at the wrong angle, you can actually warp the tub. This is the mistake that voids your lifetime tub warranty instantly. When I installed my current Bosch, I was paranoid about the leveling. I spent forty minutes adjusting the rear feet just to ensure the door didn’t put uneven pressure on the gasket. It felt like overkill at the time, but three years later, I haven’t had a single drop of water on my floor. Using top tips for selecting the right parts for dishwasher installation ensures that every component—from the hose clamps to the leveling legs—is up to the task of high-rise living.
Flush the Junk Out Before You Connect
One of the biggest ‘hidden’ mistakes I see—and I learned this the hard way after clogging a brand-new solenoid—is failing to clear the building’s sediment. In a high-rise, pipes are constantly being worked on. When the water is turned back on, it carries a slurry of rust and scale. This is the critical reason to flush your water lines before hooking up a new machine. If you don’t, that grit goes straight into your delicate water inlet valve, causing a slow leak or a total failure within weeks. Most people assume ‘new’ means ‘clean,’ but in a vertical plumbing stack, ‘new’ often means ‘disturbed debris.’ I now run at least two gallons of water into a bucket from the supply line before I even think about attaching the braided hose. 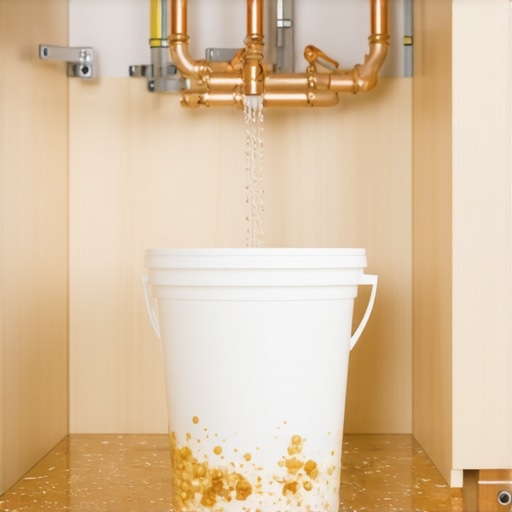
Why Does Your Warranty Claim Keep Getting Denied?
You might think that having a manufacturer’s protection plan means you’re safe from any repair costs, but the reality is much more nuanced. Manufacturers are incredibly strict about installation environments. For instance, the impact of hard water on your warranty eligibility is a common sticking point; if they find heavy scale buildup and you don’t have a softener, they may label it ‘environmental damage’ rather than a part failure. Furthermore, why your warranty claim fails without an authorized receipt often comes down to the lack of proof that a professional (or at least a certified kit) was involved. According to the International Association of Plumbing and Mechanical Officials (IAPMO), nearly 30% of appliance failures in multi-unit dwellings are attributed to improper supply pressure or drainage backflow, neither of which are typically covered under a standard parts warranty.
Stop Using Vinegar in Your Modern Machine
Here is a take that usually gets me some pushback: you need to stop using vinegar in your high-end smart machine. I know, your grandmother swore by it, and every ‘life hack’ blog recommends it. But modern dishwashers use complex rubber gaskets and plastic seals that are far more sensitive than the machines of the 1990s. The acetic acid in vinegar can slowly degrade the EPDM rubber used in door seals and pump housings. Over time, this leads to the very leaks you’re trying to avoid. Instead, focus on when to replace dishwasher parts for optimal performance, like swapping out filters and checking the spray arms for physical blockages.
The Dangerous Temptation of ‘Almost’ Compatible Parts
When a part breaks, the price tag for OEM (Original Equipment Manufacturer) components can be shocking. It is tempting to grab a generic version from a massive online marketplace. However, you must know how to spot a fake replacement part before it fries your control board. Generic heating elements, for example, often lack the precise resistance required by the machine’s computer, leading to overheating or ‘ghost’ error codes. I’ve seen a $15 knock-off part result in a $400 control board replacement. It simply isn’t worth the risk. Always refer to guide to dishwasher parts warranty: what you need to know to see if your replacement is already covered before you go out of pocket. Have you ever fallen into this trap of trying to save a few bucks only to have it backfire? Let me know in the comments.
The One Tool That Prevents a Stripped Valve
I’ve learned the hard way that using a standard pair of slip-joint pliers on a delicate water inlet valve is a recipe for a weekend at the hardware store. The threads on modern valves are often plastic or thin-walled brass, and one slip can ruin the whole unit. Now, I exclusively use a smooth-jawed pliers-wrench. It provides perfectly parallel pressure without the teeth that chew up your hardware. Finding the proper tool to use when tightening your water supply line is the difference between a secure, bone-dry connection and a slow drip that eventually rots your cabinetry. I personally use the Knipex 86-series because it adjusts instantly and won’t mar the finish on my high-end parts.
The $20 Gadget That Saves My Sanity
Living on a high floor means a leak isn’t just my problem; it’s the problem of the neighbor on the 23rd floor, too. While most high-end units have some built-in protection, I don’t trust them exclusively. I always install the 20 dollar smart sensor that detects leaks before your kitchen floods right under the main pump housing. This little puck-sized device pings my phone the second it detects moisture. I predict that in the next few years, this tech will be fully integrated into every building’s management system, allowing the front desk to shut off your water remotely if a breach is detected. It’s the ultimate layer of protection that goes beyond what any standard guide to dishwasher parts warranty will cover, especially since warranties rarely pay for water damage to your actual home. 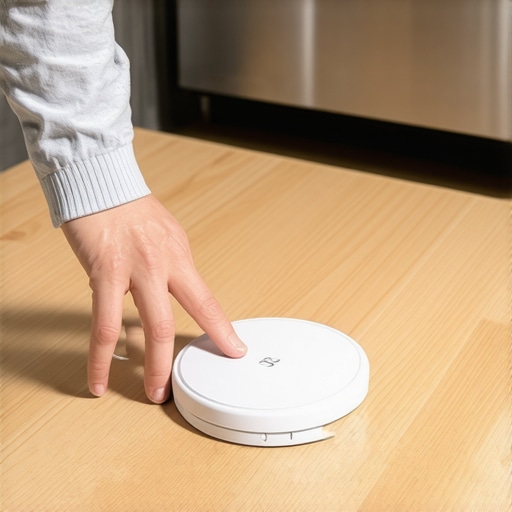
How do I maintain my high-end machine over time?
The secret to a machine that lasts fifteen years instead of five isn’t a miracle cleaner; it’s understanding the internal mechanics. You need to be proactive about understanding dishwasher parts as a key to effective maintenance. For me, this means a deep clean of the filtration system every first of the month. Most people stop at the coarse mesh, but I go deeper. I make it a point to use the best way to clean the hidden filter under the spray arm to ensure no fine silt is getting back into the circulation pump. If that pump has to work against a partially clogged filter, it runs hotter, draws more amperage, and eventually burns out. Technical documentation from the American Society of Sanitary Engineering (specifically ASSE Standard 1006) emphasizes that debris buildup in these areas is the leading cause of backflow prevention failure in residential units.
Don’t Lose Your Paper Trail
If you ever need to use your protection plan, you’ll find that manufacturers are look for any excuse to say ‘no.’ I keep a digital folder with every receipt, including the specific hoses and valves I bought. To succeed, you have to focus on maximizing your dishwashers warranty coverage today by proving you used the right components from day one. If the technician sees an unbranded, generic hose, they might flag your claim. I’ve seen people lose out on a $300 motor replacement because they couldn’t prove they used top tips for selecting the right parts for dishwasher installation during the initial setup. Before you close your cabinet for the last time, take a photo of the model number and your supply line connections. If you ever need to recover data logs from your smart control board to prove a part failed prematurely, having those photos will be your best leverage. My best advice? Stop running the ‘Quick Wash’ every day and start using the heavy cycle to improve your machine health once a week—the higher heat is the only thing that truly melts away the fatty deposits that clog modern sensors.
Hard Truths About Vertical Plumbing You Won’t Find in the Manual
One of the biggest eye-openers for me was realizing that a clear drain is only half the battle. In a skyscraper, the air pressure inside the waste stacks fluctuates so wildly that your dishwasher acts like a giant straw unless you break the vacuum. It took three service calls to finally learn that expert advice on dishwasher installation troubleshooting often comes down to physics, not just parts. I also learned that the manufacturer will look for any excuse to deny a claim. If you want to know how to get your warranty claim approved on the first try, you must document the installation of every single high-quality component. Finally, never assume your building’s water is clean just because it is filtered at the main; localized pipe work can send a wave of grit into your unit at any time, making it vital to flush lines before every new connection.
The High-Rise Gear That Keeps My Neighbors Dry
I have curated a small list of items that I never install a machine without. First, a dedicated pressure gauge is non-negotiable for high-rises to ensure the building’s pumps aren’t overpowering your inlet valve. Second, I only trust smooth-jawed pliers-wrenches to avoid the micro-scratches that lead to future corrosion on brass fittings. Third, always have a copy of the complete list of dishwasher parts covered by warranty printed out and stored near your machine; it saves hours of searching when something eventually clicks or clunks. Lastly, I cross-reference my setup with parts to check when installing a dishwasher for long-term performance to ensure I have not missed a single washer or gasket that could fail under pressure.
#IMAGE_PLACEHOLDER_E#
Own Your Installation with Confidence
Living in a condo should not mean living in fear of a flooded kitchen. By taking these extra steps—installing the vacuum break, flushing your lines, and being meticulous with your hardware—you are doing more than just hooking up an appliance; you are protecting your home and your peace of mind. Knowing what your dishwasher warranty doesnt cover and how to avoid fees gives you the upper hand in maintaining your investment. When you follow the top tips for selecting the right parts for dishwasher installation, you can rest easy knowing your machine is built to handle the unique pressures of the 24th floor. Now it is your turn to get that machine running perfectly and keep your kitchen bone-dry. Have you ever found standing water in your machine even though the drain line was clear? Let me know your experience in the comments below!
Related Posts
Why Your Dishwasher Needs a Dedicated 20-Amp Circuit
Last month, I was all set for my usual Sunday…
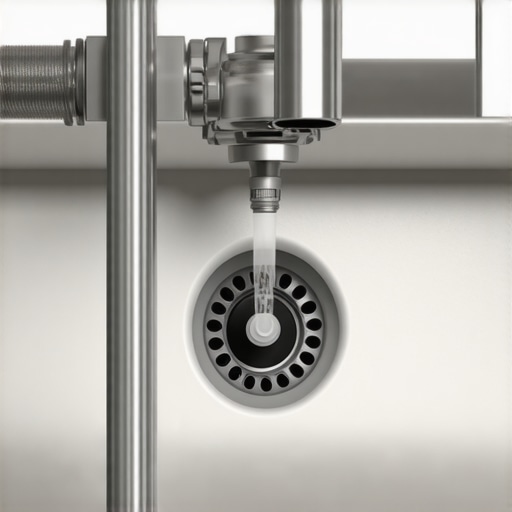
The drain hose trick that stops sink water from backflowing
It happened to me just last week. I was finally…
Why Your High-Loop Drain Is Essential for Sanitary Cleaning
I'll never forget the moment I discovered a tiny, overlooked…