
It was 11:30 PM, and the house was finally still. I was trying to be the “good spouse” by finishing the dinner cleanup without waking the kids. I grabbed the handle of our three-year-old machine, pulled it down, and—SCREECH. It wasn’t just a squeak; it was a high-pitched metallic wail that sounded like a cat’s tail getting caught in a rocking chair. I froze. My wife stirred in the other room. In my panic, I grabbed the first can of spray lubricant I found in the garage and doused the hinges. Big mistake. Within a week, that oil had attracted every bit of pet hair and kitchen dust in the house, turning the hinge into a gritty, black mess that actually made the noise worse.
Stop Ignoring the Squeak Before it Breaks Something
Look, we often ignore those little noises because we’re busy, but a squeaky door is usually the first sign of friction wearing down your critical dishwasher parts. After my “garage spray” disaster, I realized I didn’t actually know which part was the culprit. I spent a whole afternoon on my knees with a flashlight, only to find out it wasn’t the hinge itself, but the friction of the pulley cables. If you are currently dealing with a door that fights you every time you load a plate, we are going to fix that today. We’ll look at the specific points that need high-temp silicone grease and how to apply it without voiding your warranty coverage. Trust me, it is easier than you think, but you have to use the right stuff.
Will lubricating the door actually mess up my dishes?
It’s a fair question. The idea of putting grease anywhere near the place you wash your forks feels wrong. However, the hinge and spring mechanism is completely isolated from the wash tub. You aren’t putting oil in the water. One thing I learned the hard way—a mistake I see homeowners make constantly—is using petroleum-based products. According to the experts at Family Handyman, petroleum-based lubricants can actually cause rubber gaskets and seals to swell and fail prematurely. That is why you must use a food-grade silicone lubricant. It stays where you put it and won’t migrate into your clean rinse cycle. I’ve found that performing this one simple maintenance task can make a cheap unit feel like a luxury appliance again. Have you ever had a noise in your kitchen that drove you absolutely crazy before you realized it was a five-minute fix? Tell me about your noisy appliance horror stories! If you’ve already tried to replace the door hinge springs yourself and it’s still making noise, it’s time to look at the lubrication points.
Give Yourself Space by Pulling the Unit Forward
You cannot effectively lubricate a hinge if you are squinting through a two-inch gap between the cabinet and the machine. To do this right, you need to unscrew the mounting screws holding the unit to your countertop. Slide the dishwasher out about six to eight inches. It is essentially a mini-version of a DIY dishwasher installation step-by-step guide, but without the hassle of disconnecting the plumbing. I once tried to shortcut this by reaching through the toe kick area with a long cotton swab. I ended up with a shredded knuckle from the sharp galvanized steel frame and a grease stain on my favorite rug that never came out. Take the extra three minutes to pull the machine out properly.
Scrub Away the Grime First
Putting new grease over old, gritty dust is like putting clean socks on dirty feet—it just doesn’t work. Use a damp microfiber cloth to wipe down the hinge arms and the tracks where the door cables run. This is one of those parts to check when installing a dishwasher for long-term performance that people always skip. If you see black residue, that’s likely a mix of pulverized plastic and old factory lubricant. Get it clean so the new silicone can actually bond to the metal and plastic surfaces.
Target the Triple Friction Points
A dishwasher door doesn’t just have one moving part. It’s a system of balance. To silence the noise, you need to hit three specific areas. First, look at the main hinge pin at the very bottom corner. This is the pivot point that bears the weight of the heavy stainless steel door. Second, follow the cable. Most modern units use a pulley system to provide tension. If that cable is rubbing against a dry plastic wheel, it creates a vibration that sounds like a scream. If you notice the cable looks worn, you might need to learn how to replace a frayed door cable without a specialist before the whole thing snaps and drops the door on your toes.
Dab the Silicone with Precision
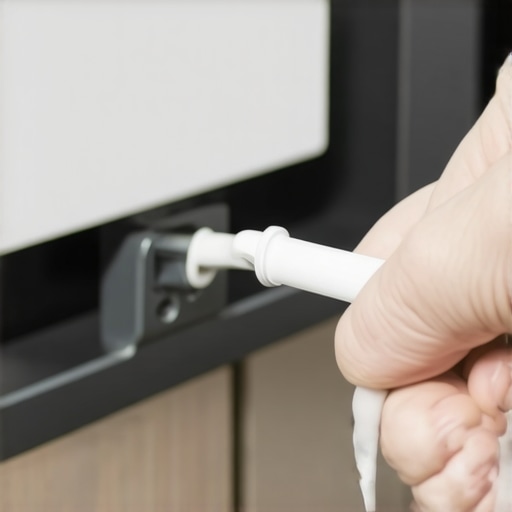
The pulley system is like a mountain climber’s rope passing through a carabiner; if there is friction, the rope wears out. Use a small brush or a gloved finger to apply a pea-sized amount of food-grade silicone grease to the center of the pulley wheel. Do not drench it. Excess grease will eventually drip onto your floor or attract pet hair. Move the door up and down slowly to work the lubricant into the grooves. This is a critical part of understanding dishwasher parts a key to effective maintenance. When the grease is distributed properly, the door should feel almost weightless, moving smoothly without that jerky, stuttering motion that usually precedes a mechanical failure.
Check the Tension Springs
Finally, look at where the springs hook into the frame. These are often forgotten essential parts every dishwasher owner should know about. Metal-on-metal contact at the hook point can create a clicking sound. A tiny dab of grease right where the spring loop meets the chassis will stop that clicking instantly. If you find that one side feels tighter than the other, your door might be misaligned. In that case, you may need to replace the door hinge springs yourself to restore the balance. Once everything is quiet, slide the unit back in, being careful not to pinch the common dishwasher parts like the drain hose or power cord located behind the tub.
While we just focused on the mechanics of the door, let’s dig deeper into the legal and technical red tape that often follows a manual repair. Most homeowners believe that if they handle the maintenance themselves, they are automatically saving money. However, a common contrarian view among veteran appliance technicians is that DIY maintenance on high-end units can actually be a financial trap if you aren’t meticulous with documentation. I used to think that as long as I used the right silicone grease, I was protected. But here is the ‘oops’ factor that most people miss: if you open that cabinet and move the unit without first documenting its initial state, you might be inadvertently committing the mistake that voids your lifetime tub warranty. According to the Association of Home Appliance Manufacturers (AHAM), a significant percentage of warranty denials stem from ‘improper installation environment’ or ‘secondary damage’ caused during owner inspections, rather than actual mechanical failure.
Don’t let a service fee surprise you
It is a bitter pill to swallow, but even if your machine is technically ‘under warranty,’ you might still be on the hook for significant costs. You need to read the fine print about why your warranty covers parts but not the 150-service-trip-fee. I once spent three weeks arguing with a manufacturer over a $20 sensor, only to realize that the mandatory technician visit for the ‘free’ part cost more than my time and the component combined. This is why understanding dishwasher warranty policies for peace of mind is just as important as knowing how to use a wrench. If you are not careful, you will end up paying a convenience tax that makes the whole DIY effort feel like a total loss.
Your subfloor matters more than you think
When you were pulling the unit forward to grease those hinges, did you take a second to look at the floor? Believe it or not, why your kitchen flooring might void your installation guarantee is a nuance that catches even the best DIYers off guard. If your kitchen floor isn’t perfectly level or if you have added a layer of luxury vinyl plank that effectively ‘traps’ the dishwasher in its cavity, the extra stress on the chassis during movement can lead to micro-fissures. The manufacturer will almost always blame these on your home’s structure rather than their machine’s build quality. 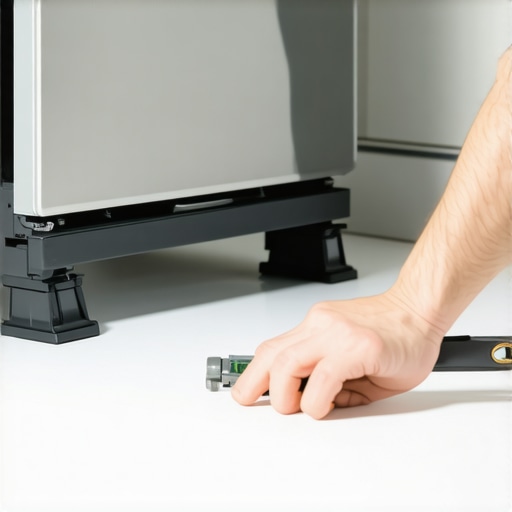
How do I get a warranty claim approved on the first try?
The secret to a successful claim isn’t just complaining louder; it is about providing objective data. You need to know how to prove pre-existing damage before your installer leaves and keep a dedicated folder of every parts to check when installing a dishwasher for long-term performance report you have made. When you can show an authorized technician that you followed the top tips for seamless dishwasher installation in 2025, they are far more likely to advocate for you with the factory reps. Have you ever fallen into this trap where a simple five-minute fix ended up costing you a fortune in denied claims? Let me know in the comments! Before you touch that next screw, make sure you understand how to get your warranty claim approved on the first try so you don’t get stuck with a massive bill for common dishwasher parts and how to replace them effectively.
Grab a Multimeter and Save Your Weekend
If you want to move beyond basic troubleshooting, you need more than just a screwdriver. My most-used tool isn’t even a wrench; it is a basic digital multimeter. I cannot tell you how many people throw away a perfectly good machine because it won’t start, when they could have simply learned how to test your thermal fuse with a basic multimeter in about five minutes. A $15 meter can tell you if a $10 part is the only thing standing between you and a clean pile of dishes. Beyond the electronics, you should always keep a dedicated roll of high-quality vapor tape in your kit. Using the best way to tape your vapor barrier during installation prevents the steam from your drying cycle from rotting out the underside of your expensive cabinets over time.
How do I maintain my dishwasher performance over the next decade?
Maintenance is less about deep cleaning and more about monitoring the high-wear zones. According to the International Association of Certified Home Inspectors (InterNACHI), the average service life of a dishwasher is approximately 9 years, but they emphasize that proactive component checks can extend this significantly. Start by making a habit of checking parts to check when installing a dishwasher for long-term performance at least once a year. This includes inspecting the spray arms for mineral clogs and ensuring the drain hose hasn’t developed any kinks. If you start seeing spots on your glassware, don’t just blame the soap; you might need to know when to replace dishwasher parts for optimal performance like the water inlet valve, which can become restricted by sediment.

The Kitchen of 2030 is Already Here
I predict that within the next five years, the idea of a ‘surprise’ dishwasher leak will be a thing of the past. We are seeing a massive shift toward integrated diagnostic systems. Many high-end units now allow you to see exactly what is failing before the machine even stops running. Learning how to recover data logs from your smart control board will become a standard skill for the savvy homeowner. Furthermore, the rise of affordable water security means you should consider installing the 20-smart-sensor that detects leaks before your kitchen floods. These tiny devices can shut off your main water line the second they feel a drop of moisture, potentially saving you thousands in flooring repairs. Before your next big load, I challenge you to pull out your bottom rack and check the hidden drain screen you probably forgot to clean—it is the single easiest way to boost your machine’s efficiency tonight.
The Hardest Lesson I Learned About Dishwasher Hinge Maintenance
After years of tinkering, I’ve realized that the biggest mistake isn’t forgetting to grease the hinges—it’s over-applying the lubricant. A “more is better” approach actually creates a gritty paste that accelerates wear. I’ve also learned that your smartphone is your best tool; taking a quick video of the spring tension before you unhook anything saves an hour of guesswork later. Most importantly, never underestimate the power of a clean surface. Applying new silicone over old kitchen grease is the fastest way to ensure the squeak returns. If you want to keep your machine running perfectly, understanding dishwasher parts a key to effective maintenance is far more valuable than just having a toolbox.
My Essential Maintenance Kit
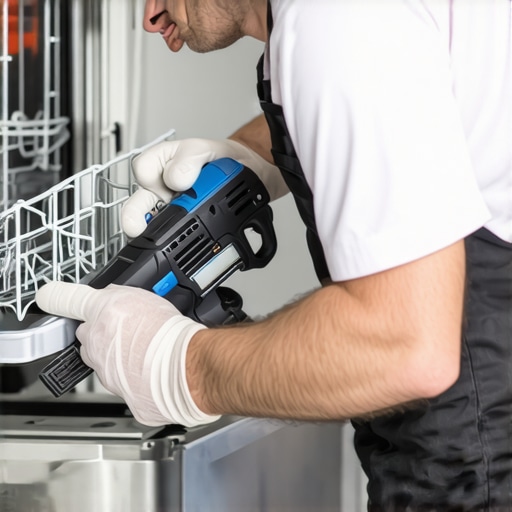
You don’t need a garage full of gear to keep your appliance in top shape. First, I always keep a tube of food-grade silicone grease handy—it’s safe and stays put. Second, a digital multimeter is non-negotiable; it’s the only way to know how to test your thermal fuse with a basic multimeter without just guessing. Third, I swear by high-quality vapor tape to protect my cabinets from steam damage. Finally, I always keep a digital copy of my understanding dishwasher warranty policies for peace of mind folder on my phone. Having these resources ready transforms a potential crisis into a simple Saturday morning task.
#IMAGE_PLACEHOLDER_E#
Ready for a Quieter Kitchen?
A quiet dishwasher isn’t just a convenience; it’s a sign of a healthy, well-maintained home. When the door glides without effort, it prevents unnecessary stress on the chassis and the common dishwasher parts and their role in proper installation that keep your kitchen dry. Taking thirty minutes today to address a minor squeak can save you from a major flood tomorrow. By following the top tips for seamless dishwasher installation in 2025, you can ensure your machine stays silent for years to come. What’s the loudest noise your dishwasher ever made—a screech, a bang, or a mysterious thumping? Let me know in the comments below!
Related Posts
Why Generic Spray Arms Ruin Your Cleaning Performance
I remember the first time I spent hours trying to…
The $2 part that prevents your drain hose from kinking
If you've ever battled with a stubborn, clogged dishwasher drain…
The One Tool That Makes Spray Arm Removal Effortless
It happened to me on a busy Saturday afternoon —…