
I still remember the exact moment I heard that sickening crunch. I was just trying to start a heavy-duty cycle after a big Sunday roast, and instead of the usual satisfying beep, I felt my thumb sink straight through the plastic skin of my dishwasher. It wasn’t just a hairline fracture; it was a gaping hole right over the Start button. I stood there, soapy hands and all, wondering if I’d just turned a perfectly good appliance into a very expensive drying rack. If you are staring at a spiderweb of cracks on your interface, you are probably feeling that same mix of annoyance and dread. But here is the good news: you don’t need a degree in electrical engineering to fix this. Today, I am going to show you exactly how to replace a cracked control panel overlay without losing your mind or your savings.
Stop the Steam Before It Fries Your Circuit Board
The biggest mistake I made early on was thinking a crack was just a cosmetic eyesore. I figured I could live with the ‘weathered’ look for a few months. Boy, was I wrong. Every time your dishwasher hits the drying cycle, it releases a cloud of hot, humid steam. That steam loves to find its way into any opening, and a cracked overlay is basically an open door to your machine’s brain. According to Consumer Reports, electronic control failure is one of the most frequent reasons for professional service calls, and moisture is the primary villain. When I ignored my crack, the buttons started acting possessed—starting cycles at 3 AM and refusing to cancel. I quickly realized that understanding what your dishwasher warranty doesn’t cover is vital, because most manufacturers consider this ‘wear and tear’ or physical damage, leaving you to foot the bill for a technician. Learning to identify the parts you can swap yourself is the ultimate secret to keeping your kitchen running smoothly without the ’emergency’ repair fees.
Is a new overlay actually worth the DIY effort?
You might be skeptical. Is it better to just buy a whole new door assembly or even a new machine? In my experience, absolutely not. Replacing just the overlay is a surgical, low-cost strike that fixes the root problem. I once made the rookie error of buying a ‘universal’ sticker kit from an unverified seller that didn’t even line up with the LED lights. It was a mess. Now, I always tell people to focus on how to diagnose dishwasher parts during warranty periods so you know exactly what you are dealing with before you start peeling things off. Have you noticed your buttons becoming less responsive lately, or are you currently staring at a crack that’s held together by a prayer and some old scotch tape? Let me know, because I’ve been there, and the fix is easier than you think. This project is about more than just looks; it’s about protecting the expensive electronics hidden just millimeters behind that plastic film. Ready to get your hands dirty?
Cut the Power and Clear the Deck
Before you even touch a screwdriver, you need to treat your dishwasher like a live circuit—because it is. Don’t just press the power button; go to your breaker box and kill the juice. Working on a control panel with the power on is like performing open-heart surgery while the patient is jogging. Once the power is off, open the door fully. You are looking for the Torx or Phillips screws lining the inner door perimeter. While you are at it, this is a great time to review common dishwasher parts and how to replace them effectively so you aren’t surprised by the wiring harnesses hidden behind the metal.
Strip the Inner Door to Reach the Goods
As you loosen those screws, the outer door panel will start to sag. This is the moment where most people panic. Pro tip: prop the bottom of the door with a sturdy box or your foot so it doesn’t slam onto your toes. I once let a panel slip, and it pulled the delicate ribbon cable right out of the socket. If that happens, you aren’t just replacing a sticker; you’re replacing the whole computer. Once the screws are out, you can gently tilt the control console away from the door frame. I learned the hard way that screws love to bounce into the most inconvenient places; if you lose one, here is how to recover a dropped screw from your sump assembly before it ruins your pump.
Use Heat to Win the Battle Against Old Glue
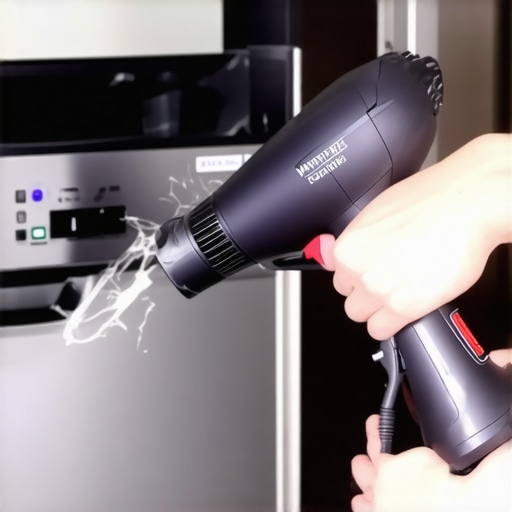
The cracked overlay is essentially a high-tech sticker held down by industrial-grade adhesive. If you try to peel it cold, it will snap into a thousand tiny, sharp shards. Grab a hair dryer and give it about sixty seconds of medium heat. This softens the glue, making it feel like peeling a stubborn price tag off a new plate. I remember my first attempt where I skipped the heat; I spent two hours scraping glue with a credit card, cursing my impatience. Learn from me: get it warm, and it should lift in one satisfying piece. This is one of those parts you can swap yourself without calling a pro, provided you don’t gouge the plastic housing underneath.
Line Up the Windows Before the Glue Sets
Once the old piece is off, the surface must be surgically clean. Use 90% isopropyl alcohol to remove every trace of residue. If the surface is even slightly tacky, your new overlay will bubble or peel within a week. When you are ready to apply the new one, do not just slap it on. Line up the LED display window and the Start button first. These are your anchors. I’ve seen people start from the edge only to find the ‘Normal Wash’ button is now half-covered by the ‘Heavy’ label. Since this is one of those essential parts every dishwasher owner should know about, getting the alignment right is the difference between a repair that looks factory-fresh and one that looks like a DIY disaster. Take your time, press firmly from the center outward to chase away air bubbles, and ensure the seal is airtight to keep that board-killing steam out.
A common piece of advice in the DIY community is that ‘parts are parts,’ and as long as the buttons line up, you are golden. I am here to tell you that is a dangerous oversimplification. Everyone says you can save fifty bucks by grabbing a generic overlay off a random marketplace, but in my experience, the manufacturing tolerances on those cheap stickers are abysmal. One nuance most people miss is that the overlay is not just a label; it is a precision-engineered moisture barrier. According to the Association of Home Appliance Manufacturers (AHAM), maintaining the integrity of the control interface seal is critical for preventing internal corrosion. If the replacement is even a fraction of a millimeter too thin or the adhesive is not marine-grade, steam will find its way in. This is where you see the real difference between aftermarket and factory gaskets and seals—OEM parts are designed to withstand 140-degree steam cycles for a decade, while the cheap stuff often curls at the edges within six months. 
Does Swapping an Overlay Void Your Whole Warranty?
This is the question that keeps most homeowners from picking up a putty knife. The short answer? It depends on your paper trail. Many people assume that any DIY work immediately kills their protection. However, the Magnuson-Moss Warranty Act generally protects consumers who perform basic maintenance. The trap lies in what happens to your coverage if you use third-party parts that subsequently cause a board failure. If a generic overlay leaks and fries the computer, the manufacturer is well within their rights to deny a $400 repair claim. To stay safe, you should always focus on how to diagnose dishwasher parts during warranty periods so you can prove the failure was a component defect and not a result of your repair. I always keep my receipts for the OEM overlay as ‘insurance’ to show I maintained the machine to factory standards.
Capture the Serial Number Before You Peel
Here is the ‘oops’ factor that almost cost me a brand-new machine: the mid-year revision. Manufacturers like Bosch or Whirlpool often change the wiring or the button layout halfway through a production year without changing the model number. If you order a part based solely on the model number on the door, you might get an overlay where the ‘Delay Start’ button is actually over the ‘Cancel’ sensor. I cannot stress enough the critical reason to document your serial number before a repair. That specific string of digits tells the parts warehouse exactly which revision of the control board is sitting in your kitchen. Without it, you are just guessing. Also, be wary of static electricity. Touching the control board without grounding yourself can fry the microprocessors instantly. I have seen more boards killed by a ‘simple’ overlay swap than by actual water damage because people forget to touch a grounded piece of metal first. Understanding what your dishwasher warranty doesn’t cover is usually a painful lesson involving expensive service fees. Have you ever fallen into this trap or bought a part that didn’t quite fit? Let me know in the comments below, and let’s make sure we’re all keeping our kitchens running without the unnecessary headaches.Every DIYer has a ‘junk drawer,’ but for this job, you need precision. I never go into a control panel without my nylon spudger set. Using a metal putty knife is a recipe for scratched plastic and shorted circuits. I also keep a tube of dielectric grease on standby. This isn’t just for car batteries; a tiny dab on the ribbon cable pins acts as a moisture-proof seal that prevents oxidation. If you are serious about understanding dishwasher parts a key to effective maintenance, you will realize that the mechanical connection is just as vital as the sticker on top. 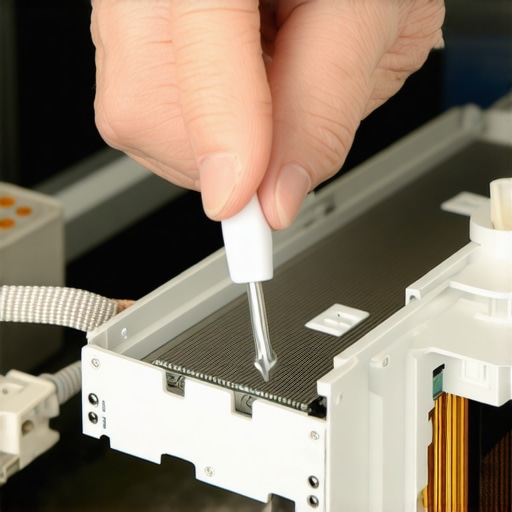
How do I maintain my control panel over time?
The secret isn’t a special spray; it’s what you don’t use. Most people reach for heavy-duty degreasers or window cleaners containing ammonia, which can actually eat through the adhesive of your new overlay. I only use a damp microfiber cloth with a drop of mild dish soap. Also, pay attention to your vent. If your dishwasher isn’t venting correctly, steam builds up behind the door. This is why the replacement parts every dishwasher owner should keep on hand often include new door gaskets—because a bad seal elsewhere can ruin your brand-new interface. According to the NEMA (National Electrical Manufacturers Association) standards for residential enclosures, the integrity of the interface seal is the first line of defense against dielectric breakdown in humid environments. If that seal fails, you’re looking at a dead board, and we already know that why your warranty doesnt cover power surges or moisture damage is a hard pill to swallow.
The Shift Toward Glass and Capacitive Touch
Looking ahead, I suspect we are seeing the end of the ‘sticker’ overlay era. Higher-end brands are moving toward capacitive touch integrated directly into glass panels, similar to a smartphone. While this makes the machine look sleek, it also makes repairs more expensive since you can’t just peel off a layer of plastic anymore. For now, mastering this DIY fix is the best way of maximizing your dishwashers warranty coverage today by preventing the kind of deep electronic damage that leads to a ‘totaled’ appliance. My challenge to you: before you snap that door back together, apply a tiny bead of dielectric grease to the ribbon connector pins—it is the single best way to prevent future moisture corrosion and ensure your fix lasts for a decade.
The Hardest Lessons from My Repair Bench
I used to think a crack was just a visual nuisance, but I quickly learned that waiting to act is a gamble with your machine’s life. One specific insight I gained is that the overlay is more than a sticker; it is a shield. If you have been putting this off, remember that understanding dishwasher parts a key to effective maintenance is the best way to prevent a total circuit board meltdown. I also discovered that precision matters more than force—never pull the old overlay without heat, and always check your revision numbers. I cannot emphasize enough the critical reason to document your serial number before a repair, as the wrong button layout will render your new part useless and waste your hard-earned money.
My Trusty Toolbox for Panel Success
To get this job done like a pro, you do not need a massive workshop, but you do need the right accessories. I always keep a set of non-marring nylon spudgers to avoid scratching the plastic console. I also swear by 90% isopropyl alcohol for cleaning; anything less leaves a film that ruins the bond and causes peeling later. For the longevity of the connection, I keep dielectric grease nearby to seal out the steam. These are among the replacement parts every dishwasher owner should keep on hand to ensure a smooth fix. I trust these tools because they turn a stressful ‘will it work?’ moment into a confident victory.
#IMAGE_PLACEHOLDER_E#
Take Charge of Your Kitchen’s Tech
Now that you know exactly how to replace a cracked control panel overlay, you are no longer at the mercy of expensive service calls or confusing repair manuals. By taking these small, proactive steps, you are maximizing your dishwashers warranty coverage today by proving you are a responsible owner who prevents secondary water damage. Don’t let a small crack turn into a $500 computer failure. You have the knowledge, the tool list, and the confidence to get your dishwasher back to its factory-fresh glory. Have you ever felt that moment of panic when you realized steam was getting into the electronics? Let me know in the comments below!
Related Posts

How to Inspect Your Sump Basin for Hidden Blockages
There was a moment in my kitchen when I opened…
How to Replace a Dishwasher Door Cable in Under 20 Minutes
There I was, mid-week chaos in my kitchen, and suddenly,…

The Gasket Mistake That Leads to Mold Under Your Floorboards
I remember the exact moment I realized my mistake. It…