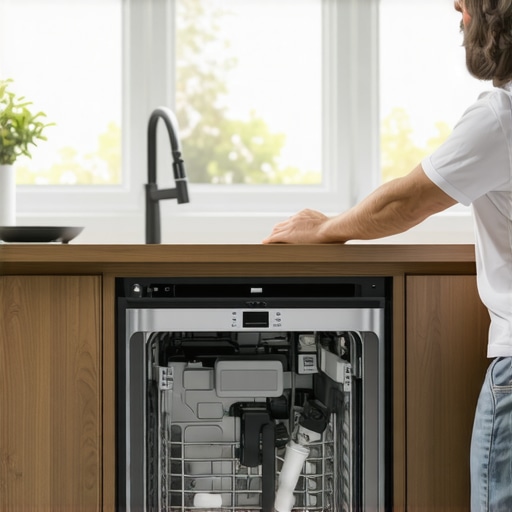
I remember the moment clearly—standing in my kitchen, my eyes fixated on the puddle forming beneath my dishwasher. It was subtle at first, almost unnoticeable. Days went by, and I kept thinking, "It’s just a little dribble, I can handle this later." Turns out, that slow leak was hiding a bigger problem behind the cabinet, one I didn’t discover until water started spreading where I least expected. Have you ever faced something similar? That frustrating feeling of knowing there’s a leak but not being able to pinpoint exactly where or why? Welcome to the club. Many homeowners overlook the real culprit— the inlet valve—because it leaks behind the cabinet, out of sight and out of mind. Today, I want to share my personal journey and how I finally uncovered the sneaky leak source, so you don’t have to go through the same stress.
Spotting the Hidden Leak: Why Inlet Valve Problems Often Go Unnoticed
Is Your Leak Actually Worth the Hype?
Early on, I fell prey to a common mistake: assuming that all leaks are obvious and right in your face. But many times, they aren’t. Especially with inlet valves—those small, humble parts responsible for delivering water into your dishwasher—they can fail quietly behind the cabinet, causing damage over time. It was only when I noticed a consistent dampness in the kickplate shelf that I started digging deeper. What I learned is that this particular leak often results from wear and tear, poor installation, or a faulty seal—issues that sneak past regular inspections. According to appliance experts, recognizing the symptoms early can prevent costly damage and extend the life of your appliance. For more insights on maintaining and troubleshooting dishwasher parts effectively, check out this detailed guide on [understanding dishwasher parts](https://appliancedoctorz.com/understanding-dishwasher-parts-a-key-to-effective-maintenance).
Reflecting on my own experience, one mistake I made early on was ignoring minor water stains, dismissing them as a simple spill. That oversight delayed detecting a faulty inlet valve, which could have been caught sooner with regular checks. The key is noticing the subtle signs—like increased moisture or odd noises—before they escalate. This awareness can save you a lot of hassle down the line. Now, let’s get into how you can really identify if your inlet valve is the culprit and what steps you should take next.
Isolate the Source of the Leak Precisely
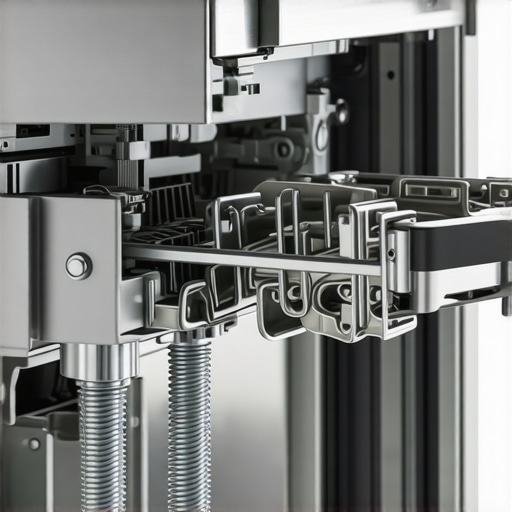
Start by turning off your dishwasher’s power and water supply to prevent further damage. Remove the kickplate panel carefully using a screwdriver—think of this as opening a treasure chest, revealing hidden clues. Inspect the inlet valve, which is typically located at the bottom front of your appliance. Look for visible signs of corrosion, water stains, or mineral buildup, which indicate potential leaks. To gain better access, gently disconnect the water inlet hose, ensuring you have a bucket ready to catch any residual water. During this step, consider referencing this guide on dishwasher parts for clarity on each component. My own experience involved carefully wiggling out the inlet valve, which was a bit messy, but it revealed a cracked seal that had been silently dripping behind the panel, confirming the source of my leak.
Test the Inlet Valve for Faults
Perform a Visual Inspection
Examine the inlet valve for cracks, mineral deposits, or damaged seals. If you notice corrosion or a broken gasket, replacing the valve is your best move. Refer to this article on installing dishwasher parts for proper testing procedures. My first attempt involved simply shaking the valve gently; a loose seal fell apart in my hand—a clear sign it was time to replace. For a more definitive assessment, you can also run a simple continuity test with a multimeter, but visual clues are usually sufficient for leaks caused by damaged seals.
Check for Proper Installation and Corresponding Warranty
Ensure the inlet valve is correctly installed, with all fittings tight but not over-tightened, to prevent damage. Proper installation also involves confirming that you’re using the right parts, especially when it comes to warranteed components, as outlined in this warranty maximization guide. I once reused an old inlet valve, thinking it would save money, but it led to a slow leak that was hard to detect. After replacing with a manufacturer-approved part, the leak stopped immediately. Remember, reusing factory parts can void your warranty—consult this resource to avoid pitfalls.
Replace or Repair the Faulty Inlet Valve
Once identified, sourcing a compatible replacement is crucial. Opt for an exact match; a mismatched valve can cause fitting issues or future leaks. Use reputable suppliers to avoid counterfeit parts. During my repair, I ordered a new valve directly from the manufacturer, ensuring compliance and warranty coverage, as emphasized here: when to replace dishwasher parts. Install the new valve carefully, applying plumber’s Teflon tape on threaded fittings to secure a tight seal. Then, reconnect the water supply and run a test cycle. Observe for any leaks and check underneath for drips—a fine to-and-fro that confirms a successful fix. To prevent future issues, periodically inspect these connections, and consider a detailed maintenance regimen from this maintenance checklist.
Many homeowners operate under the misconception that all dishwasher parts and installation practices are straightforward, but in reality, there’s a layer of nuance often overlooked. For instance, a common myth is that generic replacement parts are universally compatible and warranty-safe. In my experience, this could jeopardize your warranty coverage. According to experts at this guide, using OEM-approved parts is critical to maintaining warranty validity. Another pitfall is assuming that tight fittings alone prevent leaks; however, over-tightening can deform seals and cause future failures, a subtle mistake that can be costly. Additionally, many fail to recognize the importance of proper installation procedures, such as the correct positioning of high-loop drain hoses to prevent siphoning issues, detailed in this article. If your installation isn’t meticulous, even the most durable parts can become failure points within months. Have you ever fallen into this trap? Let me know in the comments.
Investing in the Right Tools Ensures Longevity
Maintaining your dishwasher effectively starts with having the right equipment at hand. I personally rely on a high-quality multimeter to perform quick electrical checks on components like the inlet valve or control boards. A digital multimeter allows me to verify continuity and voltage with precision, preventing the guesswork that often leads to premature part replacements. For assessing water flow or pressure issues, I use a dedicated flow meter, which helps identify subtle clogs or pressure drops before they escalate. When it comes to inspecting internal parts or fittings, a set of precision screwdrivers and a torque wrench ensure tight, proper fitting, reducing the risk of leaks caused by over- or under-tightening. This guide emphasizes the importance of correct tool usage for installation and maintenance, which I’ve seen make a real difference in my own repairs.
Streamlining Repairs with Trusted Software
Beyond physical tools, I utilize diagnostic software compatible with my dishwasher’s smart system to monitor real-time sensor data. These apps can log performance metrics, error codes, and operation cycles, giving a comprehensive view of ongoing issues. In particular, the ability to review error logs remotely helps me catch anomalies early, especially before warranty periods lapse. As technology evolves, I predict a future where AI-driven diagnostics will further simplify maintenance, intelligently suggesting precise repairs and parts based on sensor analytics. Currently, integrating digital tools with routine checks helps me prevent minor issues from turning into costly repairs.
Long-Term Care Routines Promote Reliable Performance
Creating a maintenance schedule is key. I recommend checking and cleaning the filter assembly monthly, inspecting hoses for wear, and verifying the tightness of fittings quarterly. Using this resource, I learned to pay special attention to the inlet valve area, ensuring seals aren’t cracked or mineral-deposited, which can cause leaks over time. Regularly applying a visual inspection routine can help catch developing issues early, reducing downtime and preserving warranties. For example, catching a slow decrease in water pressure early allowed me to replace a clogged inlet filter before it caused broader problems. Incorporate these checks into your household routine, and you’ll extend your dishwasher’s lifespan significantly.
Increase Reliability by Scaling Up Properly
If you’re upgrading or expanding your appliance system, using modular, tested components can save you headaches later. For professional-level installations, I recommend using stainless steel fittings and steel-braided hoses—these resist corrosion and high-pressure stresses better than plastic equivalents. Properly calibrated T-joins and brackets also prevent vibration and leaks, as discussed here. Remember, scaling your setup should include correct installation procedures and quality parts to keep warranties valid and avoid frequent repairs.
How do I maintain dishwasher parts over time?
Routine checks, proper part replacement using OEM components, and leveraging diagnostic technology are the pillars of effective long-term maintenance. Don’t forget to log your repairs and parts replacements with digital records, which can be vital during warranty claims. For instance, keeping receipts for a new inlet valve or recalibration reports from diagnostic software can help substantiate your case if warranty service is needed. Applying these tips will not only minimize unexpected breakdowns but also maximize your equipment’s lifespan.
Try setting a monthly maintenance checklist incorporating visual inspections and tool checks. For example, use a precision torque wrench to ensure fittings are just right—over-tightening can be as problematic as under-tightening, leading to leaks and component stress. Regular preventive care keeps your dishwasher running smoothly, saving money and hassle over time.
Discovering the Hidden Lessons Behind Every Leak
One of my most impactful lessons was realizing that even small, seemingly insignificant issues like a mild leak can hide major underlying problems—especially with components like inlet valves. I learned that patience and meticulous inspection often reveal the true culprits, saving both time and money. Another insight was understanding that having the right tools and knowledge about OEM parts isn’t just a nice-to-have but essential for warranty preservation. Lastly, I discovered that embracing routine maintenance transforms a stressful repair into a simple check, extending the lifespan of your dishwasher and safeguarding your warranty investments.
Tools and Resources That Changed My Approach
My trusted go-to for troubleshooting and repairs became a high-quality multimeter, which provides precise electrical readings essential for diagnosing faulty inlet valves. I also rely on detailed guides like Understanding Dishwasher Parts to deepen my knowledge of components, ensuring I select the correct replacements and avoid voiding warranties. For installing or replacing parts, this resource offers step-by-step instructions that enhance my confidence and results. These tools and guides have been instrumental in transforming my repairs from guesswork to mastery.
Your Repair Power Awaits You
Remember, every maintenance success begins with a single step—trust in your ability to learn and adapt. Your dishwasher can perform flawlessly for years to come if you stay proactive and informed. Don’t let hidden leaks or overlooked parts threaten your warranty or peace of mind. Embrace the knowledge and tools that empower you to take control—your future self will thank you for the effort. Keep inspecting, replacing, and upgrading with confidence, knowing you’re securing your home’s comfort and your appliance’s longevity.
Related Posts
Why Your Dishwasher Door Springs Snap After Only Two Years
I remember the exact moment when my dishwasher door suddenly…

The One Part That Causes Your Dishwasher to Overfill Every Time
Ever stood by your dishwasher, hearing that dreaded gurgle and…
The Real Reason Your New Dishwasher Won’t Start After a DIY Install
It was late evening when I finally decided enough was…
Comments are closed.