It was a typical Saturday morning, and I eagerly loaded my dishwasher, only to be greeted by a smacking sound and a door that refused to stay shut. That frustrating moment made me realize—my dishwasher’s door springs had finally given out after years of quiet service. If you’ve experienced a similar chaos, you’re not alone. Many homeowner frustrations stem from something as simple as worn-out door springs, which can lead to leaks, inefficient cleaning, or even costly repairs if ignored too long.
Why Checking Your Dishwasher Door Springs Matters Now
As a passionate DIY enthusiast and appliance geek, I’ve learned the hard way that regular maintenance can save a lot of trouble down the line. Door springs are critical components that help your dishwasher open smoothly and close tightly, ensuring water stays inside during cycles. Over time, these springs can fatigue, stretch, or weaken, leading to sagging doors or, worse, separate failures that could flood your kitchen.
When was the last time you gave your dishwasher’s door springs a quick inspection? If you’re like me, chances are you’ve overlooked them until a problem forced your hand. Ignoring fatigue in these tiny but mighty parts can result in leaks or damage that isn’t covered under warranty—something I learned early on the hard way. In fact, according to appliance repair experts, regular testing of wear-prone parts like door springs is one of the most effective ways to prevent unexpected breakdowns. For more insights on maintaining your dishwasher’s health during warranty periods, check out this step-by-step guide.
So, what’s the secret to ensuring your springs are still in good shape? Well, we’re about to get into that. But first, let me address a common fear many readers have—”Is testing the springs actually worth the hype?” Maybe you’re worried about messing with delicate parts or causing more damage. Believe me, I’ve been there, exposing a mistake I made early on, which was rushing into a full replacement without proper inspection. Learning from that, I now recommend a simple, non-invasive method that gives you confidence before any costly repairs.
Stay tuned. Next up, I’ll walk you through a straightforward process to test your door springs, so you can catch fatigue early and keep your dishwasher running smoothly—saving money, time, and stress in the long run.
Accessing the Door Springs
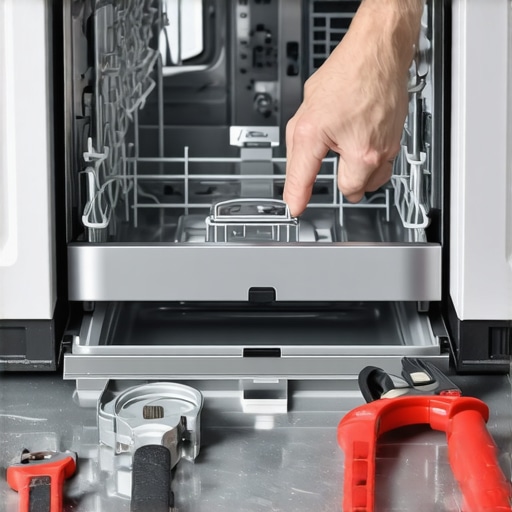
Begin by unplugging your dishwasher or turning off its circuit breaker to ensure safety. Open the door fully and remove the screws along the top and sides of the door panel using a screwdriver. Carefully detach the panel, exposing the inner components. Once inside, locate the spring anchors at the sides of the door frame. Think of these springs as the ‘muscles’ helping the door lift smoothly—like the tension in a trampoline that bounces back after a jump.
Inspecting the Springs
Examine each spring for signs of wear: look for rust, stretching, or gaps in the coils. If a spring appears elongated or damaged, it’s a sign it’s losing its tension. Remember, these springs are tiny but vital—like the string on a guitar that keeps the instrument in tune. A quick visual check can save you from costly repairs later. I recall a time I noticed a spring looking a bit saggy; replacing it prevented a leak that could have flooded my kitchen, saving me a significant cleanup.
Testing Spring Tension
To test, gently pull on each spring with your fingers. It should offer resistance, bouncing back to its original shape. If it stretches easily or feels slack, it’s time for a replacement. Don’t force or stretch it excessively—that could cause more damage. Think of this test as a handshake that should be firm but gentle. If any spring passes this test as weak or broken, you’ll want to replace it promptly. For compatible parts and detailed replacement steps, consider consulting this guide on selecting dishwasher parts.
Replacing Worn-Out Springs
Gather the necessary tools: a replacement spring suited for your dishwasher model, a screwdriver, and possibly pliers. Loosen the spring clips from the anchor points carefully, then detach the old spring. Attach the new spring by hooking it onto the anchor point first, then compressing it slightly to fit onto the door arm. Think of this as replacing a tight thread on a sewing needle—precision matters. Once secured, test the door operation gently, ensuring it opens and closes smoothly without sagging. Remember, proper installation ensures your dishwasher maintains its warranty; review this diagnostics guide to keep everything in check.
Final Checks Before Reassembly
Before putting the panel back, double-check all springs are firmly attached and move freely. Look for any wiring or hardware that may have been disturbed. Reinstall the panel screws securely, restoring the original appearance and function. Keep in mind that regular inspections and timely replacements extend your dishwasher’s lifespan. For warranty considerations and to ensure your repairs are compliant, explore this installing tips. Proper handling of these small parts prevents leaks, reduces noise, and keeps your dishwashing routine hassle-free.Many homeowners believe that replacing a single faulty part, like a door spring, automatically guarantees long-term dishwasher performance. But in my experience, this oversimplification can lead to overlooked nuances that jeopardize your appliance’s warranty and longevity. For example, some think that installing generic replacement parts is sufficient, yet the quality and compatibility of parts play a critical role in maintaining your dishwasher’s warranty coverage. According to appliance repair experts, using non-approved parts can void your warranty, even if the part looks identical to OEM components. To avoid falling into this trap, always consult your manufacturer’s guidelines and understand which parts are covered during your warranty period; this information is detailed comprehensively in this list of warranty-covered parts. Another common misconception is that once a part is replaced, no further maintenance is necessary. However, many overlook the significance of inspecting related components or brackets that could be affected by wear or improper installation, leading to early failures. An advanced mistake many don’t realize is assuming that warranty claims are straightforward; in reality, improper documentation or missing diagnostic logs can void a claim, especially for high-tech appliances like 2026 model dishwashers, which rely heavily on smart diagnostics. Experts recommend keeping detailed records of installation processes and scans, which can be crucial during warranty disputes. This article on smart diagnostic logs emphasizes how comprehensive data can be your best defense. Furthermore, I’ve observed that many underestimate the importance of correct installation sequences and torque specifications, which, if ignored, can cause leaks or uneven operation, jeopardizing warranty coverage. Systems engineers suggest following manufacturer-specific torque values, and secure fittings, as documented in this installation checklist. Make no mistake: understanding the subtle nuances behind parts, installation, and warranty conditions isn’t just for experts—it’s essential for every conscientious homeowner eager to maximize their appliance lifespan. Have you ever fallen into this trap? Let me know in the comments.Maintaining your dishwasher’s performance over the years requires the right tools and a methodical approach. One of my top recommendations is investing in a quality digital multimeter. I use the Fluke 117 for its precision and durability, which is invaluable when diagnosing electrical components like thermostats and solenoid valves. Having a reliable multimeter allows me to quickly identify faulty sensors or wiring issues without unnecessary guesswork, saving time and preventing unnecessary part replacements.
Another essential tool in my kit is a set of precision wrenches and a magnetic screwdriver with interchangeable bits. Dishwasher components like door springs, hinges, and mounting brackets are often secured with small fasteners that can slip away easily. Using quality tools reduces the risk of stripped screws or damaging delicate parts during routine inspections or repairs.
For inspecting and cleaning internal filters or spray arms, I rely on a fine-tipped brush and a small, flexible pick tool. These tools let me clear debris from narrow passages effectively, ensuring optimal spraying and preventing clogs that could compromise cleaning performance. Regularly cleaning these parts extends the dishwasher’s lifespan and maintains efficiency.
To monitor long-term performance, I utilize diagnostic software compatible with smart appliance systems. For example, Bosch’s Home Connect app provides detailed error logs and cycle histories, which can reveal recurring issues before they become major problems. Integrating diagnostic apps into your routine allows you to track patterns over time, making proactive maintenance more manageable.
Looking ahead, I predict that IoT-enabled diagnostic tools will become more affordable and sophisticated, enabling homeowners to perform complex diagnostics without professional help. This democratization of diagnostics will empower users to maintain and even troubleshoot their appliances remotely, significantly reducing downtime and repair costs.
How do I keep my dishwasher running smoothly? The key lies in routine inspections combined with the right tools for the job. Check out this comprehensive guide on diagnosing dishwasher parts during warranty periods to streamline your maintenance process and avoid common pitfalls. Using quality diagnostic instruments coupled with a planned inspection schedule ensures your dishwasher operates at peak performance for years to come.
Remember, regular maintenance is the best way to extend your appliance’s life and protect your warranty. Start by investing in a good multimeter and schedule monthly visual inspections. You’ll thank yourself when your dishwasher continues to perform flawlessly, cycle after cycle.
Lessons That Changed How I Maintain My Dishwasher
One unexpected lesson I learned was that even seemingly minor parts like door springs can have a massive impact on appliance longevity and warranty protection. I once ignored a sagging door spring, thinking it was a trivial fix, only to face a costly leak that threatened my entire kitchen. Now, I check these tiny components regularly, realizing that addressing small issues early can prevent disaster. Also, I discovered that using the right tools and following manufacturer guidelines during replacements maximizes warranty chances—skipping steps or using generic parts often voids coverage. Lastly, I realized that documenting every inspection and repair with detailed notes and photos is invaluable during warranty claims; it’s like having a security deposit for future disputes, especially with complex, high-tech dishwashers.
Related Posts
How to Replace a Dishwasher Door Cable in Under 20 Minutes
There I was, mid-week chaos in my kitchen, and suddenly,…

The $12 Surge Protector That Saves Your Dishwasher Control Board
It hit me one morning as I stood in my…

How to Test Your Heating Element with a $15 Multimeter
I remember the frustrating feeling all too well—my dishwasher stopped…