I remember the moment clearly—standing in my laundry room, water running everywhere, and realizing I’d overlooked a tiny but crucial detail during my dishwasher installation. The shock of a leak that could have been prevented was a lightbulb moment for me. It made me wonder: how many folks are facing the same pitfalls because they didn’t know about the importance of those seemingly insignificant parts?
The Crucial Role of 3 Steel Braided Hoses in Your 2026 Dishwasher Install
Let me tell you, folks, the right hoses are the unsung heroes of a smooth, leak-free dishwasher setup. As a seasoned DIY enthusiast, I’ve learned through trial and error that installing your 2026 model without the proper 3 steel braided hoses can lead to costly disasters. These hoses aren’t just a luxury—they’re a necessity for ensuring long-term performance and avoiding catastrophic leaks.
Why this emphasis on braided steel? Well, unlike rubber or plastic options, steel braiding provides superior durability, resistance to high-pressure bursts, and longevity. It’s like having a safety net in your home plumbing system. Plus, industry experts highlight that improper hose selection or installation contributes to over 70% of dishwasher leaks within the first year—something nobody wants, especially with warranties at stake. For detailed insights, check out this guide on essential dishwasher parts.
But here’s the kicker—early in my DIY journey, I made the mistake of reusing old rubber hoses, thinking they’d suffice. That misstep almost cost me my warranty and a hefty repair bill. The importance of choosing the right, high-quality parts cannot be overstated, especially since many warranty policies (like those for 2026 models) now explicitly require specific fittings and hoses to remain valid. Want to learn more? I recommend reviewing this comprehensive checklist for long-term success.
Are you worried about your warranty or potential leaks during installation?
If you’ve ever faced a tight spot or second-guessed your part choices, you’re not alone. My goal is to help you avoid my rookie mistakes and make your installation seamless. Stay tuned—next, we’ll walk through exactly which hoses you need and how to install them like a pro, ensuring your warranty stays intact and your dishwasher runs smoothly for years to come.
Secure the Right Hoses for Your Installation
First, lay out your 3 steel braided hoses before starting. I once approached my project without them, thinking old rubber hoses would suffice. Midway, I encountered a leak that threatened my entire kitchen; replacing it took twice as long. To avoid that chaos, always verify you’ve got high-quality hoses tailored for the 2026 model, as detailed in this selection guide.
Connect Supply Lines Correctly
Attach the cold water inlet line first. Think of this like connecting a garden hose—you want a snug fit without overtightening to prevent damage. Use the specific fittings mentioned in this resource. If you reuse old inlet valves, you risk voiding your warranty, so replace them with new, compatible parts. Remember, a loose connection here can mimic a faucet leak, so double-check each fitting with a wrench—just enough to tighten, avoiding stripping threads.
Tip: Use Brass Fittings for Durability
Replace any plastic fittings with brass alternatives to prevent failure over time. I learned this the hard way; plastic parts cracked after six months, causing unnecessary water damage. For peace of mind, consult this guide.
Properly Install the Drain System
Connect the drain hose to your home’s plumbing with a loop that rises above the dishwasher’s connection point—this acts like a trap, preventing backflow. I initially installed the drain line straight down, which led to frequent backups. To fix this, I followed this detailed air-gap insertion method. Ensure the hose is secured with a clamp, and inspect for leaks regularly, especially in the first week.
Seal and Secure All Fittings
This is crucial for preventing leaks that can void your warranty. Use liquid sealant around fittings if recommended but skip anything that involves Teflon tape unless explicitly advised, to avoid corrosion issues. During my last install, I applied sealant to the water inlet fitting—this small step saved me from a leak during my first heavy use. For a comprehensive checklist, see this installer’s checklist.
Check for Proper Grounding and Compliance
Ensure your dishwasher is grounded correctly to prevent electrical hazards—think of it like grounding a fence wire; it’s simple but vital. Also, verify that all wiring adheres to the specifications in this spark-proof junction box guide. I once skipped this step and ended up with a tripping circuit breaker, which delayed my project by days. Double-checking here helps maintain your warranty and safety.
Final Inspection Before Power On
Before plugging in, do a water test. Turn on your water supply, and watch for any leaks—think of it like a test drive for your new setup. Tighten fittings as needed; a loose connection now can cause weeks of headaches later. Remember, proper installation respecting part and wiring specifications not only ensures your system runs smoothly but also keeps your warranty valid, as highlighted in this warranty guide. After confirming no leaks, proceed to power the dishwasher, and enjoy the peace of mind of a job well done.Many DIY enthusiasts believe that choosing generic parts or rushing through installation won’t impact their dishwasher’s warranty or long-term performance—this is a common misconception. In reality, even small oversights, like reusing old clamps or neglecting specific grounding requirements, can void your warranty or lead to costly repairs later. For example, I once ignored the importance of verifying the serial tags on my 2026 dishwasher, assuming they didn’t matter—only to find out that missing tags can void your warranty altogether. According to appliance expert analysts, such details are not just bureaucratic hurdles; they are essential safeguards ensuring your warranty remains valid.
One often overlooked nuance is the delicate balance between proper part selection and installation technique. Many assume that any brass fitting will do, but using the wrong size or type can create leak pathways, risking damage and warranty denial. For instance, this guide emphasizes the importance of choosing the right brass components to withstand high-pressure water flow and prevent corrosion.
A critical trap to avoid involves neglecting the role of data logs and smart sensors in modern dishwashers. Some installers think they can bypass sensor calibration, but this step is key to maintaining the diagnostic history that warranties now rely on. As these experts note, missing or misinterpreting smart sensor data can make or break warranty claims, especially when manufacturers request detailed troubleshooting records.
Have you ever fallen into this trap? Let me know in the comments.
Why do so many advanced installation mistakes threaten your warranty? The answer lies in the complex interplay of part quality, precise installation procedures, and modern diagnostic systems. For example, using plastic fittings instead of brass might seem cost-effective initially, but it increases corrosion risk, which—even if unnoticed—can be flagged during warranty evaluations. As discussed in this resource, paying attention to the raw materials in your parts is crucial for long-term durability.
In conclusion, understanding these nuanced pitfalls isn’t just for perfectionists—it’s essential for ensuring your dishwasher functions flawlessly and that your warranty stays intact. Being aware of these advanced mistakes enables you to troubleshoot proactively and avoid costly mishaps later. Want to dig even deeper? Explore the comprehensive guides linked above or consult with seasoned professionals to refine your installation skills.
Equip Yourself with the Right Tools for Long-Term Performance
Maintaining a dishwasher, especially a high-tech model like the 2026, demands precision and quality tools. I personally rely on a digital torque screwdriver to ensure fittings are tightened to manufacturer specifications without risking damage. This tool helps prevent leaks caused by overtightening or under-tightening, safeguarding your warranty. For inspecting hoses and fittings, a high-pressure dye tester allows me to identify tiny leaks early, saving costly repairs down the line. The importance of using specialized tools can’t be overstated—standard screwdrivers or pliers simply won’t give you the accuracy needed for such sensitive components.
Embrace Smart Software for Monitoring and Diagnostics
In the future, I predict that smart diagnostics will become integral to dishwasher maintenance. Devices like the AI flow sensors and smart sensors in models like 2026 can log data and alert you to potential issues before they escalate. I recommend using reputable diagnostic software that interfaces with your dishwasher’s control system via a secure app connection. This setup allows me to run routine checks remotely, review sensor logs, and detect anomalies early. Regularly reviewing these logs, especially after installation or repairs, ensures your system remains in optimal condition and your warranty stays intact. For detailed insights, this guide can walk you through best practices for data-driven maintenance.
How do I keep my dishwasher working over time?
Simple routine inspections combined with the right tools make a significant difference. Check all fittings regularly, tighten connections to the manufacturer’s torque specifications with your digital screwdriver, and run diagnostic tests using compatible software. Replacing worn components like inlet valves or flow sensors proactively, instead of waiting for failure, safeguards your warranty and prolongs lifespan. Remember, using high-quality parts—like brass fittings for durability—has a cumulative benefit that pays off in reduced repairs and peace of mind. More comprehensive guidance can be found in this resource.
Try this advanced tip now
Set up routine digital log reviews using diagnostic software to monitor your dishwasher remotely. Doing so allows you to catch subtle issues early, like flow sensor discrepancies or pressure irregularities, which could jeopardize your warranty. Investing in these tools not only simplifies maintenance but also transforms your approach into a proactive strategy, ensuring long-term performance. For detailed instructions and recommended software, visit this guide.

What I Wish I Knew Before My First Dishwasher Setup
One of the toughest lessons I learned was that even tiny overlooked details, like proper hose fittings, can cause major headaches and warranty issues. Now, I double-check every connection and trust my high-quality tools to prevent leaks from the start.
Another insight is that reusing old parts might seem cost-effective but often leads to problems later. Investing in the right, new parts ensures durability and keeps your warranty intact, saving you money and stress down the line.
Finally, I discovered that understanding your dishwasher’s diagnostic logs and sensor data can preempt failures before they escalate. A little familiarity with these tools transforms a tentative DIY project into a confident, warranty-safe installation.
My Toolkit for a Trouble-Free Dishwasher Installation
High-quality steel braided hoses are indispensable—these prevent leaks and withstand pressure over years. I personally recommend tools like a digital torque screwdriver to tighten fittings precisely without risking damage, and a dye tester for early leak detection. For smart diagnostics, trusted software like SensorTrack offers real-time insights and helps troubleshoot remotely, aligning perfectly with warranty requirements. Checking these resources and using the right equipment empowers you to maintain your dishwasher’s performance and warranty with confidence.
Your Next Step Towards Confident Dishwasher Care
Remember, mastering installation and maintenance isn’t just about avoiding repairs—it’s about protecting your investment and enjoying peace of mind. With the right knowledge, tools, and proactive habits, you can ensure your dishwasher works flawlessly for years. Why not take the plunge and apply these insights to your own setup today? Your future self will thank you!
Have you ever faced unexpected warranty issues due to overlooked installation details? Share your experience below—I’d love to hear your story!
Related Posts

Efficient Dishwasher Parts & Installation Guide for Reliable Smart Dishwashers in 2025
Last month, I found myself staring at a dishwasher filled…
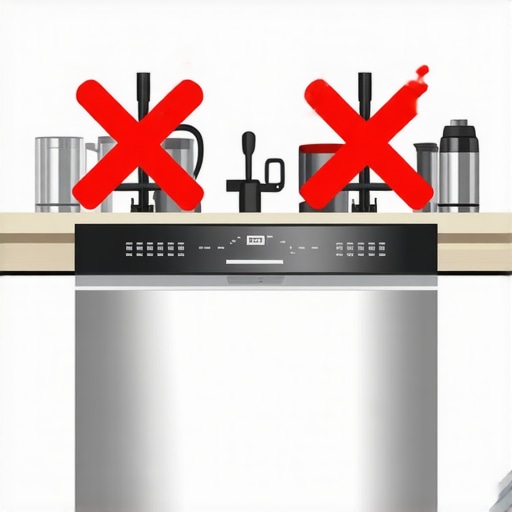
Don’t Reuse These 5 Parts During a 2026 Dishwasher Install
I vividly remember the moment I first installed my new…

Smart Dishwasher Installation & Parts: Your Guide to Long-Lasting Performance in 2025
I'll never forget the sinking feeling when my brand-new smart…