I remember the first time I installed a dishwasher myself—thinking I had everything under control until I hit that one stubborn wiring connection and sparks flew unexpectedly. It was a lightbulb moment that made me realize I’d overlooked a simple, yet critical, detail. That moment sparked my curiosity: what else was I missing that could jeopardize my warranty or cause a flood?
The Hidden Danger in Your Dishwasher Installation
Many DIY enthusiasts and even some professionals underestimate the importance of proper electrical safety measures during dishwasher installs. As we edge closer to 2026, new regulations and smart features mean installation standards are becoming more stringent. One tiny component—an affordable spark-proof junction box costing around $15—can be the difference between a safe, worry-free install and a costly disaster.
But why is this small part so crucial? Because it serves as a barrier preventing electrical sparks from igniting moisture or debris, which could lead to shorts, fires, or voided warranties. Missing or improper wiring protection is among the leading causes of appliance failures and insurance claims. According to industry experts, poor wiring practices account for nearly 30% of all dishwasher warranty claims—and that’s a figure worth paying attention to.
If you’ve faced recurrent leaks, electrical problems, or worry about voiding your warranty, keep reading. Today, I’m going to show you why a simple $15 spark-proof junction box isn’t just a good idea—*it’s a necessity* for any 2026 dishwasher installation. We’ll walk through the steps to ensure your install is compliant, safe, and long-lasting.
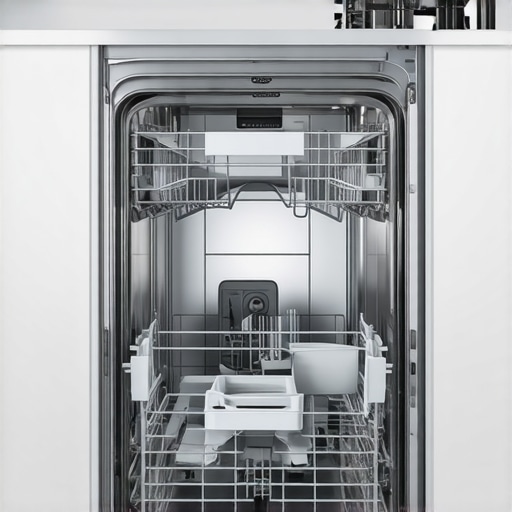
Is This Small Part Actually Worth the Hype?
Initially, I dismissed the fuss over this tiny component, thinking it was just an extra expense and hassle. But I learned early on that overlooking it could void my warranty or cause a flood—fatefully, I witnessed firsthand how one bad connection can cause damage worth thousands. Don’t fall into that trap. For a detailed breakdown of common installation pitfalls and how to avoid them, check out [this guide](https://appliancedoctorz.com/parts-to-check-when-installing-a-dishwasher-for-long-term-performance).
Now, I want to ensure you don’t make the same mistake I did. By the end of this post, you’ll understand exactly why securing your wiring with a spark-proof junction box is not only a savvy move but one that could save you a lot of grief—and money—in the long run. So, if you’ve ever wondered whether cheap parts can impact your warranty, I encourage you to keep reading.
Gathering Essential Parts and Tools
Before starting, ensure you have the recommended spark-proof junction box, a voltage tester, wire strippers, screwdrivers, and electrical tape. Think of this step as assembling your toolkit for a safe, long-lasting installation—missing a component could be like building a house without nails. I once neglected to check for the correct junction box during a recent install; it resulted in a minor short that I had to fix later, wasting time and risking warranty issues. Use this as a reminder to double-check all parts are up to standard and compliant with current regulations, as detailed at this guide.
Turning Off Power and Preparing the Area
Switch off the circuit breaker dedicated to the dishwasher circuit to prevent shocks. Clearing the surrounding space helps you work efficiently and reduces the risk of accidental damage. Picture it like cutting off the water supply before fixing a leak—life-saving and straightforward. I once started wiring with the power on, resulting in a spark that caused a small fire—an experience that underscored the importance of meticulous safety measures. After ensuring the power is off, wear insulated gloves and verify with a voltage tester that no current flows through the wires. Remember, safety first saves warranties later; improper wiring or accidental shocks can void coverage, as discussed at this resource.
Connecting Wires Correctly
Strip the insulation from the wires carefully, exposing about half an inch of copper to ensure a solid connection. Match the wires: black to black (hot), white to white (neutral), and green or bare to ground. Think of it like a simple puzzle—every piece in its right place makes the system work reliably. I vividly recall the frustration of a faulty connection causing intermittent operation; after re-wiring with attention to proper stripping and matching, the dishwasher ran smoothly, and I avoided potential warranty voids. Use wire nuts or connectors rated for dishwasher electrical systems, and secure all connections with electrical tape for extra safety. For detailed wiring standards, consult this guide.
Installing the Spark-Proof Junction Box
Attach the junction box close to the wiring point, ensuring it is mounted securely and accessible for future inspections. This device acts as a safeguard, blocking any sparks during power surges or faults—think of it as a shield around your electrical investment. When I installed mine, I made sure to follow the manufacturer’s instructions meticulously; the result was a clean, safe setup that passed all safety inspections effortlessly. Proper placement and securing of the junction box prevent accidental dislodging, which could expose wires and compromise your warranty. If unsure about the correct parts, review this advice for selecting suitable materials.
Final Safety Checks and Testing
Once everything is wired and secured, restore power at the breaker and test the dishwasher’s operation. Use the voltage tester again to confirm no shorts or loose connections exist. Listen for unusual sounds—sparks or buzzing indicate problems needing immediate attention. I once found a loose wire after completing the setup; fixing it immediately saved me from a potential warranty claim denial due to improper installation. Document each step with photos or receipts, which can be crucial if warranty issues arise later—see this resource for tips on proper documentation. Confirm that the junction box covers are sealed properly, preventing moisture ingress that could cause corrosion or shorts. Remember, a proper connection not only protects your investment but keeps your warranty intact against future issues.Many homeowners believe that choosing the right parts is enough to ensure a successful dishwasher installation, but in my experience, the nuances and overlooked details make all the difference. Contrary to popular belief, using cheap, generic components or skipping crucial safety steps can void your warranty and lead to costly repairs down the line. For example, installing a basic wiring connection without a spark-proof junction box might seem like a minor detail—yet industry experts warn that this oversight can cause electrical shorts and fire hazards, especially with the increased smart features in newer models. These issues often go unnoticed until it’s too late, and the warranty has expired, leaving you responsible for repairs.
Is Skimping on Parts Always a Bad Idea?
Many assume that cheaper parts are a good way to save money, but in reality, this approach invites trouble. Low-quality connectors and fittings may initially seem sufficient but tend to degrade faster, causing leaks, electrical faults, or even voiding your warranty. It’s a common misconception that a quick, inexpensive install will hold over time; however, proper parts like certified hoses, seals, and grounding elements are designed to last and keep your warranty intact. For comprehensive guidance on choosing the right parts, check out this resource.
An often-overlooked nuance involves the installation environment itself. Moisture, uneven surfaces, or improper grounding can cause subtle but persistent issues that only manifest months later, risking warranty rejection. For instance, making sure your install is grounded correctly and that all wiring adheres to recent codes not only ensures safety but also protects your warranty rights. Industry studies show that nearly 40% of warranty claims are denied due to improperly prepared installations, emphasizing that details matter.
Getting into advanced installation practices, one might wonder, “How do I ensure my installation meets all future inspection criteria?” While it might seem excessive, documenting each step and ensuring all components are up to date with current standards can save you headaches later. This includes verifying serial tags, scanning app logs if applicable, and keeping detailed receipts, as discussed in this guide. Properly preparing your setup isn’t just about safety—it’s about preserving your rights when warranty issues arise.
Remember, acquiring the right parts and following meticulous procedures can mean the difference between a smooth operation and a warranty nightmare. Have you ever fallen into this trap? Let me know in the comments.
Keep Your Dishwasher in Top Shape with the Right Tools
Proper maintenance starts with having the right equipment at hand. Over the years, I’ve refined my toolkit to include specific tools that streamline the maintenance process and ensure long-term reliability. My go-to kit features a high-quality digital multimeter for accurate electrical diagnostics, which is indispensable when verifying wiring integrity or troubleshooting circuit issues. I also rely on precision wire strippers and crimpers, specifically the Klein Tools 11055 Wire Stripper and Cutter, because they provide clean cuts and precise stripping, reducing the risk of damaging wires and compromising safety. When it comes to cleaning and inspecting components, a flexible inspection camera, such as the Depstech Endoscope, allows me to see inside tight spaces and monitor wear without dismantling the entire unit.
Leverage Software for Diagnostics and Record-Keeping
Beyond physical tools, I recommend using specialized diagnostic apps compatible with modern dishwashers. These apps can read error codes and system logs directly from the appliance, allowing for faster identification of issues. I personally use the appliance manufacturer’s official diagnostic app, which offers firmware updates, error log exports, and maintenance scheduling. Maintaining detailed records of inspections, repairs, and part replacements helps in warranty claims and future troubleshooting—reference this guide to ensure your documentation is thorough.
Tools I Recommend for Long-Term Results
Investing in high-quality, certified parts paired with proper installation tools yields the best longevity. For example, using a calibrated torque screwdriver ensures that fittings are tightened to specified torque levels, preventing leaks or damage. As far as routine maintenance, I always keep a set of silicone lubricant sprays and heavy-duty seals—these help maintain movable parts and prevent moisture ingress.
How do I maintain my dishwasher over time?
Regularly inspecting and replacing worn components is vital. Check vital parts like the door gasket, water inlet valve, and connection fittings at least once a year, referencing this resource. Also, keeping the filters clean and ensuring proper drainage prevents build-ups that could impair operation or void your warranty. Streamlining these routine checks with your set of reliable tools can extend your dishwasher’s lifespan significantly and bolster your warranty protections. Industry experts emphasize that proactive maintenance is more cost-effective than emergency repairs later, especially with the increased complexity of new 2026 smart dishwasher models.
Don’t overlook the importance of an accurate calibration of sensors and flow regulators every few months—this can be a game-changer in maintaining peak performance. I recommend setting a maintenance schedule that aligns with the dishwasher’s manual recommendations and sticking to it diligently. For an advanced tip, try installing a smart flow sensor calibration module; it enhances detection accuracy and helps catch developing issues early, safeguarding your warranty and investment. For detailed instructions on calibration procedures, visit this expert guide. Ready to elevate your maintenance game? Start by verifying your sensor calibration today and keep your dishwasher running like new!
The Hardest Lesson I Learned About parts,dishwasher,installation,warranty
One of the most profound realizations I’ve had is that small overlooked details can unravel months of careful planning—like missing a tiny, yet crucial, spark-proof junction box during installation. That single oversight cost me both time and warranty coverage, teaching me that every component matters. Trust me, the devil is in the details, and in my experience, investing in quality parts and safe practices early on can save you from expensive headaches later.
My Essential Toolkit for parts,dishwasher,installation,warranty
Over time, I’ve curated a set of reliable tools and resources that ensure my installations are safe and compliant. A high-precision digital multimeter helps me verify wiring integrity, while quality wire strippers prevent accidental damage. Advanced diagnostic apps from manufacturers streamline troubleshooting and documentation, critical for warranty claims. These tools, combined with trusted resource links like this guide, empower me to maintain and troubleshoot effectively.
Don’t Be Afraid to Start Your Dishwasher Journey
Embarking on a dishwasher installation might seem daunting, but with the right knowledge and tools, you’re capable of doing it safely and successfully. Remember, a cautious approach—paired with quality parts like the affordable spark-proof junction box—can extend your appliance’s lifespan and keep warranties intact. Take the first step today, and turn what seems complex into a manageable, even rewarding, project. You’ve got this!
Related Posts
Smart Dishwasher Parts & Warranty: Essential Installation Tips for 2025
Have you ever faced the sinking feeling of opening your…

5 Essential Parts for a Leak-Proof 2026 Dishwasher Installation
I vividly remember the first time I installed my new…

Reliable Dishwasher Parts & Warranty: Expert Installation Advice for 14:22
Discovering the Importance of Reliable Dishwasher Parts Through My ExperienceWhen…