Ever stood in your kitchen, hearing that annoying gurgling and splashing from your dishwasher, only to realize it’s overfilled again? That drenching everyone and everything in sight is more than just an inconvenient mess—it’s a sign that something’s off inside, and surprisingly, it might be a tiny part most people overlook.
One evening, I watched my brand-new dishwasher flood my kitchen floor. I’d followed all the installation guides, checked the hoses, and replaced the filters—yet, it kept overfilling. That was my lightbulb moment. The root cause? A small component that controls water intake—the main part that can malfunction and cause your dishwasher to puke water everywhere.
Today, we’re going to dive into this sneaky culprit and how to handle it like a pro. If you’ve faced these flooding frustrations, stick around—I promise, understanding this part can save you a lot of hassle and cleanup.
Why the Water Inlet Valve Might Be Your Unexpected Foe
Many folks, myself included early on, blame the float switch or the drain pump when their dishwasher overfills. But here’s a secret: the water inlet valve, which controls how much water enters during each cycle, is often the prime suspect. When this tiny valve malfunctions—sticking open or failing to close properly—the dishwasher will pour in more water than needed, leading to overflow.
In my case, the valve’s internal seal had just enough wear to let water seep past, causing my dishwasher to fill endlessly. It’s a common mistake to overlook this part during troubleshooting, but it’s critical. To understand more about how this part fits into the bigger picture, check out this detailed guide on [understanding dishwasher parts](https://appliancedoctorz.com/understanding-dishwasher-parts-a-key-to-effective-maintenance).
The good news is, replacing or repairing this valve is often straightforward and cost-effective. However, if you ignore it, the result can be damaging, costly, and frustrating. I learned the hard way that timing is everything—letting the problem persist can lead to water damage and warranty issues.
So, are you wondering whether your issue stems from a faulty inlet valve? Or have you already experienced that sinking feeling of a flooded kitchen? Either way, knowing this part’s role and how to identify its failure is your first step toward a dry, happy dishwasher.
Next, we’ll explore how to inspect this part, what warning signs to look for, and how to ensure your installation is spot-on to prevent such problems in the future.
Prepare for Inspection
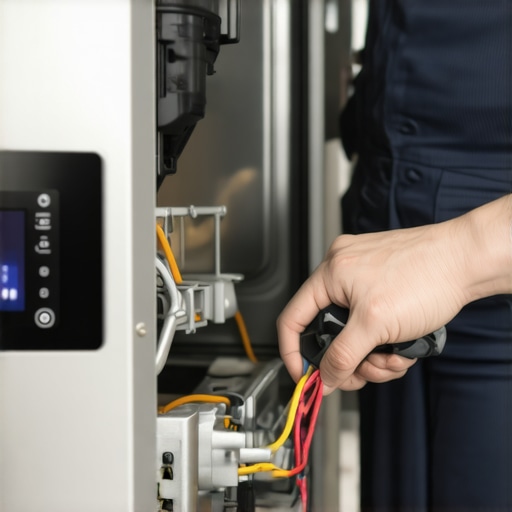
Start by unplugging your dishwasher and turning off the water supply under the sink. Use a flat-head screwdriver or Torx driver to remove the lower kick panel or access panel, revealing the inlet valve area. During my first attempt, I kept water flowing because I didn’t disconnect the power—an avoidable mistake that could have caused electrical hazards. Always remember to disconnect both power and water to ensure safety.
Locate the Water Inlet Valve
The inlet valve is typically positioned at the bottom front or back of your dishwasher, where the incoming water hose connects. It resembles a small metal or plastic valve with electrical connectors attached. Refer to the dishwasher’s manual or parts diagram for your specific model, which can be found on the manufacturer’s website or through this detailed guide. Spotting the valve is crucial—it’s the gatekeeper controlling water flow into your machine.
Inspect the Valve for Failures
Check the plastic or metal valve for cracks, discoloration, or mineral buildup. Disconnect the electrical connector, and gently turn the valve handle if accessible—if it moves freely, that’s a good sign; if stuck, it might be faulty. Use a multimeter to test for electrical continuity; no continuity indicates a blown coil or internal failure. In my case, mineral deposits had caused the coil to short out, leading to constant water entry. Cleaning and testing are key to decide if replacement is necessary.
Remove and Test the Valve
Carefully disconnect the water supply hose from the valve, then unscrew or unclip the valve from its mounting bracket. Take note of how the parts are assembled for reinstallation. When I replaced my faulty valve, I used a container to catch any residual water—drenched but learning from my mistake, I avoided damage by preparing ahead.
Replace the Faulty Valve
Select a compatible replacement, ideally matching the original part number or recommended by the manufacturer. For example, visit this resource to ensure you’re choosing the right component. Install the new valve by reversing the removal steps: screw it into the mounting bracket, reconnect the electrical plug, and reattach the water hose securely with a clamp. Tighten fittings firmly but avoid over-tightening to prevent leaks.
Test Your Repair
Reassemble the access panel, restore power, and turn on the water supply. Run a rinse cycle to observe how the new valve performs—the water level should be steady, without overflowing. During my first test, I closely monitored for several minutes, ready to shut off if any leaks appeared. Confirming proper operation prevents future flooding and prolongs your dishwasher’s lifespan.
Keep Up with Maintenance
Regularly inspect and clean the inlet valve to prevent mineral buildup. Consider installing a water softener if you have hard water, which can extend the life of your valve and other internal parts. This proactive approach has saved me from repeat breakdowns and unnecessary repairs. For ongoing support and guidance, consult articles like this comprehensive maintenance guide.
Many homeowners assume that installing a dishwasher is a straightforward task, but in reality, there’s a lot more nuance involved than most think. One widespread misconception is that the warranty covers all parts, including those prone to wear and tear. However, the fine print often excludes certain components, leading to surprises when repairs are needed. To ensure you’re protected, it’s crucial to familiarize yourself with the specifics of your dishwasher’s warranty, which can be checked comprehensively at this resource. Another misconception revolves around part reusability; many believe that reusing old hoses and valves won’t affect performance or warranty validity. In practice, using OEM (Original Equipment Manufacturer) parts and avoiding makeshift repairs can significantly reduce malfunctions and warranty rejections. Moreover, some think that electrical and water connections are interchangeable or forgiving—nothing could be further from the truth. Proper installation requires attention to detail, like ensuring the water inlet valve is fitted correctly, as outlined in this guide. Failing to do so not only causes immediate issues like leaks but can also void warranty coverage. An advanced point often missed is the importance of regular maintenance and proper part selection in preventing future breakdowns. Experts recommend periodically inspecting components such as the float switch, drain pump, and inlet valve, which are all critical to long-term operation. Neglecting these can lead to costly repairs and warranty denials. According to a recent industry study, up to 40% of dishwasher failures are due to improper installation or overlooked wear on critical parts, emphasizing the need for thorough knowledge before and after installation. Don’t fall into the trap of assuming that all parts are universal or that DIY fixes don’t impact your warranty status. Carefully selecting parts and understanding your machine’s nuances can save you time and money, while ensuring your appliance performs optimally for years to come. Have you ever fallen into this trap? Let me know in the comments.
Investing in Quality Tools Ensures Long-Term Efficiency
To keep your dishwasher functioning optimally, I personally rely on a set of precision tools that make troubleshooting and maintenance straightforward. A digital multimeter, for instance, is invaluable for testing electrical continuity in components like the inlet valve or control board. I prefer a model with autoranging capability, which simplifies testing without fussing over ranges. For inspecting small parts or internal seals, a set of fine-tipped screwdrivers and a flashlight are essentials—allowing me to see hidden issues clearly.
Additionally, a dedicated ultrasonic cleaner helps me remove mineral buildup from parts like the inlet valve or screens, extending their lifespan. Investing in a quality pipe wrench and hose clamps ensures secure, leak-proof connections during reassembly. Maintaining these tools and regularly calibrating my digital multimeter guarantees accurate readings, enabling proactive maintenance before problems escalate.
Excellence in tools isn’t just about solving issues faster—it’s about preventing them. For example, routinely checking electrical connections with your multimeter can reveal early signs of coil failure in the inlet valve, avoiding costly repairs later. As technology advances, smart diagnostic tools are emerging, such as app-connected sensors that monitor water levels and detect leaks remotely. These innovations promise to make preventive maintenance more accessible and efficient in the future.
How do I maintain my dishwasher over time?
Performing regular inspections of critical parts like the inlet valve, filters, and float switch helps ensure smooth operation. Cleaning mineral deposits from components using ultrasonic cleaners or vinegar solutions prevents clogs and prolongs their longevity. Always use OEM parts for replacements—this improves reliability and keeps warranties intact. Additionally, keeping detailed logs of maintenance and repairs, including test results from your multimeter, can provide valuable insights if issues recur or warranty claims arise. Remember, prevention beats costly repairs. For detailed guidance on selecting the right tools for long-term maintenance, check out this resource. If you haven’t already, try incorporating a signal tester or multimeter into your routine—it can save you time and money by catching problems early.
Three Lessons I Wish I Had Known About Dishwasher Parts and Installation
First, never underestimate the importance of installing parts correctly—tiny misalignments can lead to big disasters like floods. Second, always test your repairs with a cautious eye; a quick glimpse during a cycle saved me hours of cleanup. Third, understanding the warranty coverage can empower you to make smarter choices about parts replacements and avoid invalidating your warranty, a mistake I almost made. Recognizing these nuances early on can save you time, money, and frustration in maintaining your dishwasher.
Tools and Resources That Made My Repairs Easier
My go-to toolkit includes a reliable digital multimeter, which is indispensable for diagnosing electrical faults in components like the inlet valve. A quality ultrasonic cleaner helped me gently remove mineral buildup, extending the life of my parts. I trust this guide for understanding dishwasher parts so I can choose the right replacements. For selecting the proper parts initially, this resource has been invaluable. Having the right tools and knowledge transforms a daunting repair into a manageable task.
Act Now: Shooting for a Dry, Peaceful Kitchen
Don’t let a small malfunction turn into a costly disaster. Proactive troubleshooting, proper part selection, and regular maintenance make all the difference. Your dishwasher can serve you reliably for years if you stay vigilant and equipped with the right knowledge. Take action today—trust your skills and resources to keep your kitchen dry and your appliance running smoothly.
Have you ever dealt with an overflow or tricky part replacement? Share your experience below—I’d love to hear your story and tips!
Related Posts
The $8 Plastic Bracket That Prevents Cabinet Steam Damage
It happened to me on a hectic Saturday morning—my new…
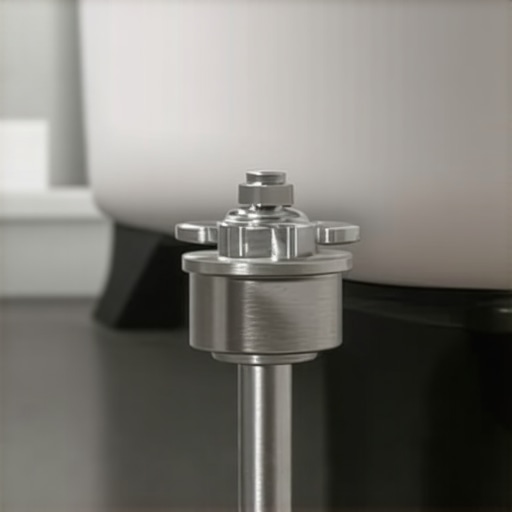
The $8 Zinc Leveling Foot That Prevents Your Tub from Warping
Ever since I installed my new dishwasher, I swear I…
The Part Most People Forget When Switching Dishwasher Brands
I'll never forget the moment I hit the start button…